Archives for February 2012

Turkey Meatloaf Cupcakes

I’ve never been a meatloaf kinda person. I can’t even recall a single time that I’ve made it for my husband. I have an issue with putting meat in the form of a loaf. Why I don’t mind it in the form of meatballs or now cupcakes is something that we can ponder on. Yes, the other day I came across this recipe at First Look, Then Cook and immediately added it to my list of things to conquer. I have a new obsession with small food these days and this is right up my alley.

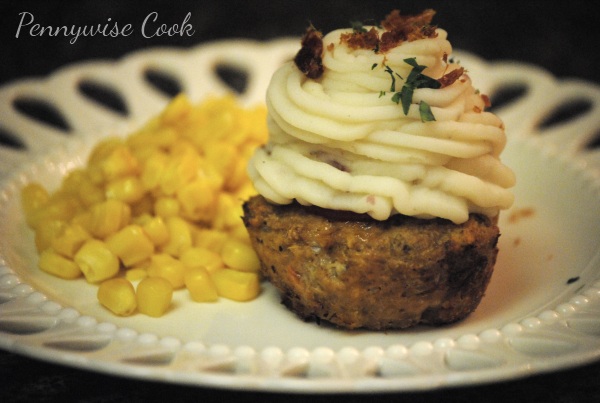
I was pretty much giddy to make these and I ran it by my husband to see what he thought of this. He’s quite the picky eater, so I also kinda wanted to prepare him. Without any hesitation, he proceeded to give me a disgusted look. The words meatloaf and cupcake in the same sentence really threw him for a loop. 😉 I then explained that no, these were meatloaf flavored cupcakes, they are literally meatloaf in the form of a cupcake with mashed potato “frosting”. He was on board then.

The night that I made these, everyone cleaned their plates. Even Addie who we usually have to set food aside (that she has to eat) for devoured hers. She doesn’t usually even like mashed potatoes, but she did that night! I didn’t make the mashed potatoes from scratch, by the way. Took a little help from the store and Betty Crocker. It was a heck of a lot easier that way! Of course, you can make your own mashed potatoes. My sister did and had fabulous results. I made mine with ground turkey, but feel free to use any ground meat that you have on hand.

You can also make these ahead of time to freeze them. Make the meat mixture (do not cook) and place the pan in the freezer for about 2 hours to keep their form. Once firm, place them in bags. To cook, bake at 350 degrees for about 30-40 minutes until temp inside is 160 degrees.
Turkey Meatloaf Cupcakes

Turkey Meatloaf Cupcakes

A spin on traditional meatloaf with a tasty yet fancy presentation!

Ingredients

  • 1 lb Ground Turkey
  • 1 c. Onion, Finely Chopped
  • 1/2 c. Carrot, Finely Chopped
  • 2 Cloves Garlic, Minced
  • 2/3 c. Ketchup, divided
  • 1/2 tsp Oregano, Dried
  • 1 Tbsp Olive Oil
  • 1/2 Tsp Worcestershire Sauce
  • 1/4 Egg Substitute or 1 Egg
  • 2/3 c. Plain Bread Crumbs
  • Salt & Pepper to Taste
  • Cooking Spray
  • Betty Crocker Potatoes for Topping (Or make your own)
  • Bacon Pieces for Topping (optional)
  • Parsley or Chives for Topping (optional)

Method

  1. Preheat Oven to 350 degrees.
  2. Saute onion, carrot, garlic and oregano in olive oil. About 2 minutes until softened. Let cool.
  3. Combine the onion mixture, 1/4 cup ketchup, and all remaining ingredients except cooking spray in a bowl. Get well incorporated.
  4. Spray muffin pan with cooking spray. Place meat mixture into the muffin cups and top each with 2 tsp ketchup (or a good circle around the top).
  5. Bake for 25- 30 minutes or until brown and the internal temp is 160.
  6. Top meatloaf cupcakes with mashed potatoes. Use a piping bag with large star tip or cut the tip of a Ziploc bag to pipe.
  7. Sprinkle with toppings and serve.

Notes

I served them with corn and Addie came up with a fabulous idea to put her corn on top of the cupcakes. She was calling it “sprinkles”. 🙂 These will for sure be a regular on our menu!

http://www.pennywisecook.com/turkey-meatloaf-cupcakes/


Like this post? SHARE it!

Related Posts Plugin for WordPress, Blogger...

Frugal Kitchen Tip: Freezing Fresh Herbs

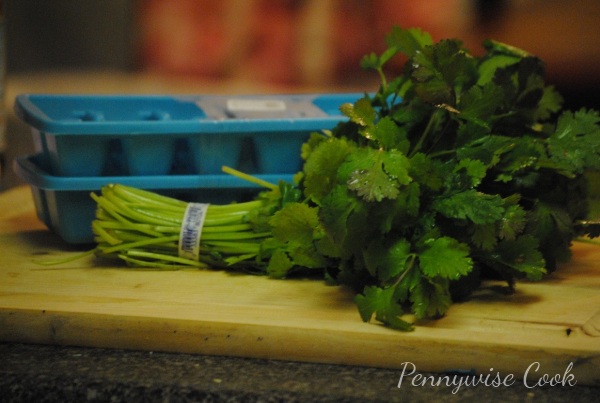
Standing there in the produce section seeing all of those fresh herbs, I think to myself, I’d buy tons of that if it would stay fresh longer. There is no doubt that fresh herbs add a lot to a dish. I love the crisp bite and beautiful green color that parsley can add to just about any meal. I was watching Barefoot Contessa the other day and she shared this amazingly genius tip for storing fresh herbs. I usually buy it for a particular dish and then it goes bad before I can ever use it again. Then I go and buy some again for the next meal. It’s a continuous cycle that can really get costly.

Here’s a trick for FREEZING your herbs and having them on hand for quickly adding them to your meal. You will need ice cube trays for freezing the herbs in. You can find these just about anywhere including Dollar Tree. They sell two in a pack for $1.

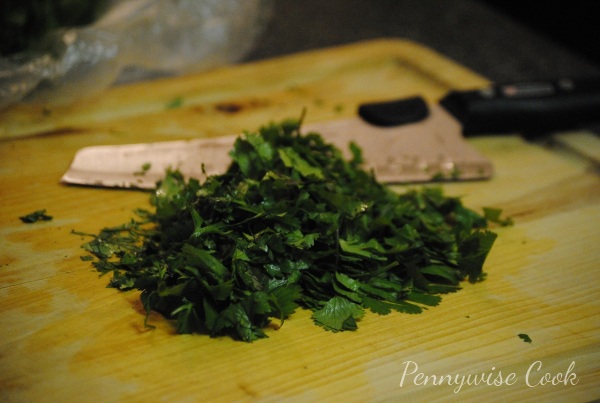
Rinse the herbs and dry well with a paper towel. Then roughly chop them up.

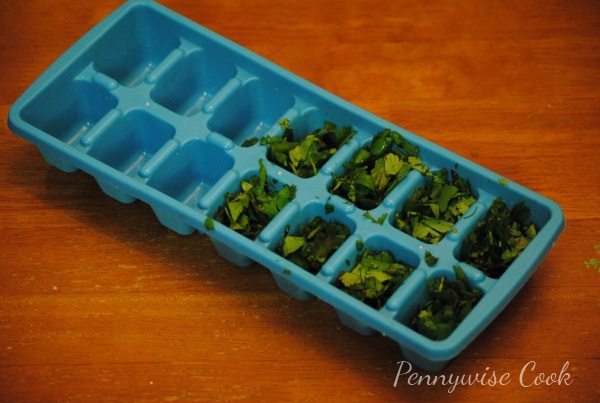
Spoon the chopped herbs into the ice cube tray and add a drop or two of water on top. Pop them in the freezer and voila! The next time that you have a meal requiring a fresh handful of herbs, pop some of your frozen herbs out and throw them in.

I have found that they generally keep their shape and color even after freezing. Barefoot Contessa didn’t mention adding a drop or two of water to the herbs in the ice cube tray, but I find this helps to keep them together more in the freezing process. If the meal you are using your herbs in isn’t a hot one (whether in the oven or on the stove) then you may want to thaw the herbs a little before hand. Otherwise, it thaws fairly fast in most. And I don’t recommend keeping them frozen for more than a few months. They do tend to lose color after a few months. But a few months is better than a few days in the refrigerator!


Like this post? SHARE it!

Related Posts Plugin for WordPress, Blogger...

Instant Cakeification: Chocolate Cake In A Mug

Has it been one of those weeks? It’s Friday, so I hereby declare that it will get better. And to celebrate Friday in all it’s glory, I think that you need a nice and chocolately piece of cake. How about it? It’s almost impossible to refrain from eating chocolate cake if it’s in my house. This is the exact reason that I just don’t make it often! You start with a really small piece trying to be good. Next thing you know, you’ve eaten the entire cake in a matter of two days and you feel horrible. At least that’s how it goes around here. Either that or I’m having to fight my husband away from the cake every 5 minutes.

But sometimes you just need a good, gooey, yummy piece of chocolate cake to satisfy that sweet tooth or to make your day (or late night) a little better. What if I told you that you could have your cake, and eat it too? Eat it and really enjoy it without guilt and without having to look at an entire cake sitting around afterwards. Yeah, that’s my kinda cake. Enter Chocolate Cake in a Mug! This clever little invention has been around for years, but somehow I missed the boat and am just now hearing about it. Two servings of chocolatey, gooey, delicious, indulgent chocolate cake in a matter of minutes without guilt and without a cake staring at you the next day. Sign me up!

After trying out a variety of recipes (it’s research you know, so I tried a LOT of them), I found one that I think is the best! There are a bunch of different recipes for cake in a mug, many of which just didn’t do it for me. With this one, from beginning to end you know the best way to get this cake to come out perfect each time. I made it as healthy as possible and you can’t even tell. Top it with a little powdered sugar or whipped topping and you have yourself a SWEET treat at any hour. No really, you can even eat this as a midnight snack. I give you permission. This has become a favorite snack of mine and my husband’s.

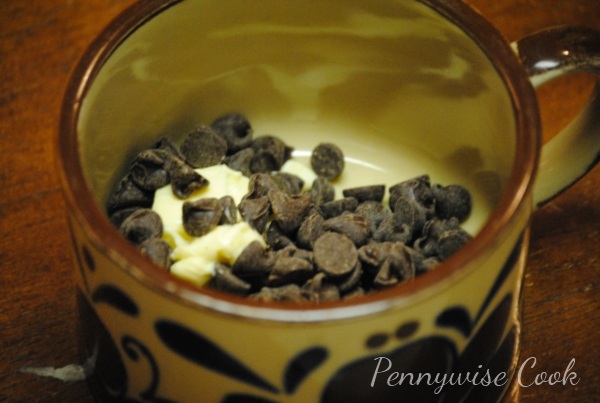
Using your widest and biggest mug, start out by melting 3 tbsp of chocolate chips into a tbsp of butter. I used Fat Free I Can’t Believe It’s Not Butter and it worked well! Mix that together well and add in 2 tbsp light or reduced fat sour cream (or substitute applesauce) and then 3 tbsp of skim milk. Then mix in 1 egg or egg substitute and 1/2 tsp vanilla extract. It’s recommended that you use a fork and I agree that this makes it easier!

It’s going to look kinda like this once you’ve gotten all of that mixed together. Kinda runny because it’s missing the sugar and flour!

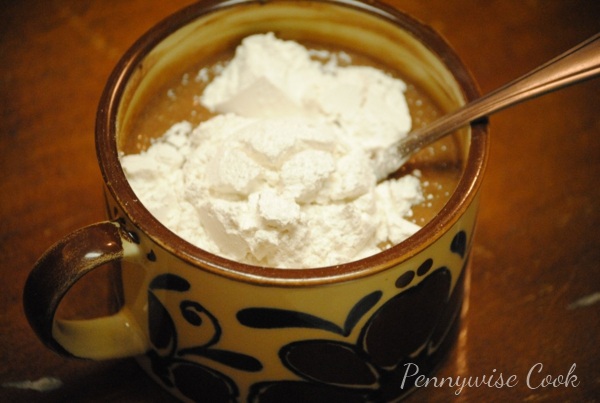
And finally, mix in 3 tbsp splenda and 4 tbsp flour. I used cake flour for a fluffier texture, but of course you can use what you have on hand.

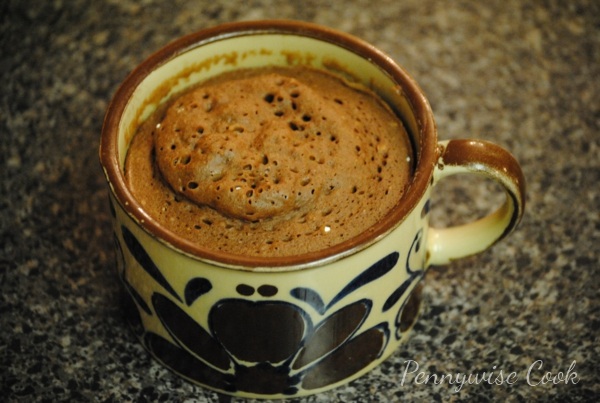
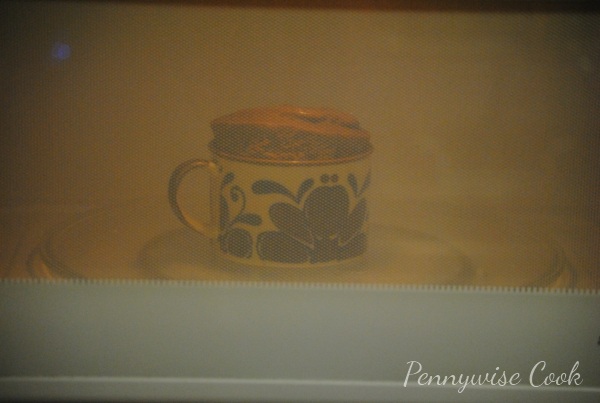
In the microwave, it tends to rise up like this. Don’t worry, I haven’t had one escape from my mug yet.

How easy was that?

Recipe courtesy of Urban Domestic Diva

Chocolate Cake In A Mug

Chocolate Cake In A Mug

Chocolate cake on-demand from your microwave!

Ingredients

  • 1 Tbsp. butter
  • 3 Tbsp. semi-sweet chocolate chips
  • 2 Tbsp. light sour cream
  • 3 Tbsp. Skim Milk
  • 1 egg substitute
  • 1/2 tsp. vanilla extract
  • 3 Tbsp. Splenda
  • 4 Tbsp. Flour

Method

  1. Melt chocolate chips into butter for 30 seconds in microwave. Mix well with a fork.
  2. Add in the sour cream and milk. Mix well.
  3. Next, add the egg and vanilla extract. Whip for a fluffy texture.
  4. Now add the Splenda and combine well.
  5. Lastly, add in the flour and make sure that all ingredients are incorporated well.
  6. Microwave for 2:30- 3 minutes. Times depend on your microwave. (Mine is perfect at 3 minutes)
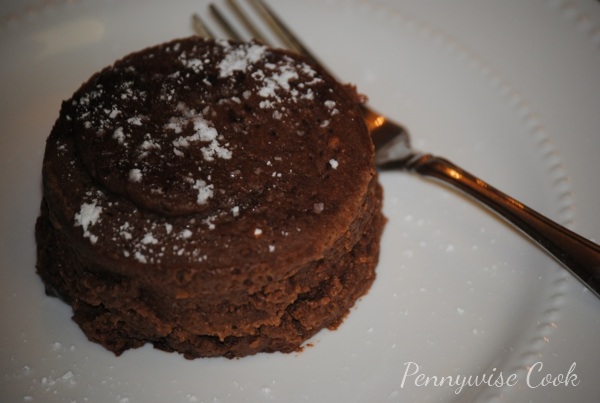
  7. Top with powdered sugar or whipped topping and enjoy!

Notes

You can eat this right out of the mug or invert onto a plate like we do. Makes it easier for sharing.

http://www.pennywisecook.com/instant-cakeification-chocolate-cake-in-a-mug/

Now, take your cake and go watch Hot in Cleveland!

Do any of you watch that show? It’s my favorite!


Like this post? SHARE it!

Related Posts Plugin for WordPress, Blogger...

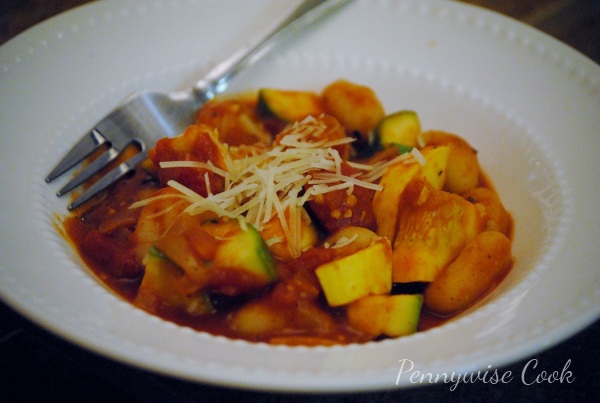
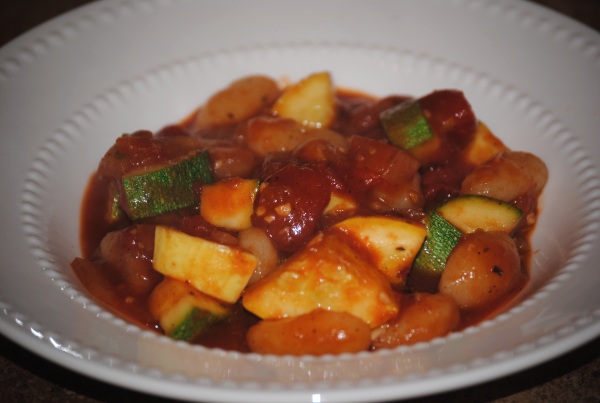
Zesty Squash and Zucchini Over Gnocchi

Around these parts we are big fans of squash and zucchini. I buy it all year ’round because it’s one of few vegetables that I know my family will eat. Trying to find new ways to invent the wheel, or in this case make a squash and zucchini dish can be a difficult task. However, I got a little inspiration from this recipe and turned this summer recipe into a warm and spicy winter dish.

If you’ve never tried gnocchi before, this would be a nice starting point for you. Gnocchi is basically mashed potato and flour rolled into little dumplings. They are usually quite tasty to kids as well as adults alike. Since I made up this recipe, I conquered making my very own gnocchi! Sure it’s made out of instant potatoes, but it’s still homemade gnocchi all the same. Look for that deliciousness soon…

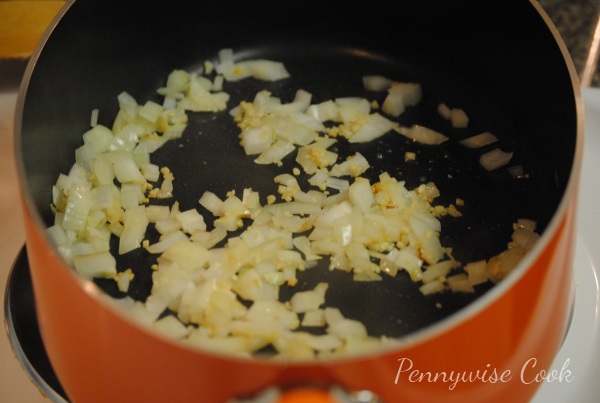
Back to the squash and zucchini! Start out with some nice warm extra virgin olive oil in a pan and then saute up onions and garlic to start off your sauce.

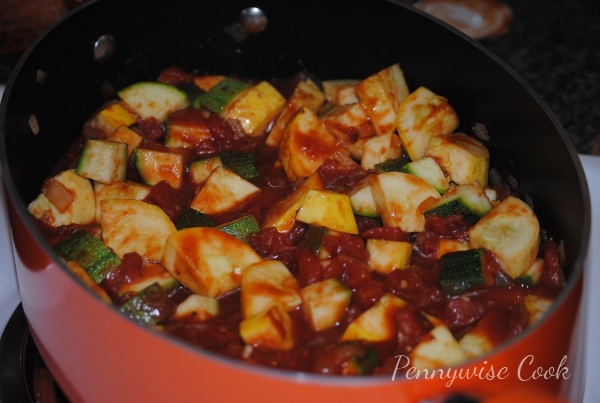
Throw cubed squash and zucchini into stewed tomatoes and tomato sauce along with some very zesty spices to create one smokin’ pot of goodness. But in all honesty, the crushed red pepper flakes provide a LOT of heat. If you like that, you can add more. If not, 1tsp is plenty.

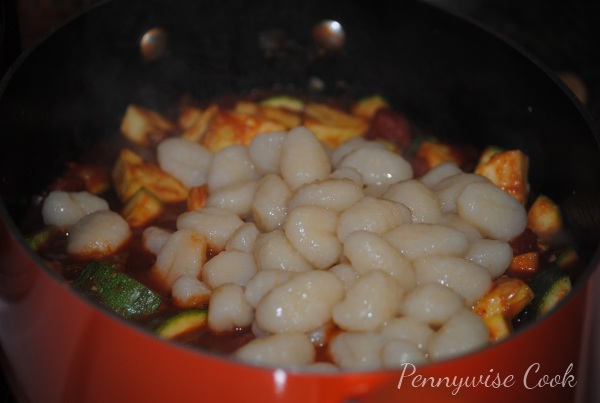
Then it’s time to add in the smooth and starchy gnocchi to cool down to spiciness. Toss it together and serve. You can use any pasta that you’d like. I just like the fluffiness that the gnocchi gives with the zestiness in this dish.

Zesty Squash and Zucchini Over Gnocchi

Zesty Squash and Zucchini Over Gnocchi

Take your squash and zucchini and turn it into a saucy and spicy main dish!

Ingredients

  • 3 Medium Small Yellow Squash, Cubed
  • 3 Small Zucchini, Cubed
  • 1 14.5 oz Can Stewed Tomatoes
  • 1 8 oz Can Tomato Sauce
  • 1/2 Onion, Chopped
  • 2 tsp Minced Garlic
  • 1 Tbsp Extra Virgin Olive Oil
  • Salt to taste
  • Garlic Powder to Taste
  • Dash of Cumin to Taste
  • 1 tsp Crushed Red Pepper Flakes- This is the heat!
  • 1 Package Store Bought Gnocchi (I use whole wheat or make your own)

Method

  1. Cook gnocchi according to package directions. They will generally be finished when they float to the top.
  2. Heat oil in large skillet over medium heat. Add onion and garlic and saute until translucent.
  3. Add in squash, zucchini, tomatoes, tomato sauce and spices. Bring to a boil over medium-high heat until squash and zucchini start to become tender.
  4. Toss in gnocchi and mix well.
  5. Serve with grated Parmesan cheese sprinkled over top. (optional)

Notes

This is really a pretty dish! Might be good for entertaining when you need to impress. Just make sure that you don’t get it too spicy in case your guests don’t like too much heat.

http://www.pennywisecook.com/zesty-squash-and-zucchini-over-gnocchi/


Like this post? SHARE it!

Related Posts Plugin for WordPress, Blogger...

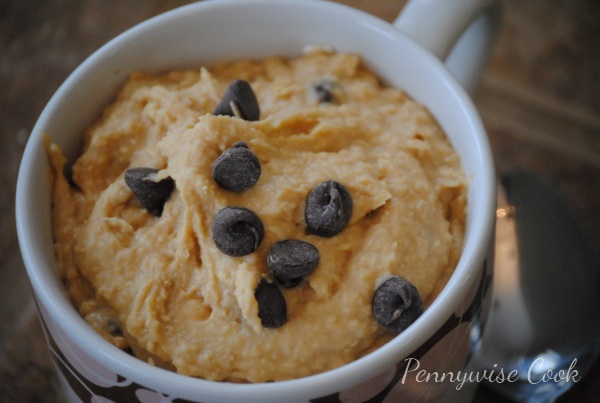
Chocolate Chip Cookie Dough Dip

How did your Valentine’s Day go? Oh really? Uh-huh. Interesting… Well if you had a less than satisfactory day (or even if you had a great one), you might just want to dig into this little sumthin’ sumthin’ here…

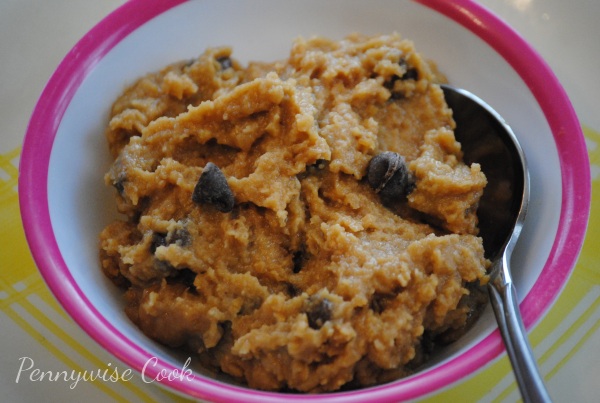
You are about to be amazed. How incredible does THAT look? Couldn’t you just dive right in? Well you really can, because it’s actually healthy. How many times have you been making cookies and stolen a bite or two of the dough? It’s almost humanly impossible for me not to. That’s probably why I don’t make cookies that often. I’d be as big as a house. I digress…

This cookie dough “dip” has a secret and it’s not going to tell anyone. I am- Chickpeas! Yes, that’s right. Those little garbanzos that no one knows what to do with half the time actually add something nutritional and special to this dip. It’s also been called “dessert hummus”, but I’m not too keen on that title. There are a ton of different versions of this dip everywhere right now. They are all very similar either being very smooth or very chunky. With or without sweeteners. With or without oats. It’s all a matter of taste. This recipe is the one that I enjoy the most, but you can feel free to adjust it to your liking.

Everyone always want to know what to dip these in. I’ve used vanilla wafers and graham crackers. And don’t tell anyone (I’m totally going to look like a pig now), but you can also pile some into an ice cream cone and eat it like ice cream. I don’t have ice cream in there with it, but that might be delicious too. I prefer the sugar cones over the others.

It’s fantastic and I can say that on my scouts honor. My husband and I devoured an entire bowl of this the other night. Not needing crackers or cookies to dip in it, it’s lovely right out of the bowl. You will want to make this tonight, I can almost guarantee it. Here’s the recipe, exactly as I made it.

You can find similar recipes for “dessert hummus” at Nourishing Flourising, Chocolate Covered Katie and Food Doodles. All fabulous! This one is kind of a mixture of those.

Chocolate Chip Cookie Dough Dip

Chocolate Chip Cookie Dough Dip

A dessert hummus recipe that no one will ever guess what's in it! Healthy but equally as delicious.

Ingredients

  • 1 Can Chickpeas, Drained and Rinsed
  • Pinch of Salt
  • 1 Tsp Vanilla Extract
  • 1/4 c. Peanut Butter (Natural if preferred although I’ve used Peter Pan Honey Roasted before and Reduced Fat even works!)
  • 1 Tbsp Milk (skim is healthiest!)
  • 2/3 c. Brown Sugar (Even Splenda Brown Sugar works!)
  • 2 Tbsp Oats (optional)
  • 1/3 c. Chocolate Chips

Method

  1. Place all ingredients, except chocolate chips, in food processor and mix until very smooth.
  2. Add in chocolate chips and stir. Serve with graham crackers or devour right out of the bowl.

Notes

I tried using less chocolate chips to be “good” and it’s just not the same. I usually end up adding more than the recipe calls for. 😉 If you don’t prefer the grit of the brown sugar, you can try using 1/4 + 2 Tbsp of maple syrup like Food Doodles does. This makes it very fluffy!

P.S.- you can also use White Northern Beans or Cannelini Beans in place of the Chickpeas if you’re seeking a smoother texture. I just prefer a thicker dip. 🙂 Also, I recommend refrigerating it a bit before eating. It thickens up a bit and tastes better chilled to me.

http://www.pennywisecook.com/to-die-for-cookie-dough-dip-its-healthy-too/


Like this post? SHARE it!

Related Posts Plugin for WordPress, Blogger...

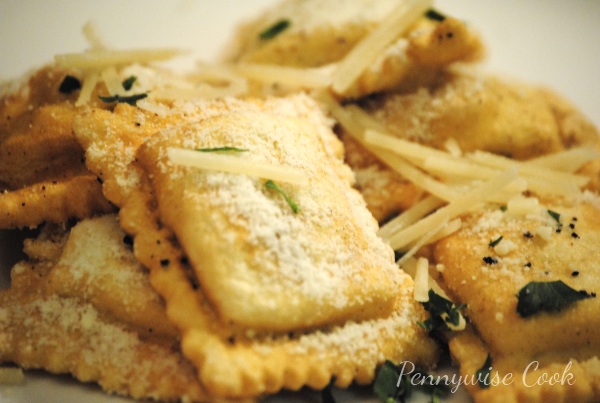
Easy Fried (Yes Fried!) Ravioli

Happy Valentine’s Day! Need a quick, but fancy meal tonight? These might just do the trick!

I’m not usually one for fried things. My mind associates the word “fried” with evil. Evil as in, this food is going to devilishly make you gain 5 pounds. I haven’t always had these feelings about fried things. Like most people, I really do love my french fries and fried chicken, but actually seeing the process makes me feel so dirty and well, evil. I may not like frying things very often, but I am most definitely not above it on occasion, especially when it involves a pasta filled with something yummy.

At your local grocery store, pick up a bag of the frozen ravioli. I found that Walmart has the cheapest prices of any place I looked. They were around $2.50 there. Of course, you don’t have to use frozen, but the Pennywise method surely does call for the cheapest means and honey, that’s Walmart! Technically that’s the only ingredient you really need. Besides the oil to fry it in, but you may want to have some parmesan cheese for sprinkling and marinara sauce for dipping when they are done. As for the ravioli themselves, you can do this with any that you like. They have several varieties at the stores to choose from. Spinach and Ricotta, Four Cheese, Beef…you name it.

These little guys were a huge hit at my house and I can’t honestly tell you that they will make a regular appearance at my house. But I can tell you that Ravioli is absolutely delicious fried and would make a GREAT get appetizer at a party or get together.

Easy Fried Ravioli

Easy Fried Ravioli

Chang up the same old ravioli by frying them up and serving them as an appetizer.

Ingredients

  • 1 Bag Frozen or Fresh Ravioli (if using frozen, thaw in refrigerator ravioli completely before frying)
  • Vegetable Oil
  • Parmesan Cheese

Method

  1. Place oil in fry machine or about 2 inches of oil into a medium sauce pan. Heat to medium-high heat. (Be careful it’s hot!)
  2. Place thawed ravioli into hot oil (carefully!) until it puffs up and begins to brown on one side. Then turn over to brown the other. This is a VERY fast process.
  3. Place on paper towels to drain excess oil. Sprinkle parmesan cheese on each and serve with marinara sauce!

Notes

Be sure to be very careful when placing and removing the ravioli from the hot oil. It can burn you and it’s very brutal if it does. These will fry very quickly so be sure to watch them like a hawk through the entire process. Do not crowd your pan. I fried no more than 4 at a time. This is so they won’t stick together and you have room to flip them.

http://www.pennywisecook.com/easy-fried-yes-fried-ravioli/


Like this post? SHARE it!

Related Posts Plugin for WordPress, Blogger...

Heavenly Orange Angel Food Cake

We had a fantastic weekend. Max and I went on our first date in about 10 months. Wow. I had forgotten how much I really enjoy adult conversation. Although, I also had forgotten how hard it is to not talk about our girls too. Hooray for uninterrupted conversations! My mother and step dad came for visit and I got to cook for them. My mom always cooks for me, so it’s nice to return the favor sometimes.

Here’s a recipe that I like making almost as much as I love eating.

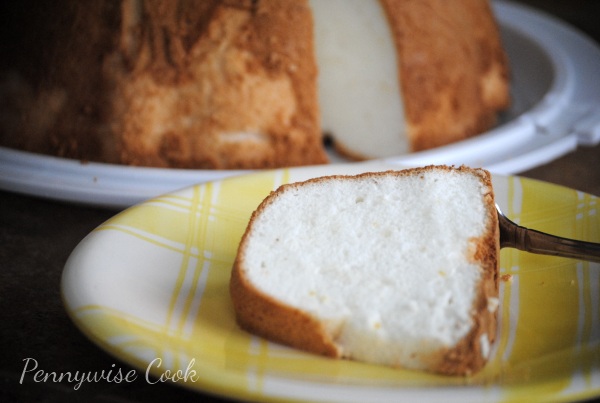
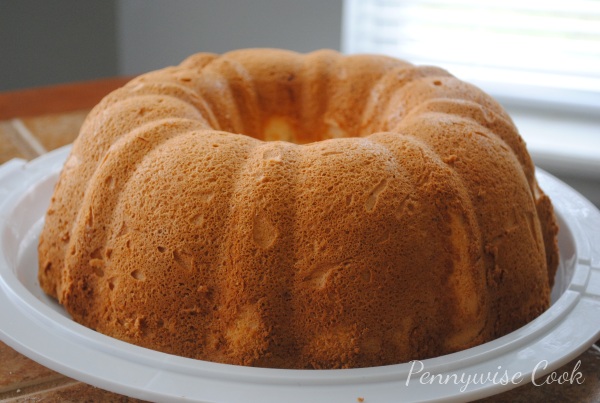
Named for the fact that it’s light and airy, angel food cake was definitely named well.  I’ve always had a thing for it because  it just seems healthier than most other cakes. It in fact is! And there are only about a million different ways to make an angel food cake. Of course, you could start with a box mix and whip one up in no time. But who wants to do that when you can make your very own from scratch that taste waaaaay better? For years I’ve been purchasing angel food cakes at the store only to find out that the labor I was avoiding wasn’t so bad after all.

I do believe that an angel must have invented this cake, because it truly is heavenly! Budum chhh. 🙂

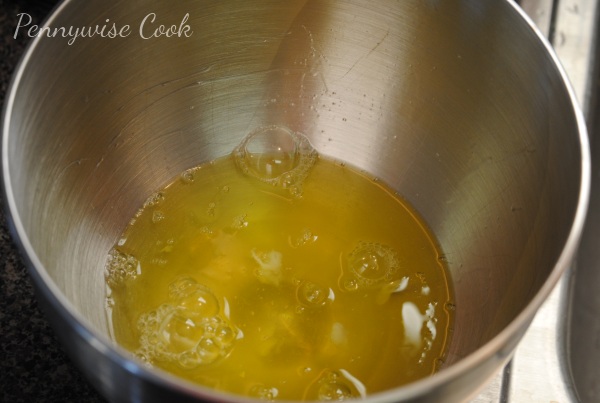
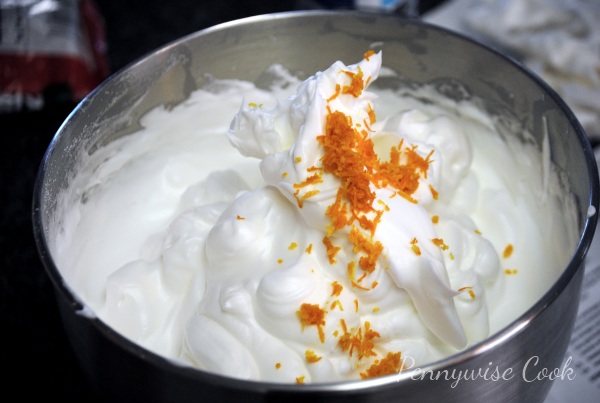
The main ingredient that creates its fluffy and white texture is the egg whites. Just be sure to have them at room temperature when you begin to whip them. Along with some cream of tartar, these babies will form peaks like the Grand Tetons. Next comes the shug-ah slowly added in by tablespoons.

My recipe is for Orange Angel Food Cake and the orange-y taste comes straight from the zested orange. No artificial extracts or flavors. Slowly fold in the flour and that’s it!

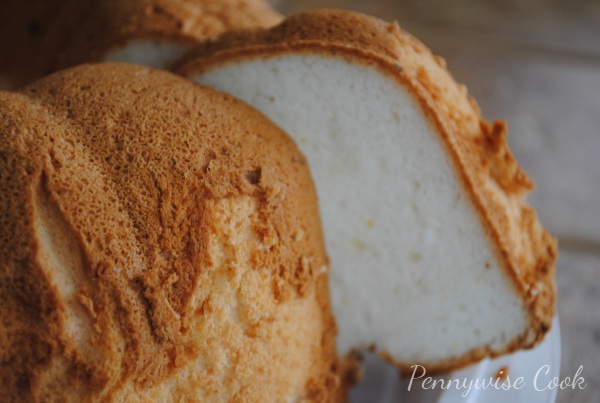
The result is a very incredible ever-so-slighty orange angel food cake that everyone will love. But believe me, they won’t need convincing. It’s just that good. And YOU will feel special for creating something so yummy that not even a store can beat. If you don’t like the taste of orange, you can always leave out the orange zest.

There is also a recipe there for a fruit compote to serve with this. I’ve made that along with this cake before and it’s yummy.

Recipe courtesy of Fitness Magazine.

Orange Angel Food Cake

Serving Size: 1 Piece

210

Orange Angel Food Cake

Simple homemade angel food cake with a hint of orange!

Ingredients

  • 1 1/2 cups egg whites (10 to 12 large)
  • 1 teaspoon cream of tartar
  • 1 1/3 cups extra-fine granulated sugar
  • 1 tablespoon finely shredded orange peel
  • 1 cup sifted cake flour

Method

  1. Preheat oven to 350 degrees.
  2. Place egg whites in extra-large bowl and allow to sit at room temperature for 30 minutes.
  3. Place your oven racks to the lowest point possible. Preheat oven to 350 degrees.
  4. Add cream of tartar to egg whites and beat with an electric mixer until soft peaks form. Slowly add in the 1 and 1/3 c sugar tablespoons at a time.
  5. Sprinkle orange peel into egg whites. Slowly fold in sifted flour a fourth at a time.
  6. Pour batter into an ungreaded bundt pan.
  7. Bake for 40 minutes or until top of cake springs back.
  8. Once cooked, immediately invert the cake on a stand or plate until cool. Using a knife around the edges, remove cake and serve!

Notes

The toppings are endless. My suggestions would be strawberries, blueberries, whipped cream or even ice cream!

http://www.pennywisecook.com/heavenly-orange-angel-food-cake/


Like this post? SHARE it!

Related Posts Plugin for WordPress, Blogger...

Subscribe to Pennywise Cook via Email

Many of you have asked how to subscribe to Pennywise Cook via email. You can subscribe here or you can click on the social button at the top right that says Subscribe. It will ask for your email address and once you sign up you’ll receive an email with a confirmation link to verify your subscription. Please do sign up and THANK YOU to everyone for all the kind words!


Like this post? SHARE it!

Related Posts Plugin for WordPress, Blogger...

Magnetic Spice Rack DIY

Happy Saturday! It’s a good day for a DIY project don’t ya think?

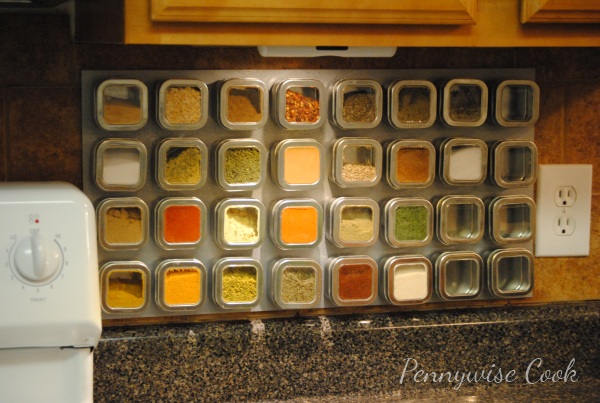
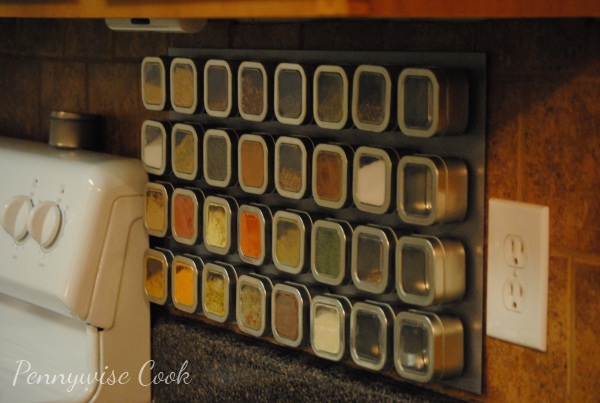
I have a confession. I absolutely love my spice rack. I’m not sure if it’s the stainless steel tins or the beautiful colors that it creates in my kitchen, but I have a love for my spice rack unlike any that I have for my other kitchen gadgets. My KitchenAid stand mixer is a close second though. 😉

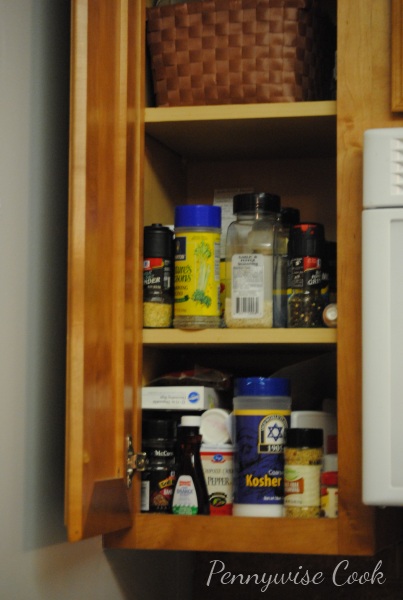
You see, this is my spices cabinet before. In this picture, I’ve actually removed quite a bit of them already so you don’t see them stacked to the top like they normally are, but you get the idea. We have a small house so there just aren’t many places for spices to go. They got the cold shoulder into the smallest possible cabinet available. So I got the bottles flying out at me every time that I went to grab my parsley flakes and one day I said enough is enough. I scoured the web looking at tutorials on how to make your own spice rack and I found some that were magnetic. A light bulb went off in my head and I was hooked. I got some fantastic ideas, but most involved expensive materials and things you had to purchase online. Unfortunately I was in a get-it-now mood so I came up with my own plan.

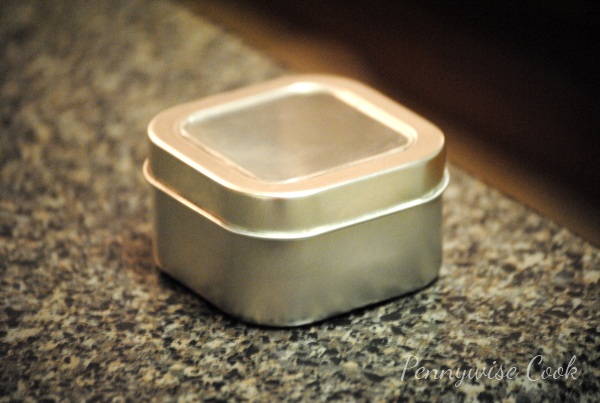
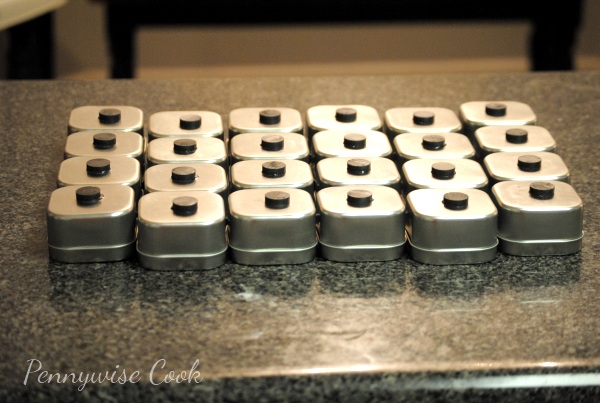
I took myself down to about 5 different stores including your obvious places like Target and Walmart looking for spice tins. Most don’t have anything close to what you see above. I did find something similar at Old Time Pottery, but for $1.99 a pop that just wasn’t going to do. I was imagining a big and magnificent spice rack and at that price, I would be completely broke. I finally settled on ordering them online from Specialty Bottle. They were a much more affordable $.64 per tin. I got the 4 oz tins and they are plenty large enough. Shipping was a bit expensive, but still cheaper than what I would have paid at Old Time Pottery.

Next I needed a piece of metal for the tins to adhere to. Most suggestions that I saw were to order stainless steel sheets online. I can’t believe how expensive those sheets of metal can get. You can’t just walk into Lowes and purchase one. Trust me, I tried. You can however, get a piece of steel at Lowes. I purchased an 18″x20″ piece of it for around $10 there. Using my noggin I realized that if its not stainless, it can rust and around the kitchen there is lots of moisture. I opted to get some Rustoleum that mimics stainless steel to coat it with that ran us another $5 bucks. I actually got the “hammered” look and it turned out wonderful! If you want something that will fit in better with your kitchen colors, they have tons of color options of Rustoleom that would be beautiful on a spice rack.

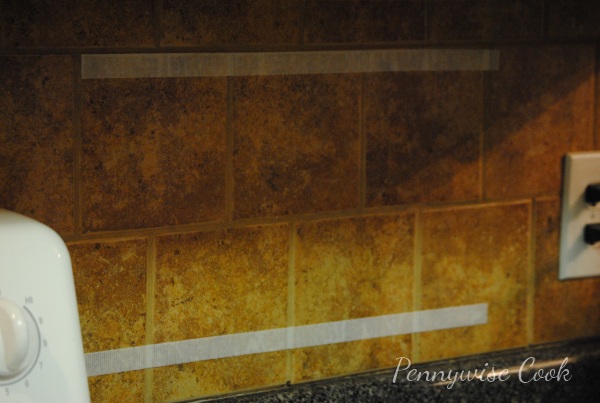
Instead of the usual method of hanging the sheet metal, we opted for using Velcro. It may sound silly, but we have a tile back splash and I didn’t want to risk breaking the tile in the process. Surprisingly enough, the Velcro has worked out fantastically. It ran us about $5 in total.

Next, I needed magnets. After all, you can’t have a magnetic spice rack without those! I purchased 4 packs of 8 ct regular plain jane magnets at Lowes for about $2.50 each. Total= $10. I also used Locktite Super Glue to adhere them to the tins. I didn’t use much at all so they didn’t look messy.

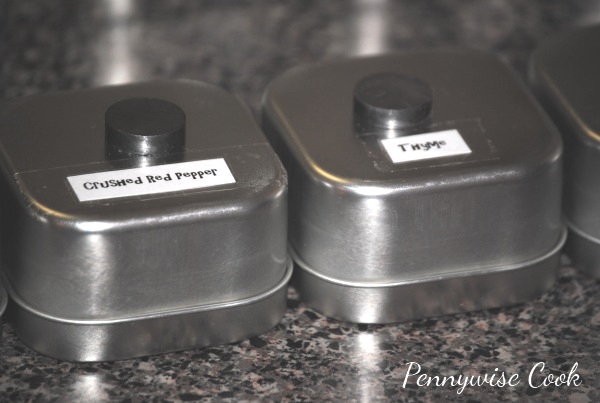
I’m pretty good at knowing what certain spices look like, but I am not great at it with others. It’s amazing how some look like others once you get them up there on that rack. I simply typed up the name of my spices on a Word document and cut them out. Then taped them on the back of the tins. When I need to be sure, I just take it off and look. Simple enough and they look clean on the front without words. They have spice labels for sale on Amazon. Most are less than $3, but these didn’t cost me a dime.

All in all, my Magnetic Spice Rack cost us about $50 plus the shipping for the tins. They have sites that sell these premade online, but I’m very happy with the result that we got for our money. And it was actually quite easy as it turns out!

If you are wanting to do one of these, use your imagination. Don’t always listen to what others suggest. I’m glad that we didn’t because this was possibly a lot cheaper than we would have paid ordering from places online or purchasing some of the other expensive materials.

Yay for DIY!


Like this post? SHARE it!

Related Posts Plugin for WordPress, Blogger...

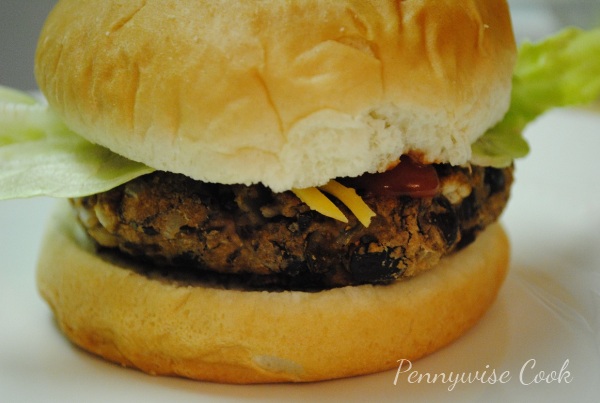
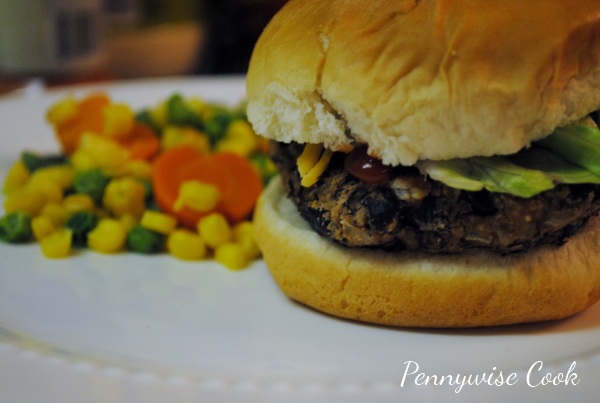
Black Bean Burgers Even Your Husband Will Like

Take a deep breath Amy. It’s just the very first recipe that everyone will see here on Pennywise Cook. No pressure or anything. I’ve been cooking for quite some time and I have a lot of recipes to share. So when it came time to pick one to start out with, I had trouble. In the spirit of the upcoming Valentine’s Day I thought what better of a recipe than to share one that the hubby will like too. I do find that leaving out the fact that these include black beans helps to make them a little more appealing to husbands. But after they have one, they’ll come around.

In hopes to get my family to eat more vegetables and healthier, I’m always looking for substitutions. I’m not huge into making fake meat burgers, but I really love black beans so I decided to give it a whirl. With high hopes and confidence I made up these burgers and served them to my family one night. To my surprise, the reaction from the hubby was that of pure enjoyment. He even stated, “they’re acceptable”. If you know my husband, then you know that that is HUGE praise for a meatless burger. I consider him to be a burger connoisseur among the best.

It’s pretty incredible the consistency that black beans can take on when mixed with a few other ingredients and grilled like a burger. They are very moist, much like a very well cooked burger. With all the fixin’s, you’d never even know. Here’s my recipe.

Black Bean Burgers

6 Patties

Black Bean Burgers

Ingredients

  • 2- 15 oz Cans Black Beans- divided, drained and rinsed well
  • 1/2 medium onion, chopped
  • 2 Tbsp Mayonnaise (I used reduced fat)
  • 1 Tbsp Worcestershire Sauce
  • 1 Tsp Cumin
  • 1/4 Tsp Cayenne Pepper
  • 1/4 Tsp Dried Parsley
  • 1/2 Cup Plain Bread Crumbs
  • 1/2 Tsp Dried Oregano
  • 2 Tbsp Extra Virgin Olive Oil
  • 6 Hamburger Buns

Method

  1. Place 1 can of black beans in food processor with onion and Worcestershire sauce and pulse until it’s a coarse puree. Transfer to large bowl.
  2. Mix in the mayonnaise, cumin, cayenne pepper, parsley, bread crumbs, oregano, and last can of black beans. Mixing with your hands is easiest.
  3. Form into 6 patties. Heat oil to medium-high heat and fry burgers on each side until outsides become browned. Usually around 5- 8 minutes total.
  4. Serve on buns with your favorite fixin’s!
http://www.pennywisecook.com/black-bean-burgers-even-your-husband-will-like/


Like this post? SHARE it!

Related Posts Plugin for WordPress, Blogger...