Archives for March 2012

Mini White Bread Cinnamon Rolls

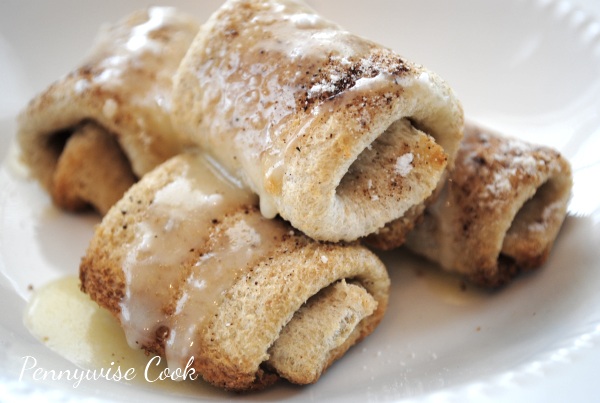
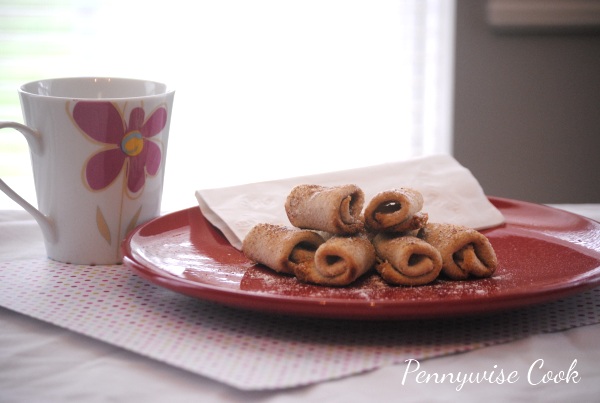
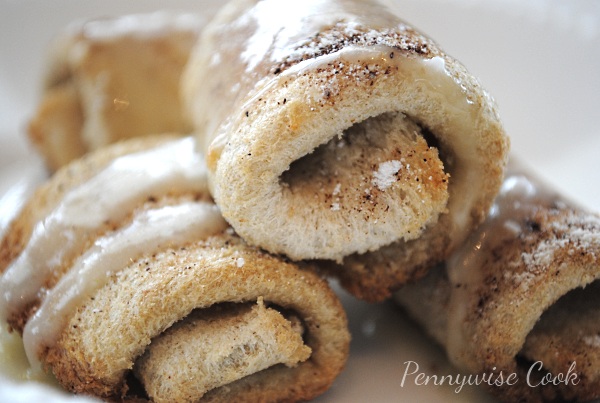
So who knew that the best thing since sliced bread would be itself? I really love finding ways to use things that I already have around my house to make easy and awesome snacks. I would totally put these into the awesome category. I mean they are cinnamon rolls made from regular old plain jane white bread. Before you get too excited, just note that these aren’t as magnificent as Grands!, they are small and dainty. But they will definitely suffice in a pinch and make the kiddos just as happy for sure.

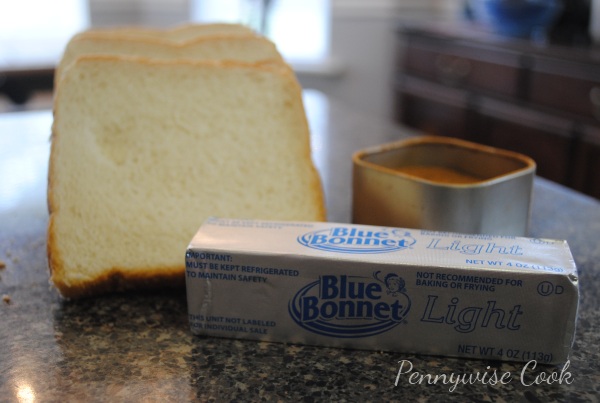
Ya got your butter, your cinnamon sugar, and your loaf of bread. And if you want that yummy glaze for them you’ll also need powdered sugar that’s not pictured here. Use your magic wand (I have one, don’t you?) and voila! Cinnamon rolls!

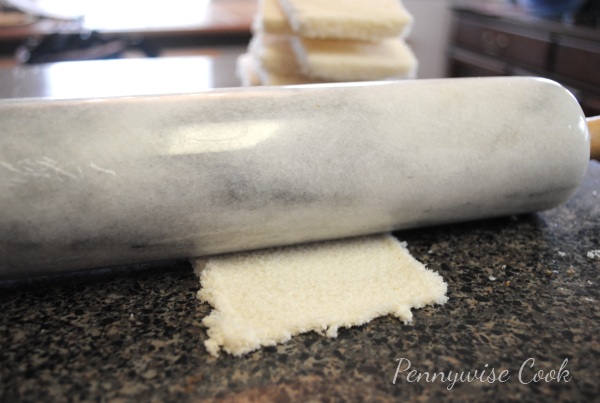
Cut the crust off of each slice of bread and use a rolling pin or heavy can to flatten them out. The better you are at cutting the crusts off, the more roll you’ll have. I’m not amazing at it, but I’m working on it. Get them nice and flat, then use a brush or something like that to brush on some melted butter. You don’t want them to be swimming in it, but just enough to coat. Something for the cinnamon sugar to stick to.

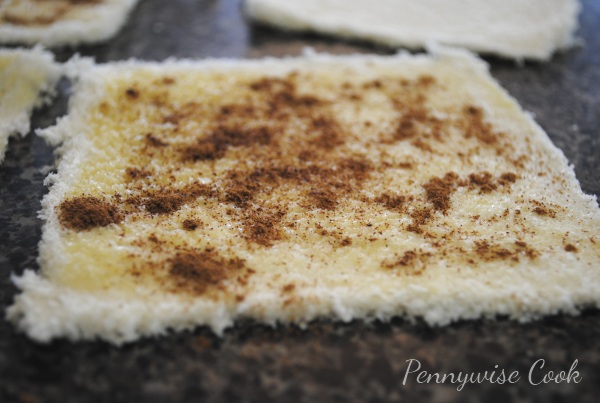
Then sprinkle the cinnamon sugar to your liking on the buttered and flattened bread. It is already looking fabulous. Fold each edge into the center and then roll them up. Place on a greased cookie sheet or in a muffin pan. I used a muffin pan to make sure they didn’t try to roll on me.

After baking them at 375 degrees for a little while, they come out crusty on the outside and little soft on the inside. Mix some of the melted butter with powdered sugar and you have a yummy butter glaze to drizzle over the top.

Recipe courtesy of Circle B Kitchen
White Bread Cinnamon Rolls

White Bread Cinnamon Rolls

Out of Pillsbury sweet rolls? Have a loaf of bread? Make your own mini cinnamon rolls in no time with this easy fix. Only 4 ingredients!

Ingredients

  • A dozen or so slices of soft white bread
  • Melted Butter (1/2 c. should be plenty)
  • Cinnamon Sugar
  • Powdered Sugar (optional for glaze)

Method

  1. Preheat oven to 375 degrees.
  2. Cut the crusts off the pieces of bread. Roll very thin with rolling pin or can.
  3. Brush both sides of the bread with melted butter. Then sprinkle one side with cinnamon sugar.
  4. Fold each side of the bread into the center, then roll up.
  5. Place onto greased cookie sheet or muffin tin. Bake for 15-20 minutes until they start to turn golden.
  6. Add powdered sugar to the leftover melted butter for glaze and drizzle over the top.

Notes

You can freeze these too! Although, they don’t stick around long enough to get frozen here.

http://www.pennywisecook.com/mini-white-bread-cinnamon-rolls/


Like this post? SHARE it!

Related Posts Plugin for WordPress, Blogger...

Peanut Butter & Banana Chocolate Chunk Cookies

I spend a lot of time in the kitchen. I really do. I love to experiment and create and when something turns out right, I feel a bit of accomplishment. Don’t you? I also have times when I follow a recipe to the letter and it comes out completely inedible. When this happens, I like to think that my kitchen might just be part of some freak gravitational or atmospheric region that causes my recipes to flop. But when it comes down to it, sometimes recipes just don’t work out. Of course it’s usually something small like a little too much of something or a little too little. I consider this to be learning and it often times gives me ideas.

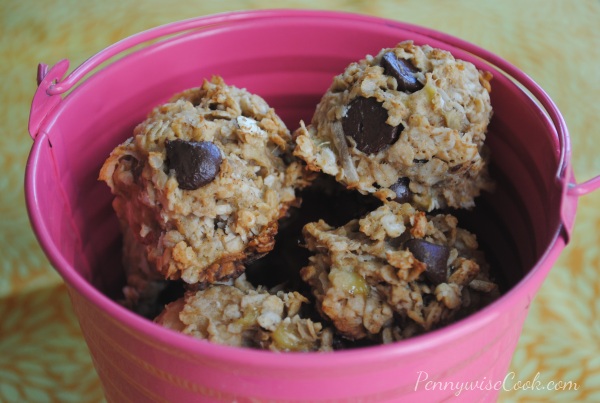
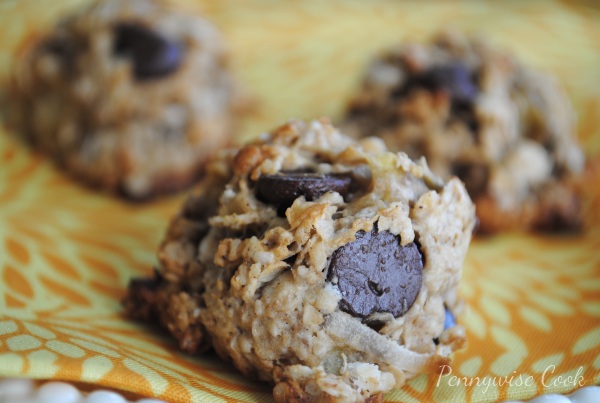
The cookies that I am sharing (found over at The Family Kitchen but originally from 101 Cookbooks) with you today are not flops, but they remind me of flops because they are basically a bunch of yummy ingredients that just so happen to be put together to create a really yummy cookie. Everything you want in a cookie and more.

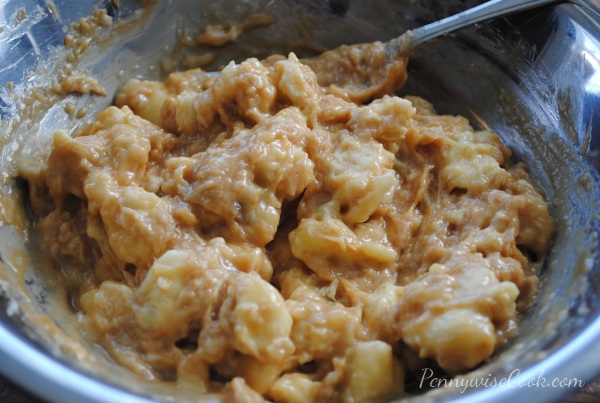
Just look at that bowl’s contents. Couldn’t you just dive right in?. Are you a peanut butter and banana fan? Oh you know I am! I’m starting to think about those Whole Wheat Peanut Butter & Banana Pancakes that I made. These cookies bring in a new ingredient that can only make those two even better- chocolate chips. There’s even a little coconut hidden in there. But shhhh don’t tell anyone. My husband still doesn’t know that these have coconut in them. It’s such a small amount and completely optional, but I think it adds a little something.

Peanut Butter & Banana Chocolate Chunk Cookies

Peanut Butter & Banana Chocolate Chunk Cookies

Peanut Butter's best friend banana got together with chocolate to create a craving-busting cookie!

Ingredients

  • 3 large, very ripe bananas
  • 1/2 cup peanut butter (preferably natural)
  • 1/4 cup canola or olive oil
  • 1 tsp. vanilla extract
  • 2 cups old-fashioned quick oats
  • 1/3 cup shredded coconut (optional)
  • 1 tsp. baking powder
  • 1/4 tsp. cinnamon
  • 1/4 tsp. salt
  • 1/2 – 1 cup chopped dark chocolate or chocolate chips

Method

  1. Preheat oven to 350?F.
  2. In a large bowl mash bananas with the peanut butter, oil and vanilla.
  3. In a different bowl stir together the oats, coconut, baking powder, cinnamon and salt. Add the dry ingredients to the wet ingredients along with the chocolate and stir until combined.
  4. Drop spoonfuls of dough onto a parchment or Silpat lined baking sheet, or one that is sprayed with nonstick spray, and bake for 12-14 minutes, until just set.

Notes

If you want these to come out flatter more like cookie, then you'll need to flatten when placing them on baking sheet. They don't rise very much and pretty much keep their shape the whole time. Makes 2 and 1/2 dozen cookies.

http://www.pennywisecook.com/peanut-butter-banana-chocolate-chunk-cookies/

I was really impressed with these. They’ll make regular appearances around here.


Like this post? SHARE it!

Related Posts Plugin for WordPress, Blogger...

Homemade Instant Potato Gnocchi

Feeling a bit adventurous? How about homemade gnocchi? You can do it with a little help from Betty Crocker. Believe me, if I can do this anyone can!

Gnocchi is beginning to be found at many restaurants these days. It’s a very fluffy potato pasta that is incredibly indulgent and yummy. I’ve been buying it pre-made for a few years and it wasn’t until recently that I got up enough courage to attempt it myself. Mind you, I’ve never made any type of pasta before. I decided to give it a try and to my surprise, I found out that I do have the ability to create these fluffy potato pillows of yummy goodness! You most certainly can too and I encourage you to do it!

The version that I’m going to give you will make it super easy for you to give it a try. It’s made with instant potatoes instead of having to peel and boil and mash real potatoes.

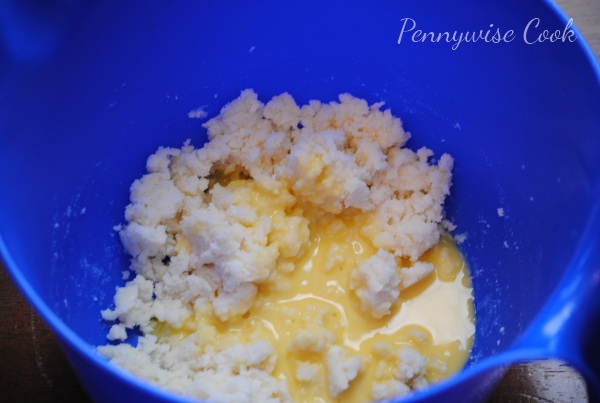
Start out by mixing dry potato flakes (instant potatoes) with water and then adding an egg and a little bit of salt. Can you believe that you’re almost done?! That’s how easy it is to make these!

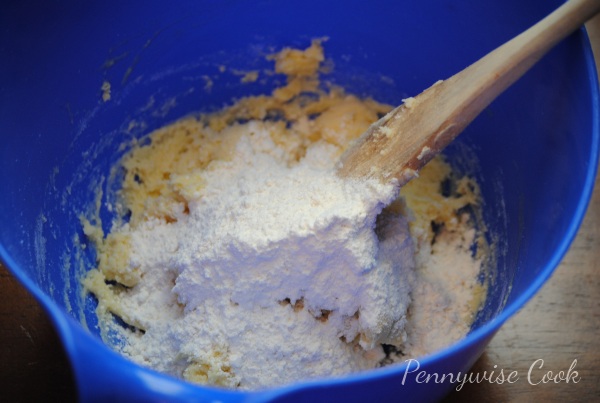
Next, you add in the flour slowly which starts to turn the potatoes into dough.

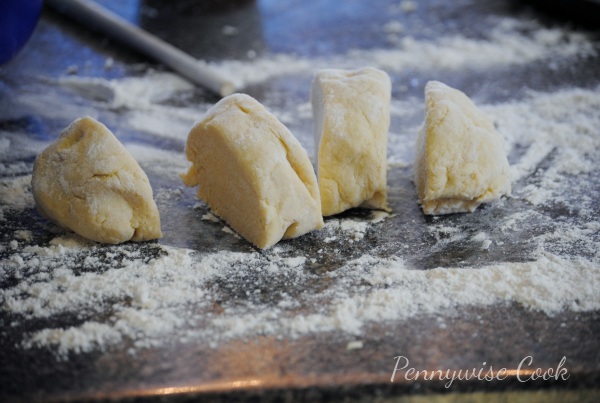
You knead the dough and then divide it into sections for rolling out.

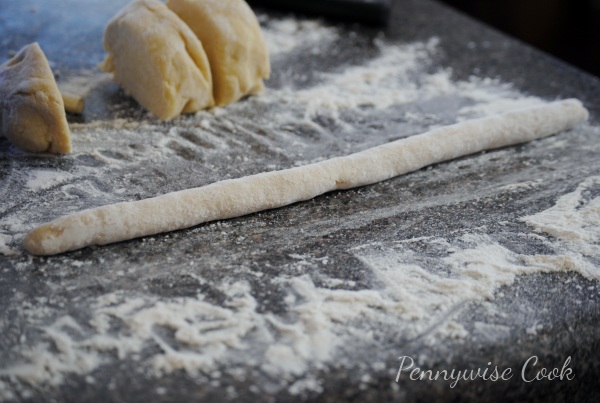
Roll each section into long cylinders the size of your thumb. Then cut into small bite-size pieces.

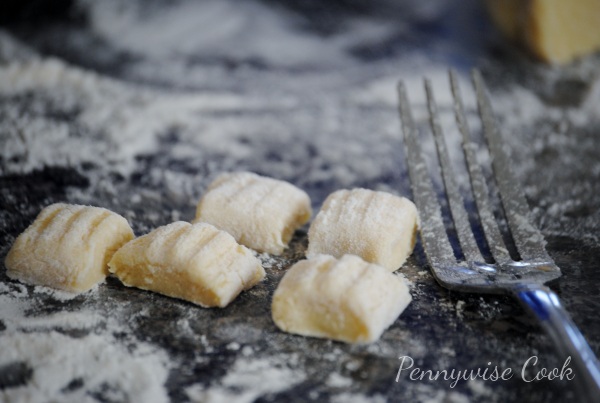
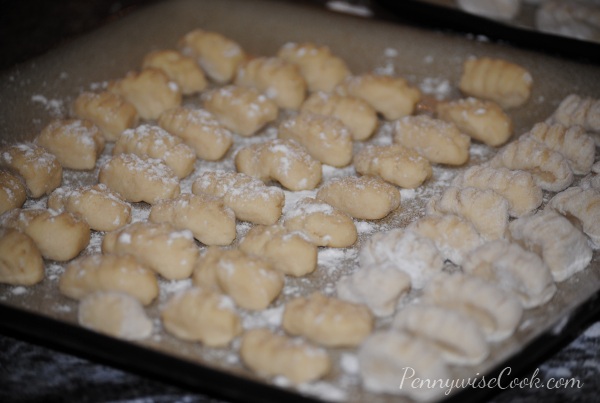
Use your fork to make imprinted lines across the gnocchi. This is how your yummy sauce will stick to them. Then you can shape them to look more like gnocchi which is generally more round and not squared. Don’t get hung up on the shape. They will taste like gnocchi no matter what shape they are in. They are wonderful served with a tomato basil sauce, cheese sauce, or brown butter sauce.

Or you could always toss into Zesty Zucchini and Squash Over Gnocchi!

Recipe courtesy of Food.com

Homemade Instant Potato Gnocchi

Homemade Instant Potato Gnocchi

Ingredients

  • 2/3 c. Dry Instant Potatoes
  • 2/3 c. Boiling Water
  • 1 Egg at Room Temp, beaten slightly
  • 1/2 Tsp Salt
  • 1 1/2 c. All-Purpose Flour

Method

  1. In a medium bowl, stir instant potatoes into boiling water until blended.
  2. Fold the egg and salt in.
  3. Slowly add in the flour, a third at a time. Dough will become thick and won’t stick to the bowl anymore.
  4. Place the dough on a well-floured surface and knead well. You want it to not stick to anything, but you don’t want to add too much flour. The thicker the dough the denser your pasta will be.
  5. Cut the dough into 4 sections. Roll each section into cylinder rolls about the thickness of your thumb. Cut them into bite-size pieces.
  6. Using your fork tines, make indentions on the gnocchi and form to your liking.
  7. To cook- place gnocchi into boiling salted water. Do not crowd the pot. Gnocchi is done when it floats to the top.
  8. Serve with your favorite sauce.
http://www.pennywisecook.com/easy-homemade-potato-gnocchi/

Simple enough and you can say that you made it from “scratch” without hesitation. 😉


Like this post? SHARE it!

Related Posts Plugin for WordPress, Blogger...

Incredible Salted Caramel Brownies

I hope you enjoyed your weekend. We had a BLAST on our anniversary trip to Memphis. We got a massage and got to eat at two of our favorite places in the world- Bahama Breeze and Benihana. We don’t have either of those around here so it’s rare that we get to go. They did not disappoint! I only strive to have my chicken fried rice come out even halfway close to Benihana’s. It’s fabulous.

I’m not scared of heights (I think), but our hotel room was on the 22nd floor. I had a little trouble going close to the window though because it was straight down it seemed. If you’re ever in the Memphis area, I do recommend the Hilton. The service was incredible and everything was perfect.

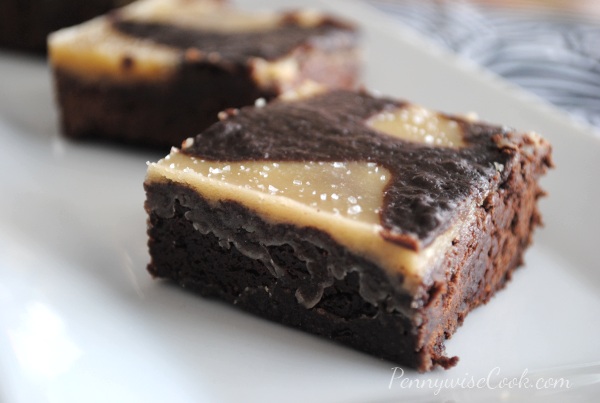
You know something else that’s perfect? Brownies! Not just any brownies either, Salted Caramel Brownies. I made these last week and I’m sitting here wishing there were some left. I can’t tell you that these are low calorie because that would just be telling a fib. But I can tell you that they are low-ER calorie. How’s that for satisfaction? One of these babies only has 180 calories. And believe me, one is plenty. (Yeah right)

I found these brownies over on Pinterest. If you’re not following me yet, you really should. I want to follow you back too! It only took one glance at them to know that I had to make them. As I clicked the picture and prepared myself to view a recipe that was loaded with calories, I was really surprised to see that this is a Cooking Light recipe. I was more than excited when I realized that there weren’t 500 calories per brownie.

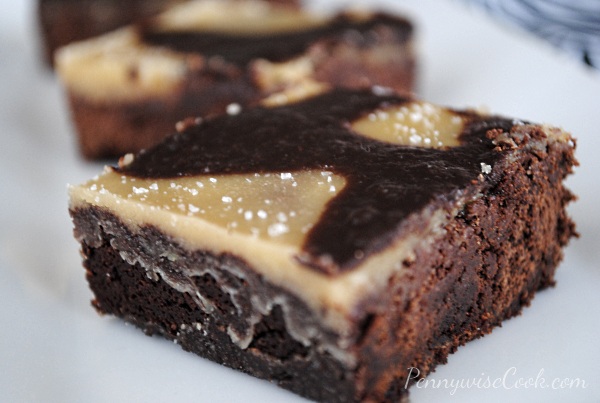
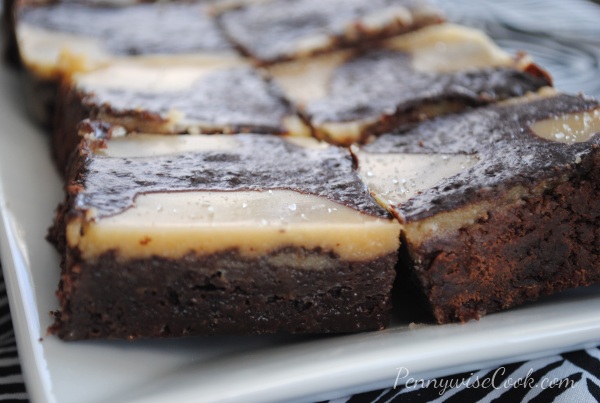
My brownies didn’t end up looking exactly like the picture in the recipe and from the reviews it seems that no one has gotten them to look as pretty as the picture. However, who cares? They are so tasty and that’s all that matters. Salted caramel on top of a delicious chocolate brownie? I’m not sure that it gets any better than that.

Recipe courtesy of MyRecipes.

Salted Caramel Brownies

Salted Caramel Brownies

A salty caramel version of your every day brownie.

Ingredients

    For the Brownies
  • 3 19/50 ounces all-purpose flour (about 3/4 cup)
  • 1 cup granulated sugar
  • 3/4 cup unsweetened cocoa
  • 1/2 cup packed brown sugar
  • 1/2 teaspoon baking powder
  • 6 tablespoons butter, melted
  • 2 large eggs
  • 1 teaspoon vanilla extract
  • Cooking spray
  • For the Topping
  • 1/4 cup butter
  • 1/4 cup packed brown sugar
  • 3 1/2 tablespoons evaporated fat-free milk, divided
  • 1/4 teaspoon vanilla extract
  • 1/2 cup powdered sugar
  • 1 ounce bittersweet chocolate, coarsely chopped
  • 1/8 teaspoon coarse sea salt

Method

  1. Preheat oven to 350°.
  2. Combine flour, sugar, cocoa, brown sugar and baking soda in a large bowl, stirring well. Combine 6 tablespoons butter, eggs, and 1 teaspoon vanilla. Add butter mixture to flour mixture; stir.
  3. Scrape batter into a square baking pan coated with cooking spray.
  4. Bake for 19 minutes or until a toothpick comes out with moist crumbs clinging. Cool in pan on a wire rack.
  5. Melt 1/4 cup butter in a saucepan over medium heat. Add 1/4 cup brown sugar and 1 1/2 tablespoons milk; cook 2 minutes.
  6. Remove from heat. Add vanilla and powdered sugar; stir until smooth. Spread mixture evenly over cooled brownies. Let stand 20 minutes or until set.
  7. Combine 2 tablespoons milk and chocolate in a microwave-safe bowl; microwave on HIGH for 45 seconds or until melted, stirring after 20 seconds. Stir until smooth; drizzle over caramel.
  8. Sprinkle with sea salt; let stand until set. Cut into squares.

Notes

You can add more salt as you see fit. I think I ended up adding about a tablespoon since I like things a bit salty when mixed with sweet.

http://www.pennywisecook.com/incredible-salted-caramel-brownies/

There are the perfect thing to bring along to a cookout or gathering. They will most definitely be a hit!


Like this post? SHARE it!

Related Posts Plugin for WordPress, Blogger...

Easy Tomato Basil Sauce

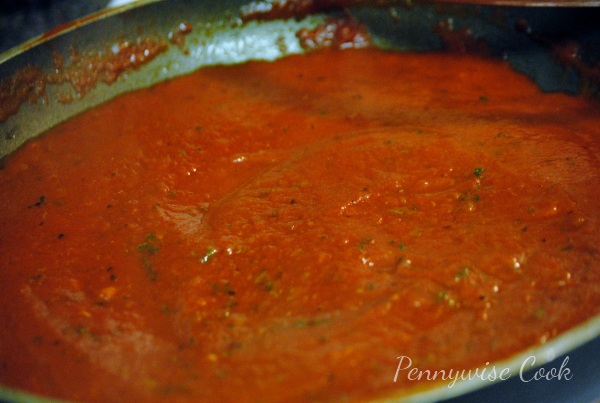
When it comes to cooking, the tomato basil sauce is a go-to red sauce for a variety of different meals. You can use it for practically anything that requires tomatoes. The basil gives such a fresh herb taste. It’s become my favorite by far. I just love how easy it is and that I have most everything already on hand. Skeptical at first that the recipe would be too simple, I was amazed at the flavor that this gave a few different dishes that I’ve used it for.

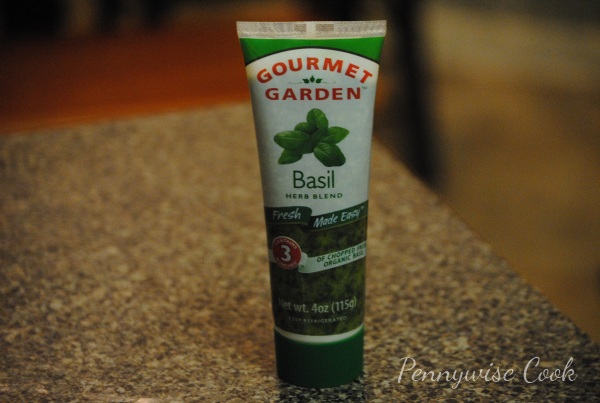
I went to the grocery store in search of fresh basil. Most stores around here (ie. Kroger, Walmart) don’t just have fresh basil in their produce. They do have some pre-packaged options, but they are crazy expensive and I refuse to pay for those. I came across this little tube in the fresh herb section and decided to give it a whirl. It’s made of fresh organic basil and some additives to keep it fresh longer. It will last in that tube for 5 months! Tablespoon for tablespoon it’s equivalent to fresh basil. It was $3.99 for the tube and was worth every penny to me.

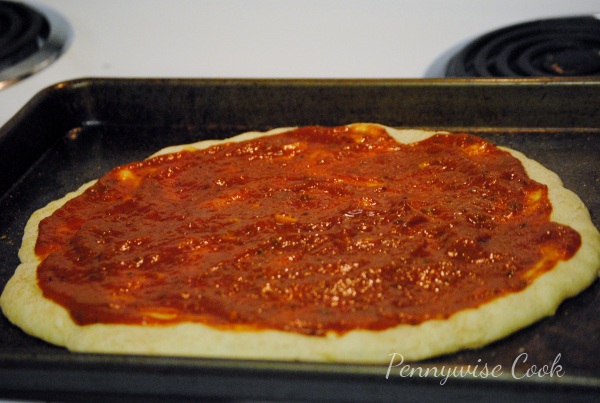
We made a homemade pizza the other night and I used my homemade tomato basil sauce on it. FABULOUS! My husband said that this was the best homemade pizza that he’s ever tasted and I would have to agree with that. This sauce would be wonderful over pasta, in lasagna, pizza, dipping and more! In fact, why not whip some up for your Cauliflower Crust Pizza? Oh I’ve done it and it’s fantastic!

Adapted from this Tyler Florence recipe.

Easy Tomato Basil Sauce

Easy Tomato Basil Sauce

Simple tomato basil sauce that you can use for a variety of dishes!

Ingredients

  • 2 Tbsp Olive Oil, divided
  • 2 Garlic Cloves, Minced
  • 1 Can Crushed Tomatoes, 16 oz
  • Pinch of Sugar
  • Kosher Salt and Ground Pepper To Taste
  • 4 Fresh Basil Leaves, Chopped or 4 Tsp Basil from Tube

Method

  1. Heat 1 tbsp olive oil in pan over medium-high. Add the garlic and cook until soft.
  2. Add in the crushed tomatoes and sugar, then season with salt and pepper.
  3. Turn the heat up a bit and simmer for 10 minutes, stirring occasionally. Be sure to keep a cover on as it will splatter!
  4. Stir in the remaining olive oil and basil. Serve!
http://www.pennywisecook.com/easy-tomato-basil-sauce/


Like this post? SHARE it!

Related Posts Plugin for WordPress, Blogger...

Amazon Gift Card Winner & Random Thoughts

Thank you to everyone who entered the $50 Amazon Gift Card Giveaway! It was a very big success and I’m so thrilled to have such awesome readers already!

There were 158 fabulous entries. I appreciate all of your input and feedback on the new site. I always strive to make things as easy for YOU (and me) as possible. I hope that you caught the new Print and Save Recipe Feature that I added this week. I plan to eventually add those options to the top right of the blog so that you can always view your saved recipes with the click of a button.

I’m still gettin’ the hang of this food blogger stuff. I’m so used to the fast paced frugal deal sharing on Saving with Amy that it’s almost tranquil to come over here where it’s calm and delightful. I just love food y’all, it’s my favorite. 🙂 I’m also working really hard on improving my food photography. I never knew how difficult it was to get really great pictures of food. You see these photos on all the big blogger sites and on the food sites and think it’s so simple. I can tell you, it’s not.

Anywho, if any of you have any requests or want to send me recipes please do so at amy (at) pennywisecook (dot) com. I’d love to hear from you!

And P.S.- I love comments by the way. If you check out a recipe, I’d love to hear your thoughts or suggestions. It kinda helps me to know that I’m not all by myself over here. 🙂


Like this post? SHARE it!

Related Posts Plugin for WordPress, Blogger...

DIY: Cute Way to Say I Love You

WARNING- things could get a bit mushy…

We are finally going to enjoy a few kid-free moments this weekend. Either that or we’re going to look at each other and A) talk about the kids or B) wonder what in the world to do! We’re going to eat at one of our most favorite restaurants, Benihana and get a massage. Haven’t had one of those in quite a while! Tomorrow is our anniversary. It’s number 6 for us! We’ve actually been together since we were sophomores in high school so it feels like longer. Even after all this time, I still love him as much as I did when we married if not more. We have grown up together and it’s kinda neat to see how each of us have blossomed into the adult folks that we are today.

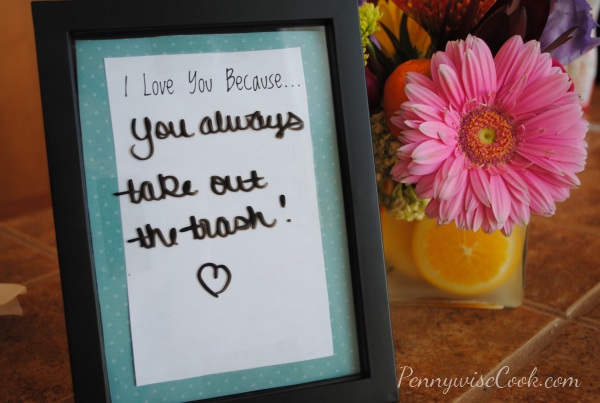
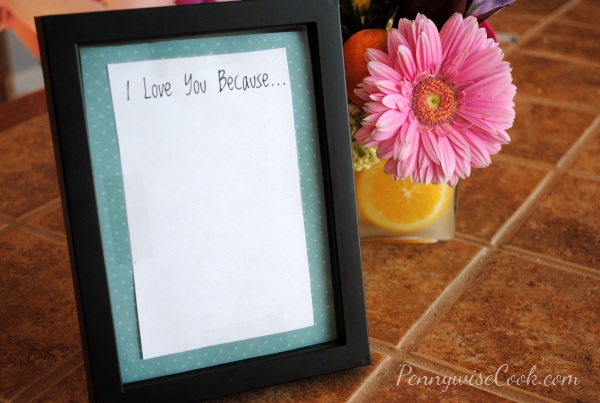
I came across this idea on Pinterest a few weeks ago. Forgive me, I can’t find the link anymore. (I never pinned it AH!) If you search, you’ll find tons more like this. Most of which probably look a lot better than mine. However, mine is uber frugal and we like cheap don’t we? I mean, I’m talking about $1 cheap here.

I simply bought this cute little black frame at Dollar Tree, printed the words in this cute font on a piece of paper that I cut, and taped it to a piece of scrap booking paper that I had. Just use dry erase markers on the glass to leave your romantic messages.

It’s not even about how cute your frame or font is. It’s about what get’s written on it. I’ve had this on our kitchen table for about a week now. Every day while Max is at work I write something thoughtful on it. I try to make them serious yet light-hearted and encouraging. The messages can easily get cheesy and Hallmark Cardesque, so I try my best to really think of things that apply to us.

It’s a simple way that we can connect with each other each day. Love is so hard to share sometimes, especially with a busy schedule and work. But it definitely shouldn’t be forgotten. If you don’t already do something like this, this might just be a quick and simple way to start!

P.S.- You can also do this with your kids! If they are old enough to read, this would be a great reading exercise or just great encouragement.

Your Turn! Do you write little messages to your significant other?


Like this post? SHARE it!

Related Posts Plugin for WordPress, Blogger...

3 Tips For Shopping at a Salvage Grocery Store

Have you ever seen those hole in the wall Salvage Grocery Stores in your area? I grew up going to one in my hometown with my mom and grandmother. I remember being a really good girl so that I could pick out an entire bag of candy. They had an entire shelf dedicated to candy and other sweets. Little did I know that one day I might like salvage grocery stores for something other than those treats.

Since moving away from home years ago, it has taken me a while to find one of these stores in our area. They aren’t like Walmart with one on every corner. Not only that, but it’s sometimes hard to decipher what kind of salvage a store might sell. From auto parts to furniture, there are several different types of salvage stores out there. Similar to thrift stores, salvage grocery stores offer deep discounts on groceries for various reasons. It might be that the cans are dented. It could be that the cereal boxes are smashed. Or perhaps the products are just overstocks, out of date, or just wouldn’t sell. Whatever the case, you’re sure to find at least 50% savings. They are a great way to save money on common grocery items, especially canned goods. Even though the packaging may look less than perfect, the food inside could still be just fine and best of all, inexpensive.

Tips for shopping at salvage grocery stores:

  • Consider expiration date. This is one of the biggest factors when purchasing at a salvage grocery. Expiration dates vary depending on the food. Canned foods generally last a lot longer than boxes foods such as cereal. Nutritional values may also deteriorate the closer to expiration a product gets.
  • Consider the condition of packaging. If you find a box of crackers that has been smashed to smithereens, they may not be very fresh even if in date. This is also the case if you find a package with a hole in it. Another thing to consider are canned goods. Most are ok with a dent, but be sure to look at the top ring. If the ring is dented, it will be difficult to open to get the contents out.
  • Use your common sense. Products like pasta and canned goods are generally still good even after their sell-by date. Anything containing liquids might be worth inspecting first. If it doesn’t look appealing, don’t buy it.

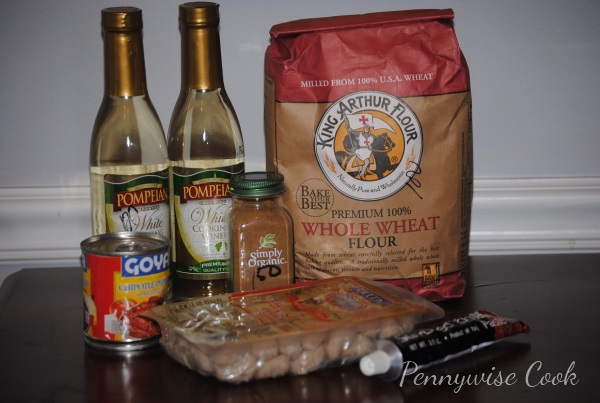
I found a local salvage grocery store about 30 minutes away and fell in love. Going in their this past week, they had several boxes of organic baby puffs for $.50 each. Score! Britton has been enjoying those. Digging through the spices, I found  a bottle of organic coriander for $1.50. Some other nice cooking finds were Whole Wheat Flour and Chipotle Peppers in Adobo Sauce. Everything that I bought was in date.

Here’s what I bought and paid:

  • Organic Coriander $1.50
  • King Arthur Whole Wheat Flour $1
  • Goya Chipotle Peppers in Adobo $.50
  • Pompeian White Cooking Wine $1 (!!)
  • Whole Wheat Gnocchi $1
  • Sun Dried Tomato Pasta in Tube $.50

I spent a total of $6.50 for gourmet ingredients that would have for sure cost double if not triple at any other grocery store. Very exciting indeed! You can find a salvage grocery store in your area here. This list may not be completely up to date, but it’s all I could find.

Have you ever shopped at one of these stores? Found any great finds?


Like this post? SHARE it!

Related Posts Plugin for WordPress, Blogger...

Crispy Oven Baked Chicken Nuggets

Happy Friday! This weekend is my husband and I’s 6th anniversary so we are headed out on a special little trip together. No kids allowed! We are so excited to have some time together as life gets so hectic these days. It’s going to be so nice to have an entire couple of days to reconnect. I’m actually quite giddy about it!

I’ve told you before about my fear of frying things. Whenever humanly possible I will bake something in place of frying to make it healthier. I mean if you have achieve the same general flavor and composition, what’s the use in all that unnecessary oil? One thing that I’ve always loved even since I was a kid was chicken nuggets. Who doesn’t like chicken nuggets?

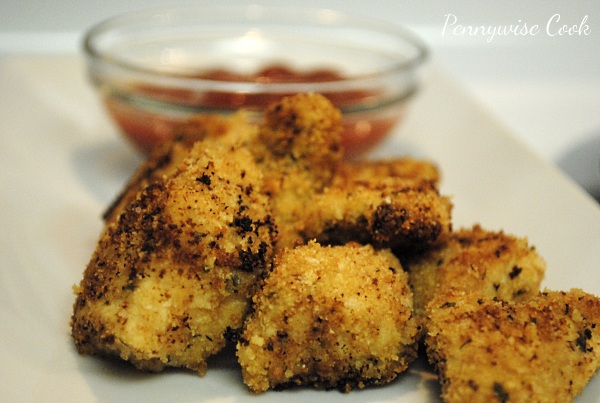
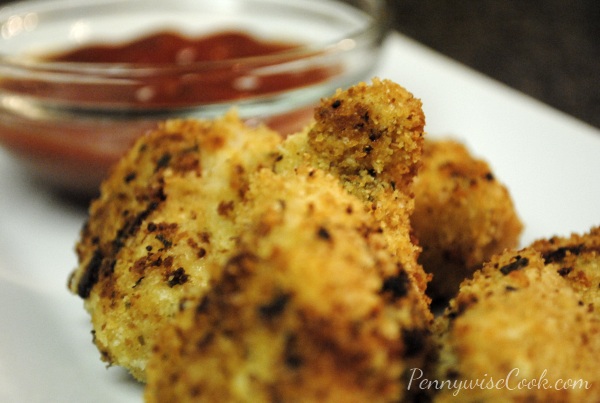
The chicken…in the form of a nugget…you just can’t beat that. I’ve made some pretty darn amazing chicken tenders in the past, but never tried the smaller bite-size nuggets before.  Why you ask? I have no earthly idea. In fact when I came across this recipe, it really made me wonder to myself why I hadn’t tried chicken nuggets before. It was well worth the wait though. These baked chicken nuggets came out crispy  and yummy. It’s so nice to eat a chicken nugget and know exactly what is inside of it. 😉

If you have never tried to make your own nuggets before, I encourage you to try this one. The one suggestion that I do have with this recipe is not to fiddle with the chicken too much until they are done. You do have to turn them over during the baking process, but I wouldn’t give them too much of a jolt as the breading tries to come off when they aren’t done yet.

Very simple recipe with things you might already have laying around the house. And since they aren’t fried and aren’t coated in thick batter, they are actually very healthy too! These would go really awesome along side some Crispy Homemade Oven Fries!

Recipe from SkinnyTaste.com

Crispy Oven Baked Chicken Nuggets

Prep Time: 15 minutes

Cook Time: 10 minutes

Crispy Oven Baked Chicken Nuggets

Don't fight the chicken nugget cravings! Just make them better for you. Try these Crispy Oven Baked Chicken Nuggets!

Ingredients

  • 1 lb Boneless, Skinless Chicken Breasts (About 2 Large), Cut into Bite-size Pieces
  • Salt and Pepper to Taste
  • 2 Tbsp Olive Oil
  • 6 Tbsp Whole Wheat Bread Crumbs (I used Regular Italian)
  • 2 Tbsp Panko Bread Crumbs
  • 2 Tbsp Grated Parmesan Cheese
  • Cooking Spray

Method

  1. Preheat oven to 425 degrees.
  2. Place olive oil in one bowl and the breadcrumbs, panko, and parmesan cheese in another.
  3. Season the chicken with salt and pepper then place in the bowl with olive oil and coat each piece well.
  4. Put a few pieces of the chicken in the breadcrumb mixture a time and toss. Place on baking sheet.
  5. Lightly spray the tops of the nuggets with cooking or olive oil spray. Bake for 8- 10 minutes then turn and cook for another 4-5 minutes.

Notes

When you're flipping them, just be sure to be extra careful. The breading will easily come off before they start to crisp.

http://www.pennywisecook.com/crispy-oven-baked-chicken-nuggets/

Kids just love these so much. My Addie is a chicken nugget connoisseur (she likes to think) and she thoroughly approves!

Let me know if you make these and how they turn out!


Like this post? SHARE it!

Related Posts Plugin for WordPress, Blogger...

Easy Caramel Banana “Banoffee” Pie

My husband and I went to England a little over a year ago on the most amazing trip. It was for his work, but I got to gallivant around and it was pretty incredible. I really enjoyed taking in their culture and how similar, yet so different that country is. One thing that I really loved about the UK is that they are really big on Indian food there. I’m a big fan of Indian food. Kinda ironic considering that I really don’t like spicy food. I always order everything mild.

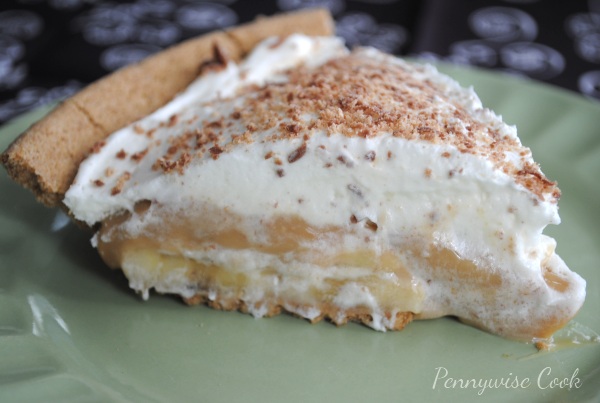
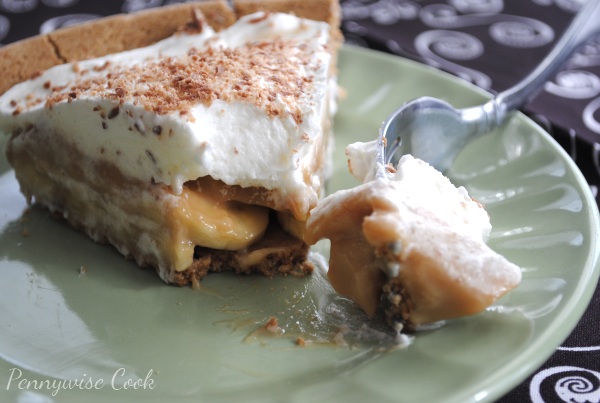
You’re probably wondering what this gorgeous pie has to do with England. This is a pie that originated in England known as a “Bonafee” pie. It comes from the words banana and toffee put together. For years, I’ve been making caramel pies very similar to this and never once thought of putting bananas with it. But boy is it yummy!

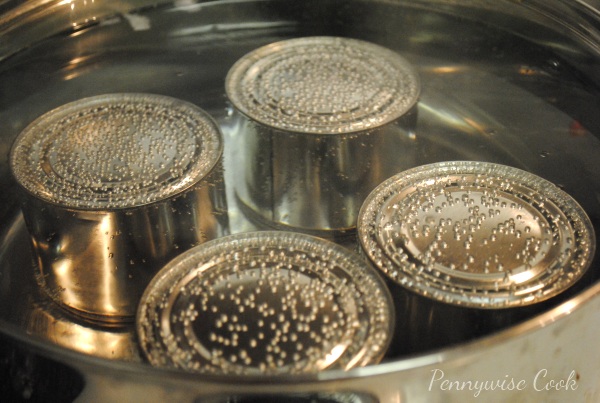
This pie is incredibly easy. Like, you wouldn’t believe how easy. You simply need a can of Sweetened Condensed Milk to boil. In about 2 hours, it turns to caramel! Yeah, it’s really that simple. You can even use fat free sweetened condensed milk. This part of the pie is the most time consuming and takes a little babysitting. You’ll want to make sure that the cans stay completely submerged the entire time. You have to add hot water just about every 30 minutes during the 2- 2.5 hours.

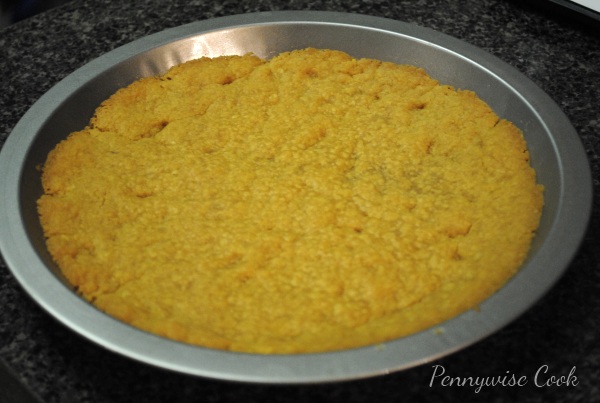
Making your own crust is super simple too. I bought some shortbread cookies at Dollar Tree and popped them into the food processor. I ground them up until they were crumbs and then added in some melted butter and pressed that mixture into a pie pan. Bake that for about 10 minutes and you have a 2-ingredient homemade pie crust! Just about any cookies will work for this crust- shortbread cookies, vanilla wafers, even biscotti!

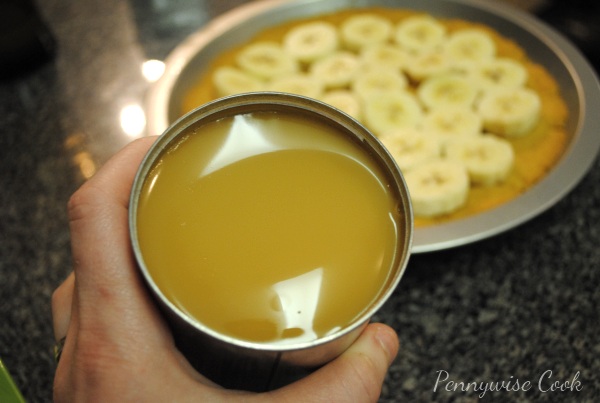
Once your sweetened condensed milk is done boiling it will look like this. Place a few sliced bananas into your pie crust. Then…

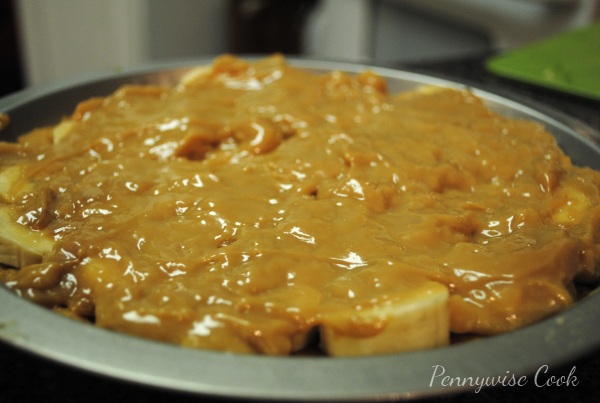
..Spread the caramel over the bananas. It’s difficult not to dive into this pie already!

Top it with some whipped cream (or homemade if you’re adventurous) and shave a little chocolate over the top. It’s best to let it chill for about an hour in the refrigerator for it to set. This pie is extremely easy to make and tastes like you put lots of work into it!

Adapted from Brooklyn Limestone’s Recipe

Easy Caramel Banana “Banoffee” Pie

Easy Caramel Banana “Banoffee” Pie

Sweetened Condensed Milk magically turns into caramel in this delicious caramel banana pie! Use Fat Free Sweetened Condensed Milk and a Reduced Fat Graham Cracker Crust for a healthier version.

Ingredients

    Pie Filling
  • 1 Can Sweetened Condensed Milk
  • 2-3 Bananas, Sliced
  • 1 Graham Cracker Crust (Or See Below for Homemade Recipe)
  • 1/2 Package Whipped Topping
  • Chocolate Bar for Topping (Optional)
  • Pie Crust
  • 1 Package Shortbread, Graham Crackers, or Cookies of your choice
  • 3/4 Stick butter, Melted

Method

    To Make the Pie
  1. In a large pot of water, place can of sweetened condensed milk. Make sure there is about an inch to 2 inches of water above the can.The can must remain completely submerged the entire process. Boil the sweetened condensed milk in a rolling boil for at least 2 hours.
  2. When the can is done boiling, turn off the burner and remove from pot. Let cool for 5-10 minutes.
  3. Place sliced bananas into the bottom of your crust. Carefully open the caramel can and spread over the bananas.
  4. Spread the whipped topping over the caramel. Shave chocolate bar over whipped topping.
  5. Refrigerate for at least 1 hour before serving.
  6. For Homemade Pie Crust
  7. Place cookies into food processor or blender. Chop until cookies are crumbs.
  8. Add in melted butter and combine mixture well.
  9. Press cookie and butter mixture with your hand into pie pan. Be sure to get up around the edges.
  10. Bake in oven at 350 for 10 minutes. Let cool.

Notes

You can get creative with your crust if making it from scratch. This pie would taste good in just about any kind. I think an oreo crust would be marvelous!

Also, to make a plain old caramel pie, just boil the two cans and throw it in a pie crust! Makes a super easy dish to bring along to a cookout!

http://www.pennywisecook.com/easy-caramel-banana-banoffee-pie/


Like this post? SHARE it!

Related Posts Plugin for WordPress, Blogger...