Silly me, I posted this accidentally the other day with no content inside. I’m sure that some of you were wondering about that. You’ll have to forgive me, I have a very frantic brain!
My girls both have their birthdays in May. It’s great for getting them out of the way in just one month out of the year, but I think eventually they will wish they were born in different months. You know how siblings can be.
This year I was extremely excited to make up these super cute royal icing cookies for Addie’s birthday party. I’ve made all kinds of cookies before, but never ones that are topped with royal icing. I thought for sure that the process would be difficult and that mine would end up ugly. I must admit that I can’t draw. Therefore, anything that requires free-handing just doesn’t look good coming from these fingers. Much to my surprise, royal icing was a cinch to work with and my cookies came out fantastic!
Believe me, if I can make these pretty, you can too!
It starts with your favorite sugar cookie recipe. I scoured the web to find one that would roll out well and hold up to all the work I was going to put them through. I eventually found one that worked like a charm. Don’t worry, the recipe is below. And of course, if you have a tried and true family sugar cookie recipe, but all means use it!
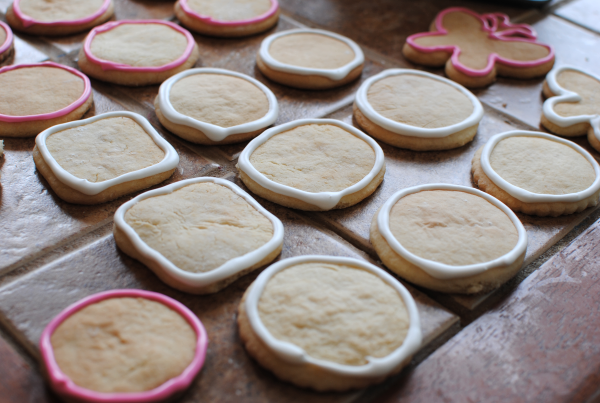
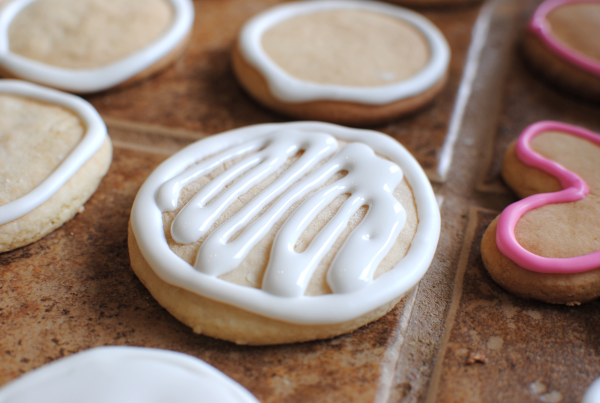
Once you make up your royal icing (it takes no time at all), the best way to start is by outlining the cookies with a line of royal icing. This kinda creates a barrier that will eventually hold in your “flood” of royal icing. It doesn’t have to be perfect!
The next step happens once the outlining is dry. I found that since it wasn’t much icing that by the time I was done outlining, the very first cookies were already dry and ready to flood. By making the icing almost a liquid, you simple drop about a teaspoon or so (depending on the size of your cookies) of the royal icing into the middle of each cookie and then use a toothpick to spread it evening over the entire cookie, getting all of the nooks and crannies. Though this is a little tedious, I find it fun.
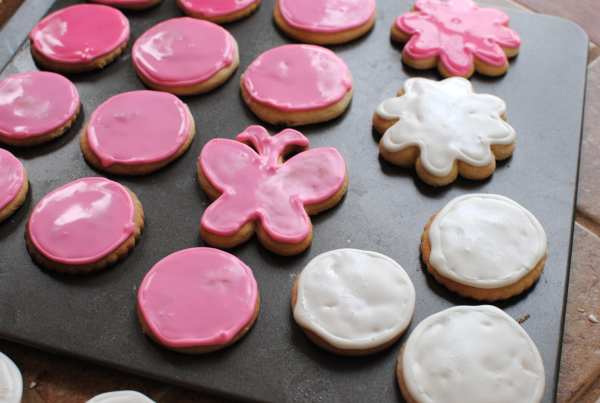
So after you have “flooded” your cookies with royal icing, they will look like this. Kinda wet to begin and then as they dry you’ll notice they harden and have a matte finish. That means it’s time to decorate them!
Add whatever decorations that you want. I used more royal icing and some sugar pearls to adorn Princess Addie’s cookies. I monogrammed some of them too. I think that’s a nice touch if you’re making them for a birthday or anniversary.
Ready for the recipes to make royally iced cookies?
Royal Icing Recipe courtesy of Brown Eyed Baker. Sugar Cookie Recipe courtesy of Spark People.

Perfect iced cookies are easier to make than you think!
Ingredients
- 1 1/2 cups - granulated sugar
- 2/3 cup - butter
- 2 whole eggs
- 2 Tbsp - 2% milk
- 1 tsp. - vanilla extract
- 3 1/4 cups - white flour
- 2 1/2 tsp - baking powder
- 1/2 tsp - salt
- 4 cups powdered sugar
- 2 tablespoons meringue powder (or powdered egg whites)
- 6 tablespoons water
- Toothpicks
- It is recommended that you have pastry or icing bags along with a decorating tip for outlining and decorating the cookies. It's possible that a heavy duty ziploc bag will work if you do not have the other. But I highly suggest using pastry bags and decorator tip.
Method
- In a large bowl, cream the butter and sugar. add in the extract, eggs, and milk until blended.
- In a medium bowl, whisk together all of the dry ingredients. Add the wet ingredients to the dry and mix with a mixer until well combined.
- With your hands, shape the dough into a ball. Wrap the dough ball in plastic wrap and refrigerate for 2-3 hours. (This will make it easier to roll out)
- Preheat oven to 400 degrees.
- Lightly grease your cookie sheets. Roll out half or 1/3 of the dough at a time while the rest is in the refrigerator.
- Flour cookie cutters and cut out your shapes.Re-roll out your trimmings and shape them too. Place the cookies 1/2 inch apart on cookie sheet. Bake for 8 min or until light brown.
- LET COOL COMPLETELY.
- Mix all ingredients on low speed for 7-10 minutes or until it loses it's shine. Add water by the teaspoon if becomes too stiff.
- Divide the icing into bowls for however many colors you plan to have. Add the food coloring and mix well. Place a damp paper towel over the top while not using it so it doesn't dry out.
- To outline the cookies, use the same color that you plan to flood the cookie with to outline. Create an outline of the entire cookie with one line of icing. Allow all cookies to dry before moving onto the next step.
- To flood the cookies, start by adding drops at a time to the color icing that you wish to flood your cookie with. You will want it to be pretty liquidy. If you lift your spoon up and it drizzles back into the bowl and disappears quickly, you have the right consistency. Using a squeeze bottle or spoon, place a little royal icing on your cookie. Use a toothpick to evenly distribute the icing to the entire cookies. Be careful to not make it too thick.
- Let all of the cookies dry COMPLETELY before you begin to finish their decorations.
Notes
For the cookies, the thinner that you roll the cookies, the firmer and crispier they will be. If you leave them fairly thick, they will be softer and chewier.
This recipe makes about 72 cookies depending on the size of your cookie cutter. I made fairly large ones and I'd say I had about 30 or so.

Like this post? SHARE it!
 |





Recipe? 😉
I made this the other night w/ the help of 2 of my kids & they were so yummy. Its hard to find a good cookie recipe & it was my very 1st time making royal icing, so easy. So thanks so much for sharing.
I’m so glad that y’all enjoyed them! It’s much easier than people think!
You mentioned to add drops to icing for flooding. But drops of what… Milk, water??
Hi, AMY.
How delicious recipe you made! it is just fabulous. I taste it just oww.