Frugal DIY: Coffee Filter Flowers


I’ve really been working on spending more time away from the computer. I think that looking at a computer screen and being so deep into social media and facebook (etc.) can really start to drain your brain. I find that spending part of my day completely unplugged really helps me to just feel better overall and that I can devote time to family and fun.

My mom called me Becky Homecky the other day….. I’d never actually heard that phrase before. She was surprised, but I honestly hadn’t. I knew what it meant immediately and I would consider it a compliment. Thanks mom! But as I pondered what exactly that meant, I began to think that I’m not really a Becky Homecky after all. I just like to cook. I HATE to clean. I intensely despise doing the dishes, but I like vacumming. Kinda weird huh?

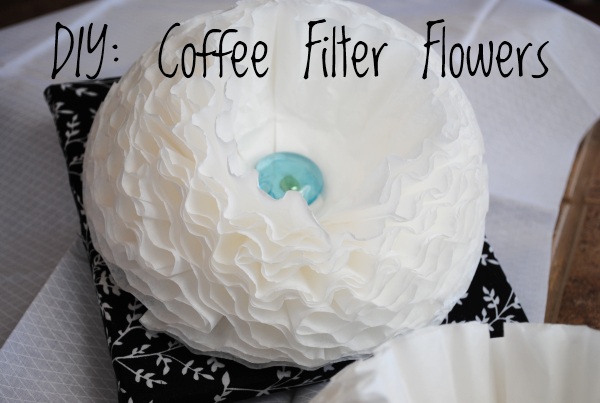
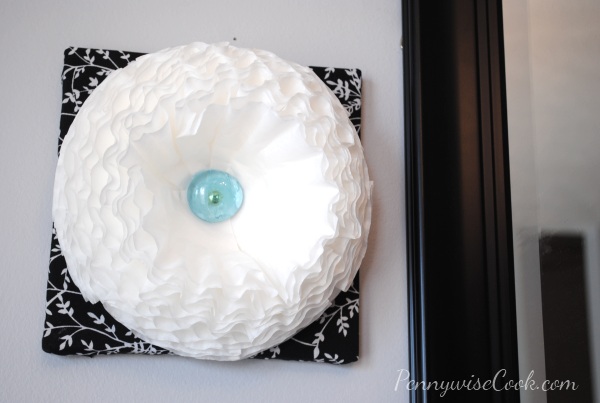
I came across this idea for Coffee Filter Flowers on Creature Comforts and got a little giddy about this craft because I thought hey, I can totally do that! So I did. These are so super easy and they make me feel like a true Becky Homecky, y’all.

Coffee filters cost what? Like $1 at the dollar store! You can’t beat that price for a homemade flower.

What you need:

22 Coffee Filters
Metal Brads or Brass Fasteners (I found them at Walmart for around $2.50)
Button, jewel, or ornament for the center (I used marble jewels that I got at Dollar Tree)

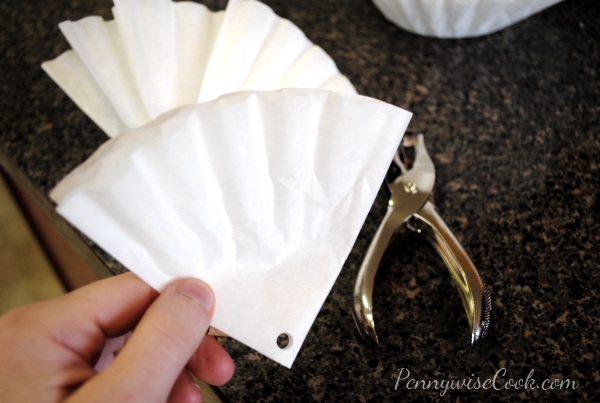
1) Fold the filter in half. Then in half again. Punch a hole with a handheld puncher and then place the brad through.

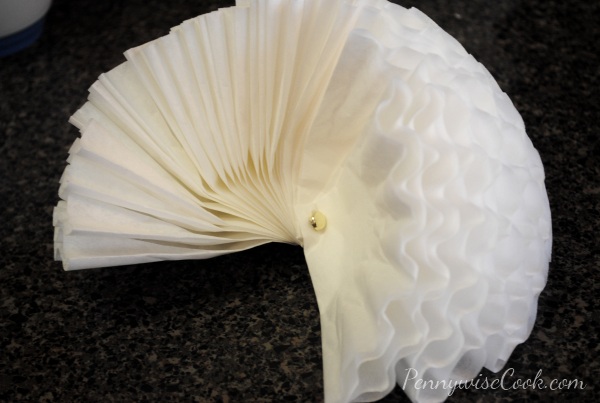
2) Continue doing this for all 22 of your coffee filters, fanning them out as you go. Don’t worry about it being perfect, you’ll be able to fix it at the end.

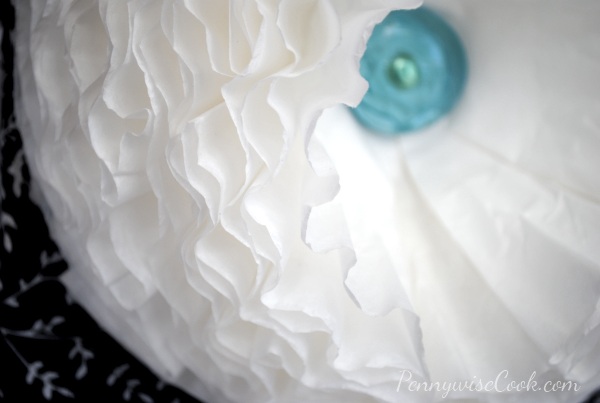
3) Once you’ve got them all together, bend the brad on the back and fluff and organize the flower like you desire.

4) Hot glue your jewel or ornament to the middle to keep it all together and finish off your flower.

If you want to make a hanging pom pom with these, you simply tie a string to the back of the brad and hot glue two of these together. Beautiful decorations for a party!

I hung a couple of these up next to the mirror in our kitchen. I just glued the flower to a small canvas ($1 at Dollar Tree) that I covered with a little fabric. It was fun. I got to use my staple gun. I always feel powerful with my staple gun. 🙂

You can also dye these to be any color you’d like. Place a little latex paint (your choice of color) into a bowl and water it down well. Dip the coffee filters into the water until it absorbs the color. Let it dry and assemble the flowers like above.

I’m going to have a party this summer and I plan to make a bunch of these to hang around that match the theme. I’ll be sure to take pictures!


Like this post? SHARE it!

Related Posts Plugin for WordPress, Blogger...

DIY Framed Earring Holder

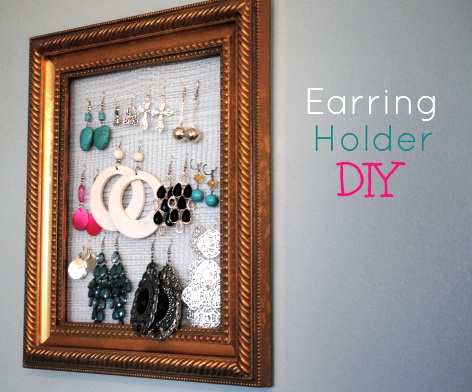
For anyone who knows me, they know that I’m a huge earrings fan. I don’t spend much money on my earrings because they always get lost (or taken and sat on by my oldest). When you buy a pair to match all your outfits they start to pile up and it’s just plain hard not to lose them. Especially when you have a frantic and frazzled mind like myself. I’ve been keeping them in a little box for the last few months and it’s working out ok, but to be honest no more will fit. It’s that full. What prompted this project was a friend on mine on facebook who made one with chicken wire. I love the look of that, but I’d much rather work with fabric than wire. I’ve seen a few DIY projects on how to create an earring holder yourself so I thought I’d give it a shot.

And yay, here’s me with some of my dagglier earrings. I know I posted a picture of myself (with Cynthia Sass) yesterday, I promise I’m not full of myself. Just let me know if you get tired of seeing my mug. 😉 The pictures that I have to document this project are darker than I wanted them to be, I apologize. Like I’ve said before, I’m trying to get used to this photography thang and it’s still a work in progress.
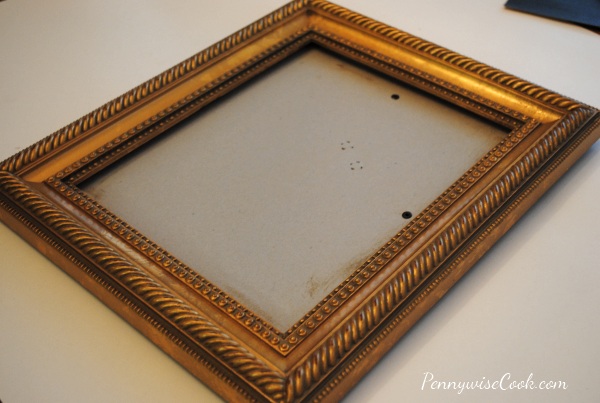
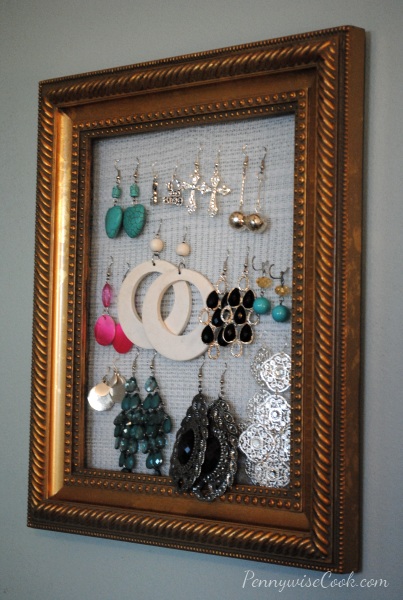
Here’s the frame I found at Goodwill for $1.99 (woot!). It’s surprising, but they have really gone up on their frames. Most of the others that I found were at least $4.99 each. Sadly enough, you can do better than that at Walmart these days so why waste your time getting one used anyhow? Back to the frame- this one was in perfect condition so I went for it. It’s an 8X10, but you can use any size that you’d like. It all depends on how many earrings you plan to hold. And you may have one at home that you don’t use anymore, that’s even cheaper and super smart.

When I got home, the intention was to paint it brown to match the furniture in our bedroom but after holding it up in the room it actually fit it quite nicely even being gold.

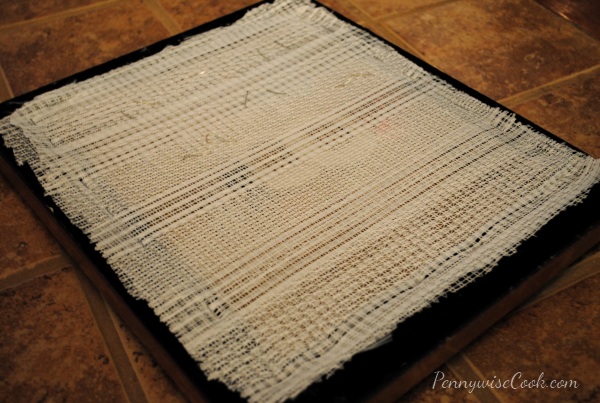
I also picked up these really ugly, yet perfect curtains to be the backing for the earring holder. They seriously were hideous, but they were white and hole-y so I thought they would work well. I removed the back of the frame and using a staple gun, I just pulled and stapled the curtain fabric tightly across the back of the frame. I actually did a double layer of the fabric to thicken it up a bit and give the earrings a little more to cling to.

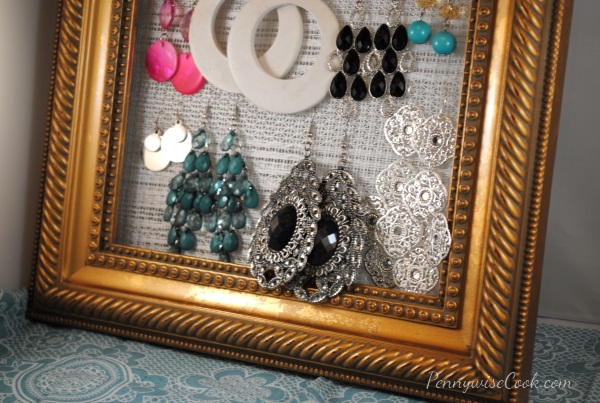
It turned out as good as I could have hoped. Speaking of hope, I’m praying that all of my earrings are going to fit on this thing! My husband thinks I’m going to have to make another one. I’m afraid that I might have to as well.

Cost breakdown:

Frame- $1.99
Curtain- $2.49
Total= $4.48

I love the way that this looks on our wall. It’s almost like an antique with a modern twist. Shabby Chic we’ll call it! And the sky is the limit on the fabrics and frames that you could get to match your decor. That’s what I love about DIY projects. Sure you can go out and buy something already completed, but sometimes you have to make sacrifices because things aren’t always customized for you.

I know this isn’t a “recipe” per say, but I’m going to put it in this format in case you want to print it out. It’s simple enough, but I know how having it on paper can make things easier sometimes!

If you know someone who might like this DIY project, be sure to Pin It below!!

DIY Earring Holder

DIY Earring Holder

Ingredients

  • Frame- Your Choice of Size
  • Fabric for the Back- Ex. Lace, Mesh, Burlap, Etc.
  • Staple Gun
  • Paint (Optional)

Method

  1. If necessary, paint the frame FIRST to the color of your choice.
  2. Remove the backing from your frame. (Keep in mind that if your frame's hanging mechanism is on the backing, you'll need to find another way to have it later.)
  3. Cut your fabric to just more than the size of your frame. Stretch it tight and staple it to the frame along the edges.
  4. Attach your earrings and you're done!

Notes

If you don't have or want to invest in a staple gun, you may be able to use a hot glue gun as well. That may work in a pinch, but a staple gun is recommended for maximum support.

http://www.pennywisecook.com/diy-framed-earring-holder/


Like this post? SHARE it!

Related Posts Plugin for WordPress, Blogger...

DIY: Cute Way to Say I Love You

WARNING- things could get a bit mushy…

We are finally going to enjoy a few kid-free moments this weekend. Either that or we’re going to look at each other and A) talk about the kids or B) wonder what in the world to do! We’re going to eat at one of our most favorite restaurants, Benihana and get a massage. Haven’t had one of those in quite a while! Tomorrow is our anniversary. It’s number 6 for us! We’ve actually been together since we were sophomores in high school so it feels like longer. Even after all this time, I still love him as much as I did when we married if not more. We have grown up together and it’s kinda neat to see how each of us have blossomed into the adult folks that we are today.

I came across this idea on Pinterest a few weeks ago. Forgive me, I can’t find the link anymore. (I never pinned it AH!) If you search, you’ll find tons more like this. Most of which probably look a lot better than mine. However, mine is uber frugal and we like cheap don’t we? I mean, I’m talking about $1 cheap here.

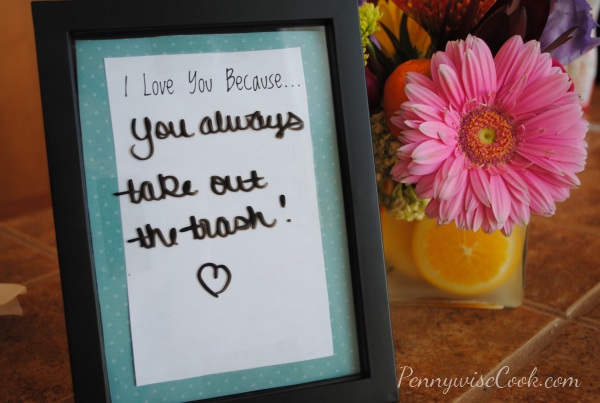
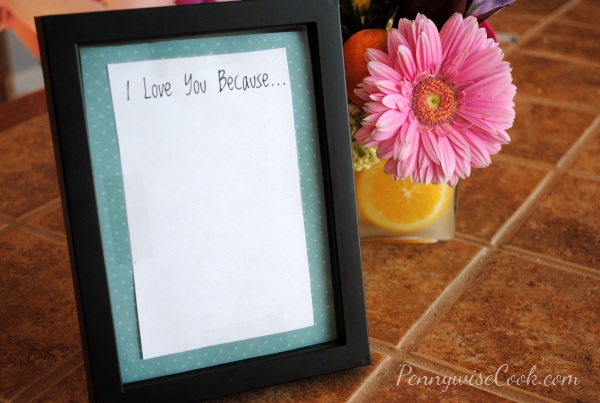
I simply bought this cute little black frame at Dollar Tree, printed the words in this cute font on a piece of paper that I cut, and taped it to a piece of scrap booking paper that I had. Just use dry erase markers on the glass to leave your romantic messages.

It’s not even about how cute your frame or font is. It’s about what get’s written on it. I’ve had this on our kitchen table for about a week now. Every day while Max is at work I write something thoughtful on it. I try to make them serious yet light-hearted and encouraging. The messages can easily get cheesy and Hallmark Cardesque, so I try my best to really think of things that apply to us.

It’s a simple way that we can connect with each other each day. Love is so hard to share sometimes, especially with a busy schedule and work. But it definitely shouldn’t be forgotten. If you don’t already do something like this, this might just be a quick and simple way to start!

P.S.- You can also do this with your kids! If they are old enough to read, this would be a great reading exercise or just great encouragement.

Your Turn! Do you write little messages to your significant other?


Like this post? SHARE it!

Related Posts Plugin for WordPress, Blogger...

Kid-Friendly Craft: Celery Art

Happy Saturday everyone! It’s been a busy week around here. I’m currently attending the Blissdom conference here in Nashville, TN at the beautiful Gaylord Opryland Hotel. It’s super swanky. I think I’m finally understanding the layout of this hotel. It only took me 3 years to figure it out. It’s HUGE! It reminds me of the Titanic for some reason. I think it’s the beauty and how some of the outside looks rounded like a boat.

But I digress…

Addie and I love doing crafts together. Addie loves not eating her vegetables. Put those two together and you have celery art! I mean come on, if you’re not going to use your veggies for nutrition and nutrients, use them for a beautiful painting right? I saw this idea in the recent issue of Family Fun and I thought how genius!

I guess I’ve never really cut celery up like this and realized how much it does sorta resemble a flower.

Add some paint and you can really see it! It’s really that simple to do. Because there aren’t really a ton of steps, kids actually pay attention long enough enjoy this craft!

This craft is especially good for using up that celery that is on the brink of going bad. Grab some paint (whatever you have on hand) and get to dipping those veggies!

The result is pretty Celery flowers that are even frame worthy! We did actually frame ours, but I didn’t get a picture yet. I may have to come back and add that later for you.

How-To: To begin, remove one stalk for making the “leaves”. Then cut your celery stalk about halfway down. Where it’s bulkiest is best. You don’t want to be too close to the top or your flower will be small. You may have to hold the celery firmly to keep the pieces from trying to move around when making the print. And to make the cute little leaves, simply use your single stalk. Also, be sure to stamp the celery a couple practice times before doing the “real thing”. The paint can often be very thick on some pieces right after you dip.

Have fun!


Like this post? SHARE it!

Related Posts Plugin for WordPress, Blogger...