DIY Personalized Gift Mugs

DIY Gift Mugs

Have you finished all your Christmas shopping yet? No? Shame on you! HA!

Totally just kidding you. I haven’t gotten anywhere close. This year has been a whirlwind and I’ve felt about a month behind each holiday as they come. So if you’re like me, then you’ll really enjoy this last-minute gift idea that takes no time at all and comes straight from your heart.

I can’t take the credit for this one, I came across it the other day at Happy Go Lucky and thought I have got to do this! I had seen the idea of it on Pinterest before, but wasn’t sure that it worked. So I was glad to have found proof that it does.

DIY Mugs Before


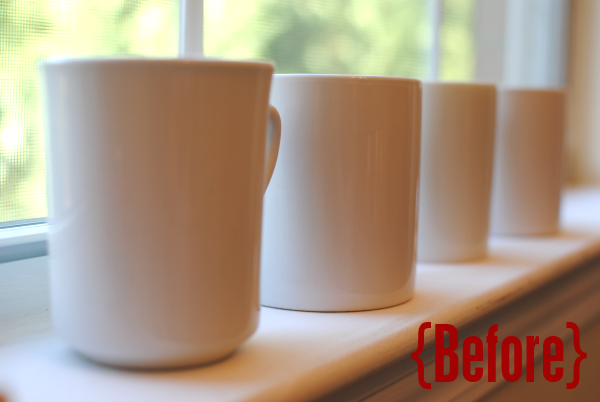
To try this out for myself, I didn’t want to spend a bundle on mugs. Even Dollar Tree is a bit expensive per mug for me. So I ran into Goodwill where there were a ton of white mugs. Whodathunkit? It was meant to be! $.49 per mug and you just can’t beat that, even with a stick.

It’s as simple as using a permanent marker to write, draw, or color on your mugs and then pop them into a preheated oven for 30 minutes. That’s 350° in the oven to be exact. When they come out, the marker has been baked, sealing it to the mug!

UPDATE PLEASE READ: I mentioned this in the comments, but DO NOT PUT THESE IN THE DISHWASHER. Using regular sharpies, it will come off. Hand washing is fine. When I gave these out, I wrote a little poem to go with that said please hand wash. I know many of you have had issues with this.

DIY Mugs After


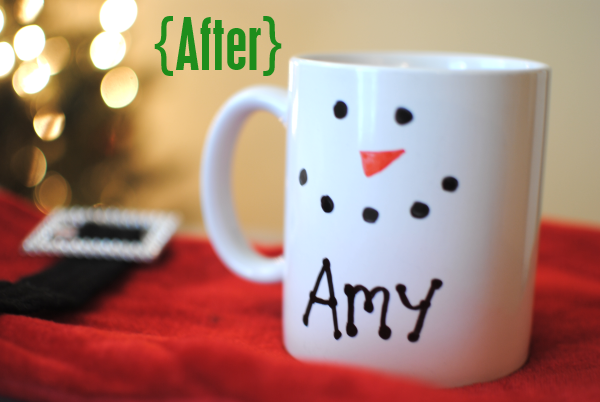
So easy and yet so thoughtful. Even the kiddos can make their own. Get creative and have fun! You can make these for any occasion as well. Add a heart for Valentine’s Day or an egg for Easter. Whatever suits your fancy.

In the meantime, Merry Christmas!

Once again: do not put these through the dishwasher unless you use a more permanent type of marker made for ceramic. The Sharpie works fine if hand washed.


Like this post? SHARE it!

Related Posts Plugin for WordPress, Blogger...

DIY Coffee Mug Holder

One thing that you may not know about me is that I have an obsession with mugs. No, not with faces, but with the ceramic formations that hold the most incredible substance that keeps me going every day, coffee. I only started to drink coffee about a year and a 1/2 ago and yet it sucked me in so fast that I didn’t even know what was happening!

I now enjoy scouring flea markets, thrift stores, and any other places finding the most unique and eclectic mugs that I can. I’d call it a “hobby”, but that would be giving in and I’m afraid that my obsession would deepen so I’m just going to pretend that it’s just something that I do. 🙂

When I noticed that there wasn’t any place to put regular glasses in my cabinet, I decided that something need to be done.

I needed a place just for mugs. After all, they are worthy.

So I thought up this mug holder idea and got to work. I knew that I wanted it to be inexpensive and semi-simple to make since I’m no carpenter. Brace yourself, I took a lot of photos for this one…

I started with cheap board from Lowes. I had them cut it to 2 feet so that it would fit on the side of my cabinet. I didn’t want anything too thick, but I wanted it thick enough to hold screw hooks well. I believe this board is 1 inch thick which turned out just right. I painted the board with a light blue before lightly painting over it with an off-white. Then I sanded it a bit to distress it.

And in the process I got paint on the garage floor. It needed some color anyways.

I found this fantastic technique for transferring text onto wood at Elm Street Life. It doesn’t get any simpler than your printer, a pencil, and a pen.

Print off the text of your choice from your printer. No need for reversing the text or anything. Cut out most of the white surrounding the text. Then using a lead pencil, color the back of each letter like the picture above. The need for a cheetah print pencil is not necessary, but it helps to make you feel awesome.

I may have gone a bit overkill, but here’s what it will look like on the back.

Tape your words lightly to your wood so it won’t try coming up on you. Using a pen, trace around each letter firmly. The lead will transfer to the wood and you’ll be left with an outline of your words.

Like this! Then you can use a brush (if you’re brave) or a paint pen to fill in the outline. They actually make an assortment of paint pens these days which is nice.  Just remember that it doesn’t have to be perfect. You can always sand it a little and if you’re going for a vintage feel anyways, it wouldn’t look perfect either.

Use your paint pen to go around the letters and then fill them in. When buying your paint pens, be sure to look at what kind of tip you are getting. Some are made for calligraphy and others for painting. I don’t suggest the calligraphy tips for this.

Tah dah! We have a board. We have text on the board. now we just need hooks and mugs for our mug holder!

You may have seen my post on Toilet Paper Roll Art. It’s quite genius and is so simple and fun. I used a paper towel roll to create this flower and then dipped it into some of my favorite aqua paint.

I gave the board a little detail with my flowers and I even added an orange one on top to give it some more color.

I let it dry and then screwed in the hooks in an unexpected way. Or at least it was unexpected to my husband. He thought I would have made it a little more uniform, but as I started hooking them in, it seemed to make more room with them being offset this way.

UPDATE: We hung this by screwing screws directly through the backside of the cabinet into the board itself. We used 4 screws total and it holds just fine.

And there you have it! A simple yet cute way to display your coffee mug obsession (if you have one) and to give your cabinets a little more room.

It’s not just functional, but it looks really cool too. We’re going to make one for my husband’s mugs for the other side too.

Happy DIYing!


Like this post? SHARE it!

Related Posts Plugin for WordPress, Blogger...