Salted Caramel Apple Spice Cupcakes- Cook for the Cure

Title Image

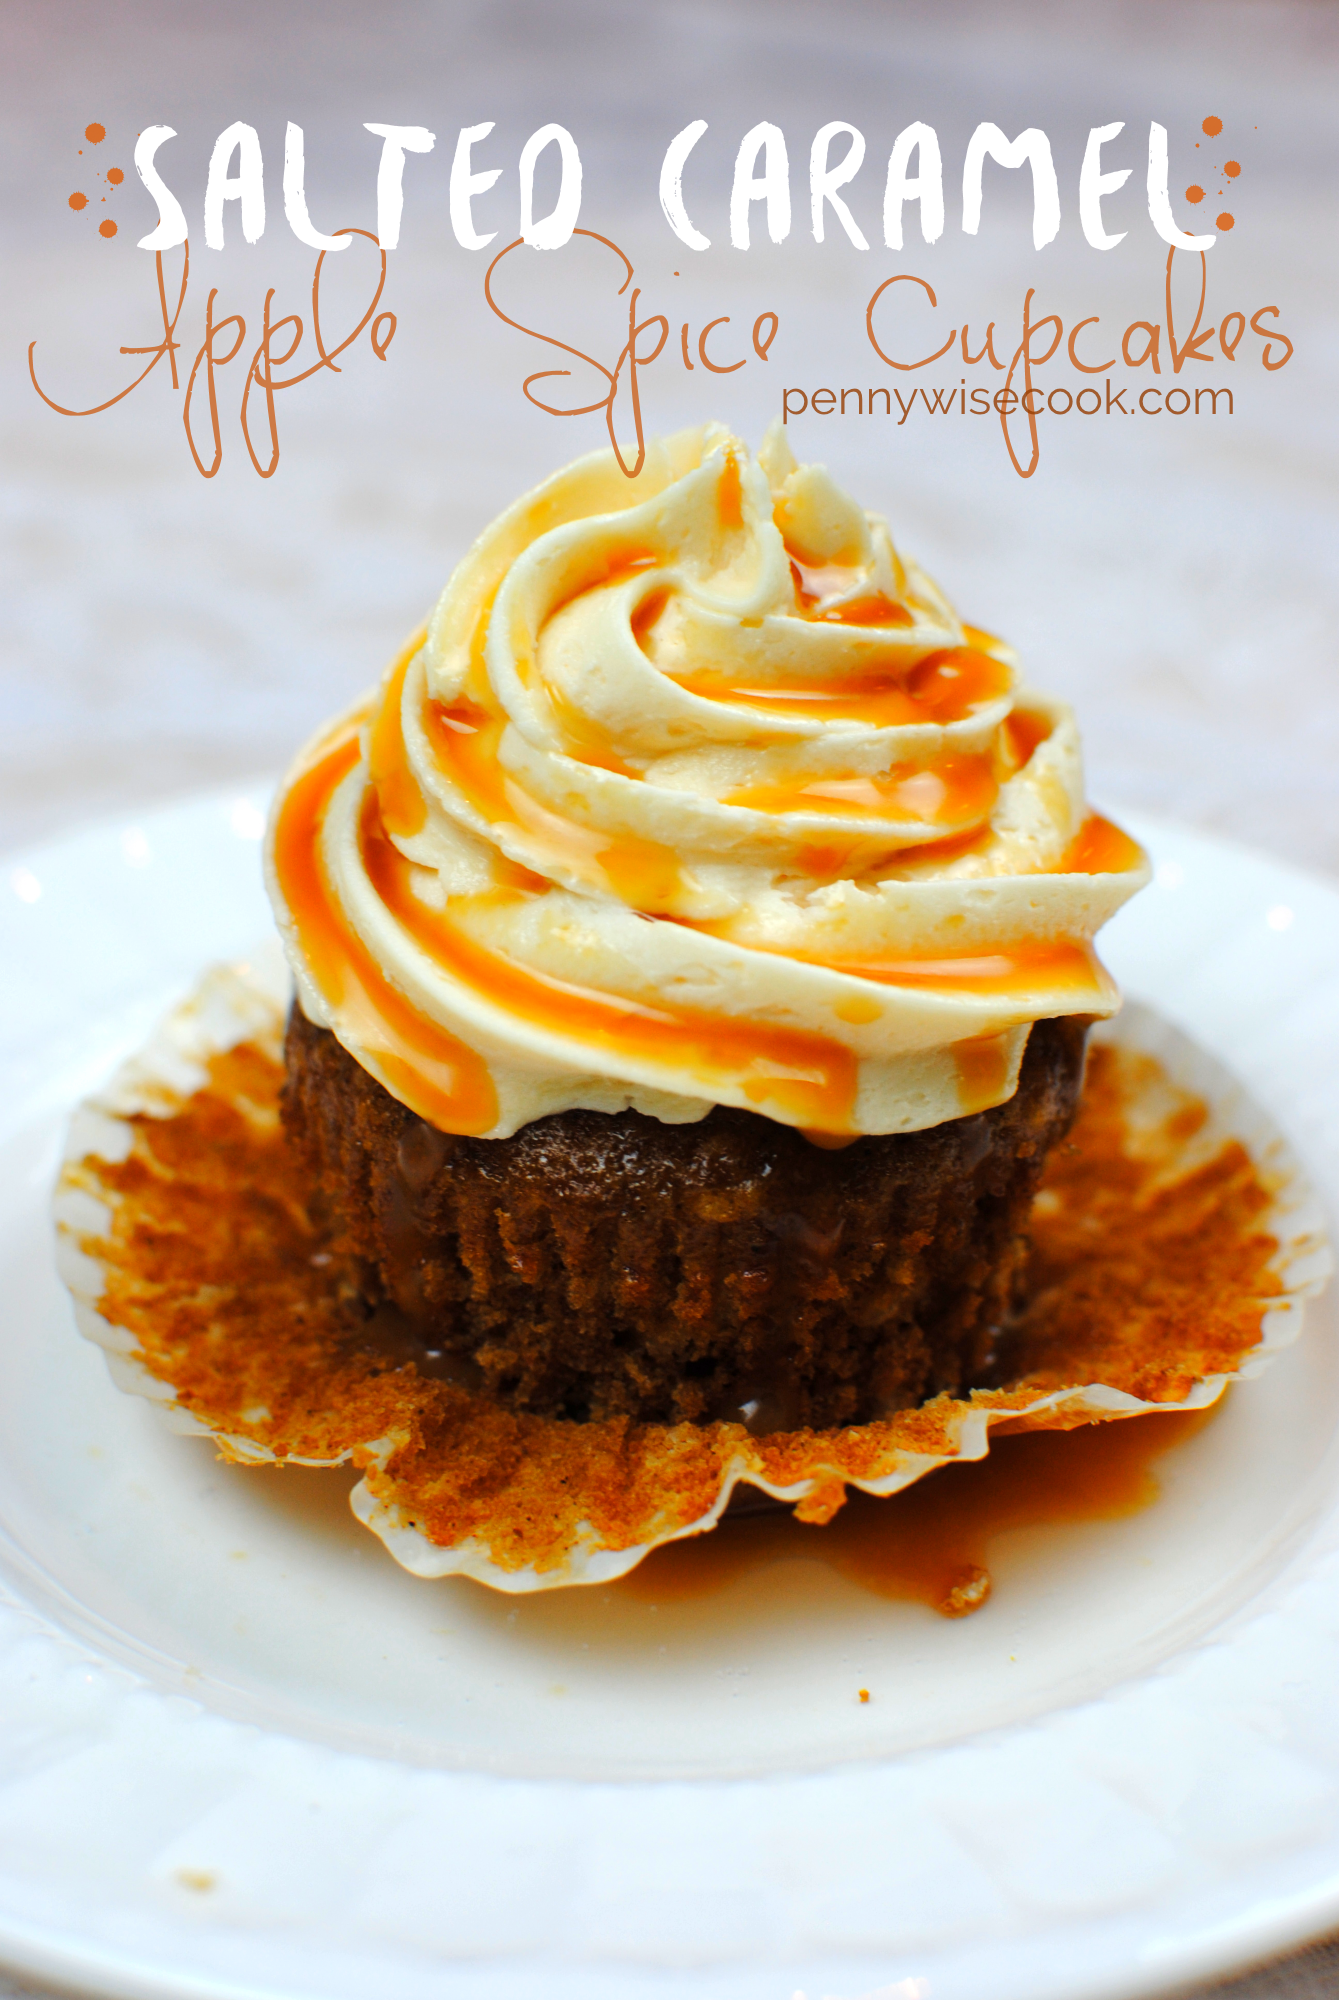
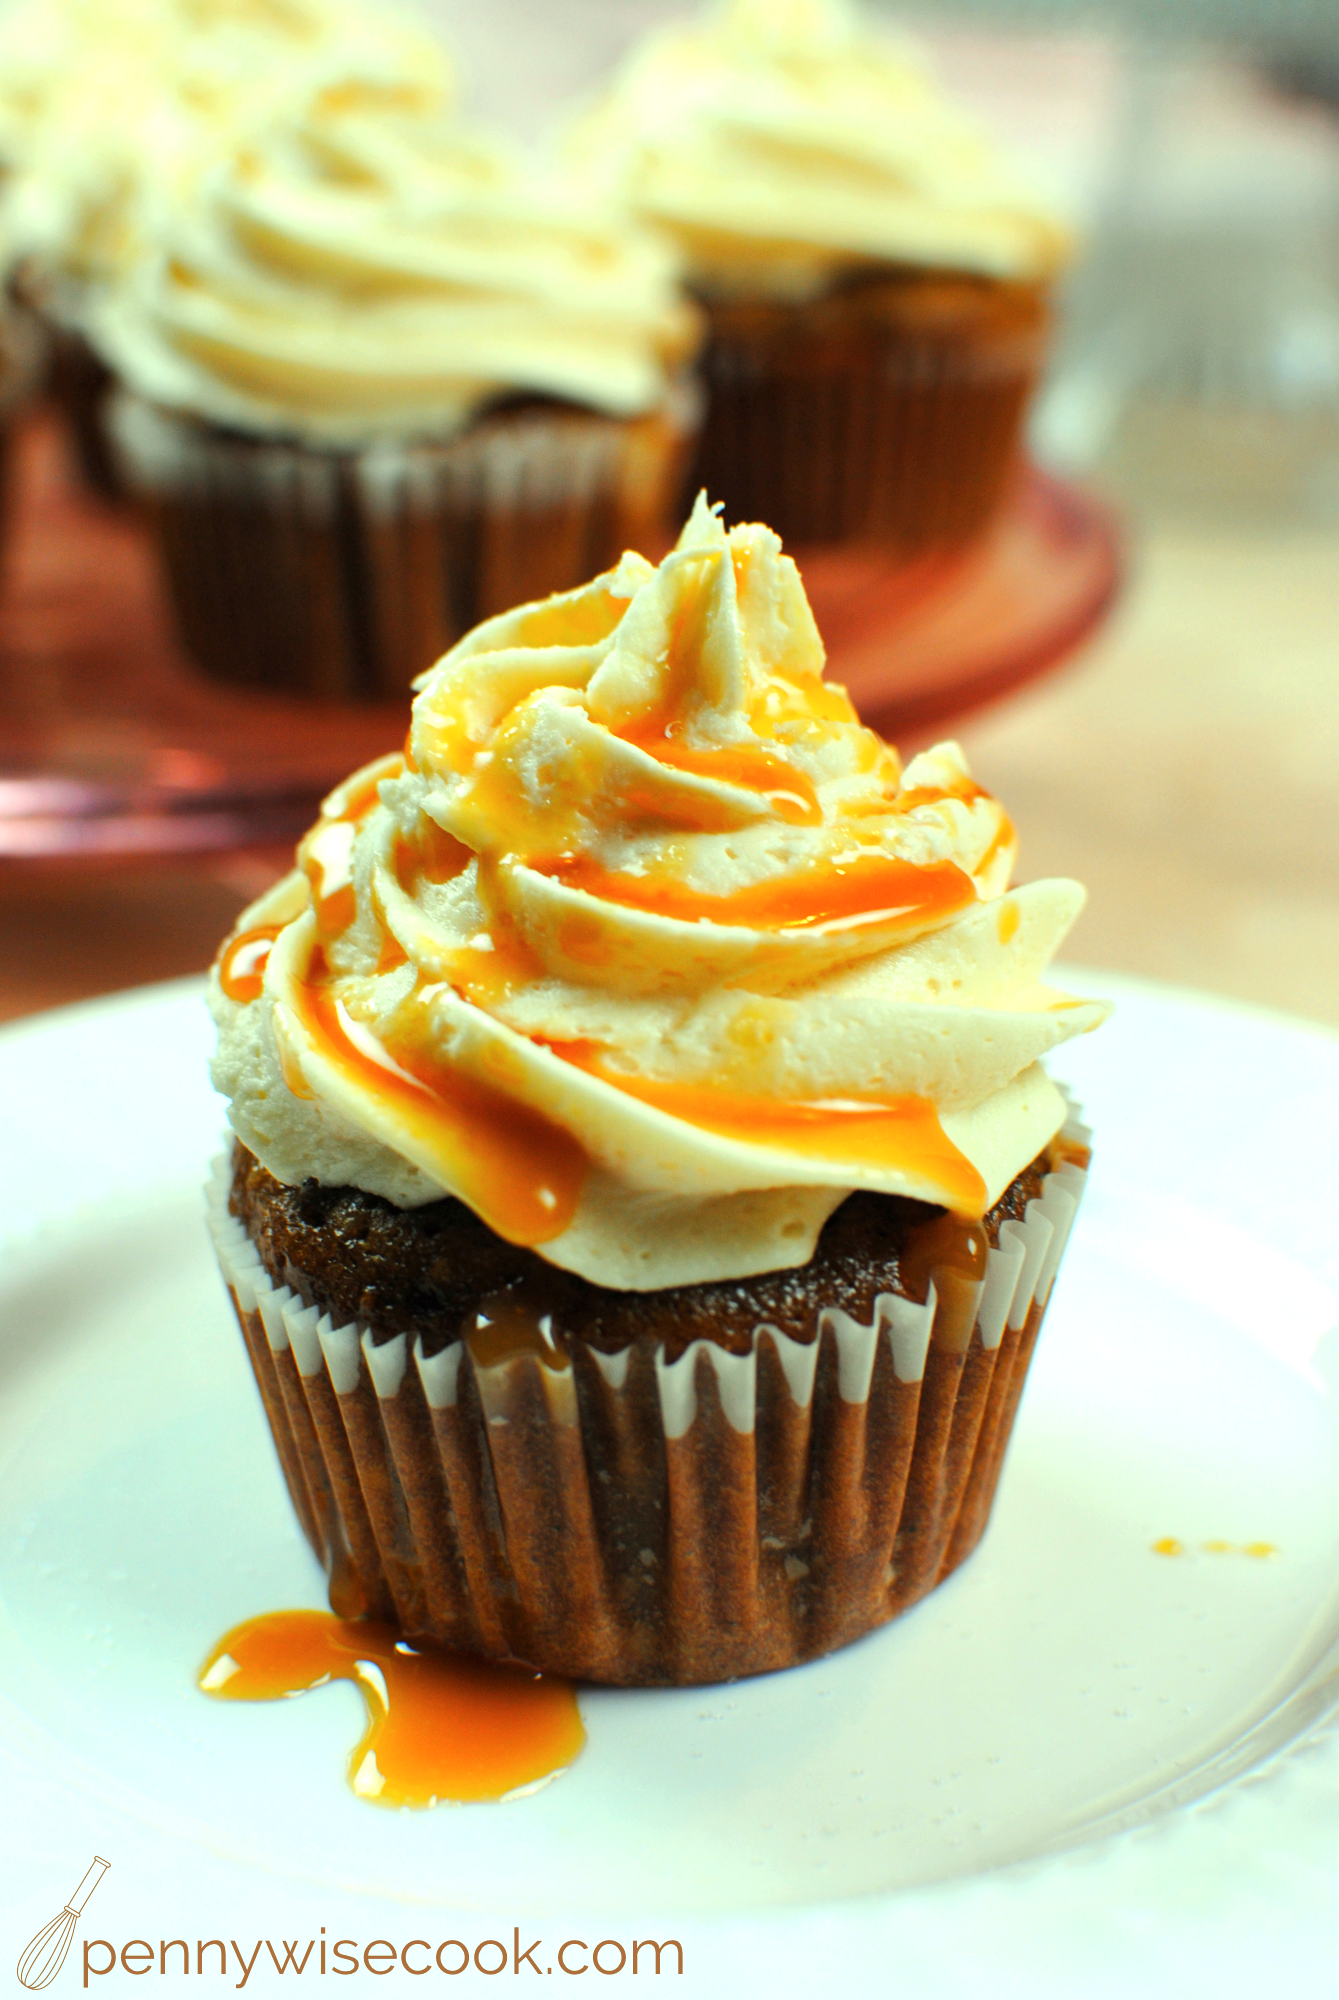
I’m not sure that this cupcake even needs a post. We could just go with that picture and be done. But there is so much to talk about including Cook for the Cure!

These are insane. These are what I call, fall in your mouth. What is it about fall that is so amazing? Could it be the colors? The cooler weather? No, I think it’s the FLAVORS. Yummy goodness that gives us that warm, cozy, nostalgic feeling.

These cupcakes will give you all of that.

Apple Spice Mixture

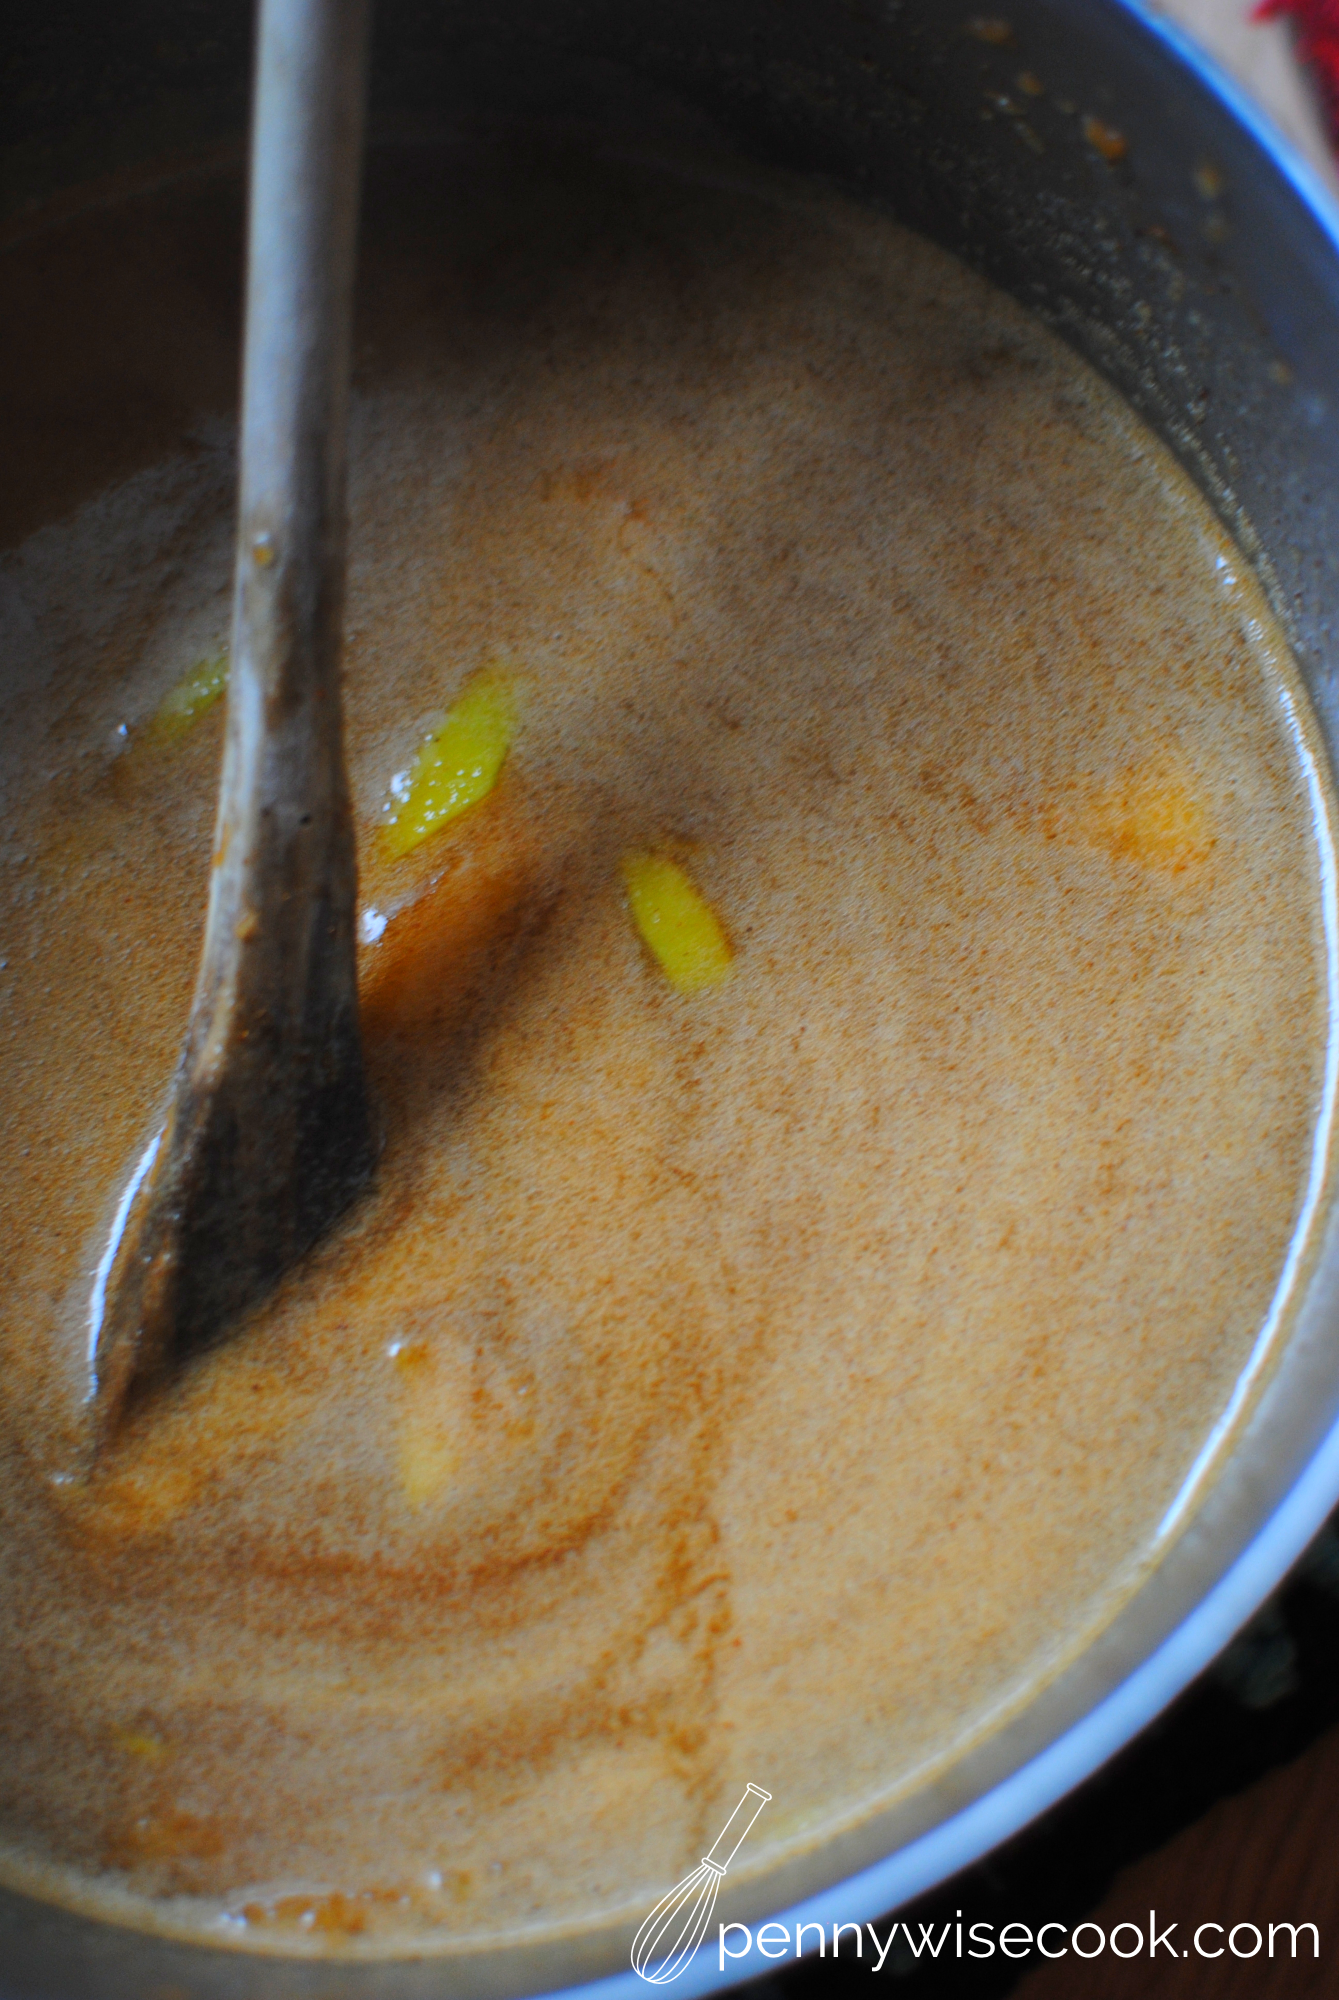
It all starts with what may seem like a way to fill your home with the smell of apple spice, but this is actually the beginning of your Apple Spice Cupcake batter. 

I had never made batter this way before, so it was new to me. But I welcomed the warm, fall smells and spent an embarrassingly long amount of time hovered over the pot.

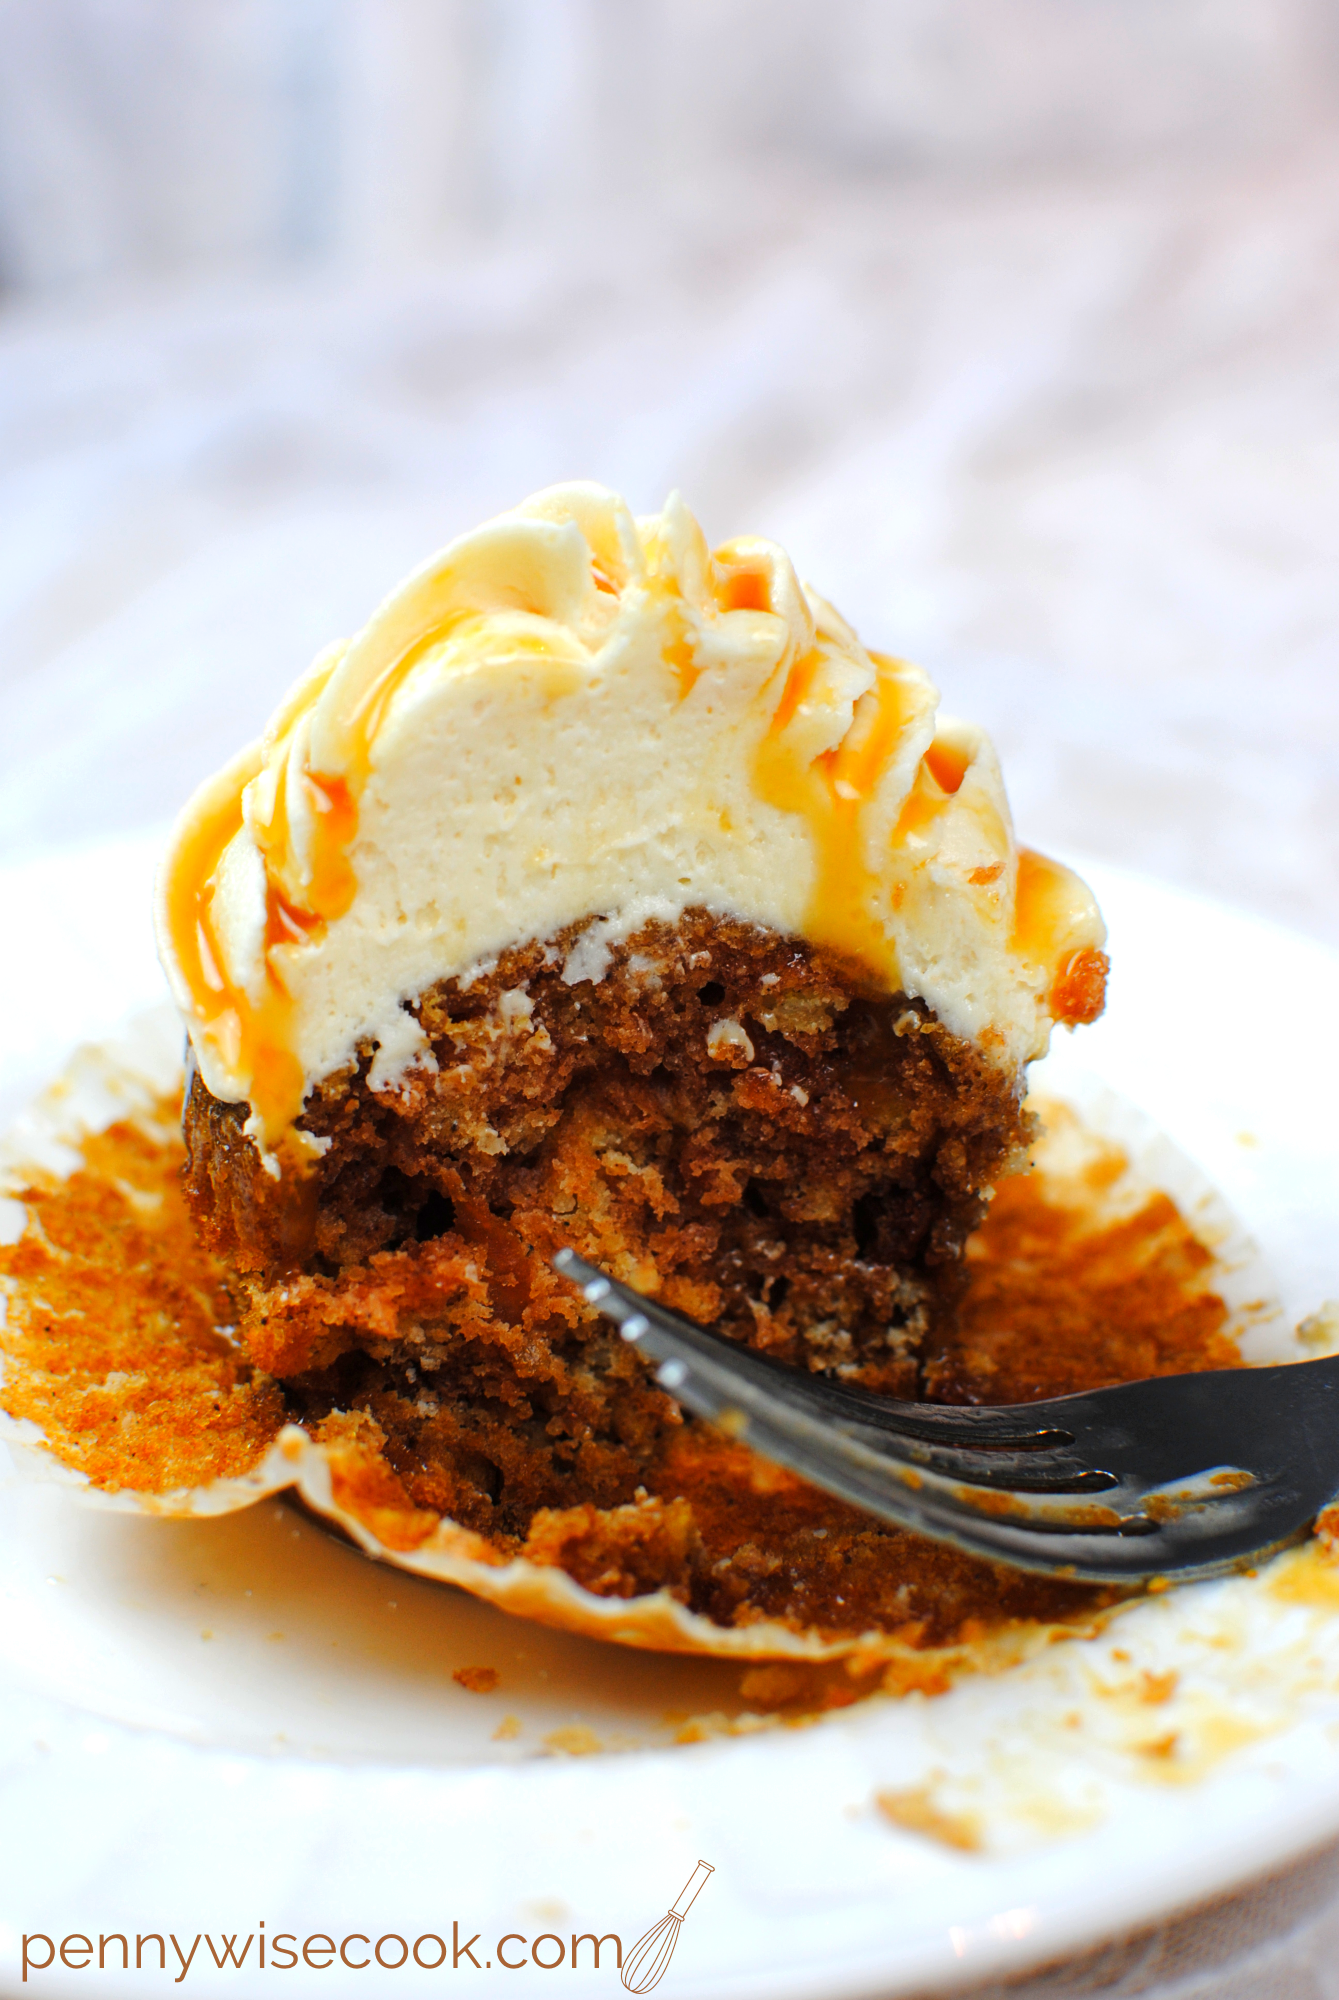
The mixture contains grated apples (the start of the show!) along with so many of our favorite fall spices including nutmeg, cinnamon, and ground cloves.

Completed Cupcake

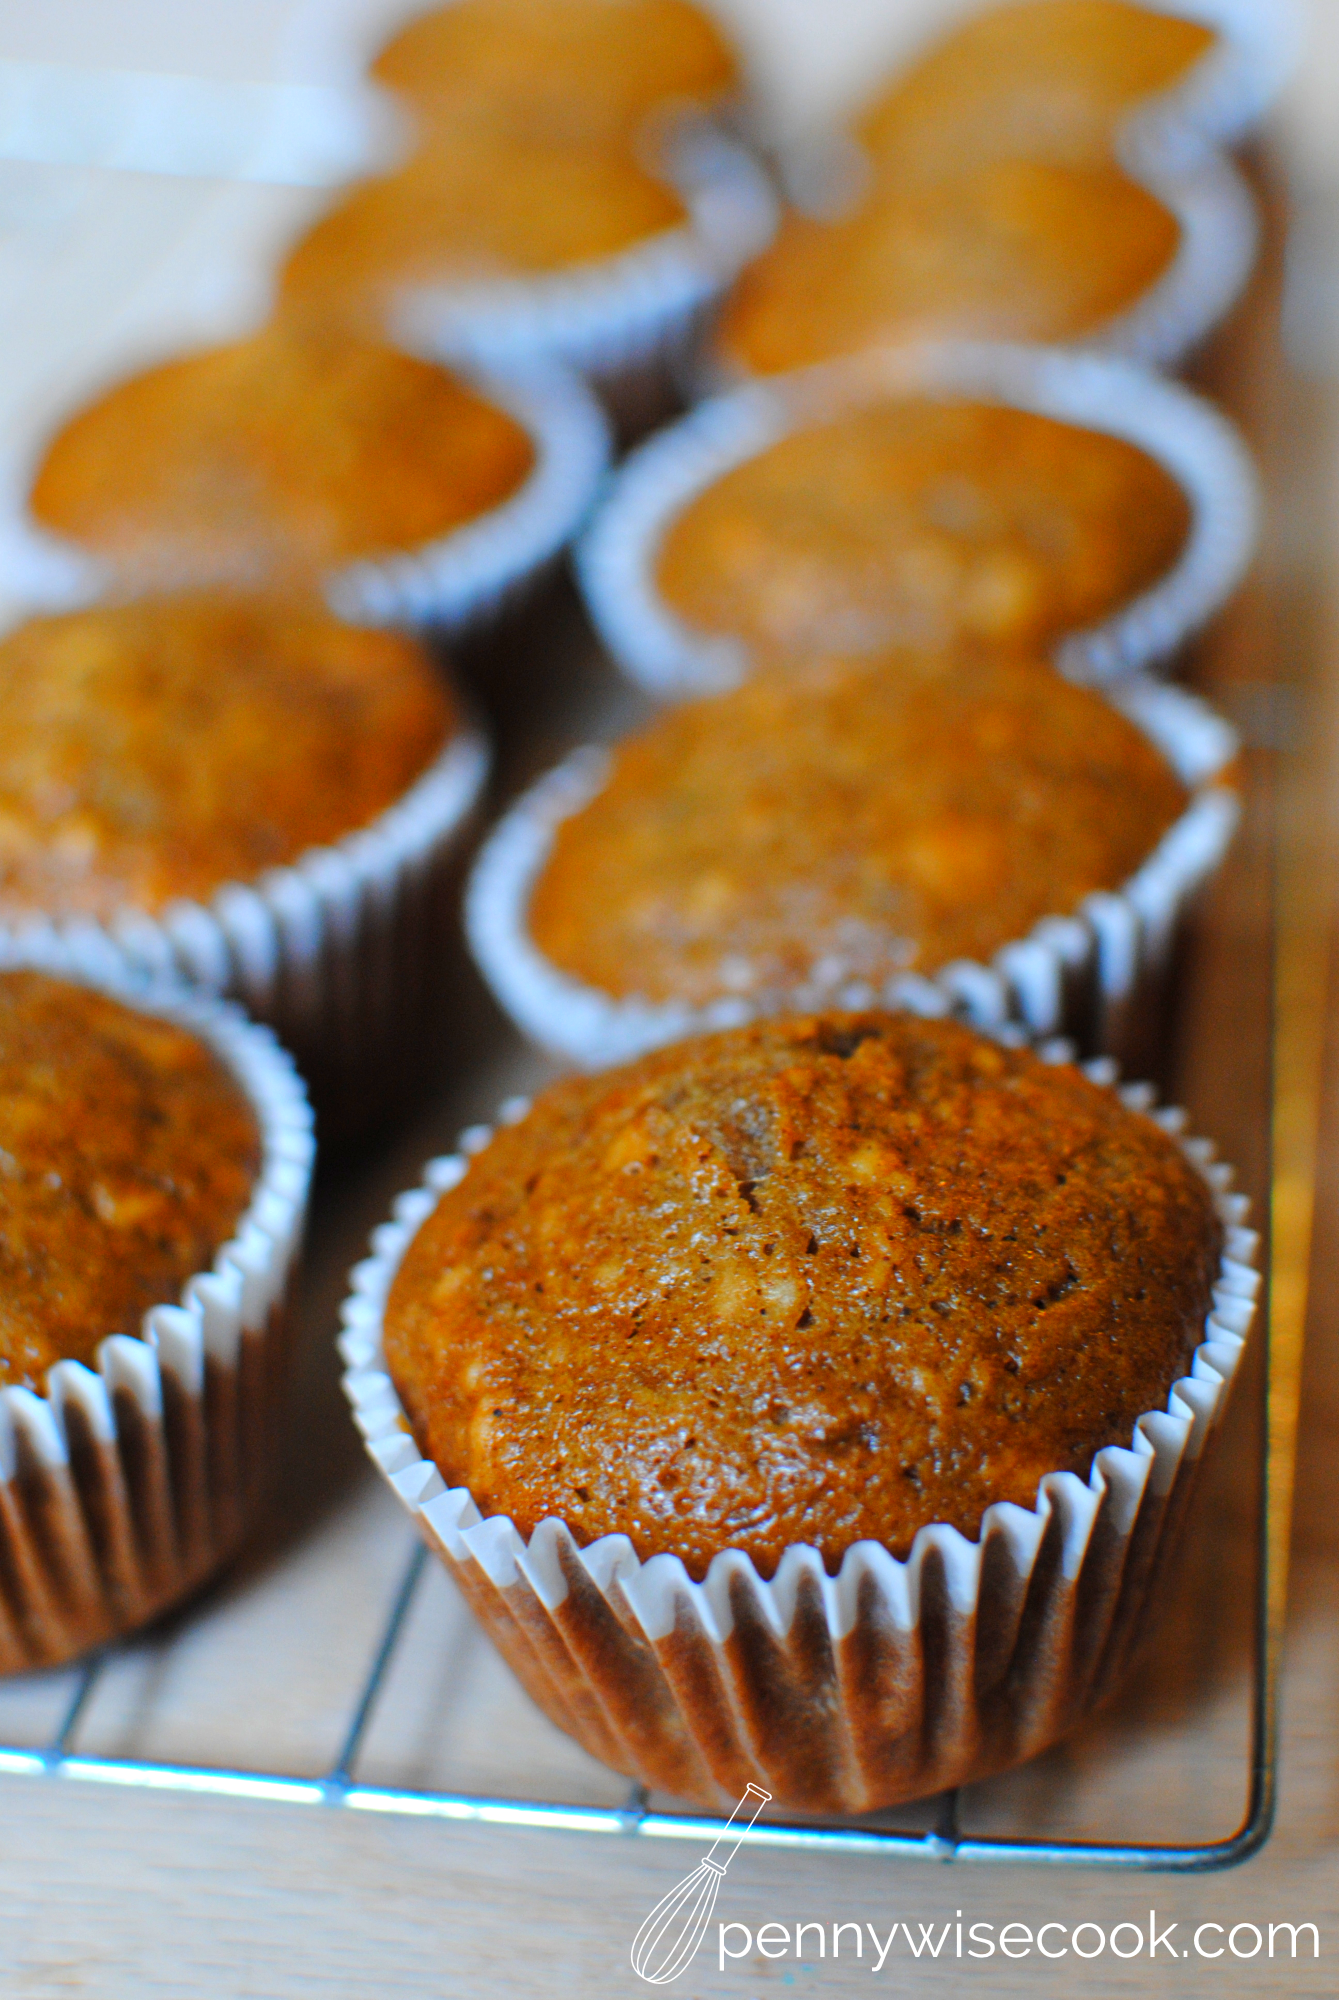
I said it before, but I really feel like these taste like fall in your mouth. I told my husband that a couple of times and when he finally tried them, he gleefully stated, “These taste like fall in your mouth!”. Maybe not gleefully. He doesn’t exactly get gleeful, but they were quite tasty and maybe he couldn’t contain his excitement? I didn’t bake 10,000 cupcakes, but I did make so many that I had to give some away!

Now, what really makes them pop is the Salted Caramel Buttercream that you put on top!

Cupcake

Oh. my. goodness. Can I get an amen?

This buttercream literally starts by making salted caramel. (Of which I burned the first time, so beware)

You add in all the regular goodness of buttercream like, oh I don’t know, butter. And powdered sugar and you have the sweetness to bring out the spice in the cupcakes. SO GOOD.

Bite Out of Cupcake

Oh yes, oh yes, oh yes.

You will NEED to find the recipe below!

_______________________________________________________________________

I want to talk to you about an AWESOME opportunity with Cook for the Cure to support Breast Cancer Awareness brought to us by hhgregg and KitchenAid! The cupcakes above are apart of the 10,000 Cupcakes: One Great Cause campaign to bring awareness about breast cancer this month.

KitchenAid

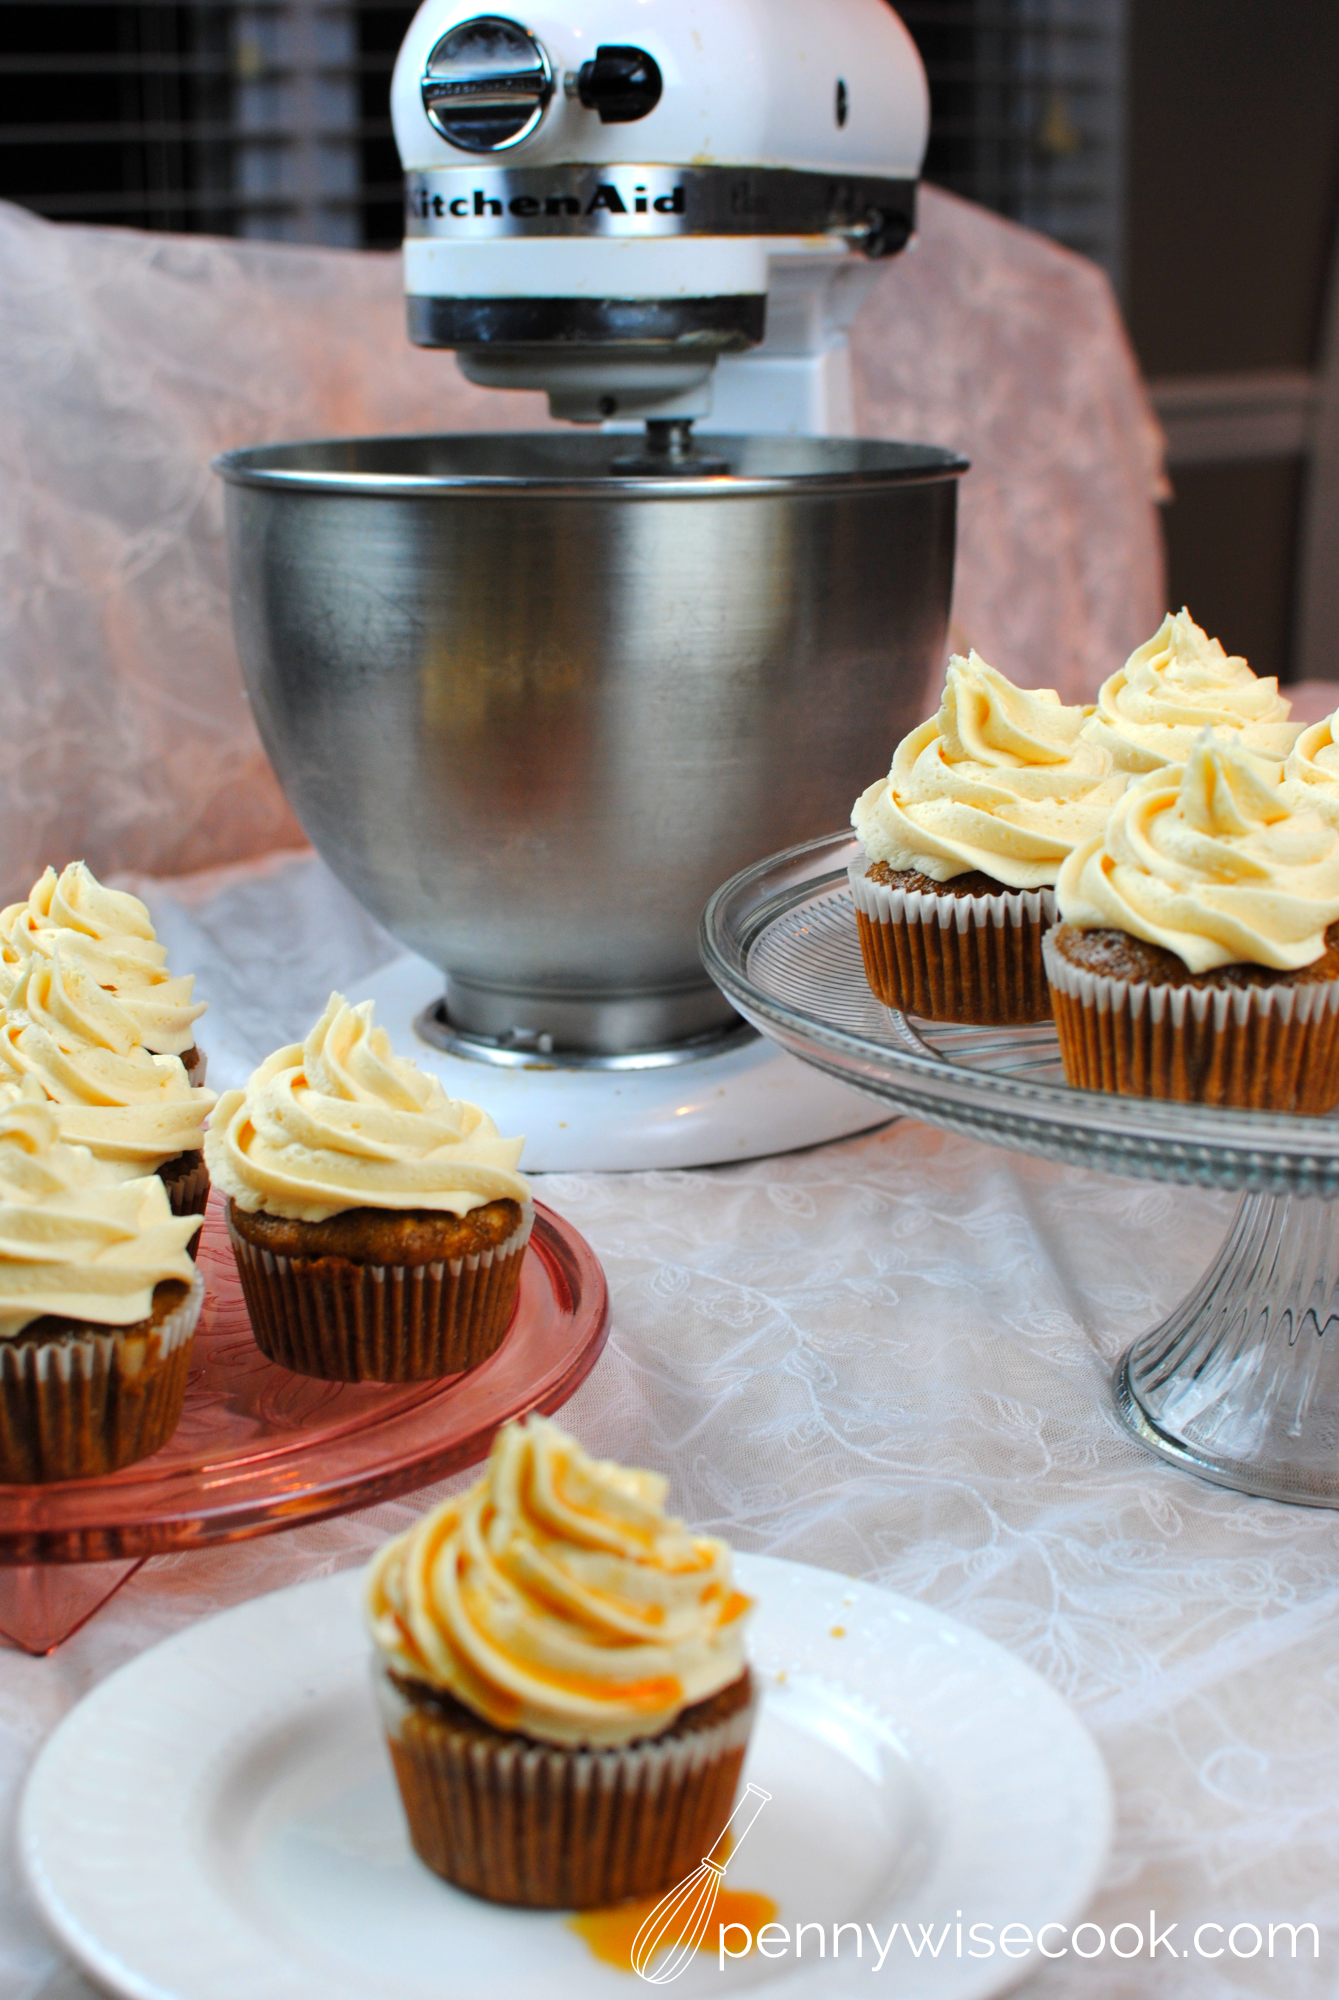
I am already a fan of KitchenAid and to know that they are supporting such a fantastic cause makes me love them even more.

KitchenAid will donate $1 to the Susan G Komen Foundation for every person who takes pictures of their cupcakes and uses the hashtags #10000cupcakes & #donate, and tagging @KitchenAidUSA and @KitchenAid. How awesome is that?!

So, the question is how can YOU get involved? Here are some ways:

  • Participate in 10,000 Cupcakes! Bake your own cupcakes and share an original picture of YOUR creation on your Twitter and Instagram channels using the hashtags: #10000cupcakes & #donate and tagging @KitchenAidUSA. KitchenAid will donate $1 to support the fight against breast cancer.
  • Host a party! You can host a party to benefit the Cook for the Cure cause any time of the year. Whether it’s an office potluck, a family cookout or weekend brunch, encourage your friends and family to donate to Susan G. Komen®. You can find out more information about how to Host-A-Party here!
  • Check out hhgregg and how they are a part of the Cook for the Cure campaign!
  • You can get KitchenAid small appliances over at hhgregg and believe me, with a KitchenAid you won’t be disappointed! You can even get a PINK KitchenAid Stand Mixer!

Now for the recipe for my Salted Caramel Apple Spice Cupcakes!

Apple Spice Cupcakes
Yields 24
Fall in your mouth, these cupcakes will make you all warm and fuzzy inside.
Write a review
Print
Ingredients
  1. 2 Green Apples, skin on, grated
  2. 2 c. sugar
  3. 2 c. water
  4. 1 c. butter
  5. 2 tsp cinnamon
  6. 2 tsp nutmeg
  7. 1/2 ground cloves
  8. 3 and 1/2 c.. flour
  9. 2 tsp baking soda
Instructions
  1. Preheat oven to 350 degrees. Line muffin tins with liners.
  2. Place the grated apples, sugar, water, butter, cinnamon, nutmeg and cloves into a large sauce pot and bring to a boil. Cool. (I let mine cool for at least 30 minutes)
  3. Add flour and baking soda. (batter will be sorta chunky)
  4. Bake until middle bounces back. (About 15 minutes depending on your oven)
Pennywise Cook http://www.pennywisecook.com/

Salted Caramel Buttercream
Yields 24
Write a review
Print
Ingredients
  1. 1/4 sugar
  2. 2 tbsp water
  3. 1/4 c. heavy cream (+ additional if needed)
  4. 1 tsp vanilla extract
  5. 1 and 1/2 sticks unsalted butter, room temp
  6. 1/2 tsp salt
  7. 1 c. powdered sugar (+ additional if needed)
Instructions
  1. Stir together sugar and water in a small sauce pot and bring to a boil. Keep cooking, without stirring, until mixture begins to turn dark amber. About 6 minutes. (This will happen fast once it begins to turn. DO NOT let it become dark brown)
  2. Remove from heat and SLOWLY add in the vanilla and cream. Stir constantly while you do this. Once smooth, set aside to let cool.
  3. Combine the butter and salt in stand mixer bowl and beat until fluffy. Reduce speed and add powdered sugar.
  4. Scrape down the side of the bowl and then add the caramel. Beat all until completely incorporated.
  5. (You may need to add more powdered sugar to make the buttercream thicker. I added approximately another cup and 1/2. You may also add a tablespoon more heavy cream to smooth it out. This was trial and error for me with the frosting. Make it to your liking.)
Notes
  1. When serving, you may drizzle each cupcake with caramel sauce to make them pretty! 🙂
Pennywise Cook http://www.pennywisecook.com/


Like this post? SHARE it!

Related Posts Plugin for WordPress, Blogger...

Valentine Pies

Valentine Pies 2

I love Valentine’s Day. Not because we get all romantic and stuff, but because it’s such an easy holiday to decorate for. 

Throw up some things that are red, pink, or white and you have got yourself some Valentine’s spirit. Not to mention that hearts are everywhere. All the dollar stores are brimming over with decor and treats galore. And the love things makes it pretty cool too. 😉

Our anniversary is just 2 weeks after Valentine’s Day so we never get too mushy on the 14th. But I love helping my daughters get their little Valentine cards and treats ready for school that day.

Ah, yes. The days when you could use cheesy lines and call everyone your Valentine!

I made up these little heart Valentine Pies the other day and I must say they were a hit. I’m sure these have been done before, but I have never made them before now. SO simple. 

I think they would make a great treat for my daughter to take to school on Valentine’s Day!

Valentine Pies 1

I used store bought pie crusts. You know me! I rolled them out and used a $.50 cookie cutter to cut out little hearts. I will use a bigger cookie cutter next time as these were just a taddy bit too small.

I dropped about a teaspoon of canned cherry pie filling into the middle of the heart and topped it with another pie crust heart.

I used a fork to crimp all of the edges. Helps to keep it from coming apart while it’s cooking.

Lastly, I cut a X in the middle to keep it from puffing up in the oven.

Valentine Pies 3

Make these extra tasty by dropping a dollop of whipped cream on top when they are warm! Use any pie filling you’d like or make your own.

Easy as pie!

Valentine Pies
Give your Valentine more than a card. Give them a PIE!
Write a review
Print
Ingredients
  1. 2 refrigerated pie crust, brought to room temp
  2. 1 (20 oz) can pie filling, you won't need it all
Instructions
  1. Preheat oven to 450°.
  2. With first pie crust, cut hearts out and place onto cookie sheet. Add about a teaspoon of pie filling to each heart.
  3. Cut out hearts from 2nd pie crust. Top each pie filling heart with another heart. Crimp closed with fork.
  4. Bake for 8-10 minutes watching to make sure edges don't burn.
  5. Let cool!
Notes
  1. You'll need a heart-shaped cookie cutter and a fork!
Pennywise Cook http://www.pennywisecook.com/

Like this post? SHARE it!

Related Posts Plugin for WordPress, Blogger...

Great Gift Ideas From Best Buy This Christmas

I am not completely sure that I have processed the fact that it is already time for CHRISTMAS! Have you? I guess whether I’ve processed it or not, I have to get ready for it. And I’m ok with that, because I LOVE Christmas. The magic and joy that it brings to everybody’s heart. The cookies and milk. Cocoa by the fire. It’s all so cozy and warm and it’s hard to be down during the holidays. 

However, with all that said, it can be stressful figuring out what to get everyone. There is some good stuff out there this year. It keeps getting better and better doesn’t it? From the tablets to the coolest new toys for the kiddos, there is so much to choose from. And I am a big fan of shopping online. I like going into stores to get my hands on things and hold them. Read their box and all that fun stuff. But there is something to be said about sitting on my couch in my pj’s with a cup of coffee and having my purchase shipped to me!

If you’re still working on some ideas for gifts, I have got some awesome ideas for you! Best Buy always has the latest and greatest gift ideas and at at an affordable price.

Hang onto your seat while I stun you with a few killer gift ideas..

With Expert Service and Unbeatable Price these top gifts are on my list this Holiday and here’s why they should be on yours:

Xbox ONE

Xbox One is the place for games.

What is Xbox One?

Xbox One was built by gamers, for gamers. With the best exclusive titles (Halo, Sunset Overdrive), the biggest blockbusters (Assassin’s Creed and Call of Duty) the hottest sports franchises (Madden 15, FIFA 15, NBA 2K15) and top family titles (Fantasia: Music Evolved, Just Dance 15, Skylanders) Xbox One takes gaming to a whole new level.

In addition to being a great gaming console, Xbox one connects consumers unlike any other device.  Xbox One enables access to the latest TV shows and movies through your favorite apps.  With Xbox One all of your media is at your fingertips when you want it.

Many of the bundles are $50 off right now and on sale. Perfect time to check them out! Find all the Xbox One deals here.

JBL Speakers and Headphones

JBL Charge 2 Portable Bluetooth Speaker

These are definitely on my list. Between the twin passive radiators for deep bass, the massive 6000mAh battery and the hands-free conference speakerphone the key benefit is the Bluetooth Social Mode which allows up to three different users to take their turns to play their own playlists on a single speaker. 

You can use these anywhere! Take them outside when you’re washing the car. Take them to the beach when you’re getting your tan on. Set it out during your Christmas party. My portable speakers are a must these days.

JBL Flip 2 Wireless Portable Stereo Speaker

Aside from the dual performance-tuned JBL drivers and a built-in bass port, the key benefit of the JBL Flip 2 is the SoundClear echo and noise cancellation combined with the state-of the art microphone system to pick up calls on the speaker.

Such an awesome gift idea. I hope my hubby is reading this. I really want one of these! 🙂

JBL Reflect Earbud Headphones

Now THESE are cool. You can walk up to 40 FEET away from your device while wearing these. Sweat proof ergonomic design.  With a 5 hour rechargeable battery and a reach of about 40 feet, the JBL Reflect BT’s key benefit is the design of the ergonomic eartips along with the built-in magnets which keep your buds on standby without loose cables.

Find all of the JBL holiday gift ideas at Best Buy here.

Garmin and TomTom

Both Garmin and TomTom have some stellar GPS options. Perfect for a gift this holiday season. Who DOESN’T want to not get lost? Ok, that is a bit confusing sounding. Who WANTS to not get lost? Oh, you know what I mean…

There are 3 GPS devices that I want to highlight for you. Each has it’s own specs. Check them out below.

Garmin 52LM

  • 5.0” display
  • Maps of 49 U.S. states, plus lifetime map updates1
  • Lane assist with junction view
  • Displays speed limit and accurate arrival time
  • Easily find addresses and millions of points of interest
  • Spoken turn-by-turn directions

Garmin 2597LMT

  • 5.0” display
  • Maps of 49 U.S. states, plus lifetime map updates1
  • Lane assist with junction view
  • Displays speed limit and accurate arrival time
  • Easily find addresses and millions of points of interest
  • Spoken turn-by-turn directions

TomTom Go 50s

  • Lifetime TomTom Traffic: Drive with TomTom Traffic for the lifetime of your device
  • Lifetime Maps (US, Canada, Mexico): Always drive with the latest map
  • 3D Maps. See buildings and landmarks in stunning 3D
  • 5″ touchscreen with advanced lane guidance

You can find all the Garmin and TomTom GPS devices at Best Buy here.

I’m still crossing my fingers hoping that my hubby is reading this. After all, it’s #HintingSeason! Be sure to check out Best Buy!

The reviewer has been compensated in the form of a Best Buy Gift Card and/or received the product/service at a reduced price or for free. All opinions expressed are 100% my own.


Like this post? SHARE it!

Related Posts Plugin for WordPress, Blogger...

Turkey and Dressing Enchiladas

Turkey Dressing Enchilada 2

 When I think of Thanksgiving, the very first thought that comes to mind is FOOD. I think that’s what most people think of. I mean that’s what it was all about back in the day. The Pilgrims and the Indians shared a meal together to show their thanks for helping them to survive once they arrived in America. They gathered around FOOD. 

Food is almost always the centerpiece. Birthdays (cake), Christmas (cookies and Ham), showers (finger foods), potlucks (things covered in butter or cheese), etc. You get the idea. We are a culture that is built around enjoying our food.

As a mom now, I also see the other part of it. It’s also about the time that you put into it all. Blood, sweat, and turkey tears at Thanksgiving!

Luckily, I have a recipe for you today that might just present an alternative to the usual Thanksgiving all-day affair. It’s not your everyday, full-blown turkey extravaganza, but it’s pretty and would make a great meal if you’re having people over around the holidays. And if you’re not in the mood for spending hours in the kitchen on a normally very busy day, this might be right up your alley too!

Dressing on Ham

Turkey and dressing go hand in hand. Why not snuggle them up close together? (For the record, this is actually a picture of ham and dressing) Prepare your dressing according to the package or recipe and then lay out sliced turkey (or ham). Plop your dressing right down in the middle. They’re going to warm up real nice together in the oven…

Ham Roll Up

Rolling Up

It’s time to cuddle y’all! Tightly roll inward trying to keep that dressing from falling out the sides. If it falls out, just stuff that dressing right back into the sides.

Before Gravy

We had some leftover dressing, so I just sprinkled it all over the top. I have turkey on the left here and ham on the right. I normally make this with turkey, but I had a request from the hubs to try it with ham. 

Pouring Gravy

Using your favorite turkey gravy (yes you can just make it too!), pour it ALL over the top of your rolls. Oh my goodness, this is when it gets sooooo tasty!

Pre Cooking

This is what it looks like right before you pop it into the oven. 

Turkey…

Dressing…

Gravy…

…all in one yummy delicious place.

Turkey Dressing Enchiladas

Turkey Dressing Enchilada 1

It’s a beautiful presentation and worthy of company. I make it for my family and every time I say I need to have somebody over so I can make this for them!

I haven’t tried yet, but I think it would be yummy to add in some cranberry sauce to a few. What gorgeous color that would add to the dish!

Make this yourself and let me know what you think!

Turkey and Dressing Enchiladas
A simple dish made with simple ingredients, but doesn't actually look like it was simple to make! Turkey and dressing make a special cuddle in the oven to create this tasty dish!
Write a review
Print
Ingredients
  1. 1 (6 oz) box dressing- Or make your own!
  2. 1 (12 oz) jar or can turkey gravy- Or make your own!
  3. 14-16 pieces of thick-sliced deli turkey
Instructions
  1. Preheat oven to 350°.
  2. Make dressing according to package (or recipe) directions. Let cool.
  3. Drop a large spoonful onto a slice of turkey. Roll inward tightly and place seam side down in a casserole dish. Repeat until all slices are stuffed and rolled.
  4. Pour gravy over all of the rolls evenly.
  5. Bake 25-30 minutes.
Notes
  1. I have made this with both think and thick turkey slices. If I am using thinner pieces, I double them up.
  2. We used ham with some of them this time around. It was a hit!
  3. Feel free to make your own dressing and gravy (especially if you already planning to do so), this is just a quicker way!
Adapted from The Four Ingredient Cookbook
Pennywise Cook http://www.pennywisecook.com/

Like this post? SHARE it!

Related Posts Plugin for WordPress, Blogger...

DIY Fall Treats: Tasty Acorns

Tasty Acorns 1

 I just about had a fit when I started to put this post together because my SD card decided that it wanted to be corrupted and not let me have access to my pictures. But you know what? I showed it who is boss and it eventually gave me my pictures. So you can see the beauty of these adorable little fall treats!

Today is the very last day of summer did you know that? Can you believe that? I sure can! And I’m completely ready for fires and everything cozy. I love fall wardrobes. Everything gets covered up, tucked in, and just more comfortable. Less intense and less need to be in shape.

So you can eat chocolate, right?! Aren’t these acorns just the cutest little fall treats? They are so easy to make and adorable to just set around for a treat. Not to mention that they taste amazing. Anything with a Hershey Kiss on it is going to make your mouth happy.

Tasty Acorns 3

 I made a bunch of these one night and it took me no time at all. Such a fun craft for the kids to enjoy with you. And because it’s so easy you can just let them take over! Just don’t let them eat too many before bed or they may never sleep. Again…

Tasty Acorns 2

 I didn’t put together step by step pictures for you because this one is easy enough. If you have questions please don’t hesitate to ask!

Tasty Acorns
With a few simple ingredients you can make tasty and edible acorns for the fall!
Write a review
Print
Ingredients
  1. Hershey Kisses
  2. Mini Vanilla Wafers
  3. Butterscotch Morsels
  4. Chocolate Frosting
Instructions
  1. Begin by placing a teensy bit of frosting in the middle on the bottom of the vanilla wafer. Press the flat side of the Hershey Kiss into the frosting and twist a little to attach it.
  2. On the top of the vanilla wafer, at a very teensy bit of frosting in the middle and press the flat side of a butterscotch morsel to the frosting, twisting a bit to attach.
  3. Set aside and allow the frosting to "crust" a bit which will help them to stay attached.
Notes
  1. I would serve these the same day or at least by the next day you plan to make them. The frosting can make the vanilla wafer begin to get a little soggy. I like when this happens but if you want them to be crisper you will want to serve them soon.
  2. Keep them in an air-tight container until ready to eat.
Pennywise Cook http://www.pennywisecook.com/

Like this post? SHARE it!

Related Posts Plugin for WordPress, Blogger...

Father’s Day Gift Idea: Omaha Steaks!

Burger


I received an Omaha Steaks Exclusive Pack for The Home Depot & compensation for the purpose of this review. This post was made possible by Mom Spark Media. Thoughts are my own.

Every year about the time blooms start to form on all the trees, men everywhere begin to get excited. Excited about summer, sun, and fun? Maybe. Excited about vacations? Could be. But mostly because…it’s grilling season. Ah yes, the time when testosterone gets to run wild while the burgers, dogs, and steaks grill to perfection on a warm summer’s day.

It’s quite the thrill. I gotta admit, the take over of dinner gives me a break so I’m not complaining! Hey, I might even do the dishes. We love to grill. I’m pretty sure that just the mention of that word gets my husband so excited that he could frolic through the wildflowers. Is that true for all men? Pretty sure that’s a yes.

The picture above is the epitome of successful meal during grilling season. Aside from a big, tasty steak of course.

Omaha Steaks Package


I was so lucky to be able to try out this super yummy Omaha Steaks package. I’m telling you, this is the ultimate idea for Father’s Day seeing as it has everything a dad would want for summer grilling.

When you order the Omaha Steaks Exclusive Pack for The Home Depot, this is what’s included:

  • 2 (8 oz.) Boneless Strips
  • 2 (5 oz.) Top Sirloins
  • 8 (3 oz.) Polish Sausages
  • 8 (3 oz.) Italian Sausages
  • 4 (4 oz.) Omaha Steaks Burgers
  • 4 (3 oz.) Gourmet Jumbo Franks
  • $3.oo Coupon off Kingsford Charcoal at Home Depot
  • PLUS, one $10 Home Depot Gift Card

That is a lot of meat. Like, a lot. It’s regularly $175, but is on sale for $69.99! Savings of $105.01. Plus, they arrive in 3-5 days so even if you’re shopping for dad last minute you can still get in on this.

Father’s Day is June 15th, 2014!

Ordering was really easy. The whole process took me less than 5 minutes and my package arrived just 3 days after ordering!

The coupon for Kingsford Charcoal at Home Depot is a nice touch since many men prefer the taste of charcoal grilling. You can buy Kingsford Charcoal at participating Home Depots. You can check here for a list of participating stores.

Now better than ever, Kingsford® Charcoal features Sure Fire Grooves®. These deep, wide and long grooves mean the briquets light easier and heat faster — while burning just as long as before. As always, each briquet is made with natural ingredients and real wood, resulting in the authentic smoky flavor that Kingsford has long been known for.  Visit grilling.com for additional recipes.

The contents of the Omaha Steaks package were all packaged very well. They come in the cooler you see above wrapped with dry ice to keep them frozen for a long period of time. It’s best to freeze them pretty quickly after they arrive so try to make sure you’ll be home on the estimated delivery date.

Thawing Burgers

One of my favorite things about ordering from Omaha Steaks is that they vacuum seal their packages. They are SO easy to thaw. We got all ready to grill out today and realized that they were still frozen. Then I remembered how easy it was to thaw these and I was instantly relieved.

I placed the burgers (still in their vacuum-sealed packages) in cool water for about 35 minutes and we were ready to go! If you’re using charcoal then it might take that much time to prepare the grill! We did this with the humongous jumbo franks we got too and it worked for them as well.

Burgers On The Grill

After thawing them out, they grilled up beautifully.

Grilled Dinner

We had some leftover macaroni and cheese that combined with the burgers, made for such a tasty lunch! There’s nothing like a good grill out!

Dad Bite

The quality of the meat Omaha Steaks offers is really good in my opinion. We’ve always liked their burgers and steaks. Mom tested and dad approved!

If you’d like to grab one of these Omaha Steaks packages for dad this Father’s Day, head over to OmahaSteaks.com/HomeDepot and grab not only some fabulous meat, but also a Home Depot gift card and discount on Kingsford charcoal!

I received an Omaha Steaks Exclusive Pack for The Home Depot & compensation for the purpose of this review. This post was made possible by Mom Spark Media. Thoughts are my own.


Like this post? SHARE it!

Related Posts Plugin for WordPress, Blogger...

DIY Personalized Gift Mugs

DIY Gift Mugs

Have you finished all your Christmas shopping yet? No? Shame on you! HA!

Totally just kidding you. I haven’t gotten anywhere close. This year has been a whirlwind and I’ve felt about a month behind each holiday as they come. So if you’re like me, then you’ll really enjoy this last-minute gift idea that takes no time at all and comes straight from your heart.

I can’t take the credit for this one, I came across it the other day at Happy Go Lucky and thought I have got to do this! I had seen the idea of it on Pinterest before, but wasn’t sure that it worked. So I was glad to have found proof that it does.

DIY Mugs Before


To try this out for myself, I didn’t want to spend a bundle on mugs. Even Dollar Tree is a bit expensive per mug for me. So I ran into Goodwill where there were a ton of white mugs. Whodathunkit? It was meant to be! $.49 per mug and you just can’t beat that, even with a stick.

It’s as simple as using a permanent marker to write, draw, or color on your mugs and then pop them into a preheated oven for 30 minutes. That’s 350° in the oven to be exact. When they come out, the marker has been baked, sealing it to the mug!

UPDATE PLEASE READ: I mentioned this in the comments, but DO NOT PUT THESE IN THE DISHWASHER. Using regular sharpies, it will come off. Hand washing is fine. When I gave these out, I wrote a little poem to go with that said please hand wash. I know many of you have had issues with this.

DIY Mugs After


So easy and yet so thoughtful. Even the kiddos can make their own. Get creative and have fun! You can make these for any occasion as well. Add a heart for Valentine’s Day or an egg for Easter. Whatever suits your fancy.

In the meantime, Merry Christmas!

Once again: do not put these through the dishwasher unless you use a more permanent type of marker made for ceramic. The Sharpie works fine if hand washed.


Like this post? SHARE it!

Related Posts Plugin for WordPress, Blogger...

Candy Cane Brownies

Candy Cane Brownies 1

The following post is brought to you by McCormick! All opinions expressed are 100% mine.

Christmas reminds me of so many things. The birth of Jesus Christ, Santa, presents, stockings, family, and so much more. And I can almost taste the flavors of Christmas when I start to imagine it each year. You have your cinnamon and apple, gingersnaps, chocolate from Santa’s chocolate chip cookies, and then there’s peppermint.

It’s not Christmas until I’ve seen a candy cane y’all!

I’ve never been a diehard peppermint fan. I wouldn’t even say that I eat even 1 candy cane per Christmas season. But I will say that when you have severe coffee breathe, peppermints are your best friend!

I am a fan of peppermint ice cream, peppermint and white chocolate, and any other creamy combination like those. I just love how it can be complemented by something that will take it’s sting away a little. You know what I’m talking about?

Last Christmas, I made homemade peppermint marshmallows. They were soooo good! I used extract to give it the flavor so no crunching from the peppermints was necessary.

Candy Cane Brownies 3

McCormick makes a good pure peppermint extract perfect for capturing that Christmas flavor this year. I cannot WAIT to share this next recipe with you. It is one of those recipes that your friends and family will probably request that you make for them over and over every year.

I’ve only made it once and it has already been requested a second time!

Let me start off by saying that I saw a picture of these taken by the talented folks at McCormick and I thought wow those look tasty. Mine will never look like that, but maybe they’ll at least taste like them! You know those recipes that are impossible to actually make look as appealing as they do in the original presentations. Well, I can attest that these will look very close to the original if you follow all the directions correctly! You’ll be famous for these!

Candy Cane Brownies 2

And trust me, they aren’t as difficult to make as they look. They take a little bit of time, but you can just catch-up on your face book or watch a Christmas movie while you’re slaving away.

Candy Cane Brownies
Recipe Type: Dessert, Treat
Author: McCormick
Ingredients
  • 1 pkg (family size) Fudge Brownie Mix
  • 2 and ½ c Powdered Sugar
  • ½ c butter (1 stick) + 7 tbsp, divided
  • 1 and ½ tbsp heavy cream
  • 1 tsp McCormick Pure Peppermint Extract
  • 12 oz Semi-Sweet Baking Chocolate (I used choco chips)
  • Crushed Peppermint Candies, optional
Instructions
  1. Preheat oven to 350°. Prepare brownie mix as directed on package. Spread into greased foil-lined 15x10x1 dish. (I used a 9×13 pan)
  2. Bake 15 min or until a toothpick comes out clean. (I baked mine for more like 26 minutes.) Cool on wire rack.
  3. Meanwhile, beat powdered sugar, 7 tbsp butter (melted), cream, and peppermint extract in a large bowl on medium speed until well-blended. (this mixture will be extremely thick, sorta like a peppermint patty middle) Spread evenly over cooled brownies. (You might need to use your hands to press it down evenly among the brownies. I also had to take a little from thicker spots and add it to the thinner places) Refrigerate for 30 minutes.
  4. Microwave chocolate and remaining ½ c butter (melted) in a large microwave safe bowl on HIGH for 2 minutes or until the butter is melted. (You may need to adjust the time depending on your microwave) Stir until the chocolate is completely melted. Spread over chilled brownies. Sprinkle with crushed peppermint candy, if desired. (I refrigerated mine again at this point to harden the ganache on top)
  5. Cut into 36 squares and serve!

You can find the original recipe where they like to call these Peppermint Bars over at McCormick!


Like this post? SHARE it!

Related Posts Plugin for WordPress, Blogger...

Free LEGO Minifig Holiday Card

This post brought to you by LEGO. All opinions are 100% mine.

Each year there are tons of cute little ways to personal holiday cards over the web. I'm sure you've seen the Elf Yourself thing that goes around each year. I still have our previous years saved and I watch them every now and then. I get a big giggle out of seeing a video of my 2 year old dressed in an elf suit and break dancing like a hip hop star.

Here's a new idea that was very timely this year. Addie has discovered that she loves LEGOs as of recently. We have even been going to LEGO club at our local library. I always expected LEGOs to be a boy thing, but Addie has proved that to be untrue. She absolutely loves creating little scenes with LEGOs. 

I came across this holiday card offer where you can make your very own family into a LEGO family and then send it around all of your social media pages to share with family and friends. I had a blast creating ours. You can choose everything from skin color to facial expressions and even the outfit. I played around with the facial expressions a bit until I found the ones just right for each of us. 

What do you think of my card? Pretty cute huh? The best part is that it's FREE!

You can head over and make your own LEGO Minifigure Family and share it with your friends and family this Christmas!


Visit Sponsor's Site


Like this post? SHARE it!

Related Posts Plugin for WordPress, Blogger...

Krispy Oreo Cookie Balls


I remember the very Christmas that I was introduced to what was called “Oreo Balls”. The most wonderful and decadent morsels made of crushed Oreo cookies and cream cheese all contained within a crust of white chocolate.

It does not get any better than that.

I must have made them 5 times that Christmas for different functions. And they have become a go-to treat ever since. While some desserts and treats can end up so stressful over the holidays, it’s always nice to have something like these Oreo Cookie Balls to fall back on since they are so easy! And not to mention that they taste amazing.

The best part is that you can practically make them festive for any holiday. Christmas is especially fun because they easily look like little snowman heads. Or simply add some red or green glitz and glam with sprinkles while they are still wet. Put them on a stick or serve them in a bowl!

You can find some super fun ideas for creating your own festive Oreo Cookie Balls HERE. There’s everything from penguins to Nutter Butter Cookie Ball ideas there. I also think that the pretzel idea for reindeer antlers is genius! You can also follow @Oreo on twitter for more cookie ball inspiration.

I made this last batch a little more on the simple side when it came to decoration. My coloring didn’t exactly work out for turning red, so I settled on pink which didn’t really matter because they were just going to get eaten anyways.

The biggest change that I made this time around was a complete experiment. I attempted to merge 2 of my favorite treats into one: Oreo Balls and Rice Krispy Treats. I decided to make them both as normal and then simply stir them together and finish off the cookie ball recipe as normal. Hence the name Krispy Oreo Cookie Balls. While the first day that I made them they were Krispy, I must confess that they lost that “krispiness” after the next day or so. That cereal tends to become soggy after a while so it didn’t surprise me. But I will say that I liked the way that the Rice Krispy Treat made the Oreo Balls lighter and not as rich. I also used Almond Bark instead of regular semi-sweet chocolate chips.

We enjoyed them!

Pure bliss in every bite. They are addicting and sure to be a hit at any holiday gathering! I’ll give you the original recipe and also the recipe that I made in case you want to try it out.

Original Oreo Cookie Balls
Ingredients
  • 1 pkg (8 oz) Cream cheese, softened
  • 36 Oreos, finely crushed (about 3 cups)
  • 4 pkgs (4 oz) semi-sweet baking chocolate, melted
Instructions
  1. Mix cream cheese and cookie crumbs until blended.
  2. Shape into 48 (1-inch) balls. Freeze 10 min. Dip balls into melted chocolate; place in a single layer on a pan covered in wax paper.
  3. Customize how you’d like!
  4. Refrigerate an hour or so until set.
  5. Enjoy!


Krispy Oreo Cookie Balls

1 pkg (8oz) cream cheese, softened
36 Oreos finely crushed (about 3 cups)
1 pkg Almond Bark, Melted

Mix cream cheese and cookie crumbs until blended.
Meanwhile heat 3 tbsp milk in a sauce pan over low heat. Add 10 oz bag mini marshmallows and stir until melted.
In a large bowl, add 6 cups Rice Krispies to melted marshmallows. Combine well.
Stir together Rice Krispies Mixture with Oreo Mixture until well-combined.
Shape into 48 (1-inch) balls. Freeze 10 min. Dip balls into melted almond bark; place in a single layer on a pan covered in wax paper.
Customize how you’d like!
Refrigerate an hour or so until set.
Enjoy!

This is a sponsored post written by me, made possible by Yummly, on behalf of Oreo. All opinions expressed are 100% my own. For more information, review my disclosure policy.


Like this post? SHARE it!

Related Posts Plugin for WordPress, Blogger...