Archives for April 2012

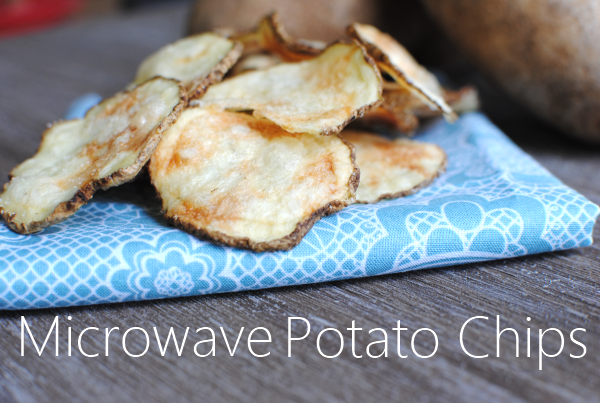
Easy Microwave Potato Chips

You are just going to have to excuse me and my love for potatoes these last couple of days. I’ve always had a thing for them. When I was pregnant with both my girls, I craved them. Give them to me in any shape form or fashion and I’m in heaven. I take that back…

I’ve never like Potatoes Au Gratin. Weird huh? I remember my mom making me eat them when I was little. To this day I can’t make myself eat them.

One of the ways that potatoes can be enjoyed is also possibly one of the worst health-wise. Potato chips. Once you pop, you can’t stop! Isn’t that the saying? It’s so true. The only way that I could eat just one chip is if it was the very last one in the bag. And if that was the case, I would have to yell at somebody for eating all the chips.

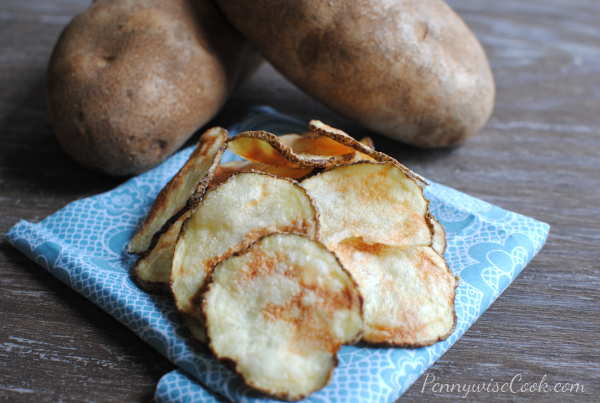
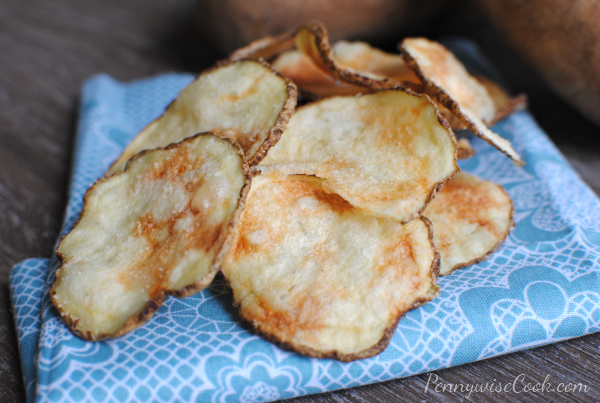
I recently discovered that you can use up potatoes by microwaving them into potato chips. How cool and incredibly simple is that?

You know how sometimes you buy potatoes to make mashed potatoes or something else and you have one or two random potatoes left. What do you do with those? Now that you’re hearing about these microwavable potato chips, this may just be your new way to use them up. It’s definitely mine.

In a matter of minutes and without frying and making them super unhealthy, you can create crispy potato chips in your own microwave. It’s a miracle I tell you.

Just the other day we were going on a picnic and I made a bunch of these up to throw in our lunches. They were so good!

Recipe adapted from Food Gal.
Easy Microwave Potato Chips

Easy Microwave Potato Chips

Create crispy, healthier potato chips in your microwave!

Ingredients

  • 2 Large Russet Potatoes (peeled if preferred)
  • Extra Virgin Olive OIl- Around 2 tbsp
  • Pinch Salt

Method

  1. Slice potatoes to about 1/8" thickness.
  2. Toss potato slices with extra virgin olive oil and salt.
  3. Spray a microwavable plate with cooking spray and place a single layer of potatoes on plate. (you may have to do more than one batch depending on the size of your plate)
  4. Microwave around 2 minutes until potatoes just start to brown. Remove, flip over and microwave another 2 minutes. (This time will really vary depending on your microwave and how thick your potatoes are)
  5. Remove slices and place on another plate to cool.
  6. Repeat with more batches if necessary.

Notes

You can use any type of potato that you prefer. Most will work just fine. Red and Yukon Gold might take a lot less time to cook however, because they are more tender. Keep that in mind.

You can also peel the potatoes if you don't like having the skin on your chips.

Once you do a batch or so, you'll get the hang of the timing for your microwave. Be sure to watch them for scorching, especially if your slices are very thin.

You can use a food processor with slicing attachment if you don't have a mandolin slicer.

http://www.pennywisecook.com/easy-microwave-potato-chips-2/


Like this post? SHARE it!

Related Posts Plugin for WordPress, Blogger...

5 Ingredients That Should Be In Your Pantry

No matter who you are, there are most likely times when you’d like to save a little money. Whether it be after the hemorrhage of money around Christmas time, when you’ve just shelled out your life savings for a medical bill, or just when you’d like to save up for something nice. Buckling down your finances is just part of life for most. And then there are weeks when you just don’t feel like braving the stores or searching for deals.

It doesn’t matter what the case, there are staple ingredients that can save you money and create meals in a pinch. Also very versatile, these also provide the base for several different types of meals in case you have a craving.

Here are 5 ingredients that you should have in your pantry (in no particular order) that can keep you AND your wallet sane when necessary.

1) Rice
Of course this is on the list! There are so many recipes that can easily be adapted and prepared with rice. From shining as the most important ingredient in a main dish to being mixed with herbs as a side dish, rice never disappoints even the pickiest of eaters. Not only is it extremely versatile, but it’s also very affordable. Buying it in bulk can really save your pennies in the long run. Coupons can also help to save money on rice. Mahatma and Riceland Rices usually have coupons out that can often make a bag close to free at stores that double coupons.

When it comes to rice, a little goes a long way. Since the grains absorb the water that it is cooked in, your cup of rice will actually become 2 cups when cooked properly.

Some simple ways to use rice:

  • Cheeseburger Rice- 1 lb ground beef, 1 and 3/4 c. water, 2/3 c. ketchup, 1 tbsp mustard, 2 c. uncooked minute rice, 1 c. cheddar cheese. Brown the meat then drain, add water ketchup and mustard and bring to boil. Stir in the rice and sprinkle with cheese. Cover and cook 5 minutes and serve. (courtesy Razzle Dazzle)
  • Leftover Rice in Chicken Fried Rice– Using leftover rice, throw it in the skillet with chopped onion, bite-size pieces of chicken, a scrambled egg or two, and any vegetables that suit your fancy. A few tablespoons of teriyaki and soy sauce and you have chicken fried rice worthy of being called homemade takeout.
  • Slow-Cooker Red Beans and Rice– Throw a pound of dried red beans along with a chopped onion and garlic into a slow cooker with 7 cups of water. (Add smoked sausage if preferred) Cook on high for 6-7 hours. Serve over cooked rice for a weeknight meal without any fuss.

2) Pasta
Just like rice, pasta is a very verstaile ingredient that can used in several easy dishes. Needing only water to come to life, even the simplest of additions can make for a filling meal. A typical box of spaghetti won’t run you more than $1.50 at the store and the stores brands are even cheaper most places. During a sale or with a coupon, you can sometimes get it nearly free. This is one of the few things that I always have a bunch of, just in case.

Some simple ways to use pasta:

  • Simple Spaghetti– I couldn’t give you suggestions without mentioning the obvious. Store bought or homemade pasta sauce creates a meal for the whole family in literally minutes. Add in meats or veggies to make it even more hearty.
  • Baked Ziti– Using your favorite pasta sauce, ricotta cheese, and mozzarella cheese, you can easily whip up yummy Baked Ziti. Always a crowd pleaser.
  • Pizza Pasta- Using canned tomatoes, pepperoni, and mozzarella cheese along with spices can add some italian pizza pizazz to your pasta!

3) Flour
There’s no mistaking the role of grains in the art of cooking. Many recipes, including the cravable sweets and savory biscuits call for flour. It’s the cornerstone of breads and other baked goods that are simple and inexpensive to make at home.

Simple ways to use flour:

  • Basic Yeast Bread– Combining 6 cups of all-purpose flour with 2 tablespoons dry yeast and 2 cups of water can create a simple bread. Let the ingredients rise for 15 minutes, then divide the dough into two. Bake at 400 degrees for 40-50 minutes.
  • Simple Biscuits– Using only 2 cups of self-rising flour, 1/2 cup butter, and 1 cup milk you can create a dozen homemade biscuits! Bake dough at 400 degrees 10 to 15 minutes.
  • Easy Fried Chicken– Scramble an egg. Dip fresh chicken in egg and then cover in flour. Skillet fry chicken on both sides until golden brown.

4) Canned Tomatoes
These little babies are a part of a meal in my house at least 2-3 times a week. Canned tomatoes can be used in just about anything and add flavor, texture, thickness, and color to several meals. Keeping a few cans of whole tomatoes or diced tomatoes on hand is a smart way to have a back-up meal at your fingertips at all times.

Simple ways to use canned tomatoes:

  • Creamy Tomato Pasta– Soften a block of cream cheese and mix with a can of (your preference) tomatoes in a skillet. Serve over cooked pasta.
  • Easy Chili– Combine canned tomatoes with kidney beans, ground meat, and chili seasoning and you have a simple chili in no time at all.
  • Simple Salsa– Use your canned tomatoes to combine with lime juice, chopped onion, minced garlic, fresh cilantro, salt, pepper, and jalapenos for heat to create a simple at-home salsa.

5) Dry Beans
These little gems make any dish hearty and full of fiber. You can’t beat their affordability compared to canned beans and they don’t go bad for at least a year! These are the exact traits that I look for in a pantry item for saving money on meals. Like rice, they tend to double once reconstituted which means more for your money. They key is soaking them completely covered for at least 4 hours up to 24 hours before cooking.

Beans make a great addition to any meal. The recipes are endless! Stock your pantry with your favorites then add to any soup, stew, casserole, or chili.


Like this post? SHARE it!

Related Posts Plugin for WordPress, Blogger...

Crockpot Baked Potatoes

If I had a dime for every time that I’ve said Why didn’t I think of that, I would probably be rich. Do you ever have those duh moments when something so simple jumps right out at you that could’ve made your life easier years ago? Oh yeah, I have those all the time. You see my brain is a little foggy after birthing my 2 children. It’s permanent and I don’t expect it to go away anytime soon. Or at least that’s what I like to blame it on anyways.

I love me a big ole baked potato sometimes. I like to fill them with whatever I have in the fridge. Whether it’s lunch meat, herbs, or just plain old butter I just love baked potatoes. They have a place here called McAllister’s that serves the most gigantic potatoes. Those are my kinda potatoes.

Aldi had a 10 lb bag of russet potatoes on sale for only $.99 the other day. There were some that were huge so I thought what better to do with those than make baked potatoes. Then I thought about the hard labor of turning on the oven and waiting and waiting for the potatoes to cook. I did not look forward to that. So I got this bright idea to slow cook them in the crockpot.

I know. It’s genius really.

I may be the last person on earth who figured this out, but I’m quite happy about it to say the least.

If you figured this out a long time ago that’s great, just let me enjoy the moment.

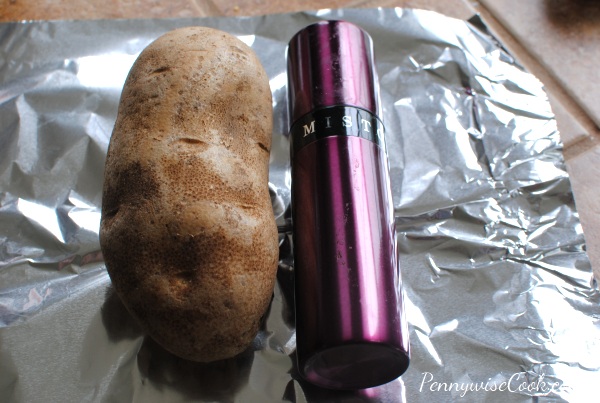
So I set out to try this new (less labor intensive) method of baking potatoes in the crockpot. First, just LOOK at the size of that potato. It is towering over my Misto isn’t it?

(Which by the way, if you don’t have a Misto you should really get one! They are so awesome. If you use olive oil a lot, you may never need cooking spray again. You can find one here at Amazon for around $10.)

Back to the potato. It’s large and in charge and I let my husband eat that one.

So I just prepared the potatoes much like I would the ones I put in the oven. Washed them, slathered them with olive oil, salted them….

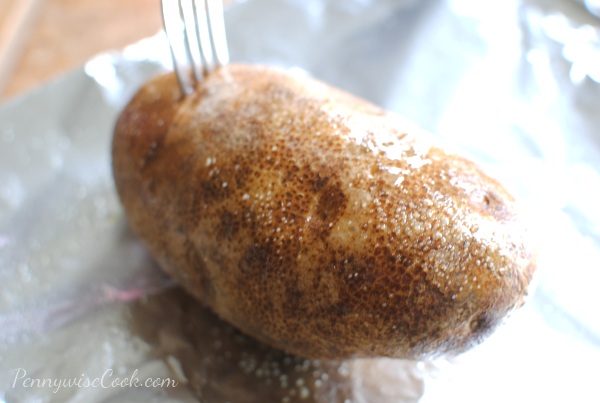
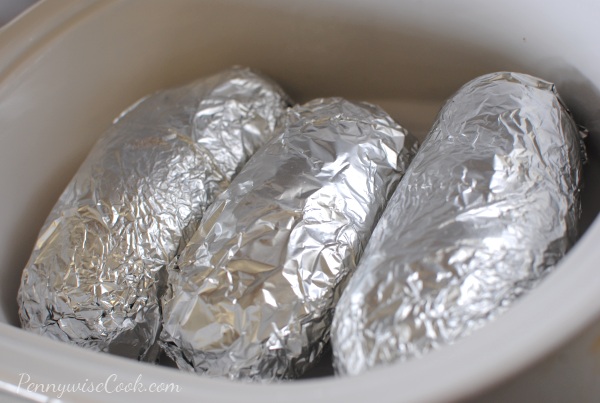
….then poked them just like they were my facebook friend. (wow, that was bad) Then of course I rolled them up in foil and placed them in the crockpot.

Look at those cute little potatoes all snug in the crockpot. This was so easy!

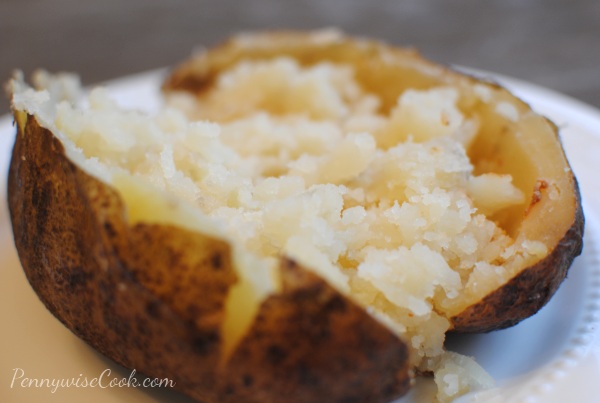
I’m not exactly sure how long that I cooked them because I was off doing more important things like Goodwill shopping or updating my facebook status. But I do think it was around 6 hours or so. This is what they looked like when they came out. PERFECT potatoes. And I didn’t break a sweat or barely lift a finger.

This is a life-changing epiphany in my household. My daughter even asked why we were having dinner so early that night. I felt like super mom. I did make up a quick little chili to put on top of these and broke up some microwaved bacon to go on top.

And I also placed a chub of ground turkey (in foil too) in the crockpot with the potatoes to see how it would cook with them so I didn’t even have to cook that and it worked! So that night, all I had to do was add a few things to the ground turkey to make the chili. The turkey did drip into the bottom of the crockpot, but since the potatoes were covered it wasn’t a big deal. Not sure if I will always do that.

Crockpot Baked Potatoes

Crockpot Baked Potatoes

You don't even have to turn on your oven for a hearty baked potato. Cook them in your crockpot!

Ingredients

    For the Potatoes
  • Russet Potatoes
  • Olive Oil (or Butter)
  • Salt to Taste
  • Foil for Wrapping
  • For the Chili
  • Not quite a whole lb of ground turkey
  • 1/2 Can of Black Beans
  • 1/2 Can Diced Tomatoes (or 8 oz can tomato sauce)
  • Chili Powder to Taste
  • Bacon Pieces for Topping
  • Shredded Cheddar Cheese for Topping

Method

    To make the Potatoes
  1. Wash the potatoes and rub them down with olive oil or butter. Salt and then poke holes in the top of each potato.
  2. Wrap in foil and place in slow cooker for 6-8 hours on low or 4-6 hours on high.
  3. To make the Chili
  4. Brown the ground turkey in a medium skillet Add in the black beans, tomatoes and chili powder and simmer until warm.
  5. Place on potatoes and top with bacon pieces and shredded cheese.

Notes

I would recommend cooking them on low just to make sure they get cooked really slowly and come out soft and fluffy inside.

Use whatever fillings that you see fit! The sky is the limit.

http://www.pennywisecook.com/crockpot-baked-potatoes/


Like this post? SHARE it!

Related Posts Plugin for WordPress, Blogger...

Roasted Broccoli and Potatoes

Some things are fantastic to buy in bulk. For instance, when there’s a stellar deal on paper towels with coupons I stock up like nobody’s business. Toilet paper also falls into this category. And then there are things like gigantic bags of salad that are on clearance. It’s really cheap but won’t last past tomorrow. You have to know when to stock up, when to freeze, and when to use.

Many times Aldi (my favorite go-to place for produce) has their broccoli, cauliflower, and potatoes on sale for cheap. You never know what to expect. You just check back during the week. The past couple weeks it’s been a 10 lb bag of russet potatoes on sale for $.99. Who in their right mind would pass those up? And since this is one of those things that could go bad in a matter of days, I was thinking of what and how I could use them up.

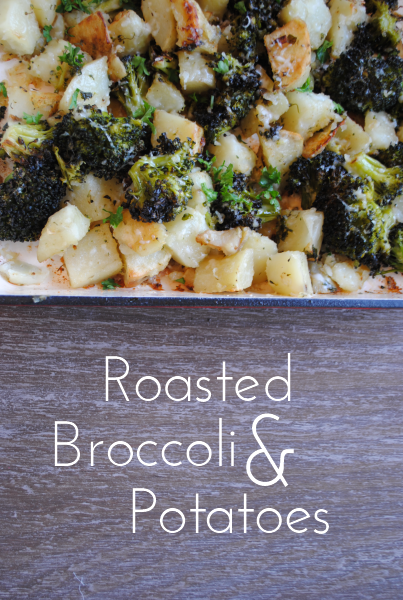
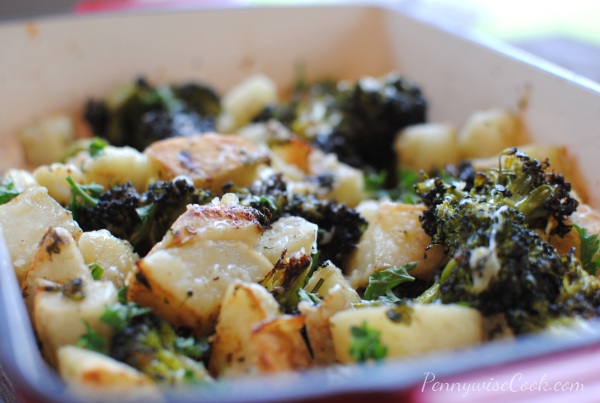
I ended up throwing together these Roasted Broccoli and Potatoes. They go really well together and play nicely with garlic.

This recipe is simple to make and is fairly cheap as well. Plus, it’s a great side dish for having company over.

Roasted Broccoli and Potatoes

Roasted Broccoli and Potatoes

This is a great way to use up russet potatoes and have your green veggies too.

Ingredients

  • 2 Large Russet Potatoes, Peeled and cut into small chunks
  • 2 Large Bunches of Broccoli, cut into bite size pieces
  • 2 Large Garlic Cloves, Chopped
  • 4-5 Tablespoons Fresh Parsley
  • 3-5 Tbsp Grated Parmesan Cheese
  • Generous Abundance of Extra Virgin Olive Oil
  • Garlic Salt

Method

  1. Preheat over to 450 degrees.
  2. Place all ingredients except for cheese and olive oil into casserole dish.
  3. Pour in generous amounts of olive oil and toss everything with it.
  4. Bake for 20 minutes. Remove and stir.
  5. Bake for 15 more minutes.
  6. Top with Parmesan cheese and serve!

Notes

Try cutting your potatoes small. They will cook and brown faster.

http://www.pennywisecook.com/roasted-broccoli-and-potatoes/


Like this post? SHARE it!

Related Posts Plugin for WordPress, Blogger...

2-Ingredient Ice Cream Bread

One of my fondest memories as a kid was sitting on the couch with my dad eating ice cream.

Right from the container.

With a fork.

Don’t ask me why, but he always ate his ice cream with a fork. To this day when I open the silverware drawer to remove a utensil for eating ice cream, I cannot help but look at a fork and remember those times with my dad.

The other fond ice cream memory would be when our family would stop at Sonic for dipped cones. I can remember hearing the blinker click on when the Sonic sign came into sight and getting extremely excited about those cones. It wasn’t until recently that my dad found out I had a complex as a kid because he used to bite the very tip off of my cone before he handed it back to me. I can’t blame him though. Those cute little chocolate peaks are very enticing. Even my husband has done this to me a few times.

Brace yourself. Today’s recipe might just be life-changing. I absolutely cannot take the credit for this simple, yet incredible recipe that I’m sharing with you today. I found this over at The Hungry Housewife who originally found it in 1001 Ways to Cook Southern which looks like an amazing cookbook.

I’d hardly call this a recipe though. It’s 2 ingredients and even a child could make this. Get you one of those 16 oz tubs of ice cream at Kroger when they are on sale for $1 and you’re set. That’s what I did. I got a few different flavors to try out. I’m going to share two of them with you today. Let your ice cream sit out and soften real good. It can still be thick, just not with big lumps.

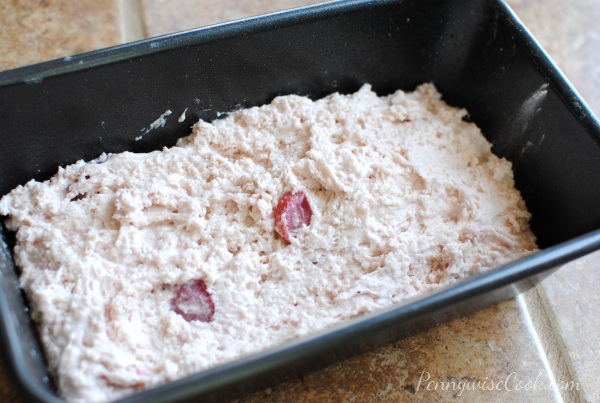
Mix the softened ice cream with 1 and 1/2 cups of (very key here) self-rising flour. Pop into a greased loaf pan and it might look a scraggily mess like mine did.

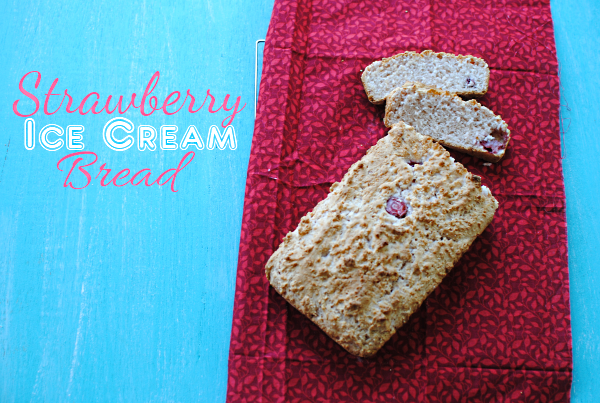
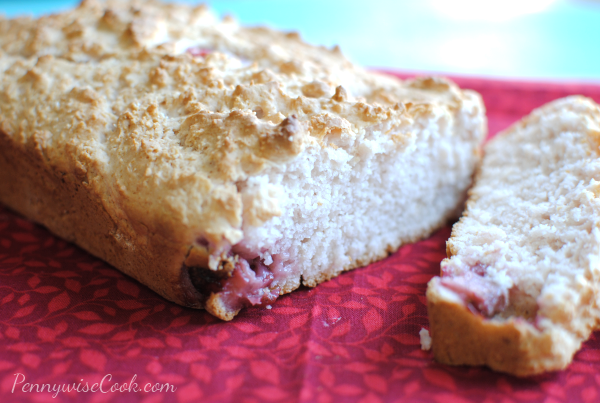
It doesn’t matter though. Because that scraggily mess makes the most delicious bread. Strawberry was my favorite so far. The ice cream had pieces of strawberry that flecked themselves all throughout the bread. It’s a very subtle strawberry taste. Don’t expect it to taste like a mouthful of ice cream or anything. This was absolutely fantastic when warm with butter slathered on it.

Well, I Can’t Believe It’s Not Butter anyways. 😉

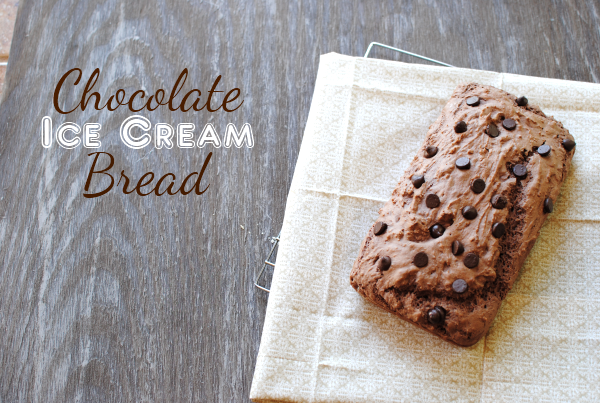
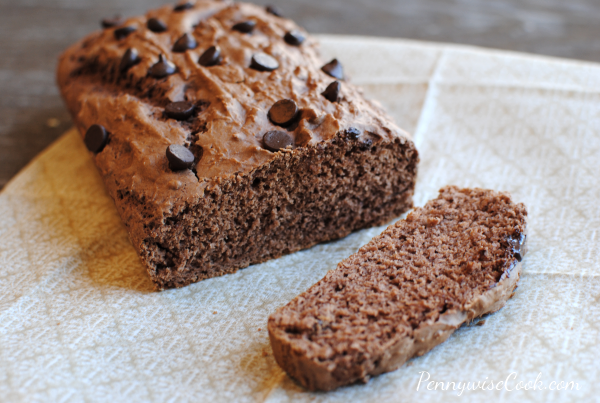
I also made this chocolate version. Oh my goodness was it good. I embellished a little with chocolate chips on top. I think this was hubby’s favorite.

Once again when it’s warm, you might try a little butter on it. It’s soooo good.

If you try any other flavors do let me know how it turns out!

Ice Cream Bread

Ice Cream Bread

Your favorite flavors of ice cream can easily be turned into bread!

Ingredients

  • 2 Cups Ice Cream of Choice
  • 1 and 1/2 Cups Self-Rising Flour

Method

  1. Preheat oven to 350 degrees.
  2. Allow ice cream to soften with no big lumps.
  3. Mix ice cream with flour and place into greased loaf pan.
  4. Bake for 35- 45 minutes or until you get a clean toothpick.
  5. Remove from pan and let cool. Or slap some butter on it and eat it right away!

Notes

My bread did not take the full 45 minutes to cook. I was using a dark coated pan so that could be why. But I suggest checking yours at around 35 minutes.

My bread batter was a bit lumpy which made for a nice crusty top. If you want smoother texture, you might let your ice cream come completely to room temperature before mixing. The flour tends to ball up when mixed with the colder ice cream.

Be sure to use full-fat ice cream.

http://www.pennywisecook.com/2-ingredient-ice-cream-bread/


Like this post? SHARE it!

Related Posts Plugin for WordPress, Blogger...

Corn Dog Waffles

When it comes to food, pleasing my husband is as simple as a bun with a plain hamburger slapped on it. No, there’s no need for anything fancy or green on it. Maybe a slice of cheese.

All American is the best way to describe his palate. Or child-like. Whichever you prefer call it. I do like to pick on him, but he has come a long way. When I met him, he didn’t like mexican food! I know, right? Who in their right mind doesn’t think they like mexican food. My point exactly. Turns out it’s because he thought it didn’t taste good, yet he had never tried it! Now he craves it and it’s one of his favorites.

When I’m not getting hubby to try new flavors and cuisines, I do let him have a shot at “creating” our meals. One of his latest….homemade baked corn dogs. What else would I have expected?

We spent a few tries working with difficult batters and trying to keep the batter on the dogs. A few different approaches yielded nothing but hot dogs falling out of batter and shattered corn dog dreams.

That is until, I was preparing breakfast one morning. I thought why not make corn dog waffles instead? Use the same batter as cornbread but lay the hot dogs inside the batter. A light bulb went off in our heads! After such determination with trial and error (mostly error), we had finally figured out a way to have baked homemade corn dogs instead of fried. After all, that was the whole point.

I have a bit of honesty for you. I didn’t make the batter from scratch. I used a store brand cornbread mix which really made my life easier. I’m not ashamed. You don’t have to be either. You are free to use whatever means of cornbread that you choose.

Addie tried to put syrup on these and was unpleasantly surprised at how it tasted with the waffle part. I then directed her to the ketchup and mustard which make a much better complement to the hot dogs.

My whole family (including myself) really loved these. They made a great meal for a busy weeknight.

Corn Dog Waffles

Corn Dog Waffles

Forget about corn dogs, try Corn Dog Waffles instead!

Ingredients

  • 1 Package Cornbread Mix (or homemade)
  • 1 Package Hotdogs, cut into 4ths

Method

  1. Mix cornbread according to package directions. Preheat waffle iron.
  2. Lay pieces of hot dogs directly on waffle maker to brown a little.
  3. Then pour cornbread batter over the hot dogs making sure not to let it run off the sides.
  4. Let cook until brown and remove.

Notes

The key is to make sure you don't overfill the waffle iron wells. I learned this the hard way when 2 of my first ones ran over the side.

You don't have to heat the hot dogs alone on the grill. I just found it necessary since the hot dogs are cold when you start.

http://www.pennywisecook.com/corn-dog-waffles/


Like this post? SHARE it!

Related Posts Plugin for WordPress, Blogger...

3-Ingredient White Chocolate Peanut Butter Fudge

It was an extremely lazy weekend around here. We did manage to get out of the house a bit, but for the most part we were like slowly moving sloths. The house was still in shambles from creating a baby shower cake last week. (Which I will be posting soon!) While I was at the shower my incredible husband actually cleaned up after me. Don’t you just love little surprises like that? These nights are extremely rare so I take what I can get.

I absolutely hate cleaning up after I cook. I don’t really think about it when I’m making the mess. It’s once I’m done that I look around and realize how many dishes I’ve used or how much flour is all over the counter and floor. I’m not the type of person who cleans as I go. Funny, because we teach Addie to play with one toy at a time and clean up as she goes.

This is where the “do as I say, not as I do” quotation comes in handy.

You may have noticed that I have a slight fixation with recipes having few ingredients. Not only is a recipe with only a few ingredients frugal, but it’s so much easier too. Easier usually means less time consuming as well which means a happy me! And you know what they say….A happy momma means a happy family.

I ran across this recipe recently at Cookies & Cups and I have no idea how. I wasn’t on Pinterest *gasp* when I found it.

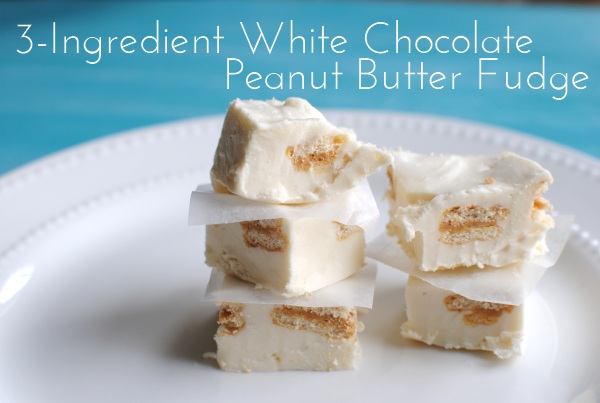
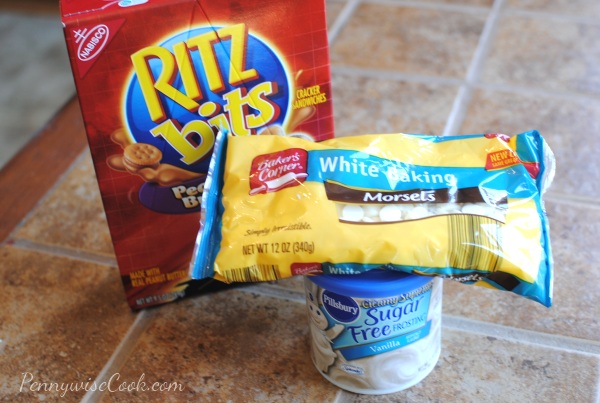
This White Chocolate Peanut Butter Fudge only contain 3 simple ingredients! Ritz Bits, White Chocolate Chips, and Vanilla Frosting! Does it get any simpler than that? I even used Sugar Free frosting. Hey I gotta make it as healthy as I can!

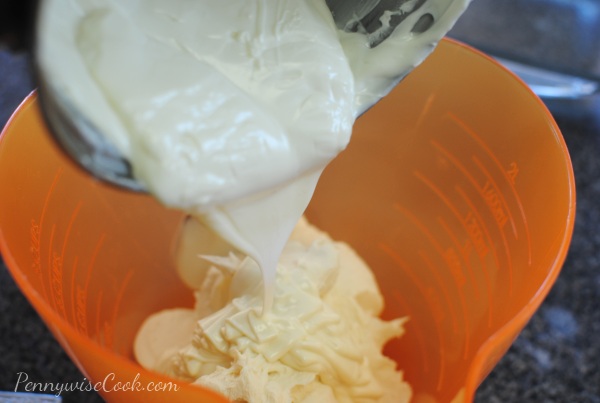
Melt the chocolate chips over a double boiler (or your rigged up pot in a pot). Once completely melted pour it into your frosting and stir until it’s all smooth.

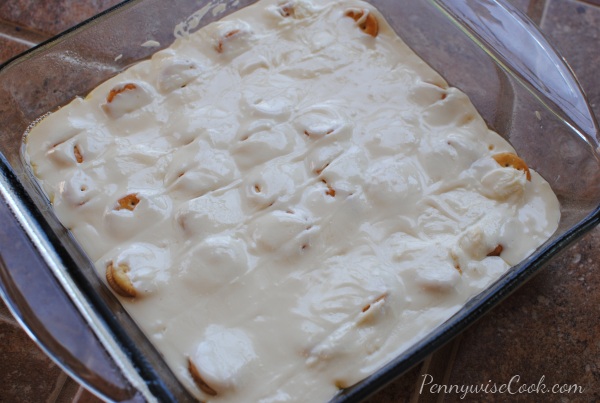
Pour half of the mixture into a square baking dish and then place the Ritz Bits all over the top. Pour the rest over the top.

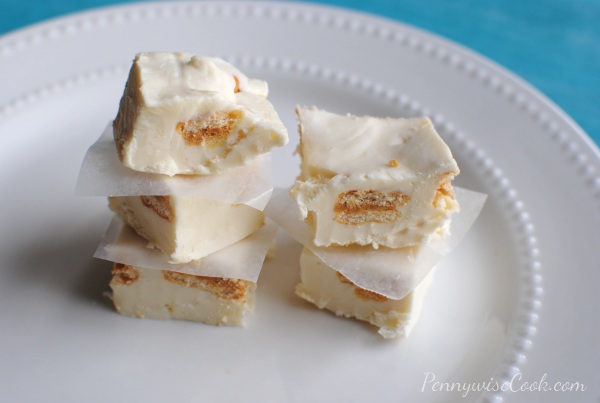
Lookie there! It will look something like this. Refrigerate it until it sets well. Then cut into pieces.

The salty. The sweet. They work together in some yummy frosting and chocolate harmony. I also LOVE the crunch that you get from the Ritz Bits.

And technically this isn’t “peanut butter” fudge because you don’t add peanut butter to it. But you do have that peanut butter flavor because of the crackers.

See? ridiculously easy. So easy that you could even make it tonight. Although, I’ve made a new rule at our house. We only make this when company comes, otherwise I’ll eat it all myself when no one is looking!

3-Ingredient White Chocolate Peanut Butter Fudge

3-Ingredient White Chocolate Peanut Butter Fudge

3 simple ingredients come together to make one tasty and amazing fudge!

Ingredients

  • 1 Tub Vanilla Frosting
  • 1 Bag White Chocolate Chips 12 oz
  • 2 Cups Peanut Butter Ritz

Method

  1. Melt the chocolate chips over a double boiler until smooth.
  2. Place the frosting in a bowl and pour the melted chocolate chips over it. Stir until smooth.
  3. Pour half the mixture into a greased square baking dish.
  4. Lay the Ritz Crackers flat on the mixture.
  5. Pour the rest over the top of the crackers.
  6. Chill until firm.

Notes

I prefer to keep this fudge in the refrigerator as it can soften up a bit when at room temperature.

http://www.pennywisecook.com/3-ingredient-white-chocolate-peanut-butter-fudge/


Like this post? SHARE it!

Related Posts Plugin for WordPress, Blogger...

Bang Bang Cauliflower

I’m the kinda girl who knows what she likes. I take forever to make a decision simply because I want to make the best possible choice. But when I see it, I know it right away.

I get “gut” feelings. You know, the ones that make lean a certain way when there are more than one options available. And most always my gut leads me in the right direction. Thank you guts! That’s something that I never thought I’d be thankful for. Guts. And I never thought I’d be typing how I’m thankful for my guts.

But I totally digress…

So I came across this recipe on Pinterest. I have a major addiction problem with that place. I won’t go into rambling about that, but just know that I am hugely infatuated with being on that site. 🙂

Back to the recipe…Bang Bang Cauliflower thanks to That’s So Michelle. Apparently it’s supposed to taste like Bonefish Grill’s Bang Bang Shrimp. I’ve never eaten that before, but it sounds like it would be tasty. And at the look of this cauliflower, I knew that I had to make some of this up. Not to mention that Aldi had their cauliflower on sale for just $.39 last week! Yes I know! My jaw was on the floor and my booty was a shakin’ walking out with my buggy full of cauliflower. This recipe is the first thing I thought of making when I got home.

Michelle said that every bite that she took made her say “Oh wow, this is sooo good”. I did the exact same thing. Oh yeah, it was that good.

We’re talking BREADED cauliflower tossed in sweet chili sauce and some other incredible ingredients. I just couldn’t get over how good breaded cauliflower was. I mean, whodathunkit? I’m calling Webster’s with that word!

You have to make this. You just have to. If you are a cauliflower fan, it is your duty. Your cauliflower duty.

Bang Bang Cauliflower

Bang Bang Cauliflower

Cauliflower has never been so tasty!

Ingredients

    For the Cauliflower
  • 1/2 cup Panko bread crumbs
  • 2 tablespoons cornstarch
  • 1/2 cup egg whites
  • 1 head cauliflower
  • Salt & pepper
  • 1 tablespoon garlic powder
  • Green onion
  • 1/4 cup coconut oil (I used olive oil)
  • For the Sauce
  • 1/4 cup lite mayo
  • 1/4 cup Franks Red Hot Sweet Chili Sauce or Siracha (add more or less depends on how hot you can handle it)
  • 1 tablespoon rice vinegar
  • 2 tablespoons sugar

Method

  1. Cut up your cauliflower florets. Mix salt, pepper and garlic powder into your Panko breadcrumbs in a shallow dish.
  2. Set separate bowls aside with egg whites and cornstarch. Dip your florets one by one into the cornstarch, and shake off excess. Then dip into egg whites, and then coat with Panko mixture.
  3. Warm up your coconut oil in a large frying pan and place all florets in hot oil. Turn with tongs making sure all sides are browned. Set on top of paper towels to remove excess oil. Top with more salt.
  4. In a small bowl mix all of your sauce ingredients. Coat your breaded and pan fried florets with sauce, top with sprinkles of green onion and serve right away.

Notes

Because I didn't have coconut oil, I just used extra virgin olive oil and it turned out just fine. So don't fret if you don't have that.

Also, the breading ingredients were JUST enough for my cauliflower so beware if you have a large head like I did.

The Sweet Chili Sauce was the perfect spiciness and sweetness.

We had this as a side, but I could totally eat a bowl just for dinner!

http://www.pennywisecook.com/bang-bang-cauliflower/

And I don’t want to beg you, but will you PLEASE leave a comment if you make this (or even if you don’t) and let me know what you think!


Like this post? SHARE it!

Related Posts Plugin for WordPress, Blogger...

In The Garden Cupcakes

I’m not much of a gardener. Most every spring I get an artificial green thumb. I like to waltz around thinking I’m going to make my flower beds and yard look amazing. It usually leads to removing about a third of the weeds and then throwing mulch on top of the rest. At least they look pretty for a little while!

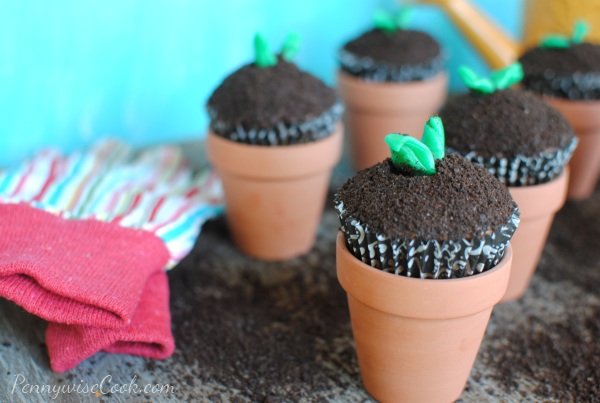
Although I will say that this spring I’ve decided to stop pretending and actually attempt to grow something that I might use that way I’m accountable. I’ve started an herb garden in pots. Which Addie insists it’s not a garden because it’s not in the ground, but I beg to differ. Aside from that, what you see above is probably about as close to a green thumb as I’m going to get.

How about In The Garden Cupcakes? Aren’t they adorable? I found these little planter pots at Dollar Tree and they where 3 for $1!

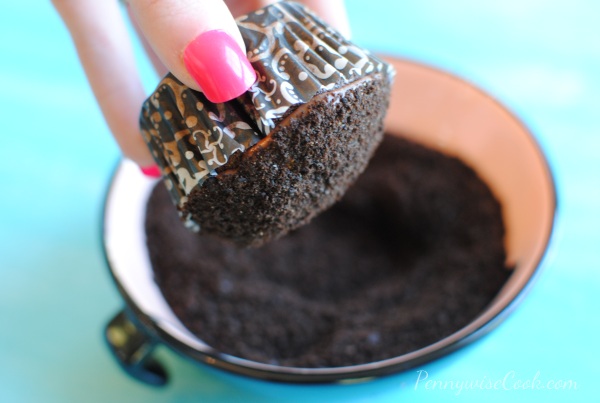
I simply made up some chocolate cupcakes (see recipe below) and frosted them. Then I dipped their tops in crushed oreo cookies like so. Before you go thinking wow are her nails so pretty, they are fake. I love those boxed nails! Cheaper than going to a salon and great in a pinch.

After getting them good and “dirty”, I made these little sprouts out of all things….Airheads! Remember those? I just cut them into small pieces and rolled them until they look semi-close to a sprout. Simple!

And then of course, I placed them into these adorable little planters. So fun and the neighborhood kids just loved them. Make these for a party and hand out the planters with them so they can each decorate one with their name. Or hoard them and keep them for another batch of these beauties.

I found this cupcake recipe over at Spark People. It’s actually healthy and only has about 110 calories per cupcake. That’s not including your frosting so keep that in mind. The frosting that I used on this cupcake was AMAZING and is my new favorite. But you’ll have to wait to get that recipe. I’ve got to have something to keep you coming back! 😉

And of course you can use whatever cupcake recipe you’d like. I’m just sharing with you the one that I used this go round.

In The Garden Cupcakes

In The Garden Cupcakes

Perfect for a party or outside gathering, these In The Garden Cupcakes make the perfect addition. Crushed up Oreos create the look of dirt and small planters complete the look.

Ingredients

  • 1 3/4 cups flour
  • 1 1/2 tsp baking soda
  • 1 tsp salt
  • 3/4 cup applesauce
  • 1/4 cup margarine (softened)
  • 1 cup splenda
  • 1/4 cup sugar
  • 1/4 cup brown sugar
  • 3 eggwhites
  • 1/2 cup skim milk
  • 1 tsp Vanilla ext
  • 2 TBSP coffee
  • 1 cup semisweet chocolate chips
  • Chocolate Frosting of Your Choice (even Betty Crocker will work!)
  • Small planters (clean)
  • 1 Cup Crushed Oreos
  • Green Airheads cut into around sixths

Method

  1. Preheat oven 350 degrees.
  2. Sift flour, baking soda, and salt. Set aside.
  3. Melt semisweet chocolate chips and coffee in double boiler. Let cool slightly.
  4. Cream butter, applesauce, splenda, sugar, brown sugar, and eggwhites. Add melted
  5. Add flour mixture. Mix well. Add vanilla ext. Add milk slowly until well blended.
  6. Pour in cupcake liners and bake for 25-35 minutes or until toothpick comes out clean.
  7. Let cool then frosting with your choice of chocolate frosting.
  8. Dip each cupcake in crushed oreos then place in planters.
  9. Roll each Airhead up and then bend at a 90 degree angle and then stick into the bottom of your cupcake.

Notes

This cupcake recipe makes 24 cupcakes, but you can half the recipe if you don't have that many planters.

Even though this is a "healthy" recipe, I've gotten very good reviews from it!

http://www.pennywisecook.com/in-the-garden-cupcakes/


Like this post? SHARE it!

Related Posts Plugin for WordPress, Blogger...

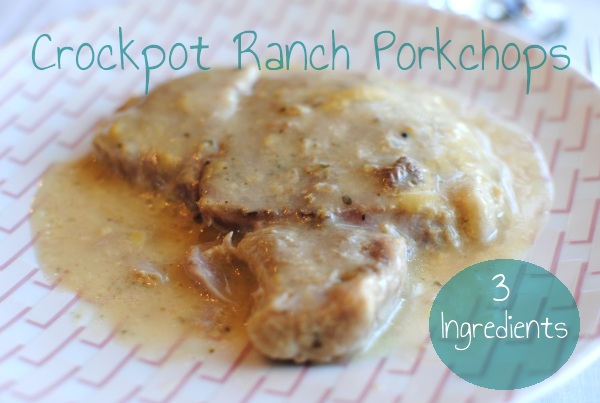
3-Ingredient Crockpot Ranch Porkchops

With busy nights, there are at least 3 nights per week that I plan on making a crockpot meal. I usually try to think of nights like soccer practice or small group when I know I’m not going to have time to cook up a big meal. My crockpot is like my best friend. It really does bring joy and happiness to my life. (Insert mushy crockpot love song here)

Take Easter for instance. We didn’t have a single plan (for once in our life). However, I was not about to spend the entire day cooking a meal. We really wanted to spend the day together enjoying each other’s company. Once again my crockpot stepped in to make life easy. I popped an entire chicken into it stuffed with rosemary and garlic and just let it go. 6 hours later after we were done playing outside, watching a little TV, and essentially getting a little tired of each other (what? doesn’t everybody?), the chicken was perfectly cooked and ready for our Easter dinner.

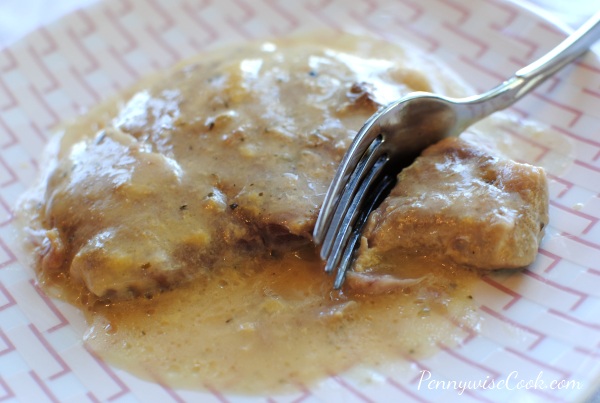
These porkchops are one of my new favorites for crockpot recipes! Only 3 ingredients and they are simply to most moist and tasty porkchops I might have ever had. No exaggeration.

I’m so thankful to have come across this recipe at Living Laughing and Loving!

You simply MUST try it!

3-Ingredient Crockpot Ranch Porkchops

3-Ingredient Crockpot Ranch Porkchops

With only 3 ingredients you can create the most moist and tasty porkchops ever!

Ingredients

  • Pork Chops
  • Ranch Seasoning Dry Mix Packet
  • 1 can Cream of Chicken plus 1 can water as needed (or 2 cans cream of chicken)

Method

  1. Combine all 3 ingredients in your crockpot and mix well.
  2. Cook on low for 4-6 hours.

Notes

I used only 1 can of cream of chicken with the 1 can water and it turned out perfect!

I cook 4 porkchops with this recipe.

This will also freeze well. Place all of the raw ingredients in a freezer bag together then run under warm water before placing in the crockpot when you're ready to cook!

http://www.pennywisecook.com/3-ingredient-crockpot-ranch-porkchops/


Like this post? SHARE it!

Related Posts Plugin for WordPress, Blogger...