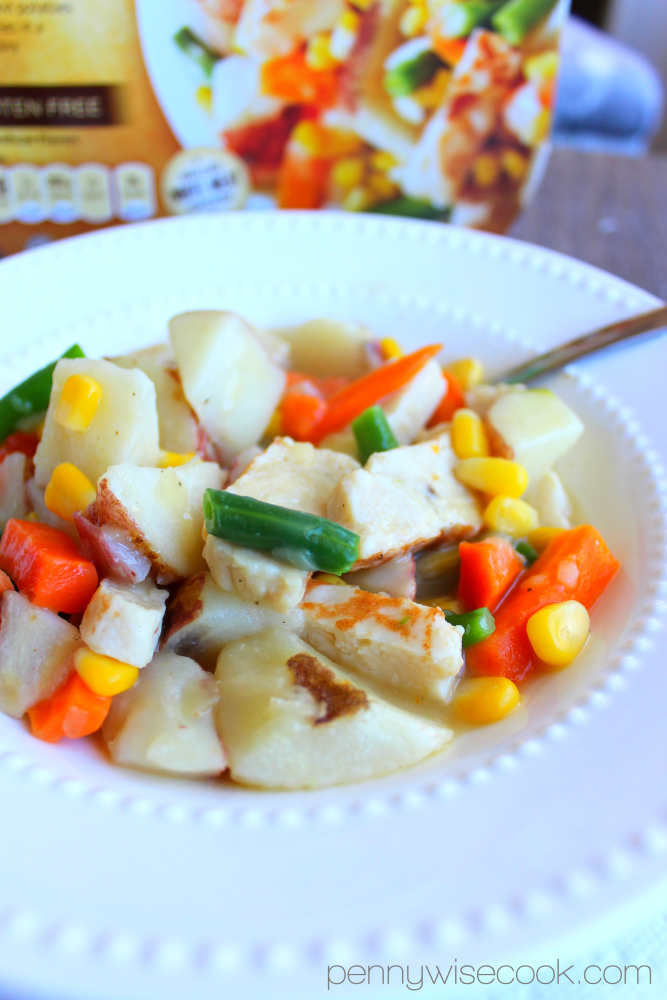
My Favorite Healthy Lunch


HC  1
It’s FINALLY warming up! Can I get an Amen?!

We have already mowed our yard once. It’s not my favorite task, but it means that warmer weather is here and that we can enjoy the outdoors again.

We are an outdoorsy kinda family spending every moment that we can soaking up the sun and refraining from holing up in the house all day. It’s a nice change from hermit status in the winter. 

I like to keep things healthy around here and gettin’ our booties outside is one of the best ways that we can do that!

Eating right is another great way to stay healthy. I won’t pretend I’m perfect in this area. I enjoy my sweets, I really do. But I also love staying on track health-wise because it makes me feel better in my skin. Taking everyday recipes and making them better for you is something I love to do. But you know something? I’ve found something easy and convenient that is way easier than creating a recipe!

HC 3

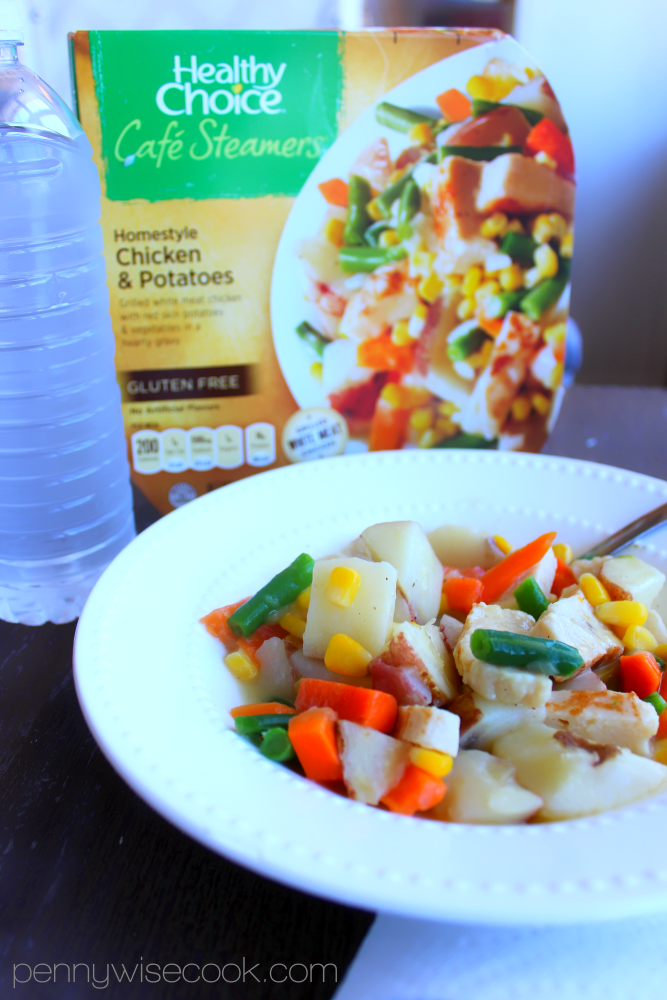
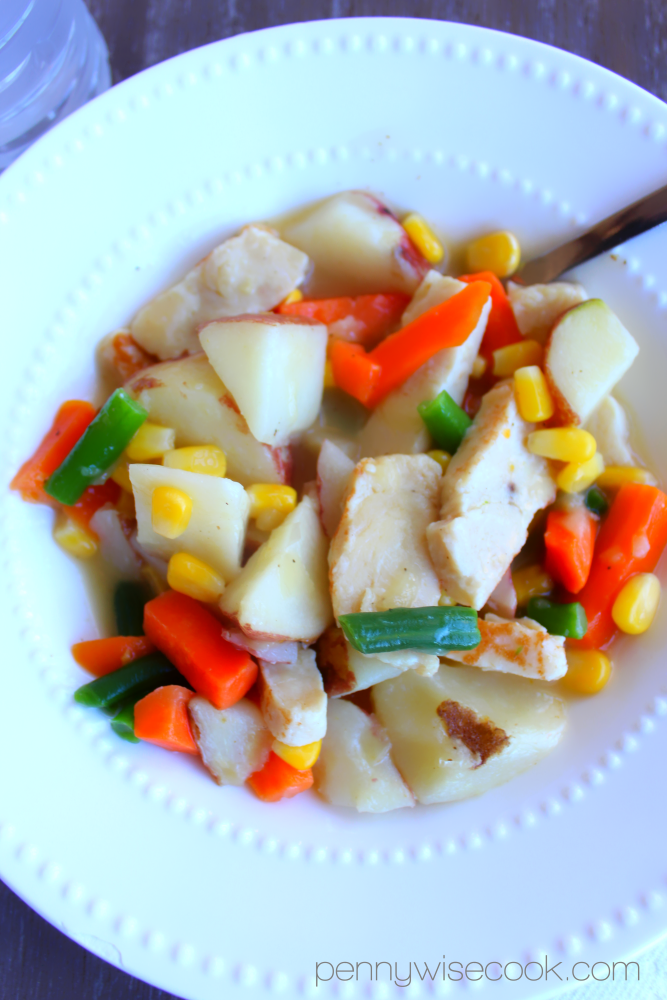
My favorite healthy lunches are the Healthy Choice Cafe Steamers! Healthy eating has never been easier. I’m able to plan my lunches ahead without even thinking.

Unlike other frozen meals, Healthy Choice Café Steamers’ feature a unique tray-in-tray steam cooking method that delivers fresh-tasting meals with crisp vegetables and juicy proteins. This also gives you the chance to be a part of the culinary experience as you pour your own sauce, determining how much or how little flavor you want with your meal. I always use it all!

HC 2

All Healthy Choice meals are made with real ingredients and no preservatives so you don’t have to worry about sacrificing taste or freshness. Since the ingredients aren’t frozen in the sauce they have a fresh, more vibrant taste.

One of my favorite things about these meals is that they always taste fresh. Certainly not like they have been spent weeks in my freezer. 

And talk about healthy, did you know that Healthy Choice is the only major brand in the frozen meals section that can call 100% of its products “healthy” as approved by the FDA? No guilt here!

Look for these great Healthy Choice Cafe Steamers at your local grocery store:

  • Balsamic Garlic Chicken
  • Barbecue Seasoned Steak and Red Potatoes
  • Chicken and Noodles
  • Chicken and Potatoes with BBQ Sauce
  • Spaghetti and Meatballs

And there are tons more! 

My current favorite is the Crustless Chicken Pot Pit! What is yours?

I was selected for this opportunity as a member of Clever Girls and the content and opinions expressed here are all my own.


Like this post? SHARE it!

Related Posts Plugin for WordPress, Blogger...

Cheesy Cauliflower with Better Bakery Melts!

The following is a sponsored post written by me on behalf of Better Bakery. It is 100% my own opinion. 

Better Bakery in frontWell happy New Year to you! I am not used to this 2016 yet. It feels futuristic to write 2016. Am I the only one? So weird with that 6 there. 

Did you make any resolutions? I made a few. To lose weight is one. Not that original, eh? I’ve got more, like to get my youngest to eat anything more veggies. Picky McPickerson she is.

What do you do when your daughter won’t eat her veggies? Throw CHEESE on it!

Cauliflower is already one of my go-to veggies because of the mild flavor and tenderness. But with cheese? I mean. Yaaaassss! And I love that you can grab them in the frozen food aisle and they are ready to prepare. Easy peasy lemon squeezy!
Cheesey Cauliflower for post

This cauliflower is bound to turn Picky McPickerson into Veggie McVeggieson. You want to know how cheesy it is? My daughters thought it was Mac & Cheese!

Did you happen to catch that super tasty looking stuffed sandwich there in the front? Of course you did. It’s pretty magnificent. Oh. My. Goodness. This is something new I found that has quickly become a family fave- Better Bakery Artisan Melts. 

Packaging Pic low res

The bread on the outside looks like a pretzel and even sorta tastes like a pretzel, but it’s artisan bread. Heaven on a plate and the ultimate main dish to the Cheesy Cauliflower side. My favorite kind of Better Bakery Artisan Melt was the Chicken & Bacon Club. It is so good! I was pretty impressed at how closely the sandwich matched the picture on the box. That just doesn’t happen with some products.
These handcrafted artisan melts are made by bakers who are committed to the Better Bakery art and want to make better food. How nice that? They truly love what they do and make a quality product that reflects that!

Cheese and Pepperoni Pizza PRoduct pac low res

The  Cheese & Pepperoni Pizza kind  was also tasty! They are a great quick and easy lunch or dinner idea when you’re in a hurry.

Freezer Section

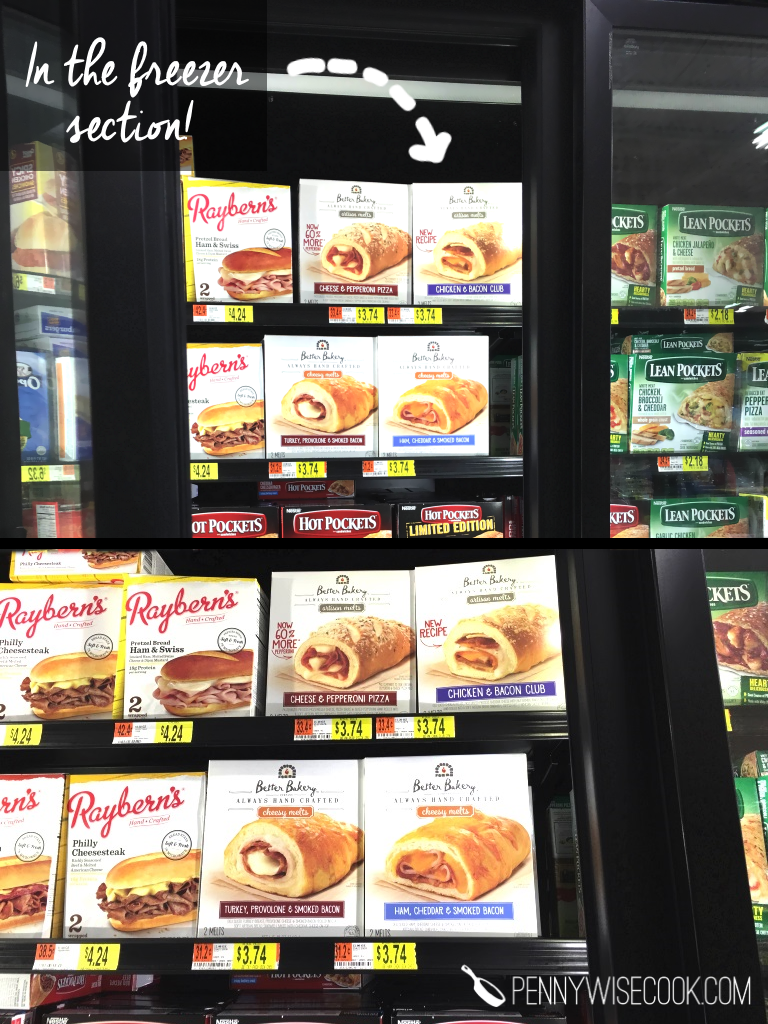
You can pick them up in the freezer section of your grocery store. I found them at Walmart! Better Bakery stands by it’s promise of “Always Handcrafted” with each sandwich hand cut, rolled, topped, and picked.

You can get a coupon for $1.50 off 1 Better Bakery Artisan Melts and locate a retailer near you, here!

To make those, it’s as easy as popping them into the oven or microwave. The recipe for the Cheesy Cauliflower is below! Here’s to the new year with successful resolutions!

Cheesey Cauliflower for post 1


Cheesy Cauliflower
Write a review
Print
Ingredients
  1. 1 (16 oz) pkg Frozen Cauliflower
  2. 1 c. Cream of Chicken Soup
  3. 1 c. shredded cheese
  4. 3 tbsp milk
  5. 1 tsp salt
  6. 1/4 tsp pepper
Instructions
  1. Preheat oven to 350°.
  2. Cook cauliflower according to directions. Place in small baking dish. Add salt and pepper.
  3. Mix together the soup, milk, and cheese. Pour and spread over cauliflower.
  4. Bake for 10 minutes.
Notes
  1. I tweaked this recipe a little. The original recipe called for an entire can of cream of chicken and more milk, but I found it wasn't need so I reduced amounts. Feel free to play with seasonings!
Adapted from Four Ingredient Cookbook
Pennywise Cook http://www.pennywisecook.com/

Like this post? SHARE it!

Related Posts Plugin for WordPress, Blogger...

Easy Fried Rice

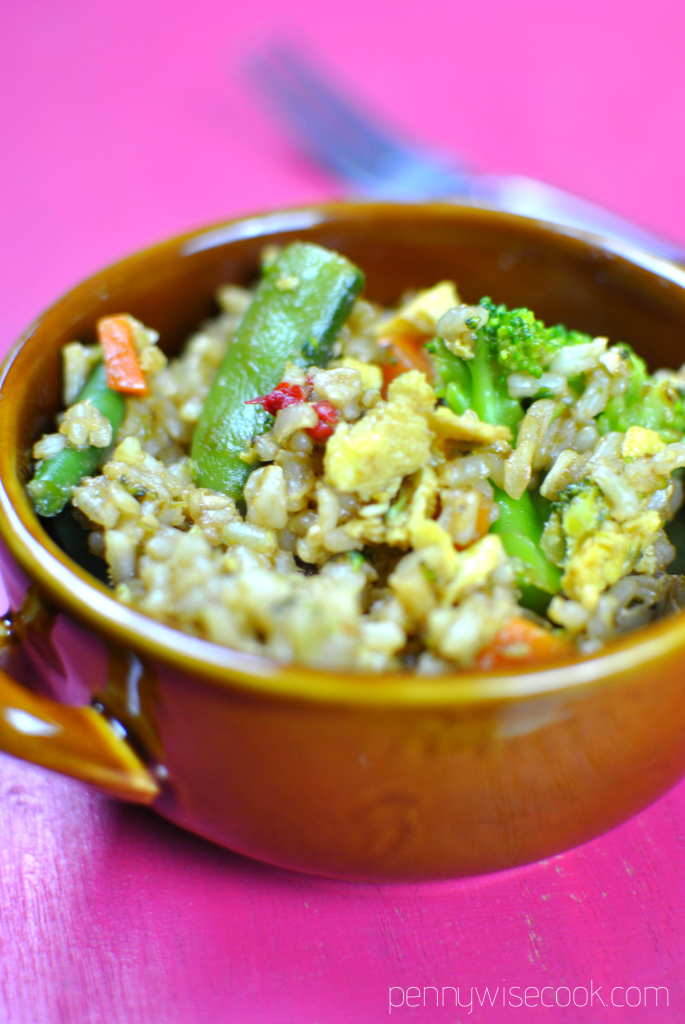
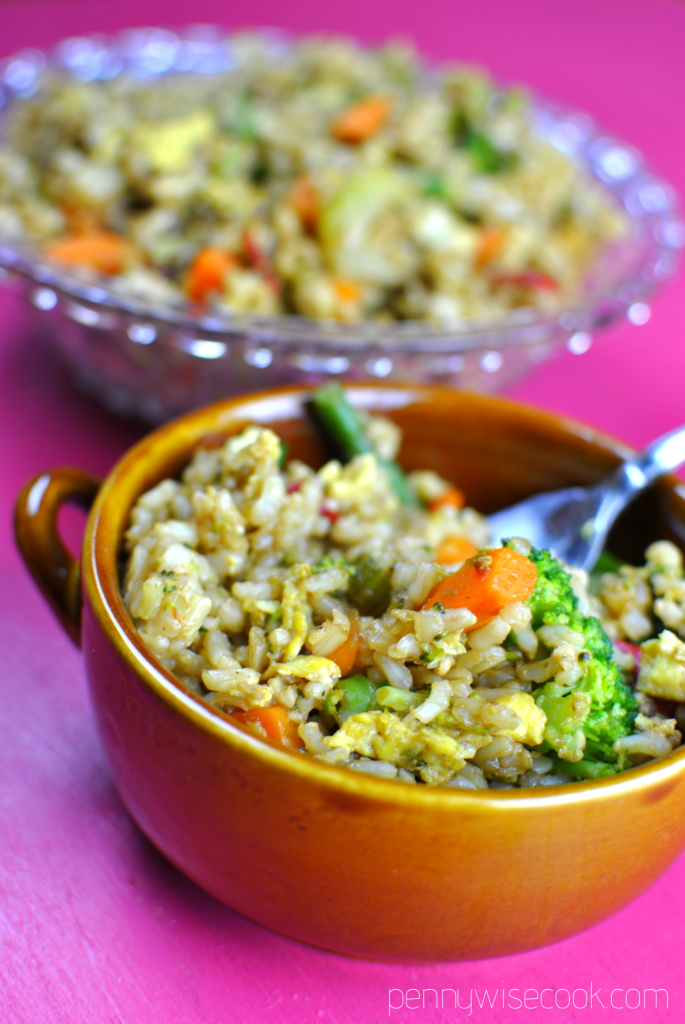
Fried Rice 2


When my hubby and I were dating, he wouldn’t eat anything but cheeseburgers.

True story.

Date nights with candlelit quarterpounders? Pretty much. He didn’t like anything green, and he especially didn’t like anything foreign.

That is, until you sit him down at a place called Benihana and feed him fried rice. It’s the one thing “foreign” that I could always count on him to eat.

Thankfully he has outgrown most of his picky pants stage and likes to eat a variety of things. But that fried rice is still the only thing he’ll order at a Thai, Chinese, or Japanese place.

I started making this rice soon after we got married for two specific reasons. I just remembered another, so there’s really three.

1) It’s easy. It’s not something you have to think too much about. Just throw it all together in a skillet and boom!

2) It’s really quick. No need to slave over the stove all night.

3) Hubby eats it. Reason enough for me!

Fried Rice 3

This is the perfect meal or side dish to make with leftover rice. It’s best when the rice has been refrigerated and is cold. I have been known to make rice the night before just for this meal.

It really confuses my family.

And then they understand when we have this meal the next night!

Fried Rice 1

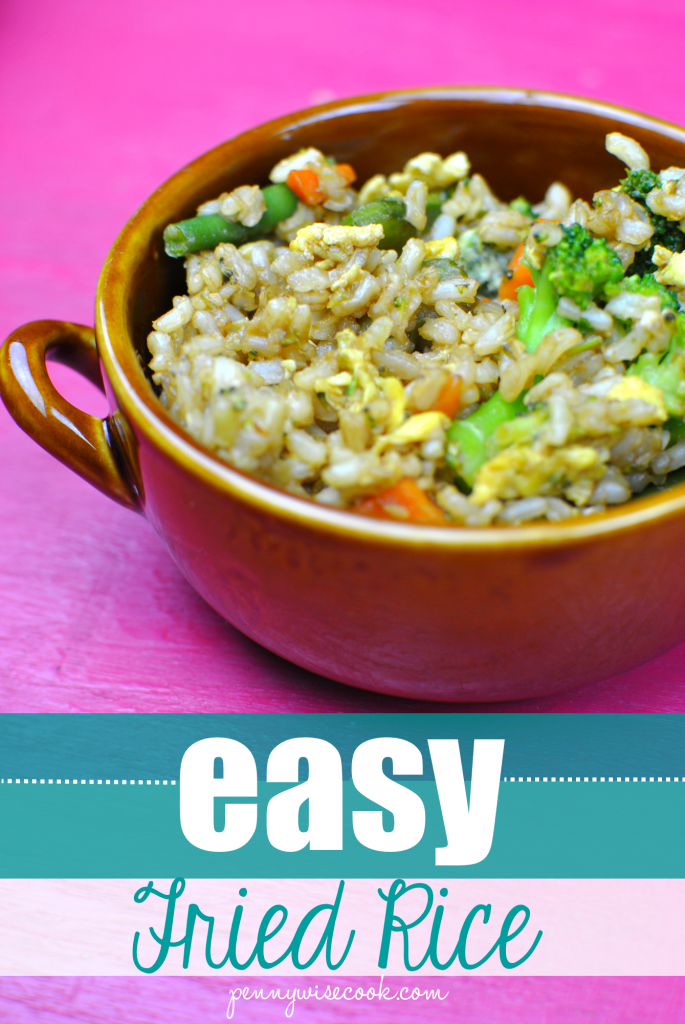
I make this with whatever frozen veggies that I can find on sale. Fresh veggies? Of course you can use them, too! It’s such a versatile and easy thing. You can’t mess it up. The variety that I got had sugar snap peas, green beans, red peppers, celery, mushrooms, broccoli, carrots, and onions in it.

Slap an egg in there with your cold rice and add some soy and teriyaki sauce and you have got a really tasty dish.

Here’s the way that I make it, but remember that you can add or take away whatever you’d like.

Simple Fried Rice
Why not make your own fried rice at home? It's simple, tasty, and easy on your wallet!
Write a review
Print
Ingredients
  1. 2 c. brown rice, cooked
  2. 1 (12 oz) bag of frozen veggies (stir fry mix is good)
  3. 2 tbsp olive oil
  4. 1 egg, scrambled
  5. 2 tsp minced garlic
  6. 1-2 tbsp soy sauce
  7. 1-2 tbsp teriyaki sauce
  8. salt & pepper to taste
Instructions
  1. Heat 2 tbsp olive oil over medium-high heat in large skillet.
  2. Add frozen veggies and cook until softened.
  3. Add garlic and cook until browned.
  4. Add egg and cook combining into veggies.Then add the cold rice.
  5. Fry over high heat. Add soy and teriyaki. Add salt & pepper to taste.
Pennywise Cook http://www.pennywisecook.com/

Like this post? SHARE it!

Related Posts Plugin for WordPress, Blogger...

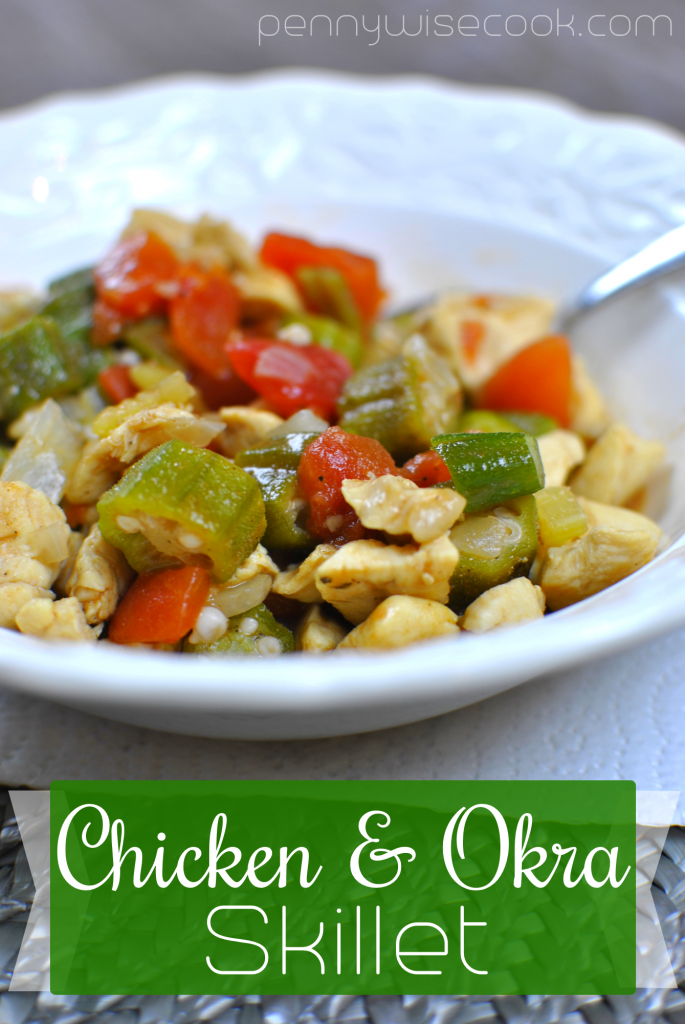
Chicken and Okra Skillet

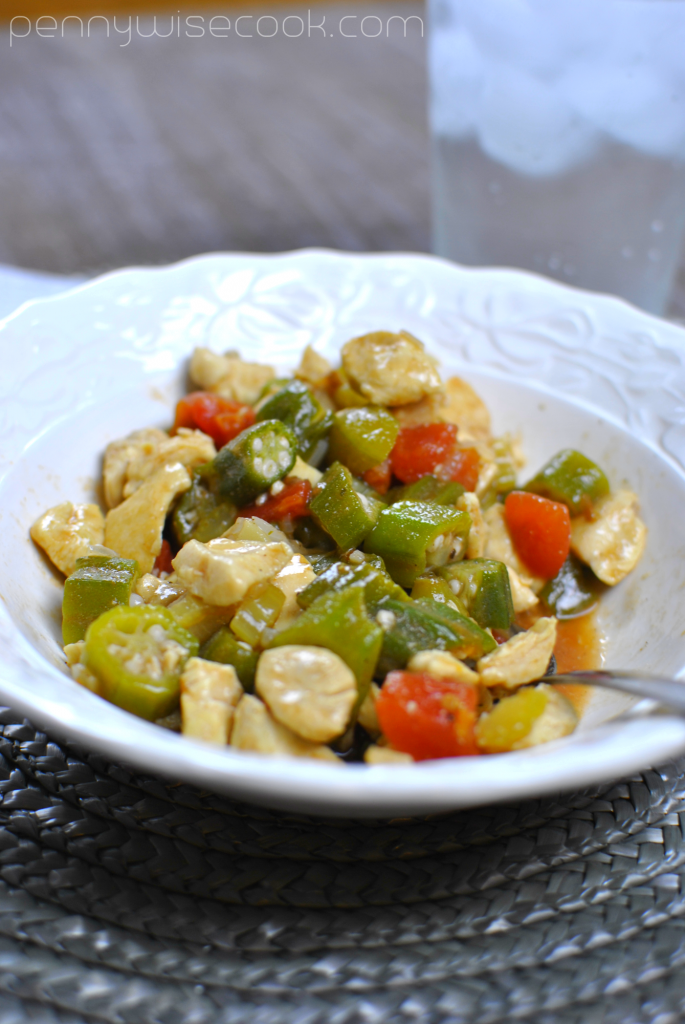
Chicken and Okra Skillet 1

Happy new year! It’s 2015 already y’all. Can you believe it? HOW are we already here?

I remember thinking that summer being over was weird. And now CHRISTMAS is over. SO weird.

I have fond memories of my great Aunt Joan always making pickled okra around the holidays. I’m pretty sure that she always made it, but we mostly saw her around the holidays so I just associated it that way. Who knew that a kid would love to dig into dig into a big old jar of homemade okra? 

My kids sure wouldn’t.

As I’ve gotten older, I’ve learned that I like lots of forms of okra. Fried, steamed, cut, you name it. It’s all good in the okra hood. My husband, not so much. Though for the new year, he is committing to eating better so he decided he would give it a chance. So I decided I would come up with something really tasty to get him on the okra train.

Chicken and Okra Skillet 4

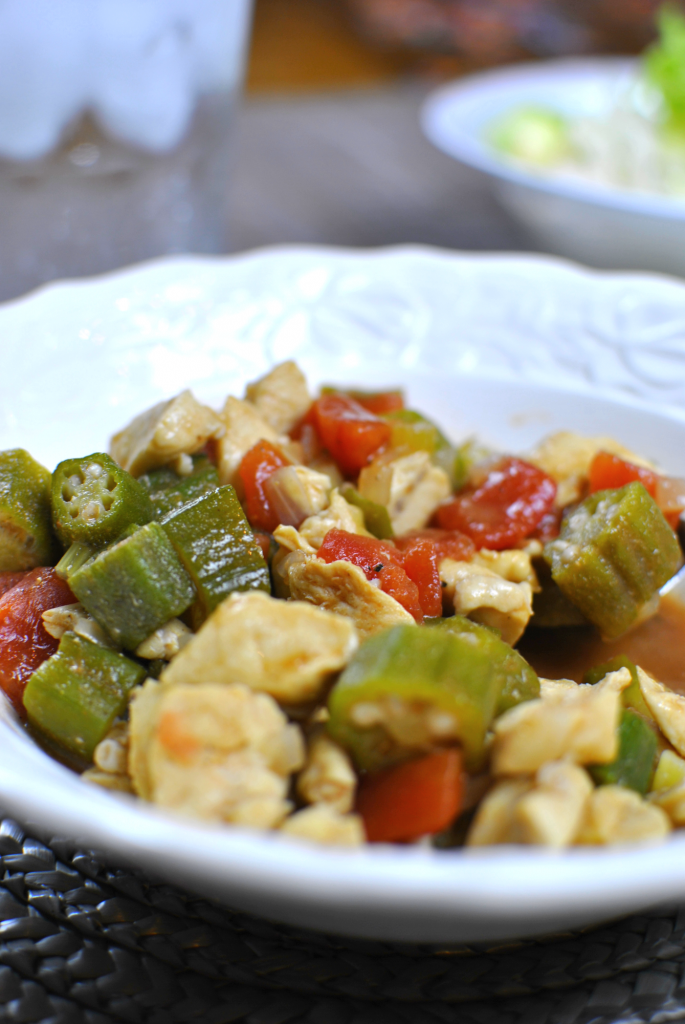
So I made this! My own creation of a few flavors that I thought would go well together. I love what the okra adds to this dish. It’s a bit slimy and soft, but that makes this so good. Gives it a sort of stew texture.

My favorite part? It’s a one-pot meal! You can easily make this whole meal in your skillet. Thank you Jesus!

Chicken and Okra Skillet 2

My husband’s verdict was made apparent when he went back for seconds! I withheld a large smile inside as I watched him dole out the next helping. I told him at the beginning that I thought that he was going to be surprised and he said that he was.

All the ingredients are really simple. Many might be things you already have. This is so quick to whip up so it would make a nice weeknight meal.

Chicken and Okra Skillet
Tomatoes, Okra, and Chicken make a great combination in this easy recipe for a great weeknight meal.
Write a review
Print
Ingredients
  1. 1 tbsp olive oil
  2. 2 ribs celery, chopped
  3. 1 small onion, chopped
  4. 2 tsp minced garlic
  5. 1 lb fresh chicken tenders, cut into bite-size pieces
  6. 1 (12 oz) bag frozen cut okra
  7. 1 (14.5 oz) can diced tomatoes
  8. 1 tsp cumin
  9. 1 tsp beef bouillon
  10. Salt & pepper to taste
Instructions
  1. In 1 tbsp olive oil, saute onion and celery over medium heat until translucent. Add garlic and saute until browned. Add chicken pieces and cook until no more pink.
  2. Season with salt and pepper.
  3. Make hole in chicken, celery and onion mixture. Add frozen okra to the middle. Cover and let steam for 5 minutes.
  4. Add can of diced tomatoes, beef bouillon, and cumin. Let simmer for about 5 minutes until warmed through. Season with salt and pepper and serve!
Notes
  1. I use my kitchen sheers to cut up the chicken! Makes it quicker and easier than a knife.
Pennywise Cook http://www.pennywisecook.com/

Like this post? SHARE it!

Related Posts Plugin for WordPress, Blogger...

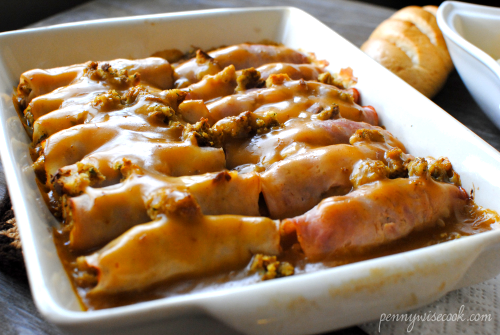
Turkey and Dressing Enchiladas

Turkey Dressing Enchilada 2

 When I think of Thanksgiving, the very first thought that comes to mind is FOOD. I think that’s what most people think of. I mean that’s what it was all about back in the day. The Pilgrims and the Indians shared a meal together to show their thanks for helping them to survive once they arrived in America. They gathered around FOOD. 

Food is almost always the centerpiece. Birthdays (cake), Christmas (cookies and Ham), showers (finger foods), potlucks (things covered in butter or cheese), etc. You get the idea. We are a culture that is built around enjoying our food.

As a mom now, I also see the other part of it. It’s also about the time that you put into it all. Blood, sweat, and turkey tears at Thanksgiving!

Luckily, I have a recipe for you today that might just present an alternative to the usual Thanksgiving all-day affair. It’s not your everyday, full-blown turkey extravaganza, but it’s pretty and would make a great meal if you’re having people over around the holidays. And if you’re not in the mood for spending hours in the kitchen on a normally very busy day, this might be right up your alley too!

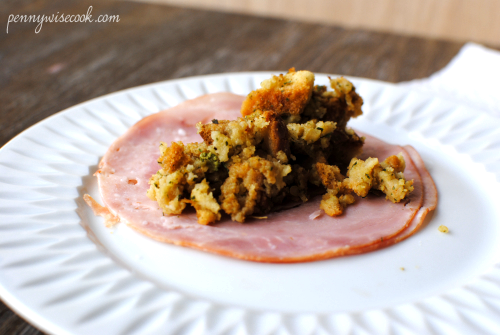
Dressing on Ham

Turkey and dressing go hand in hand. Why not snuggle them up close together? (For the record, this is actually a picture of ham and dressing) Prepare your dressing according to the package or recipe and then lay out sliced turkey (or ham). Plop your dressing right down in the middle. They’re going to warm up real nice together in the oven…

Ham Roll Up

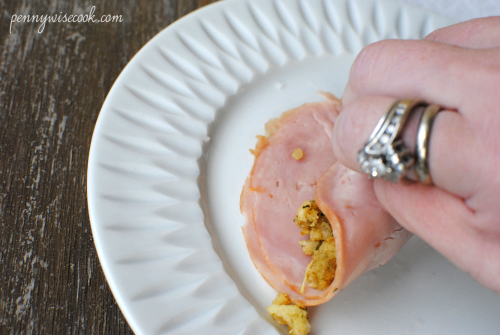
Rolling Up

It’s time to cuddle y’all! Tightly roll inward trying to keep that dressing from falling out the sides. If it falls out, just stuff that dressing right back into the sides.

Before Gravy

We had some leftover dressing, so I just sprinkled it all over the top. I have turkey on the left here and ham on the right. I normally make this with turkey, but I had a request from the hubs to try it with ham. 

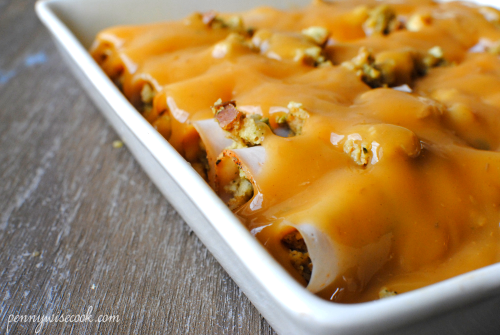
Pouring Gravy

Using your favorite turkey gravy (yes you can just make it too!), pour it ALL over the top of your rolls. Oh my goodness, this is when it gets sooooo tasty!

Pre Cooking

This is what it looks like right before you pop it into the oven. 

Turkey…

Dressing…

Gravy…

…all in one yummy delicious place.

Turkey Dressing Enchiladas

Turkey Dressing Enchilada 1

It’s a beautiful presentation and worthy of company. I make it for my family and every time I say I need to have somebody over so I can make this for them!

I haven’t tried yet, but I think it would be yummy to add in some cranberry sauce to a few. What gorgeous color that would add to the dish!

Make this yourself and let me know what you think!

Turkey and Dressing Enchiladas
A simple dish made with simple ingredients, but doesn't actually look like it was simple to make! Turkey and dressing make a special cuddle in the oven to create this tasty dish!
Write a review
Print
Ingredients
  1. 1 (6 oz) box dressing- Or make your own!
  2. 1 (12 oz) jar or can turkey gravy- Or make your own!
  3. 14-16 pieces of thick-sliced deli turkey
Instructions
  1. Preheat oven to 350°.
  2. Make dressing according to package (or recipe) directions. Let cool.
  3. Drop a large spoonful onto a slice of turkey. Roll inward tightly and place seam side down in a casserole dish. Repeat until all slices are stuffed and rolled.
  4. Pour gravy over all of the rolls evenly.
  5. Bake 25-30 minutes.
Notes
  1. I have made this with both think and thick turkey slices. If I am using thinner pieces, I double them up.
  2. We used ham with some of them this time around. It was a hit!
  3. Feel free to make your own dressing and gravy (especially if you already planning to do so), this is just a quicker way!
Adapted from The Four Ingredient Cookbook
Pennywise Cook http://www.pennywisecook.com/

Like this post? SHARE it!

Related Posts Plugin for WordPress, Blogger...

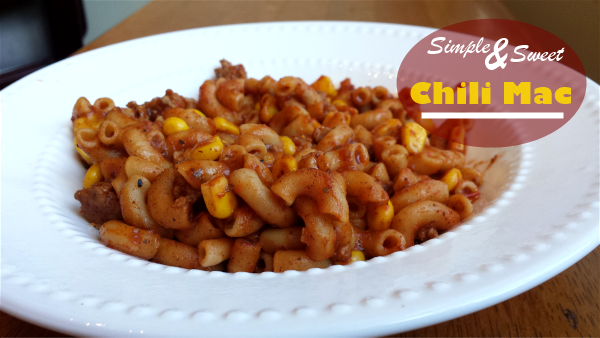
Simple & Sweet Chili Mac

Simple and Sweet Chili Mac


In our penny-wise minds, there are few dishes that scream frugal more than macaroni and cheese. Don’t you agree? Some nights there just isn’t enough energy or even time to give to a full-on, oven-baked, gourmet dinner. And some nights you just bust out a box of the mac.

It’s ok. I promise, I do it too.

And if you aren’t one of us closet macaroni makers, then you are way ahead of the game and I need you to teach me your ways!

tradish_logo_300x300

I’m a big fan of taking simple recipes and throwing in a little of this or a little of that to make them a little bit different. You can call me inventive if you’d like. One of my recent inventive meals was a little twist on Ragu’s Family Favorite Chili Mac. It honestly is already so yummy like it is, but a big favorite with my girls is corn sometimes in our chili so I thought why not add a little sweetness?

This entire recipe has only 5 ingredients and can be whipped up before you can say Bob’s your uncle.

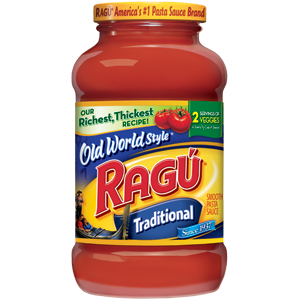
Ragu Old World Sauce

It’s really easy to use Ragu Old World Style Traditional Sauce to create the base for the mac. You simply season it to create whatever flavor you going for and in this case, it’s chili mac!

Each jar of Ragú® Old World Style® Traditional Sauce is made with 11 juicy tomatoes making it its richest,  thickest recipe. Ragú® has the Authentic Italian taste American family’s love and a variety of great tasting, quick and easy to make family favorite recipes.

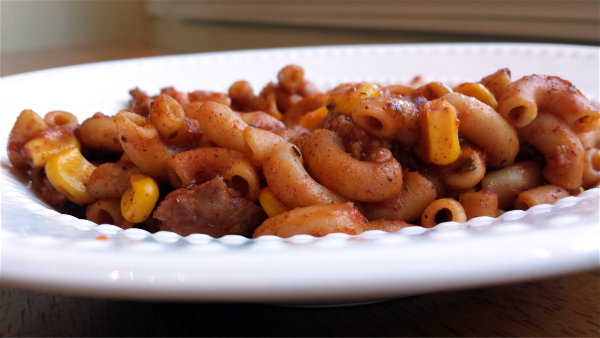
Chili Mac 1


And of course if you aren’t a huge fan of corn in your chili then you can leave that out. But I really like the sweetness that it adds to the kick of the chili powder!

You can visit Ragu’s facebook for additional quick, easy and delicious recipe ideas too. And be sure to enter the Ragú Better and Better Sweepstakes for a chance to win great Authentic Italian themed prizes and a grand prize trip to Venice for a family of four!

Simple & Sweet Chili Mac
Recipe Type: Main Dish, Pasta
Cuisine: American
Author: Adapted from Ragu’s Recipe
As easy as macaroni and cheese, this chili mac takes the cake!
Ingredients
  • 1 lb lean ground turkey or beef
  • 1 jar (1 lb 8 oz) Ragu Old World Style Pasta Sauce
  • 1 and 1/2 tbsp chili powder
  • 8 oz elbow macaroni, cooked and drained
  • 1 can (15 oz) whole kernel corn, drained
Instructions
  1. Cook ground meat in a large skillet over medium-high heat until browned.
  2. Stir in pasta sauce and chili powder. Bring to a boil over high heat. Reduce heat and simmer about 10 minutes.
  3. Stir in macaroni and can of corn and heat through.
  4. Serve with shredded cheese and sour cream, if desired!

Abbreviated Sweepstakes Rules: NO PURCHASE NECESSARY.  Legal residents of the 50 United States (D.C.) 18 years and older.  Ends 5/6/14.  To enter and for Official Rules, including odds, alternate method of entry, and prize descriptions, visit www.RaguSweeps.com.  Void where prohibited.

This is a sponsored post written by me on behalf of Ragu brought to you by Yummly. All of the opinions expressed are 100% my own.


Like this post? SHARE it!

Related Posts Plugin for WordPress, Blogger...

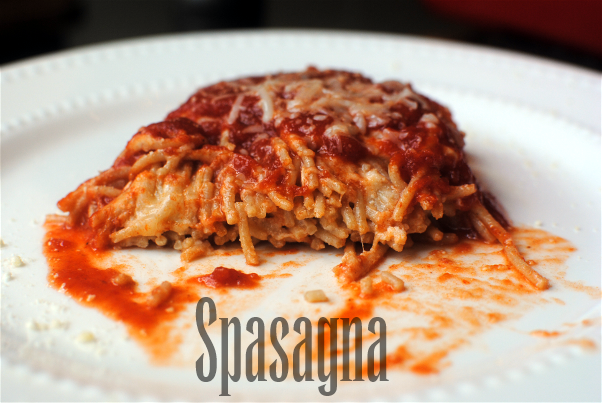
Easy Spasagna

Spasagna

 It’s been an awfully crazy last few months here in the Pennywise Cook household. You may have noticed by my lack of posts. I’ll catch you up soon.

In the meantime, I have managed to create a really tasty spin on an original Ragu recipe that I wanted to share with you guys. I made a few changes to this recipe for Ragu No Boiling Lasagna that was a huge hit at our house. At one of our favorite restaurants around here, they have this dish that is a mix of lasagna and spaghetti and it is absolutely to die for. It has something to do with the way the noodles are mixed with the cheesy goodness that makes it so amazing.

You know me. I like a challenge.

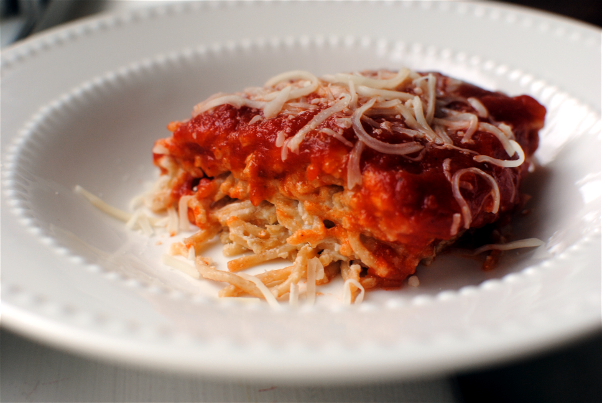
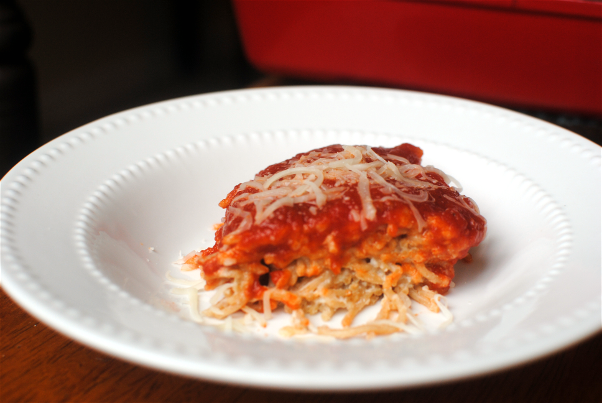
Spasagna


If we’re being honest here, and I’m not ashamed of honesty, I kinda made it up as I went. And you never know if things like this will actually be edible so it was a 50/50 situation. This one made it in our Hall of Fame for yummy dishes!

Side story: As I’m preparing to take pictures of this tasty dish (and trying my darnedest not to eat it),  there wasn’t enough light inside so I took my Spasagna outside on the balcony to take pictures. My 2 year-old comes outside and shoots a very inquisitive look my way. Then in a very puzzled tone says, “Momma, why are you taking pictures of macaroni?”. I died laughing!

You know you’re a food blogger when….your 2 year-old asks why you’re taking pictures of macaroni! I won’t even get into the conversation I had with her informing her it wasn’t macaroni, but “spasagna”. Talk about a really confused toddler.

Ragu Tra-dish

 Back to the recipe! This one is SUPER easy. It uses Ragu Old World Style Traditional Sauce so you know it has to be simple. I love that stuff. I used the meat flavored kind since I didn’t plan to add any meat. Each jar of Ragú® Old World Style® Traditional Sauce is made with 11 juicy tomatoes making it its richest,  thickest recipe. It’s affordable (especially with coupons, y’all!), tastes great, and makes any recipe a breeze. Ragú® has the Authentic Italian taste American family’s love and a variety of great tasting, quick and easy to make family favorite recipes.

Besides that, there are just 4 other ingredients in this recipe. And it isn’t very time consuming either. That’s a big thing for us these days. My girls have no patience and neither do I!

Spasgna

You can visit Ragu’s facebook for additional quick, easy and delicious recipe ideas too. And be sure to enter the Ragú Better and Better Sweepstakes for a chance to win great Authentic Italian themed prizes and a grand prize trip to Venice for a family of four!

Easy Spasagna
Recipe Type: Main Dish
Author: Pennywise Cook
Spaghetti never tastes so much like lasagna! This twist on a traditional lasagna is an easy go-to meal for the family.
Ingredients
  • 1 package whole wheat spaghetti noodles
  • 1 jar Ragu Old World style Pasta sauce
  • 1 15 oz Ricotta Cheese
  • 1 and 1/2 c mozzarella cheese
  • 2 eggs
Instructions
  1. Preheat oven to 375°.
  2. Prepare 1 package whole wheat spaghetti noodles according to package directions.Be sure to season the water with a little salt before dropping your pasta!
  3. Once cooked, let cook in strainer.
  4. Meanwhile, in a large bowl, combine tub of ricotta cheese, 2 eggs, and 1 cup mozzarella cheese.
  5. Mix cheese mixture with cooled noodles and flatten into a greased baking dish.
  6. Sprinkle with 1/2 c. mozzarella cheese. Bake 10 minutes.
  7. Remove from oven and pour entire jar of Ragu over noodles. Bake an additional 10 minutes.
  8. Cut into squares and serve!
Notes
You can use regular noodles, but I prefer whole wheat for added nutrition!

Abbreviated Sweepstakes Rules: NO PURCHASE NECESSARY.  Legal residents of the 50 United States (D.C.) 18 years and older.  Ends 5/6/14.  To enter and for Official Rules, including odds, alternate method of entry, and prize descriptions, visit www.RaguSweeps.com.  Void where prohibited.

This is a sponsored post written by me on behalf of Ragu brought to you by Yummly. All of the opinions expressed are 100% my own.


Like this post? SHARE it!

Related Posts Plugin for WordPress, Blogger...

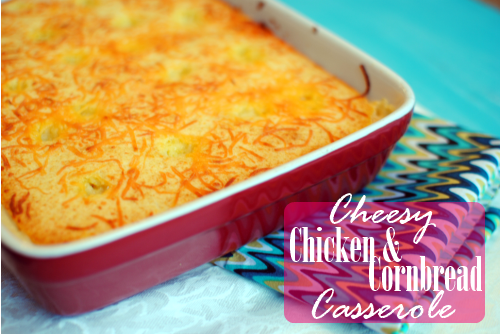
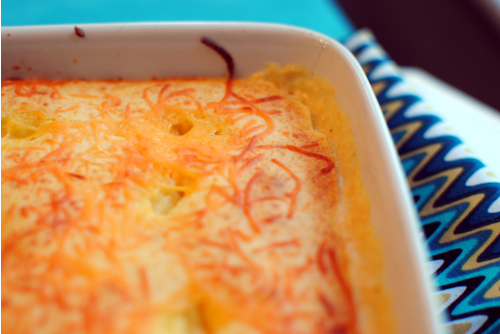
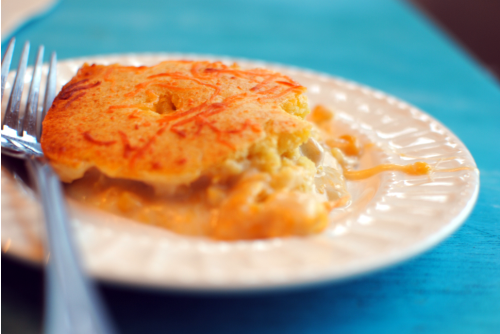
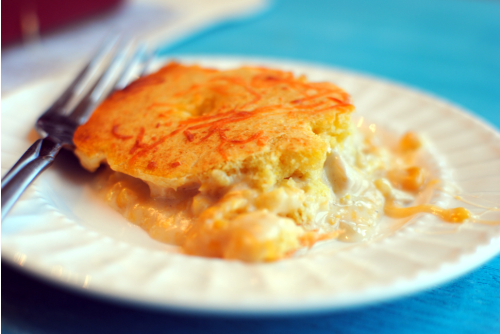
Cheesy Chicken and Cornbread Casserole


What is it about the word casserole? What exactly is a casserole? Let me consult The Google: a kind of stew or side dish that is cooked slowly in an oven. Though these days, almost anything can be considered a casserole. It doesn’t even matter the ingredients, does it?

Have some tomatoes and potatoes? Throw them in a dish, bake and you have a tomato potato casserole! I think that’s why I like casseroles so much. They are so forgiving. Well, most of them anyways. I’ve had my share of casserole failures… I just love that they are so simple and quick. Throw together what you have on-hand and bake at 350 degrees and you’ve got dinner. Casseroles were made for weeknights when momma has to grow a 3rd arm to get everything done. Who am I kidding? I grow my 3rd arm around 8am each day at breakfast…

Especially now that school has started, dinner isn’t always first thing on my mind. School doesn’t just mean the start of classes. It can also mean sports, extra-curriculars, homework, Bible study, and anything else that you can possible occupy lots of time with. My girls are still young so I’m not always a chicken with my head cut off, but I do have to say that 1st grade homework is no joke! It may not be hard, but keeping my 1st grader focused can be a chore.

Enough to build up an appetite…

For a casserole maybe?

I’ve always been a fan of those casseroles where you top it with a bread of some sort. We always used to make the chili with the cornbread on top when we were newlyweds. I’m going to be honest here and admit that it was from a box, but don’t judge. Who hasn’t made a gourmet dinner from a box while they were a newlywed? I’m also going to admit that I use boxed meals here at least once a week. You can’t have a 2 year-old and not make a little mac and cheese from a box. You just can’t. Well I can’t anyways.

Casseroles! Yes, casseroles. This one was a result of throwing together a lot of things that we really enjoy and doing everything that I could to avoid putting in those “cream of” soups”. It seems like every casserole contains that ingredient.

Not this one! I used fresh chicken, but if you have leftover rotisserie chicken or perhaps some grilled chicken, this would be an awesome way to use it up. Otherwise whatever kinda chicken you can find on sale will work. I’m all about cheap. Though I’m not sure that the canned stuff…

You can find a ton of ideas for casseroles over at Country Crock. Some interesting facts about Country Crock:

  • Have 0g trans fat per serving
  • Contain no partially hydrogenated oils (Yipee!)
  • Have no cholesterol
  • Are 70% less fat than butter per serving (WOW)
  • Have 30% fewer calories than butter per serving

Cheesy Chicken and Cornbread Casserole
Recipe Type: Main Dish, Chicken
Author: Pennywise Cook
Who doesn’t enjoy a simple and quick chicken casserole?
Ingredients
  • 3/4 lb Chicken Breast/Tenders, cut into bite-size pieces (about 3 breasts)
  • 1 tsp garlic, minced
  • 1 tsp dried onion
  • 1 tbsp olive oil
  • 1 10.5 oz can cream corn
  • 1 c. shredded cheddar cheese + 1/4. c for topping (if desired)
  • 1 c. sour cream
  • 1 tbsp butter, cut into small pieces for dotting the top (if desired)
  • cornbread mix created according to package
  • s & p to taste
Instructions
  1. Preheat oven to degree listed on cornbread mix. Spray a 9×13 dish with non-stick cooking spray.
  2. Heat olive oil in a skillet over medium high heat. Add in chicken, garlic, onion, and s&p. Cook until chicken is not longer pink.
  3. Meanwhile, in a large bowl, combine cream corn, 1 c. cheddar cheese and sour cream until well mixed. Add in chicken. (Now would be a great time to create your cornbread batter!)
  4. Pour mixture into 9×13 dish and spread evenly. Top with cornbread batter and spread evenly. Sprinkle with the other 1/4 c. cheddar cheese and dot with butter.
  5. Place in oven and cook the time listed on your cornbread mix.
  6. Remove from oven, let cool, and serve!
Notes

You are more than welcome to make your own cornbread for the top, just be sure to have the ingredients necessary when you start you casserole!

I used a slightly smaller dish than a 9×13 for mine. I can’t tell you what size because I honestly have no idea, but I think that a 9×13 will be similar. If not, then a square dish might work. I have yet to try this in a different size dish.


I was selected for this opportunity as a member of Clever Girls Collective and the content and opinions expressed here are all my own.


Like this post? SHARE it!

Related Posts Plugin for WordPress, Blogger...

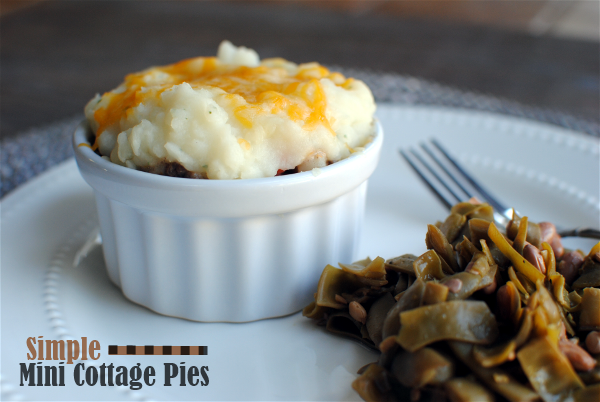
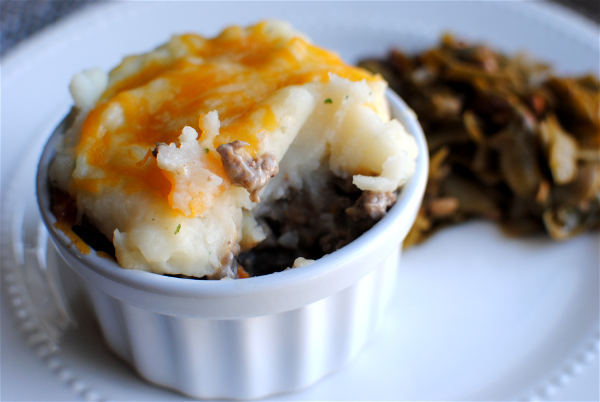
Simple Mini Cottage Pies

My husband and I went to England a few years ago. We indulged in all of the meals that you might associate with England like Fish ‘N Chips, Bangers and Mash, and of course Shepherd’s Pie. I think I was more excited to eat their food than I was to see the sites!

You may have heard of Shepherd’s Pie here in the US and have most likely eaten it before. It’s such an easy dish that almost anyone likes. But did you know that the term started out as Cottage Pie? Cottage Pie dates all the way back to 1791 when the potato was found to be an affordable option for poor folks to eat. They’d use whatever meat they had leftover and line the dish with mashed potatoes and then top it with them as well. Sound familiar? It wasn’t until 1877 that folks started calling it Shepherd’s Pie. (via Wikipedia) There are tons of variations on making this dish, but I wanted to share this easy one with you!

I’ve been making this for years. Probably not as often as I should, but when I do it’s a hit!

You guys know me and my healthification (technical word there) of my meals. In this one, I of course use ground turkey or extra lean ground beef, but I also wanted to work on portion control. When something is really good like Cottage Pie, you need a stopping point! Or at least I do…

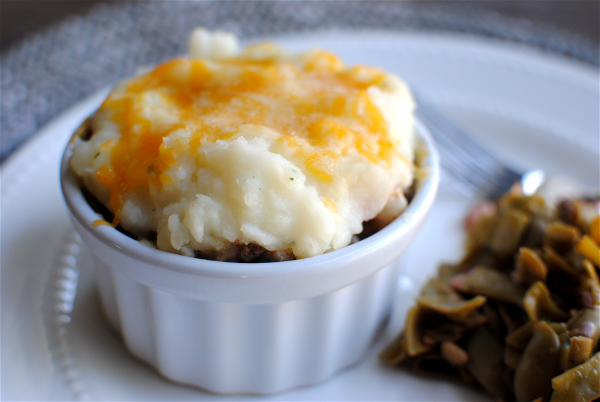
I busted out my little souffle dishes to make these and it was the perfect individual amount. As a side note, I just realized that I’ve never made a souffle before. Challenge ACCEPTED!

Anywho, if you need a really easy dinner idea this week you should definitely consider this meal. Here’s how to make them!

Simple Mini Cottage Pies
Recipe Type: Main Dish
Cuisine: Brittish
Author: Pennywise Cook
A simple way to change up your every day Shepherd’s Pie. Try these super simple Cottage Pies!
Ingredients
  • 1 lb Lean Ground Beef (or turkey)
  • 1 Medium Onion, Chopped
  • 1 can Mixed Vegetables (drained)
  • 1 can Cream of Mushroom Soup
  • 2 tsp Minced Garlic
  • 1/2 tsp Dried Oregano
  • 1 (4 serving) pkg Instant Mashed Potatoes cooked according to package
  • Salt and Pepper to Taste
  • 1/2 c. Shredded Cheddar Cheese
Instructions
  1. Preheat oven to 350°.
  2. In a skillet over medium-high heat, brown the ground beef with onion until onions are translucent. Drain. Add minced garlic and cook until it becomes fragrant.
  3. Add can of mixed veggies and can of cream of mushroom soup. Mix and cook until all is warmed through.
  4. Place equal amounts of meat mixture into 4 or 5 ramekins. Top with equal amounts of mashed potatoes.
  5. Sprinkle with cheese. Put ramekins on a baking sheet and place in the oven for 5-10 minutes or until cheese is melted. Serve!
Notes

You can add whatever kind of “cream of” soup that you’d like to these, but the mushroom version tastes wonderful. I think cream of celery would also make a good choice.
Depending on the size of your ramekins, you may need 5 of them.
And don’t feel obligated to use instant mashed potatoes. It’s a shortcut on busy nights for me, but when I have the time homemade tastes the best hands down!


Like this post? SHARE it!

Related Posts Plugin for WordPress, Blogger...

Cilantro Salsa Burgers

It’s summer time and there’s no stopping the men and their grills. Am I right? It’s a right of passage. And can we really complain? The chance to sit back and relax while watching someone else do all the cooking for once? I think I’ll take that deal.

During the summer we try to grill at least once a week. It’s nice for the whole family to get outside and enjoy summer nights playing together while daddy gets dinner ready. Memories are being made. Of course, grilling goes hand in hand with a very simple (yet taken seriously) dish, burgers. The oh-so-meaty, versatile, and flavorful burger. My husband would consider himself a connoisseur of burgers. And he has a right to. His most favorite food of all time and he’s eaten his way in burgers across the country.

One of the ingredients in most burger recipes is the binder, an egg. Have you ever used mayonnaise instead? It’s very tasty! A simple ingredient that can take your burger from boring to bam.

Hellmann’s is celebrating their 100th anniversary! Can you believe that they have been around that long? You know that a product is good when it’s been around for that many years and people still enjoy it today. As part of Hellman’s 100th celebration, they are helping to provide 1 MILLION meals to Feeding America to fight against hunger nationwide. They are also teaming up with celebrity chef Mario Batali (I’m a fan!) to showcase classic Hellmann’s recipes with a modern twist.

In fact, they have a contest going right now to give YOU a chance to win a trip to New York City with a seat at the World’s Longest Picnic Table celebrating Hellmann’s 100th anniversary. You simply have to make Mario’s twist on Hellmann’s classic recipes your own. The Create A Recipe With Mario facebook app has more details about the contest. These are simple and classic recipes, it would be a cinch to enter!

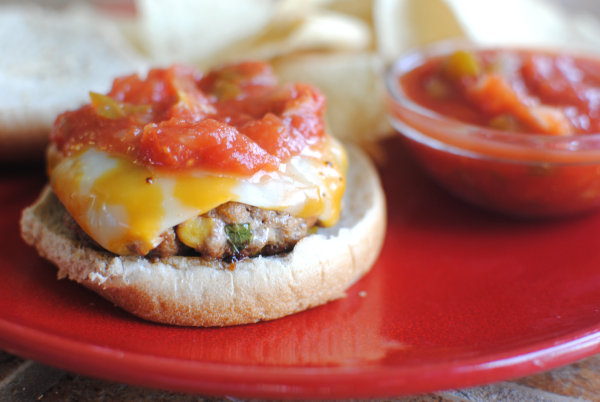
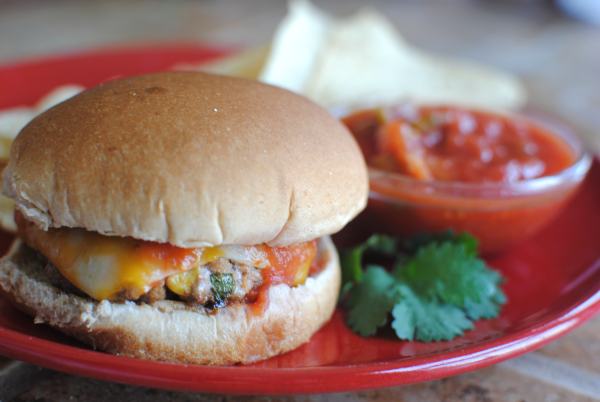
I was stoked to give it a try so I created these Cilantro Salsa Burgers.

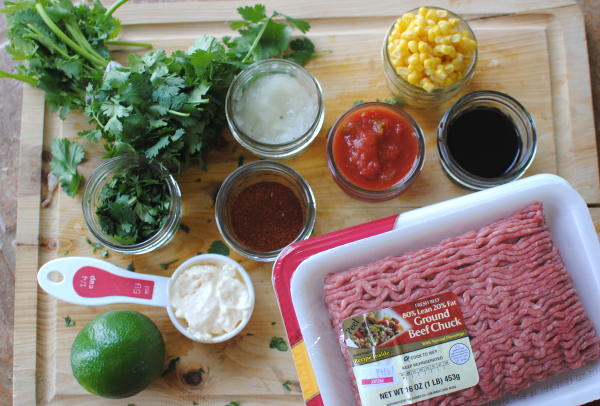
Theses are the ingredients. I have to admit that I’ve never considered putting salsa on my burger, but I love trying new things so I was all for it. The cilantro and lime really bring a new and spin on your every day burger. This is a refreshing burger to say the least!

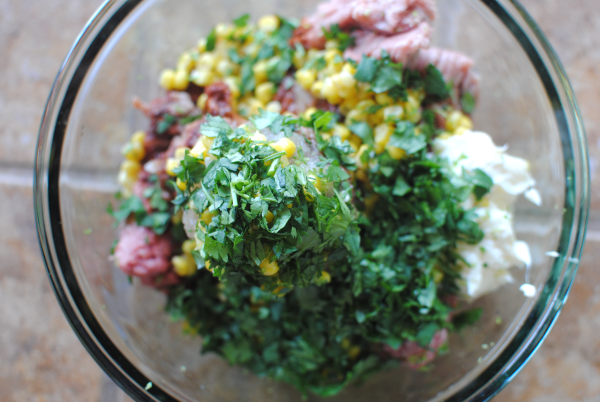
Getting your hands dirty is the best part! Or the worst, depending on who you are. I consider this fun and blissful. 🙂

Mario used ground chuck for his burger, but I used ground turkey to make them a tad bit more healthy.

Viola! Easy peazy lemon sqeezey. My husband gave his burger stamp of approval so you can be sure they are good. I hope that you’ll give these a try. And I also hope that you’ll enter Hellmann’s 100th Anniversary Contest to win the trip to New York City by creating your own twist.

Cilantro Salsa Burgers
Recipe Type: Burger, Main Dish
Cuisine: Grilling, Meat, American
Author: Pennywise Cook
A simple yet tasty burger recipe made with salsa, corn, and cilantro!
Ingredients
  • 1 lb Ground Chuck
  • 1 lb Lean Ground Turkey
  • 1/2 Onion, Peeled and Grated (makes for good juice)
  • 3 tbsp Worcestershire Sauce
  • 1/4 c Hellmann’s Mayonnaise
  • 1 tbsp Chili Powder
  • 1/4 c Cilantro, Chopped fine
  • 2/3 c Whole Kernel Corn
  • Zest of 1 Lime
  • Juice of 1 Lime
  • Salt and Pepper to Taste
  • 1 c Salsa (for topping burgers)
  • 8 Hamburger Buns
  • Sliced Cheese (optional)
Instructions
  1. Heat a skillet or grill to medium high heat.
  2. Combine all ingredients except for the salsa. Shape into patties.
  3. Grill to desired temperature.
  4. Top with 2 tbsp salsa each and serve!
Notes

For the corn, you can use canned if you like. Just make sure to drain it well. You could also use frozen, just be sure to thaw it. And of course, fresh will work too!

This is a sponsored post written by me on behalf of Hellmann’s and Yummly. All opinions expressed are 100% my own.


Like this post? SHARE it!

Related Posts Plugin for WordPress, Blogger...