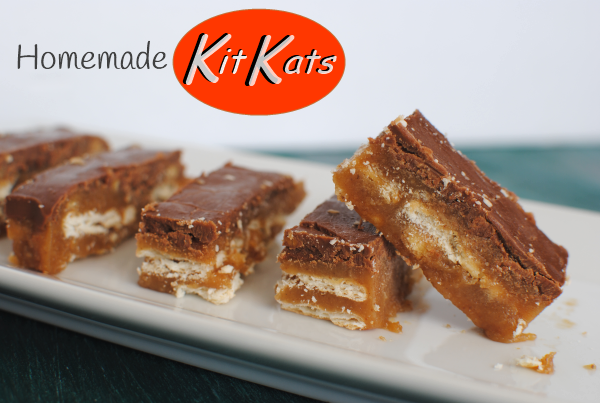
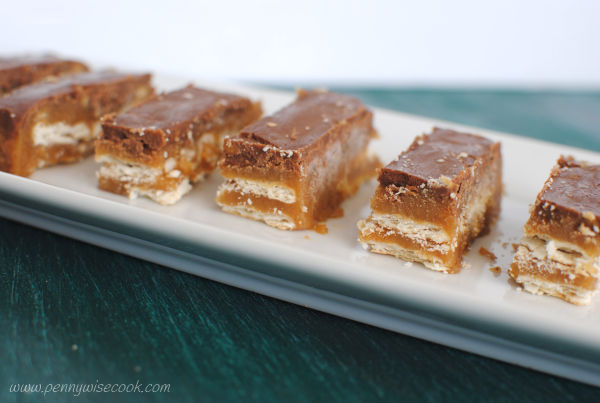
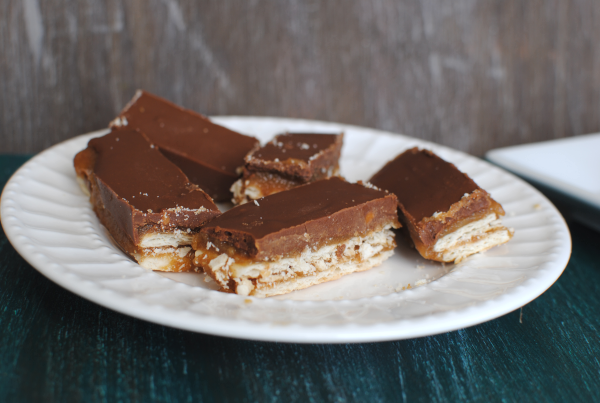
Homemade Kit Kat Bars

Warning: the following recipe could be detrimental to your diet.

Visiting with my husband’s parents every now and then, there’s a certain sweet treat that often pops up. His aunt Millie makes these treats and I can remember sneaking into the refrigerator multiple times to grab a bite of these ooey gooey and addicting morsels.

Here’s a FAQ to prepare you for what is to come if you make these:

Q- Are these good for a diet?
A- Absolutely not.

Q- Can you eat just one of them at a time?
A- Absolutely not.

Q- Will these last long in my house?
A- Absolutely not.

Q- What’s the best occasion to make them?
A- When you will be taking them far, far away from your house.

I hope that this information will be of some help when it comes time to make these Homemade Kit Kat bars. You are going to need to be armed with willpower and a big glass of milk when you do.

I’m not really sure why I was thinking of these the other day, but I asked Millie for the recipe so that I could make some up. I decided to make them for the 4th of July get together in hopes of getting other people to eat them instead of me. No luck, I couldn’t keep my hands off of them. They are SO good.

And I had no idea how yummy the filling was when it was warm until I had it bubbling on my stove. I kept taking the crackers and dipping them directly into the filling. Hubby wasn’t too excited when he went to do the same and I had basically licked the pot clean.

What can I say? It’s the least I deserve when slaving over a warm stove making Kit Kats, right?

You have free reign to create these bars as little or as BIG as you please. Be cautious and enjoy!

Homemade Kit Kat Bars
Recipe Type: Dessert, Snack
Author: Hubby’s Aunt Millie
Create yummy and addicting Kit Kat bars at home!
Ingredients
  • Club Crackers (Less than a box, About 75 Crackers)
  • 1 C. Butter
  • 2 C. Graham Cracker Crumbs
  • 1 C. Firmly Packed Brown Sugar
  • 1/2 C. Whole Milk
  • 1/3 C. Sugar
  • 2/3 C. Creamy Peanut Butter
  • 1/2 C. Semisweet Chocolate Chips
  • 1/2 C. Butterscotch Chips
Instructions
  1. Line an ungreased 9×13 pan with wax paper. Lay a flat layer of Club Crackers along the bottom cutting them to fit if necessary. Set aside.
  2. In a large saucepan, melt butter. Add in the cracker crumbs, brown sugar, milk & sugar. Bring to boil and cook for 5 minutes stirring constantly. Remove from heat.
  3. Pour half butter mixture evenly over crackers. Place another single layer of crackers flat over butter mixture, cutting to fit if necessary. Pour the remaining butter mixture evenly over crackers.
  4. In a small saucepan, combine peanut butter, chocolate chips and butterscotch chips. Melt over medium-low heat, stirring constantly. Spread evenly over top of crackers.
  5. Cover and chill for at least an hour. Cut into bars.
Notes

To make these a bit healthier, I used reduced-fat club crackers, light butter, and part splenda in place of the sugar.

To speed up the chill time, you can also place them in the freezer instead. I prefer to keep them there so they stay nice and hard.


Like this post? SHARE it!

Related Posts Plugin for WordPress, Blogger...

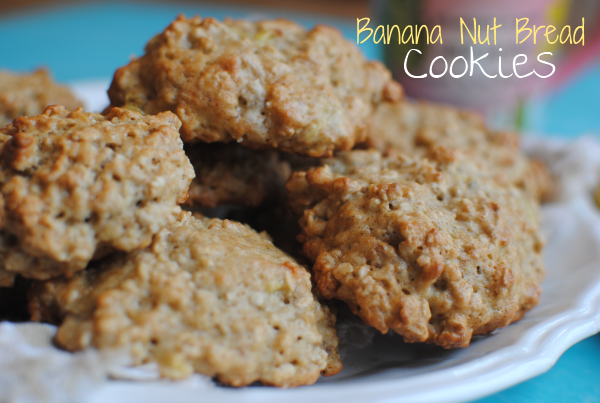
Banana Nut Bread Cookies

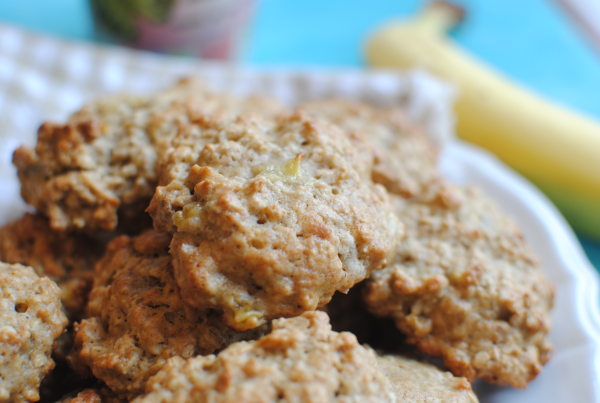
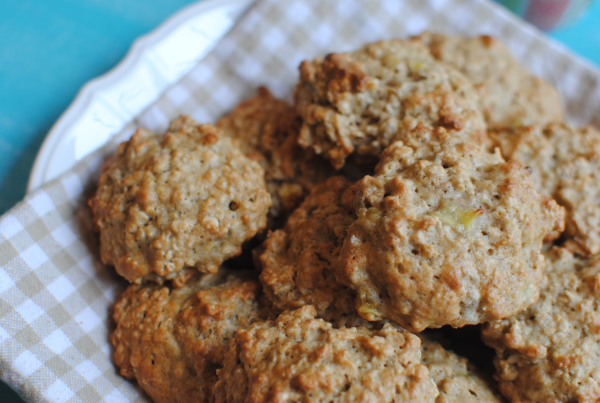
So I completely understand if you look at the title of this recipe and think, what in the world? How can a recipe be both bread and cookies at the same time? Well it’s simple really. You take the best flavors and tastes from a popular bread and bake it into a cookie leaving the cookie every so slightly bread-ish, but in bite-size form. It’s a tremendous feat. Creating the impossible.

You can be a kitchen super-hero just by making these cookies!

No really, your kids will love them. And hubby too. Mine won’t get out of the kitchen eating them. But I’m not going to scold him for it because I can’t get away from them either. I think I’ve already eaten about 6 myself.

I got this recipe from this eCookbook at Amazon called Keep the Cookie Jar Full, but I made some changes to it to accommodate what I had on hand. These turned out fantastic!

Just the right mixture of bananas, oats, and walnuts make these ultra soft and mimic the flavors of banana nut bread perfectly. Great idea for bringing along to a get together!

I can’t believe that tomorrow is July 4th already. I feel like I’m still waiting on Easter or something. Sheesh I’m behind! I’m just praying that all of these fireworks don’t set off fires all over town. Scary stuff with how dry it’s been.

I digress….

Try these cookies! You won’t be sorry.

Banana Nut Bread Cookies
Recipe Type: Dessert, Cookies
Author: Homemade Cookie Recipes eCookbook on Amazon
As tasty as a fresh loaf of banana nut bread, these cookies are the perfect alternative.
Ingredients
  • 1 and 1/2 c. All-Purpose Flour
  • 1/2 Tsp Baking Soda
  • 1 c. Sugar
  • 1/8 Tsp Nutmeg
  • 1/2 Tsp Cinnamon
  • 3/4 c. Butter
  • 1 Egg, Beaten
  • 1 Tsp Salt
  • 2 Very Ripe Bananas, Mashed
  • 1 and 3/4 c. Oats
  • 1/2 c. Chopped Walnuts
Instructions
  1. Preheat the oven to 400 degrees.
  2. In a large bowl, sift together the flour, baking soda, sugar, nutmeg, salt, and cinnamon. Add in the butter and combine until most of the lumps are gone.
  3. Add the egg and bananas and combine well. Fold in the oats and walnuts and mix well.
  4. Drop dough by the teaspoonful on an ungreased cookie sheet. About 2 inches apart.
  5. Bake for 10-12 minutes or until the edges start to brown.
  6. When done, immediately remove from pan and place on wire rack to cool.

Like this post? SHARE it!

Related Posts Plugin for WordPress, Blogger...

How to Make Old-Fashioned Caramels

Let’s go back to a simpler time shall we? How about way back 80 years ago when things were cheaper. For instance, a new house would cost you only around $7000.  Gas was about a dime per gallon and 1 lb steak was only about $.20.

If we only had a time machine…

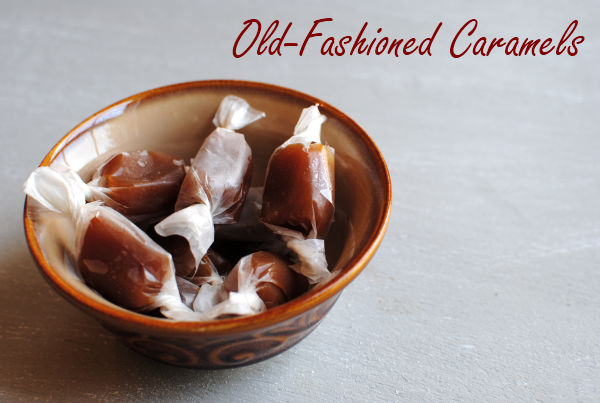
Luckily there are some things that can “transport” us back to that time with music, food, and relic furniture. One of which is my personal favorite, food. Popular in the 1930’s and a treat still on store shelves today are old-fashioned caramels. I think that it’s almost impossible to dislike smooth and rich caramel isn’t it? I guess I should never say never because I have some pretty picky eaters in my family, but I can assure you they really loved these caramels.

I’ve never really been one to make candy that often. A little peanut brittle or chocolate bark here and there, but nothing extremely involved.

And I have a confession- I have never used a candy thermometer in my life. Most recipes will say this is extremely important but I’ve always been able to get by without one.

So I found this really simple Old-fashioned Caramels recipe in my Pillsbury Cookbook and it looked so simple and tasty that I had to make some up.

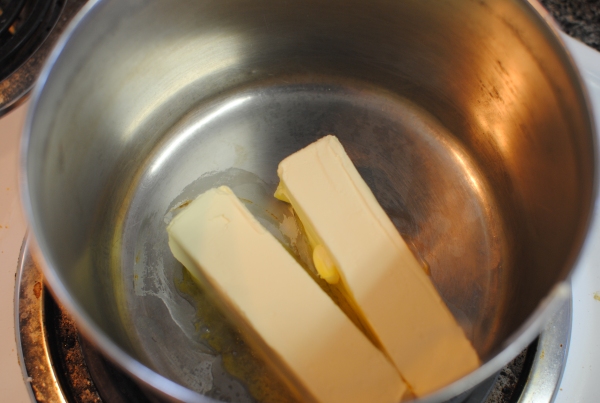
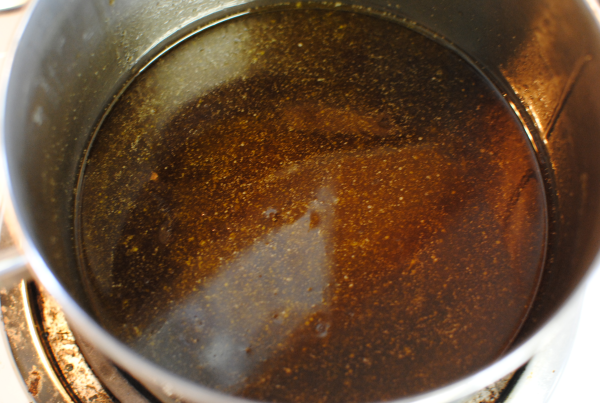
It starts with melted butter.  You know this is going somewhere good when it involves that much butter. But just for the record, I use light butter.

Then you stir in the brown sugar and corn syrup until completely dissolved.

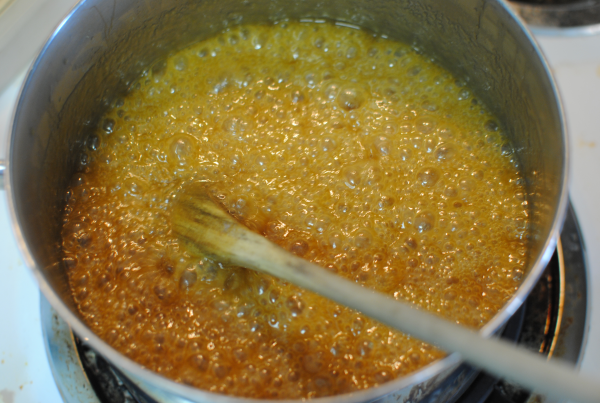
Lookie there, it’s already looking like caramel! The next step is to remove it from heat and add in sweetened condensed milk. Then we get it nice and bubbly for about 25 minutes stirring constantly so it doesn’t burn.  Now is the time when a candy thermometer should be used, so if you’re prepared and have one, use it.

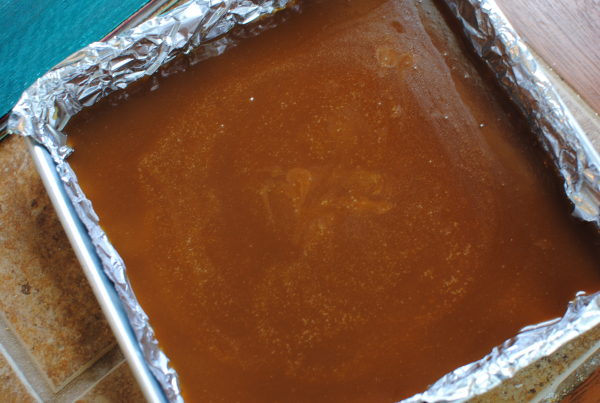
Then it’s all a matter of pouring it into a 8×8 pan and letting it harden.

Note- I do NOT recommend using foil to line your pan unless you have very hefty foil. It was a nightmare getting it off the caramel once set. Also be sure to keep your caramel in the refrigerator until ready to eat so that it stays nice and firm.

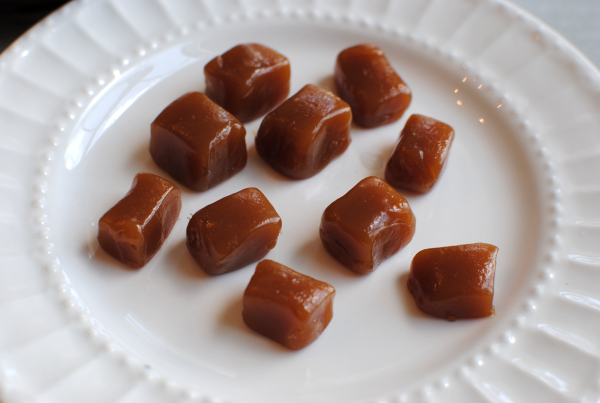
Once set, you can cut it into small squares and wrap it in squares of wax paper for easy eating and sharing. It’s oh so yummy! Even my hubby who is a strict chocolate lover loved this caramel.

How to Make Old-Fashioned Caramels
Recipe Type: Dessert, Treat, Candy
Author: Pillsbury
With just 5 ingredients you can create a time machine back to a simpler yet sweet time.
Ingredients
  • 1 cup butter
  • 2 1/4 cups firmly packed brown sugar
  • 1cup light corn syrup
  • 1(14-oz.) can sweetened condensed milk (not evaporated)
  • 1 1/2 teaspoons vanilla
Instructions
  1. Lightly grease a square baking dish.
  2. In a medium saucepan, melt 2 sticks butter. Add in brown sugar and mix well. Then add in corn syrup. Stir until sugar is dissolved.
  3. Remove from heat and add sweetened condensed milk.
  4. Heat over medium heat for 20- 30 minutes until it reaches 244 degrees.
  5. Remove from heat and add vanilla.
  6. Pour mixture into greased pan and let sit until firm.
  7. Wrap in wax paper and store in refrigerator.
Notes

This is not a diet dish by any means. Eat at your own risk!

Happy Pennywise Cooking!


Like this post? SHARE it!

Related Posts Plugin for WordPress, Blogger...

English Muffin Batter Bread


It is FRIDAY folks! Excuse me while I stop to do the It’s Friday and It Makes Me Wanna Dance dance. ::dances a jig:: There, that’s better. Now we can better reflect on our plans for the weekend.

Let’s see what’s on the agenda for this weekend….clean out the garage, place dirt in raised garden beds, create lightbox for ceiling light in kitchen. Better yet, let’s not reflect on plans for the weekend. Mine isn’t actually looking all that exciting after all. If I can get all of that accomplished, however I will be ecstatic! Got any special plans yourself?

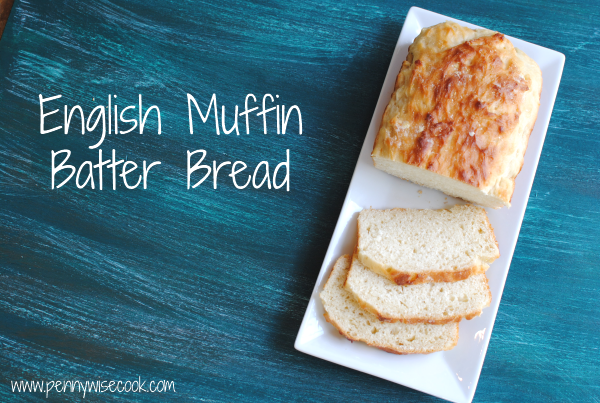
You may just want to bake up a batch of this bread at some point. It’s a fairly easy recipe with common ingredients and creates a rich loaf of English Muffin type bread.

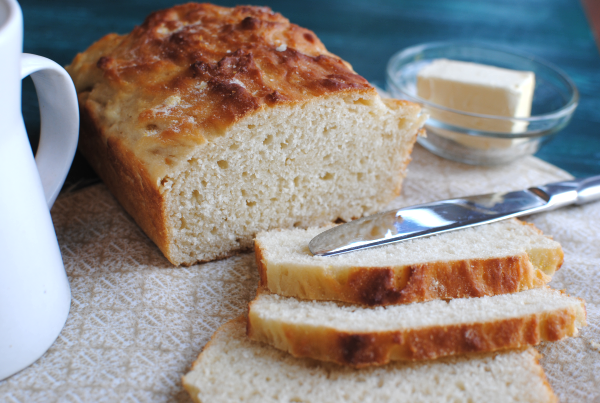
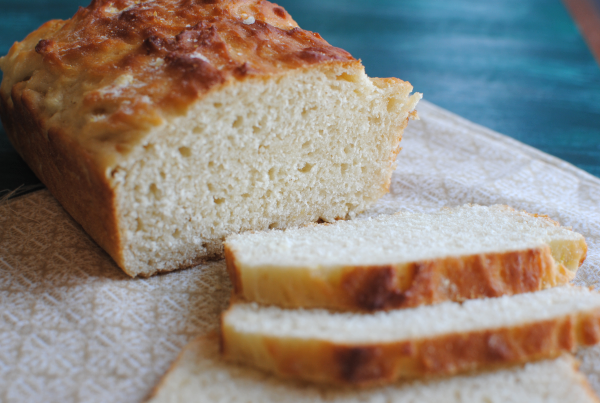
While you’d expect this bread to be just like an English muffin, I found that it was quite the contrary. In fact, I’m not really even sure why it’s called “English Muffin Bread” to be honest. What I can tell you, is that it tastes incredibly buttery and yet it doesn’t contain an ounce of butter! I kept saying that the entire time I was eating the entire loaf it. You may have heard me talk about how divine it smelled while in the oven over at the Pennywise Cook facebook community!

This recipe makes 2 whole loaves. The first loaf was gone the first day. We were cutting pretty pieces like pictured above and properly eating them one after the other, then somehow things changed when we got to the second loaf. Instead of neat as a pin slices, we were just diving in for big chunks of it at a time. It’s yumminess somehow sent us into a much more primitive method of serving.

By primitive method I mean lazy. And by serving I mean stuffing our faces. Apparently we have no shame when it comes to good bread.

So how about it. Need a new bread recipe that tastes like butter and is so yummy you’ll eat it in chunks? Find it below.

Recipe from The Pillsbury Cookbook.

English Muffin Batter Bread
Recipe Type: Bread
Author: The Pillsbury Cookbook
Serves: 24
Easy yet rich English Muffin Batter Bread.
Ingredients
  • Cornmeal for dusting
  • 4- 4 and 1/2 All-Purpose Flour
  • 1/4 c. Sugar
  • 2 Teaspoons Salt
  • 2 Pkg Active Dry Yeast
  • 1 and 1/4 c. Water
  • 1/2 c. Oil
  • 2 Eggs
Instructions
  1. Grease two 8×4 loaf pans and dust with cornmeal.
  2. In a large bowl, combine 1 and 1/2 c flour, sugar, salt and yeast.
  3. In a small saucepan , heat the water and oil until very warm (120 degrees or so). Add the warm liquid to the dry mixture and blend at low speed until moistened. Then beat 2 minutes on medium speed.
  4. By hand, stir in 3 cups flour to create dough ball. Cover dough loosely with plastic wrap and let rise in warm place until doubled in size, around 50 minutes.
  5. Stir the batter vigorously for 30 seconds the spoon into loaf pans. Cover and let rise for another 40 minutes or so until dough doubles in size.
  6. Meanwhile preheat oven to 375 degrees. Bake 20-30 minutes until all loaves sound hollow when tapped.
  7. Remove pans immediately and cool on wire racks.
Notes

A great place to let this dough rise is in your oven with just the oven light on. Or if your oven light is out, place the dough next to a bowl of hot water in your oven.


Like this post? SHARE it!

Related Posts Plugin for WordPress, Blogger...

Fluffy Lemon Blueberry Cheesecake

How was your weekend? After finally getting over a horrible sickness that suddenly struck early in the week, it finally subsided just in time for the weekend. And of course, while you lay in the bed for days, what is there to do? Twiddle your thumbs? Do a crossword puzzle? Check everyone on earth’s facebook status? Yes, I did all of those things. But eventually, you’ll find the back of your eyelids. Or you’ll find your ceiling fan, like I did.

And I thought, man I don’t like that ceiling fan.

And so I began a ceiling fan makeover plan, which I intended to carry out over the weekend assuming that I was feeling better. And we did! I can’t wait to show it to you. Makes buying a new fan look silly.

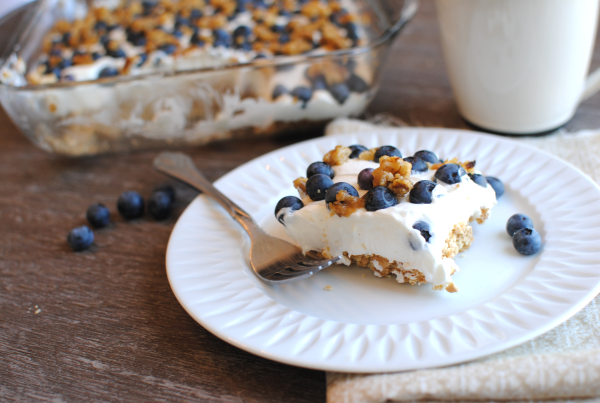
Now, onto BLUEBERRIES! Oh and fragrant, citrusy lemon. All apart of this heavenly fluffy cheesecake.

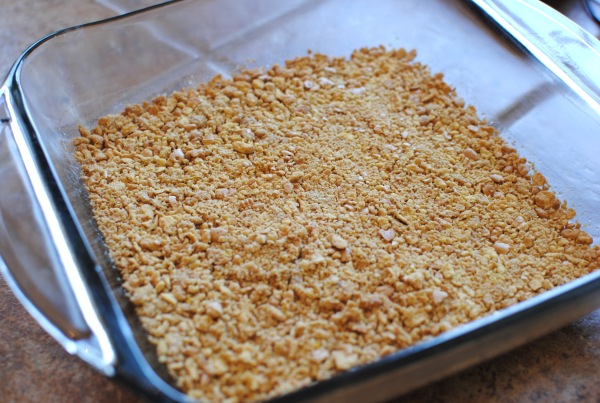
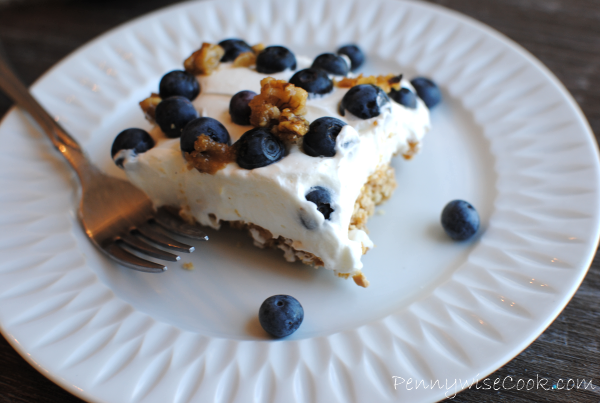
Animal crackers. Yes, animal crackers are what the crust is made out of. It’s a take on your everyday graham cracker crust, only this is a bit healthier and you’ll have a bag of animal crackers leftover in the pantry for later. What could be bad about that?

Our trip to Mississippi a couple weeks ago was so nice. My husband’s parents and grandparents have a huge garden full of heavenly veggies. They also have a row of blueberry bushes that were just brimming with the most lucious and plump blueberries just begging to be picked! And so we did. Lots of them.

My youngest has recently discovered them. While I don’t always like to change her diapers after she’s eaten a handful of blueberries, I can’t deprive her of their yumminess, can I?

These are the animal crackers. Crushed and mixed with some warm butter and a surprise zing of lemon zest. Although, you know something? I’ve always noticed a slight lemony taste in animal crackers myself. I think the lemon zest pairs well with them.

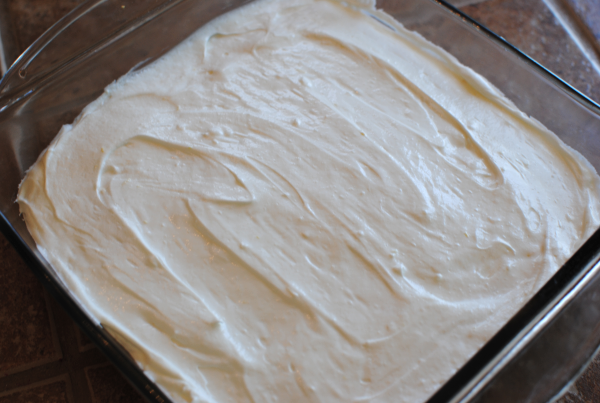
This is the fluffy part of the cheesecake. And man is it fluffy. If you’re looking for a dense kinda cheesecake, then this one isn’t for you. This is one of my grandma’s recipes for no bake cheesecake and it is like a heavenly cheesecake cloud. I absolutely adore this cheesecake and how easy it is. Even if you don’t make the lemon blueberry version of this, I highly encourage you to try just the cheesecake part.

Psssst. It’s actually lower in calories too which makes it all the more worth diving into.

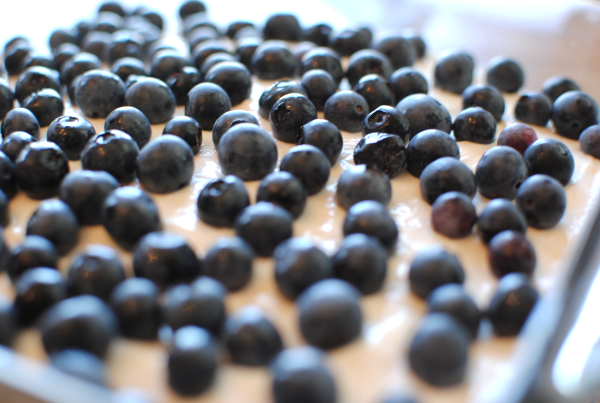
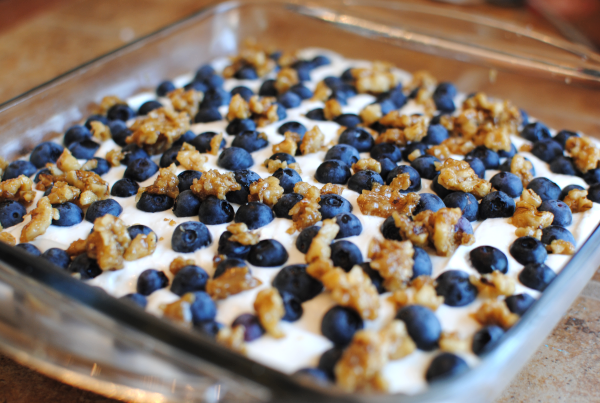
Now it’s time for the big, juicy, plum blueberries in all their purple glory. I swear, they don’t need any help looking beautiful do they?

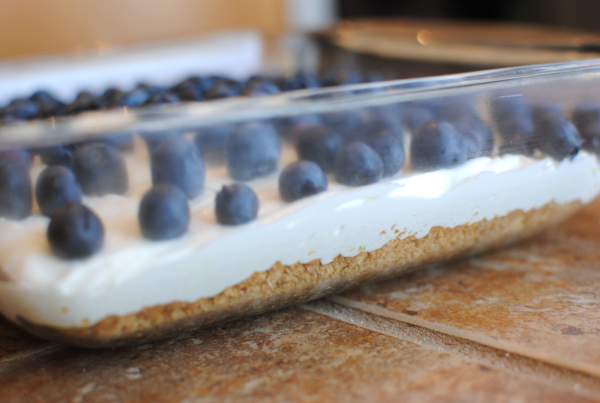
Here’s a little side boob, ahem, blueb-erry shot for you! You’d think it’s done, but it’s not! Getting there….

It’s not complete without the crunchy walnut streusal topping. Adds a little sweetness and crunch to this loveliness.

Happy Pennywise Cooking!

Fluffy Lemon Blueberry Cheesecake

Fluffy Lemon Blueberry Cheesecake

Blueberries top this fluffy and creamy cheesecake with a very subtle lemon flavor.

Ingredients

    For the Crust
  • 1 and 1/2 c. Animal Crackers, Crushed Finely
  • 2 Tbsp Sugar (or substitute)
  • 3 Tbsp Butter, Melted
  • 1 Tsp Lemon Zest
  • For the Filling
  • 1 (8 oz) Package Cream Cheese, Softened
  • 1/2 c. Sugar
  • 2 c. Cool Whip
  • 1 Tsp Lemon Zest
  • For the Topping
  • 1 c. Fresh Blueberries
  • 1/4 c. Walnuts, Chopped
  • 2 Tbsp Brown Sugar (I used Splenda Brown Sugar)
  • 1 Tsp Butter, Melted

Method

  1. Preheat oven to 350 degrees. Mix crushed animal crackers, sugar, butter, and lemon zest together and flatten into a greased 8x8 baking dish, Bake for 10 minutes. Take out and place in refrigerator.
  2. For the filling- Cream together the cream cheese, sugar, and lemon zest. Fold in the cool whip until combined. Take cooled crust out of the refrigerator and spread the filling onto the top.
  3. For the topping- Sprinkle blueberries evenly across the top of filling. Carefully, use a spoon to push them down a bit into the cheesecake. In a small bowl mix the walnut and brown sugar together, then pour in the melted butter. Mix well, then sprinkle the streusal across the top of the cheesecake.
  4. Place in refrigerator for at least an hour before serving.

Notes

The longer this sits in the fridge, the easier it will be to cut!

Not a lemon fan? Don't worry, the lemon taste is very subtle.

http://www.pennywisecook.com/fluffy-lemon-blueberry-cheesecake/


Like this post? SHARE it!

Related Posts Plugin for WordPress, Blogger...

How to Make Royal Icing Cookies

Silly me, I posted this accidentally the other day with no content inside. I’m sure that some of you were wondering about that. You’ll have to forgive me, I have a very frantic brain!

My girls both have their birthdays in May. It’s great for getting them out of the way in just one month out of the year, but I think eventually they will wish they were born in different months. You know how siblings can be.

This year I was extremely excited to make up these super cute royal icing cookies for Addie’s birthday party. I’ve made all kinds of cookies before, but never ones that are topped with royal icing. I thought for sure that the process would be difficult and that mine would end up ugly. I must admit that I can’t draw. Therefore, anything that requires free-handing just doesn’t look good coming from these fingers. Much to my surprise, royal icing was a cinch to work with and my cookies came out fantastic!

Believe me, if I can make these pretty, you can too!

It starts with your favorite sugar cookie recipe. I scoured the web to find one that would roll out well and hold  up to all the work I was going to put them through. I eventually found one that worked like a charm. Don’t worry, the recipe is below. And of course, if you have a tried and true family sugar cookie recipe, but all means use it!

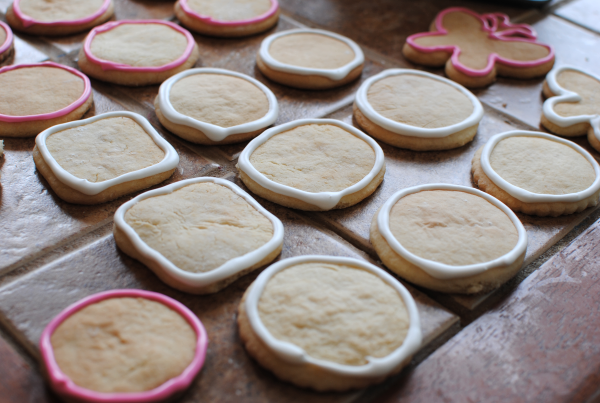
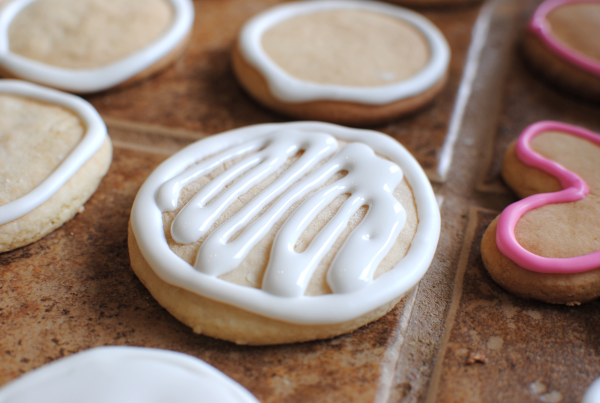
Once you make up your royal icing (it takes no time at all), the best way to start is by outlining the cookies with a line of royal icing. This kinda creates a barrier that will eventually hold in your “flood” of royal icing. It doesn’t have to be perfect!

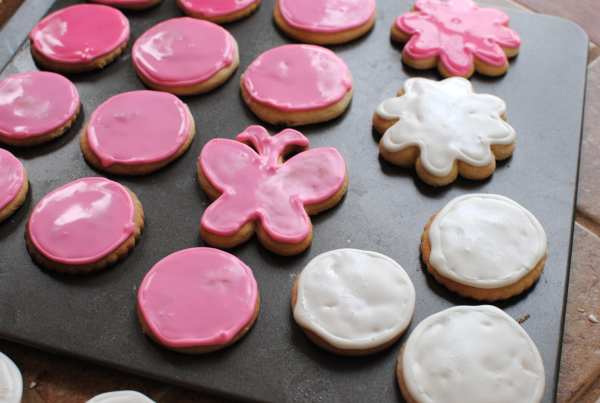
The next step happens once the outlining is dry. I found that since it wasn’t much icing that by the time I was done outlining, the very first cookies were already dry and ready to flood. By making the icing almost a liquid, you simple drop about a teaspoon or so (depending on the size of your cookies) of the royal icing into the middle of each cookie and then use a toothpick to spread it evening over the entire cookie, getting all of the nooks and crannies. Though this is a little tedious, I find it fun.

So after you have “flooded” your cookies with royal icing, they will look like this. Kinda wet to begin and then as they dry you’ll notice they harden and have a matte finish. That means it’s time to decorate them!

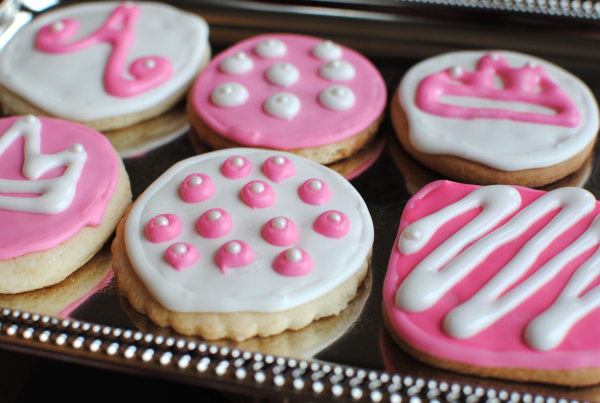
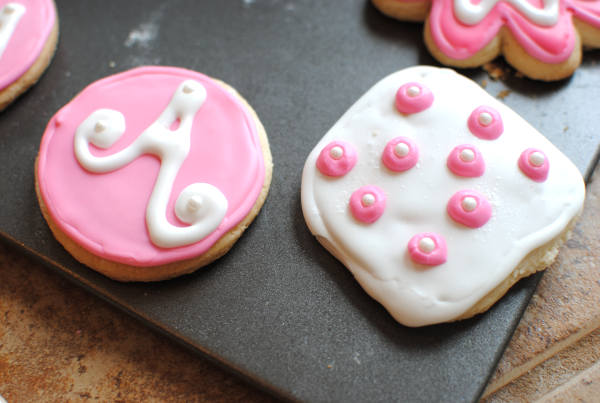
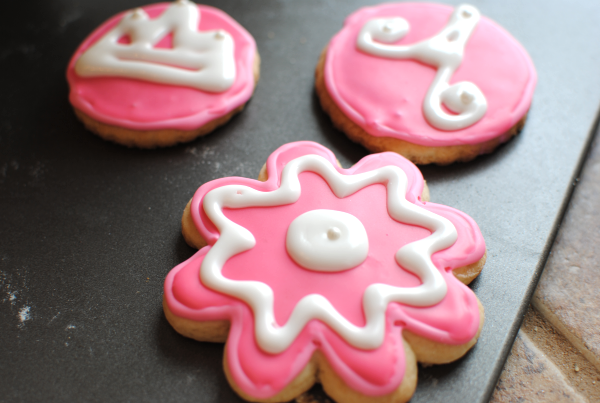
Add whatever decorations that you want. I used more royal icing and some sugar pearls to adorn Princess Addie’s cookies. I monogrammed some of them too. I think that’s a nice touch if you’re making them for a birthday or anniversary.

Ready for the recipes to make royally iced cookies?

Royal Icing Recipe courtesy of Brown Eyed Baker. Sugar Cookie Recipe courtesy of Spark People.

Royal Icing Cookies

Royal Icing Cookies

Perfect iced cookies are easier to make than you think!

Ingredients

    For the Cookies
  • 1 1/2 cups - granulated sugar
  • 2/3 cup - butter
  • 2 whole eggs
  • 2 Tbsp - 2% milk
  • 1 tsp. - vanilla extract
  • 3 1/4 cups - white flour
  • 2 1/2 tsp - baking powder
  • 1/2 tsp - salt
  • For the Royal Icing
  • 4 cups powdered sugar
  • 2 tablespoons meringue powder (or powdered egg whites)
  • 6 tablespoons water
  • Toothpicks
  • It is recommended that you have pastry or icing bags along with a decorating tip for outlining and decorating the cookies. It's possible that a heavy duty ziploc bag will work if you do not have the other. But I highly suggest using pastry bags and decorator tip.

Method

    To Make the Cookies
  1. In a large bowl, cream the butter and sugar. add in the extract, eggs, and milk until blended.
  2. In a medium bowl, whisk together all of the dry ingredients. Add the wet ingredients to the dry and mix with a mixer until well combined.
  3. With your hands, shape the dough into a ball. Wrap the dough ball in plastic wrap and refrigerate for 2-3 hours. (This will make it easier to roll out)
  4. Preheat oven to 400 degrees.
  5. Lightly grease your cookie sheets. Roll out half or 1/3 of the dough at a time while the rest is in the refrigerator.
  6. Flour cookie cutters and cut out your shapes.Re-roll out your trimmings and shape them too. Place the cookies 1/2 inch apart on cookie sheet. Bake for 8 min or until light brown.
  7. LET COOL COMPLETELY.
  8. For the Royal Icing
  9. Mix all ingredients on low speed for 7-10 minutes or until it loses it's shine. Add water by the teaspoon if becomes too stiff.
  10. Divide the icing into bowls for however many colors you plan to have. Add the food coloring and mix well. Place a damp paper towel over the top while not using it so it doesn't dry out.
  11. To outline the cookies, use the same color that you plan to flood the cookie with to outline. Create an outline of the entire cookie with one line of icing. Allow all cookies to dry before moving onto the next step.
  12. To flood the cookies, start by adding drops at a time to the color icing that you wish to flood your cookie with. You will want it to be pretty liquidy. If you lift your spoon up and it drizzles back into the bowl and disappears quickly, you have the right consistency. Using a squeeze bottle or spoon, place a little royal icing on your cookie. Use a toothpick to evenly distribute the icing to the entire cookies. Be careful to not make it too thick.
  13. Let all of the cookies dry COMPLETELY before you begin to finish their decorations.

Notes

For the cookies, the thinner that you roll the cookies, the firmer and crispier they will be. If you leave them fairly thick, they will be softer and chewier.

This recipe makes about 72 cookies depending on the size of your cookie cutter. I made fairly large ones and I'd say I had about 30 or so.

http://www.pennywisecook.com/royal-icing-cookies/


Like this post? SHARE it!

Related Posts Plugin for WordPress, Blogger...

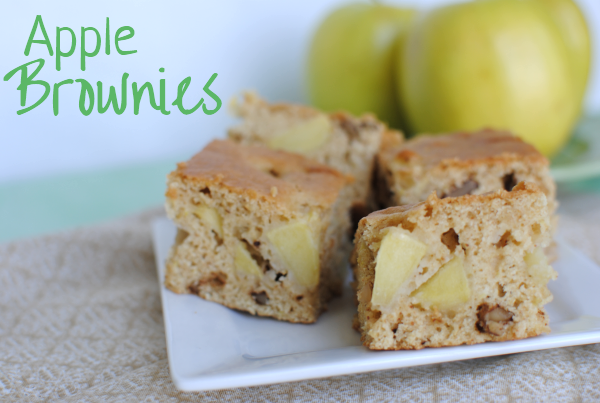
Apple Brownies

I recently pinned a seasonal veggies and fruits chart on pinterest. This was solely because I honestly am not good about keeping up with what is abundant in what season. I know a lot of the more obvious things are easy to remember but some things have always seemed to be readily available at any time. Albeit, they get crazy expensive in the off season. So I do try to stick with what’s cheap at the time because I’d rather cut off my leg than pay $2 per pound for yellow squash.

Which by the way I’m growing yellow squash in my backyard. Well, I take that back- shall I say, I’m killing yellow squash in my backyard. I’ve also killed an assortment of herbs which is actually quite sad because i was so excited about those!

We’re working on their recovery…

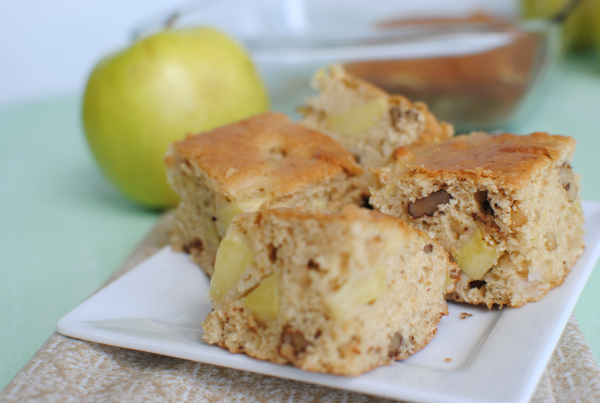
Any who so I came across this awesome recipe in this ebook the other day which involved apples. Yes I know they aren’t in season (thanks to my pinterest chart!), but they won’t break the bank because you only need 1. I completely overhauled the recipe to make it healthier. Sometimes this doesn’t work out and rarely does it come out right on the first try. But the moons must have aligned just right because they turned out perfect! Yummy apple brownies with nuts and big chunks of apples inside. They are so comforting!

Apple Brownies

Apple Brownies

These "brownies" are a healthy snack that's loaded with fresh apples and nuts!

Ingredients

  • 1 cup all-purpose flour
  • 1 cup whole wheat pastry flour
  • 1 medium apple, cored, peeled, and chopped
  • 1/2 cup unsweetened applesauce
  • 1/4 tsp nutmeg
  • 1/2 tsp cinnamon
  • 1/2 teaspoon baking powder
  • 1 tsp vanilla
  • 2 egg whites
  • 1/2 cup walnuts, chopped

Method

  1. Preheat oven to 350 degrees.
  2. Beat eggs, applesauce, and vanilla together.
  3. In a separate bowl whisk together the flours, nutmeg, cinnamon, and baking powder.
  4. Slowly add in the flour mixture to the applesauce mixture until combined.
  5. Fold in chopped apples and walnuts.
  6. Pour batter into a greased 9x9 baking dish and back for 30 minutes or until a toothpick comes out clean.
http://www.pennywisecook.com/apple-brownies/


Like this post? SHARE it!

Related Posts Plugin for WordPress, Blogger...

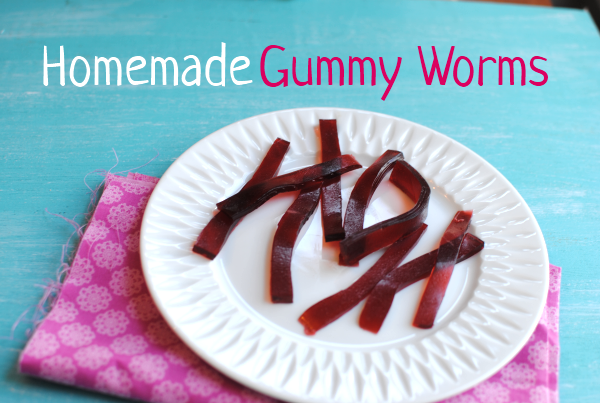
Homemade Gummy Worms

Looking back on when I was a kid, I remember always having a sweet tooth. My grandma likes to tease me about an instance at a church potluck when I was about 6. It was one of those with a ton of yummy home cooked food.I asked my mom if I could have a piece of pie (or cake or something, my memory is fuzzy- trust me it was something like that). She said no. (not sure if I couldn’t have pie because I didn’t eat all of my dinner or if it was because I had already eaten dessert!) And like most smart children, I went and asked the sweetest lady that I knew, Mrs. Benny,  if I could have a piece of pie. With all of her sweetness, she told me yes and I proceeded to eat the biggest piece of pie you’ve ever seen. My momma caught me eating my sweet treat and I got in trouble. Poor Mrs Benny said she didn’t know that I couldn’t have dessert. To this day I love that “sweet” lady!

One thing that I’ve always been a big fan of is gummy candy. Doesn’t even matter what kind, I just love the texture of gummy candy. My daughter shares this love with me. But most gummy snacks are so packed with sugar that we have to make them a special treat.

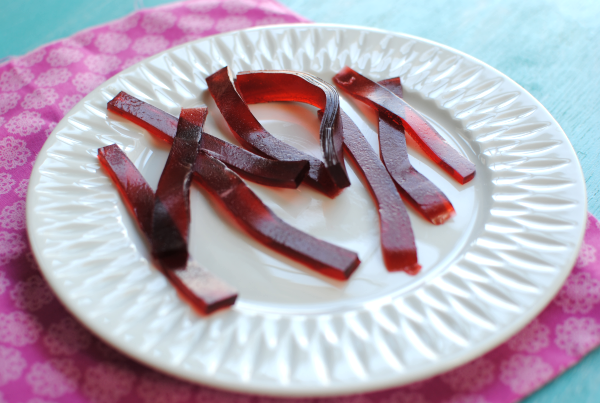
Did you know that you can make your own gummy worms at home? Not only that, but it’s crazy easy and incredibly inexpensive! Plus they contain no sugar so you don’t have to worry about your little ones climbing the walls after consuming them.

We are talking 3 ingredients and a little fridge time and viola! Homemade, sugar-free, guiltless gummy worms.

Recipe courtesy of Food.com.

Homemade Gummy Worms

Homemade Gummy Worms

Gummy worms that you don't have to feel bad about giving to the kids!

Ingredients

  • 3 envelopes unflavored gelatin
  • 2 packages sugar-free gelatin (any flavors)
  • 1 cup boiling water
  • 1 package Kool-aid for sour gummy worms (optional)

Method

  1. Whisk together unflavored and flavored gelatin in a large bowl. (Add Kool-aid if preferred)
  2. Stir in boiling water until powders are dissolved.
  3. Refrigerate for 45 minutes then cut into long strips to make worms.

Notes

It's recommended that you keep the gummy worms in the fridge. They can get really soft and almost melt if not kept in a refrigerator.

Obviously these aren't going to taste exactly like real gummy worms, but they do satisfy the craving for gummy treats!

http://www.pennywisecook.com/homemade-gummy-worms/


Like this post? SHARE it!

Related Posts Plugin for WordPress, Blogger...

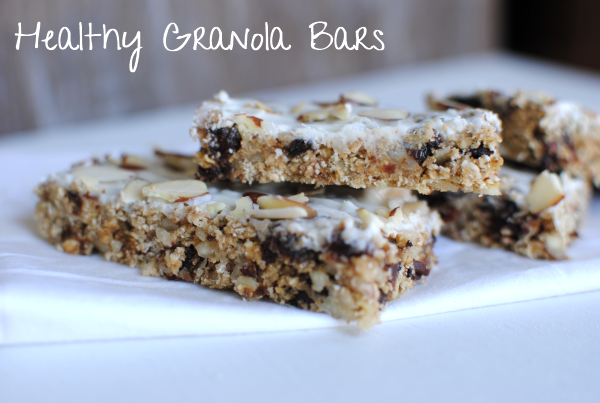
Healthy Granola Bars

Its incredible to me the amount of sugar that are in things these days. It’s almost like we humans have adapted to ginormous amounts of sugar and we just keep adding more and more to our foods. At the pediatricians office the other day, she told me that juice boxes are some of the worst things for children to drink. They are on up there with sodas! Come on, JUICE BOXES? Of all things that you expect to be ok for your kids. I was looking for juice boxes to take on an upcoming road trip and decided to take a gander at the nutrition label. 1 juice box had 24 grams of sugar! Insanity isn’t it?

Don’t get me wrong, I like my sugar. In fact, I’d much rather eat something sweet than savory any day. But I love when I can use natural sugars instead of globbing on cups of the granulated stuff.

Granola bars have long been one of my favorite snacks. Simple to grab and go and packed with nutrition. Well most of them at least. Plus, if there’s a chance that I get in a little energy and fiber then I’m all for it. This momma can really use all the help that she can get.

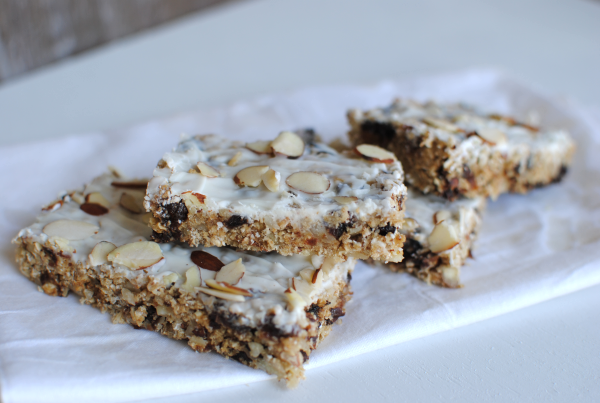
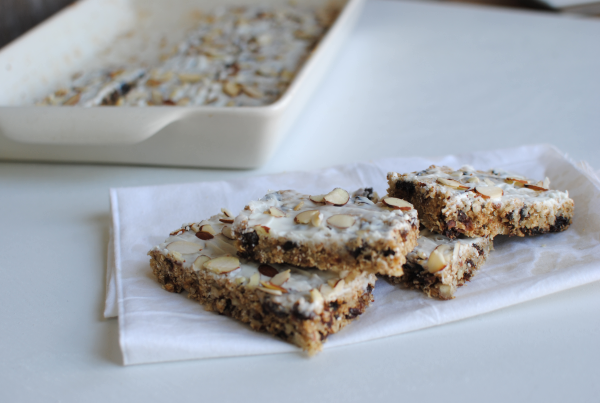
I found this High Fiber Granola Bar recipe and adapted it a bit. While the original didn’t call for any added sugar, I did top mine with a little white chocolate. And I do mean a little. I practiced a little self control and only added a very thin layer. These are packed full of grains and dried fruit along with some natural sweeteners like honey. They do require baking, which I’m sure might not sound pleasant to some of you. But if you have the time to bake these, I’m sure that you’ll like them too. And come on, you have 18 minutes right?

Minus the thin layer of chocolate on top, these are actually low in calories! Score! And my favorite part is that they are heartier than most granola bars. They don’t use rice krispies as filler, but instead use shredded wheat cereal to give you slow-burning carbs.

Recipe adapted from Fitho.

Healthy Granola Bars

Healthy Granola Bars

These granola bars are not only healthy and packed full of fiber, they are also quite tasty too!

Ingredients

  • 1 cup quick cooking oats
  • 1 cup shredded wheat cereal
  • 1 cup almonds + 1/4 c. almonds for topping
  • 1.5 cups raisins
  • 1/2 teaspoon ground cinnamon
  • 1/2 teaspoon salt
  • 3 eggs
  • 2 tbsp honey
  • 1 teaspoon vanilla essence
  • 1/3 c. white chocolate chips or almond bark, melted

Method

  1. Preheat the oven to 350°F. Grease a large baking pan and set aside.
  2. Place the oats, shredded wheat, 1 cup almonds, dried fruit, cinnamon, and salt in a food mixer until the mixture is finely chopped.
  3. In a large bowl, whisk the eggs, honey, and vanilla. Add the oatmeal mixture and stir, till its mixed evenly.
  4. Transfer to the baking pan and flatten down gently with the back of a spoon or spatula to spread evenly.
  5. Bake about 18 minutes until the edges turn golden brown and the bars are done.
  6. Remove granola bars from the oven and let cool completely. Meanwhile, melt your white chocolate chips (or almond bark) in the microwave or double boiler.
  7. Pour melted chocolate chips over the top. Sprinkle with remaining 1/4 c. almonds. Stick in the fridge to set until chocolate is firm.
  8. Cut into bars and serve!

Notes

You don't have to use raisins, you can use just about any dried fruit that you wish. Dates would be good or perhaps cherries.

When flattening the mixture into your baking pan, spray the back of your spoon with cooking spray to prevent sticking.

If you want thicker granola bars, use an 8x8 pan. I prefer thinner and longer bars so I used a 9x13 dish.

These are not that expensive to make since most are ingredients that you might have on hand. I got the shredded wheat at Dollar Tree and the Almonds at Aldi. Everything else I found in my own pantry.

http://www.pennywisecook.com/healthy-granola-bars/


Like this post? SHARE it!

Related Posts Plugin for WordPress, Blogger...

Chocolate Gravy

Some recipes come from the back of a can. Others are found in a favorite cookbook. You can even find some pretty amazing recipes just by Googling it. But some of the very best recipes in life are found passed down from relative to relative. You know the ones that are tried and true and your great grandma spent her time perfecting. These are some of the best recipes known to man.
My mom recently whipped up a very tasty concoction that apparently has been made by our family for years. And yet, I had never even tried it!
This isn’t just any concoction either.

We’re talking….

Chocolate. Gravy.

Yes it does exist and I was never told about this until just recently. My sweet grandma just published a book about her life (very interesting read!) and she even talks about this chocolate gravy on her book. So needless to say, I had to make some of this famous chocolate gravy.


Turns out that this recipe was created by my great aunt Janice! It has been a hit for years and she’s the lady behind the chocolate. She also created a chocolate pie that I’ll be trying out real soon.
I’m not going to lie to you. I screwed up this recipe the first time I tried it. Thinking that I would get all smart, I started with milk and butter and added in the flour mixture. Why did I do that? I have no idea. Everyone knows that any rue starts with butter, you add in flour and THEN the milk. After coming to my senses, it turned out perfect. Being me, I also reduced the amount of sugar from 2 cups to 1/2 cup and it still turned out plenty sweet.

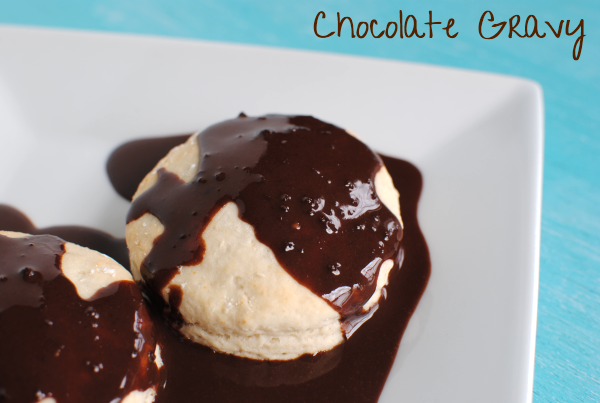
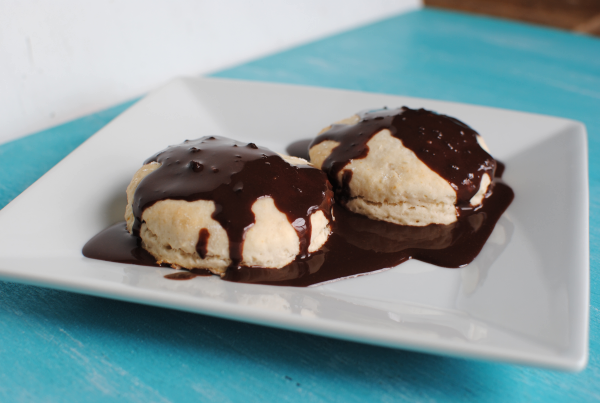
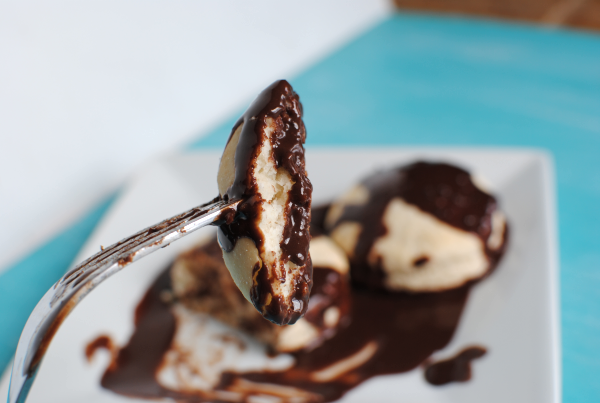
My hat is off to great aunt Janice! This gravy is the perfect chocolatey complement to a couple of morning biscuits. Or perhaps to a bowl of ice cream. Anything that you want to chocolatize really. I loves it on biscuits and I think it would make an awesome topping for cinnamon rolls instead of glaze.
Interested in trying out this spectacular chocolate gravy? Find the recipe below!

Chocolate Gravy

Chocolate Gravy

Biscuits and CHOCOLATE gravy for breakfast!

Ingredients

  • 1/2 c. Sugar
  • 6 Tbsp Cocoa
  • Dash of Salt
  • 1/4 c. Flour
  • 1/2 c. Milk
  • 2 Tbsp Butter

Method

  1. Mix all dry ingredients together in a medium size bowl.
  2. Melt butter in a small saucepan over medium heat. Slowly stir in cocoa/flour mixture.
  3. Slowly stir in milk and simmer over medium heat for 2-3 until combined.
  4. Remove from heat and gravy will thicken as it stands.

Notes

This makes a great topping for cupcakes, fruit, biscuits, and even ice cream.

http://www.pennywisecook.com/chocolate-gravy/


Like this post? SHARE it!

Related Posts Plugin for WordPress, Blogger...