My Favorite Healthy Lunch


HC  1
It’s FINALLY warming up! Can I get an Amen?!

We have already mowed our yard once. It’s not my favorite task, but it means that warmer weather is here and that we can enjoy the outdoors again.

We are an outdoorsy kinda family spending every moment that we can soaking up the sun and refraining from holing up in the house all day. It’s a nice change from hermit status in the winter. 

I like to keep things healthy around here and gettin’ our booties outside is one of the best ways that we can do that!

Eating right is another great way to stay healthy. I won’t pretend I’m perfect in this area. I enjoy my sweets, I really do. But I also love staying on track health-wise because it makes me feel better in my skin. Taking everyday recipes and making them better for you is something I love to do. But you know something? I’ve found something easy and convenient that is way easier than creating a recipe!

HC 3

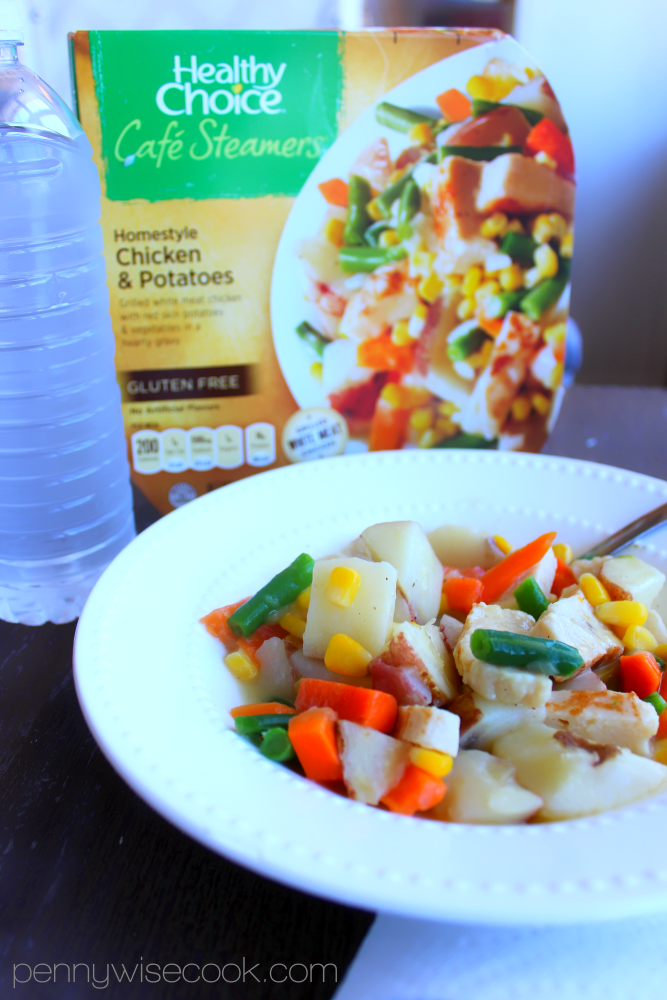
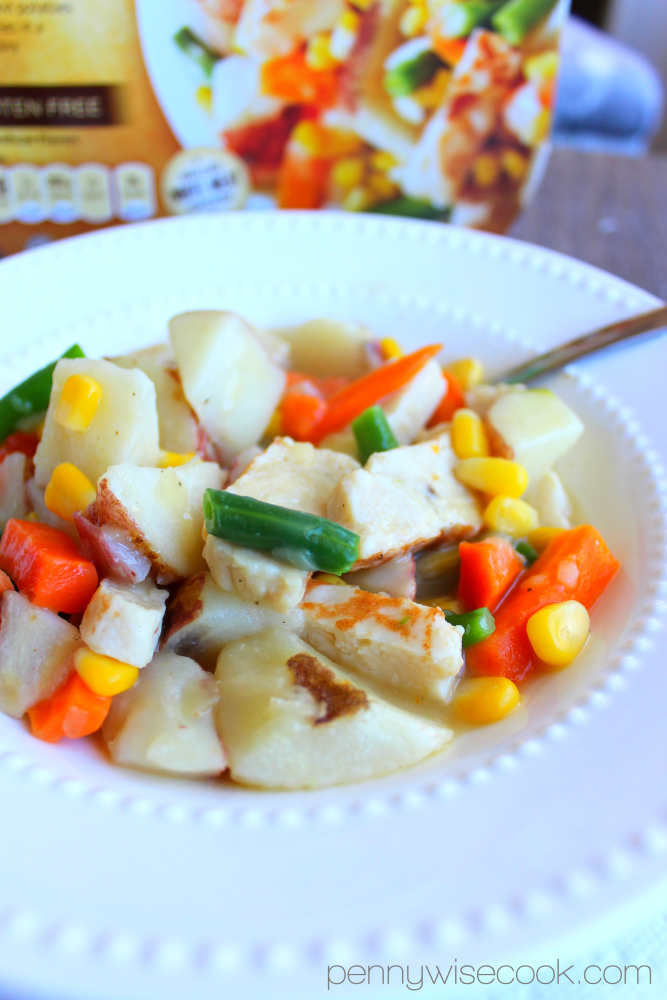
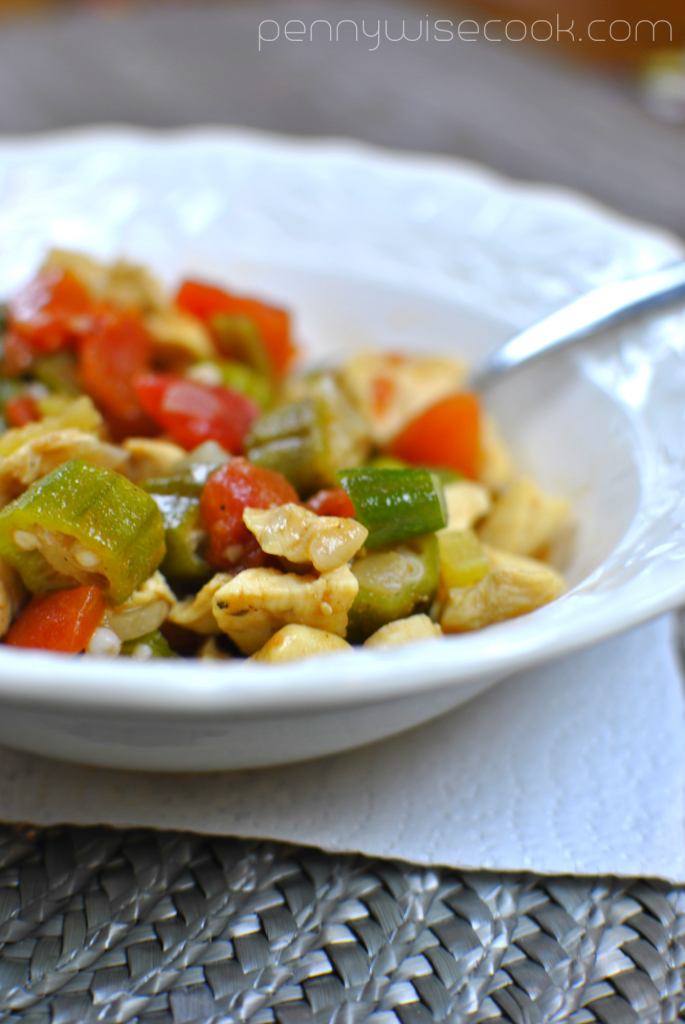
My favorite healthy lunches are the Healthy Choice Cafe Steamers! Healthy eating has never been easier. I’m able to plan my lunches ahead without even thinking.

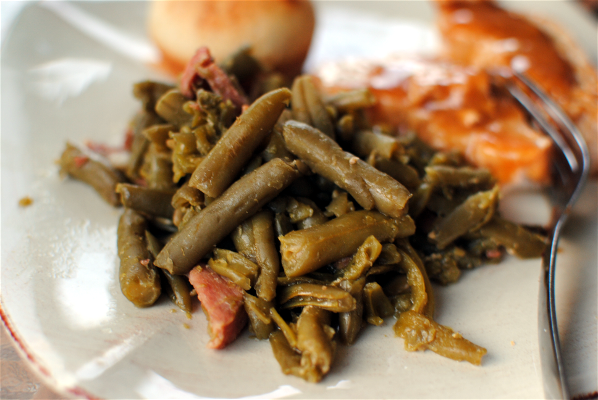
Unlike other frozen meals, Healthy Choice Café Steamers’ feature a unique tray-in-tray steam cooking method that delivers fresh-tasting meals with crisp vegetables and juicy proteins. This also gives you the chance to be a part of the culinary experience as you pour your own sauce, determining how much or how little flavor you want with your meal. I always use it all!

HC 2

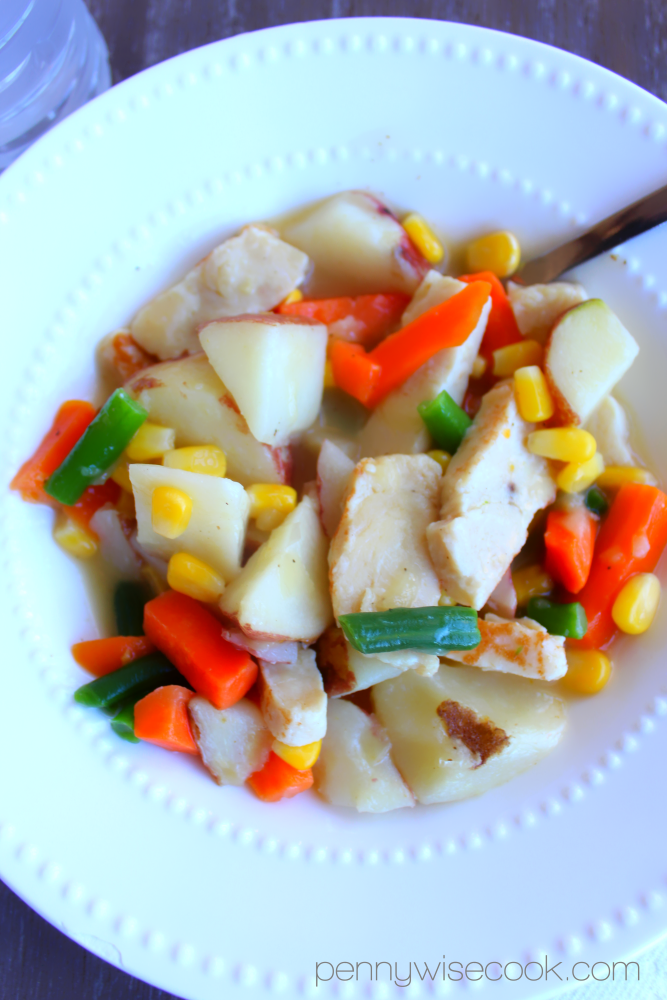
All Healthy Choice meals are made with real ingredients and no preservatives so you don’t have to worry about sacrificing taste or freshness. Since the ingredients aren’t frozen in the sauce they have a fresh, more vibrant taste.

One of my favorite things about these meals is that they always taste fresh. Certainly not like they have been spent weeks in my freezer. 

And talk about healthy, did you know that Healthy Choice is the only major brand in the frozen meals section that can call 100% of its products “healthy” as approved by the FDA? No guilt here!

Look for these great Healthy Choice Cafe Steamers at your local grocery store:

  • Balsamic Garlic Chicken
  • Barbecue Seasoned Steak and Red Potatoes
  • Chicken and Noodles
  • Chicken and Potatoes with BBQ Sauce
  • Spaghetti and Meatballs

And there are tons more! 

My current favorite is the Crustless Chicken Pot Pit! What is yours?

I was selected for this opportunity as a member of Clever Girls and the content and opinions expressed here are all my own.


Like this post? SHARE it!

Related Posts Plugin for WordPress, Blogger...

Valentine’s Day Granola Cookies

GranolaCookies

I’m a pretty big fan of granola. Are you? 

I bet you didn’t know that nothing says Happy Valentine’s Day more than granola.

It’s true.

When you make these Valentine’s Day Granola Cookies, it’s like a big old gigantic bear hug of Valentine’s Day goodness. For one because you can make them into cute and adorable little hearts. And for two because you’ll make them healthier for your favorite Valentine.

Granola Cookies 1

These tasty cookies are made using better for you ingredients, so you can feel good about making these for your Valentine.

I recently read a research study that showed that corn oil is better at lowering cholesterol than extra virgin olive oil! You learn something new every day!

I like to use Mazola® Corn Oil because it has a neutral flavor and lets the other flavors in my cooking and baking stand out. Mazola® Corn Oil made a great addition to the granola cookies that I made. I’ve also used to it to make breaded chicken and stir-fry. 

Granola Cookies 2

I have a special tip for you. Happy Valentine’s Day from me. I love you. Yes, I do! I can’t take all the credit for it. I saw this on Rachael Ray recently and thought it was genius so I had to share. 

Sticky stuff like honey is so hard to measure out and then get out of the measuring cup. You lose some as you pour it out because it sticks. I never feel like I get all the honey out. Here’s a tip:

  • Put plastic wrap into your measuring cup
  • Fill with desired honey (or sticky substance like corn syrup)
  • Bunch at the top.
  • Snip off a small hole and squeeze out every last drop.
  • Throw away plastic wrap and have a CLEAN measuring cup with no honey lost in the process! 


Granola Cookies 4Granola Cookies 5Granola Cookies 6


Genius, right? LIFE-changing!

Granola Cookies 7

The Mazola® Corn Oil does a great job holding all my wet ingredients together. The egg whites and honey kinda want to go off and do their own gloppy goo mess, but the oil man. It keeps the harmony.

Granola Cookies 8

I will not lie to you, Valentine. I did eat from this very spoon.

Granola Cookies 9

Here is yet another genius idea. I KNOW! I really, really love you.

Put a cookie cutter on parchment paper (that’s on a cookie sheet). Spray it with a taddy bit of cooking spray to keep from sticking. Then spoon in your granola and pat down. Remove your cookie cutter and you have your heart-shaped cookie. 

Granola Cookies 10

I was so happy with how they turned out. I was going for a cookie-like texture and not a granola bar and this was exactly what I got!

Granola Cookies 11

I’ll be making these often. I love how versatile they are. You can add in raisins or nuts or whatever you’d like. I added a few chocolate chips to these and red sprinkles on top to be festive. You can certainly leave them out to keep them better for you.

Check out more research facts about the benefits of Corn Oil and be sure to check out Mazola®, too!

Valentine's Day Granola Cookies
Yields 15
Skip the chocolate and try these better for you granola cookies instead!
Write a review
Print
Ingredients
  1. 2 and 1/2 c old fashioned oats
  2. 1 c crisp rice cereal
  3. 1/2 Mazola® Corn Oil
  4. 1/4 pure honey
  5. 2 egg whites
  6. 2 tsp vanilla extract
  7. 1/4 c chocolate chips (optional)
Instructions
  1. Preheat oven to 350°.
  2. Mix together oats, cereal, and chocolate chips.
  3. Wisk together oil, honey, egg whites, and vanilla.
  4. Add the wet ingredients to the dry ingredients.
  5. Cover a cookie sheet with parchment paper.
  6. Place greased cookie cutter on parchment paper and scoop in granola. Flatten and remove. Repeat until all granola is used.
  7. Bake 15 minutes or until sides begin to brown.
Pennywise Cook http://www.pennywisecook.com/

Like this post? SHARE it!

Related Posts Plugin for WordPress, Blogger...

Easy Fried Rice

Fried Rice 2


When my hubby and I were dating, he wouldn’t eat anything but cheeseburgers.

True story.

Date nights with candlelit quarterpounders? Pretty much. He didn’t like anything green, and he especially didn’t like anything foreign.

That is, until you sit him down at a place called Benihana and feed him fried rice. It’s the one thing “foreign” that I could always count on him to eat.

Thankfully he has outgrown most of his picky pants stage and likes to eat a variety of things. But that fried rice is still the only thing he’ll order at a Thai, Chinese, or Japanese place.

I started making this rice soon after we got married for two specific reasons. I just remembered another, so there’s really three.

1) It’s easy. It’s not something you have to think too much about. Just throw it all together in a skillet and boom!

2) It’s really quick. No need to slave over the stove all night.

3) Hubby eats it. Reason enough for me!

Fried Rice 3

This is the perfect meal or side dish to make with leftover rice. It’s best when the rice has been refrigerated and is cold. I have been known to make rice the night before just for this meal.

It really confuses my family.

And then they understand when we have this meal the next night!

Fried Rice 1

I make this with whatever frozen veggies that I can find on sale. Fresh veggies? Of course you can use them, too! It’s such a versatile and easy thing. You can’t mess it up. The variety that I got had sugar snap peas, green beans, red peppers, celery, mushrooms, broccoli, carrots, and onions in it.

Slap an egg in there with your cold rice and add some soy and teriyaki sauce and you have got a really tasty dish.

Here’s the way that I make it, but remember that you can add or take away whatever you’d like.

Simple Fried Rice
Why not make your own fried rice at home? It's simple, tasty, and easy on your wallet!
Write a review
Print
Ingredients
  1. 2 c. brown rice, cooked
  2. 1 (12 oz) bag of frozen veggies (stir fry mix is good)
  3. 2 tbsp olive oil
  4. 1 egg, scrambled
  5. 2 tsp minced garlic
  6. 1-2 tbsp soy sauce
  7. 1-2 tbsp teriyaki sauce
  8. salt & pepper to taste
Instructions
  1. Heat 2 tbsp olive oil over medium-high heat in large skillet.
  2. Add frozen veggies and cook until softened.
  3. Add garlic and cook until browned.
  4. Add egg and cook combining into veggies.Then add the cold rice.
  5. Fry over high heat. Add soy and teriyaki. Add salt & pepper to taste.
Pennywise Cook http://www.pennywisecook.com/

Like this post? SHARE it!

Related Posts Plugin for WordPress, Blogger...

Zucchini Brownies {3 Ingredients}

Zucchini Brownies 2

 The weekend is over. 

How do you like that reality? I don’t like it at all. Seems as though I find myself saying almost every single Sunday evening, that I don’t know where the weekend went. It’s gone in a vapor. Such is life I suppose.

So why not make some brownies to make life more enjoyable?

Warm, gooey, chocolatey brownies. Yes, I think that would make a great Sunday evening pick me up.

Oh, what’s that you say? You’re trying to eat healthier? I got you covered…

Zucchini Brownies 1

These brownies have a secret ingredient that I makes them healthy. Something that some like and some don’t. 

And believe me, if you’re the person that doesn’t like this ingredient, it won’t matter. 

I promise.

You see, these brownies are made with zucchini. Yep, that green, tender, cucumber look-alike stuff. You won’t be able to tell that it’s in them.

Untitled design

I’m not sure that anyone would ever request that big measuring cup of green goo to be placed into their brownies. If you don’t tell them, they won’t even know. 

I did just that. I made these for my family. They gobbled them up with their normal brownie enthusiasm. 

“Mmmmm I love brownies.” 

“These are so good!”

Then after they’ve had their fill, I break the news out on them like a spider monkey.

“You just ate zucchini and you didn’t know it!”

{insert evil veggie sneaking laugh there}

Zucchini Brownies 4

So you see, you have just became a zucchini ninja. Turning dessert time in vegetable time. 

With the quickness. There are only 3 ingredients in the brownies which makes them extra easy and extra quick.

A box of brownie mix. A cup of that green goo, which is just pureed zucchini. And a 3rd cup of milk (any kind you’d like). 

Ninja. Yep.

Zucchini Brownies
3 ingredients including a VEGGIE makes dessert time healthy and tasty!
Write a review
Print
Ingredients
  1. Box of brownie mix (18.3- 18.9 oz)
  2. 1 cup pureed zucchini
  3. 1/3 cup milk (of your choice)
Instructions
  1. Preheat oven to degree listed on brownie mix.
  2. Mix together mix, puree, and milk.
  3. Pour into greased 9x13 baking dish.
  4. Bake according to directions on brownie mix.
Notes
  1. I used almond milk to cut calories in my brownies. Tasted great!
  2. To puree your zucchini, cut it into chunks and throw it into a blender, food processor, or magic bullet thingy.
Adapted from Frugal Foodie Mom
Pennywise Cook http://www.pennywisecook.com/

Like this post? SHARE it!

Related Posts Plugin for WordPress, Blogger...

Chicken and Okra Skillet

Chicken and Okra Skillet 1

Happy new year! It’s 2015 already y’all. Can you believe it? HOW are we already here?

I remember thinking that summer being over was weird. And now CHRISTMAS is over. SO weird.

I have fond memories of my great Aunt Joan always making pickled okra around the holidays. I’m pretty sure that she always made it, but we mostly saw her around the holidays so I just associated it that way. Who knew that a kid would love to dig into dig into a big old jar of homemade okra? 

My kids sure wouldn’t.

As I’ve gotten older, I’ve learned that I like lots of forms of okra. Fried, steamed, cut, you name it. It’s all good in the okra hood. My husband, not so much. Though for the new year, he is committing to eating better so he decided he would give it a chance. So I decided I would come up with something really tasty to get him on the okra train.

Chicken and Okra Skillet 4

So I made this! My own creation of a few flavors that I thought would go well together. I love what the okra adds to this dish. It’s a bit slimy and soft, but that makes this so good. Gives it a sort of stew texture.

My favorite part? It’s a one-pot meal! You can easily make this whole meal in your skillet. Thank you Jesus!

Chicken and Okra Skillet 2

My husband’s verdict was made apparent when he went back for seconds! I withheld a large smile inside as I watched him dole out the next helping. I told him at the beginning that I thought that he was going to be surprised and he said that he was.

All the ingredients are really simple. Many might be things you already have. This is so quick to whip up so it would make a nice weeknight meal.

Chicken and Okra Skillet
Tomatoes, Okra, and Chicken make a great combination in this easy recipe for a great weeknight meal.
Write a review
Print
Ingredients
  1. 1 tbsp olive oil
  2. 2 ribs celery, chopped
  3. 1 small onion, chopped
  4. 2 tsp minced garlic
  5. 1 lb fresh chicken tenders, cut into bite-size pieces
  6. 1 (12 oz) bag frozen cut okra
  7. 1 (14.5 oz) can diced tomatoes
  8. 1 tsp cumin
  9. 1 tsp beef bouillon
  10. Salt & pepper to taste
Instructions
  1. In 1 tbsp olive oil, saute onion and celery over medium heat until translucent. Add garlic and saute until browned. Add chicken pieces and cook until no more pink.
  2. Season with salt and pepper.
  3. Make hole in chicken, celery and onion mixture. Add frozen okra to the middle. Cover and let steam for 5 minutes.
  4. Add can of diced tomatoes, beef bouillon, and cumin. Let simmer for about 5 minutes until warmed through. Season with salt and pepper and serve!
Notes
  1. I use my kitchen sheers to cut up the chicken! Makes it quicker and easier than a knife.
Pennywise Cook http://www.pennywisecook.com/

Like this post? SHARE it!

Related Posts Plugin for WordPress, Blogger...

Apple Dip

Apple Dip 1

 When I was young, our neighbor had an apple tree in their yard. I remember first finding out that the tree had apples on it. I ran over there and picked me one and took a big bite out of it. And then I realized…this was no regular apple tree. It was a tree of crab apples. Have you ever had a crab apple? They are not so good. Very sour, hard, and give you a sore tummy. 

Now regular apples, I love. I’m more of a green apple eater than red, but I’ll eat whatever I can get. And I adore dips for my apples. Just a big dollop of peanut butter and a juicy slice of apple can make my day.

Fall is the season when apples are ready for harvest. Though I find them just as juicy and fresh anytime of year at the grocery store. And they don’t seem to vary too much in price, which is nice.

I’ve got a dip for you today that you’re going to love. After we ran out of apples, we used our fingers to scrape the rest of the dip off the bowl. It’s so good.

Apple Dip 2

This dip is very similar to 2-Ingredient Fruit Dip, but the ingredients are a little different.

It’s a simple mixture of cream cheese (you know its going to be good), brown sugar, vanilla extract, and sour cream. Yeah, that sour cream gives it a creaminess. Love it.

Apple Dip

I love this dip for get togethers. It would be really great to buy a bunch of different types of apples, slice them, and put them on a platter with this dip in the middle. You would have so many colors! 

Just make sure that you don’t get any crab apples.

Oh yeah and, you don’t just have to eat this with apples. It’s amazing with any fruit! The recipe was originally called “Caramel Fruit Dip”, so I was going to pair it with apples thinking, you know, apples and caramel are wonderful together. After eating it, it does not have that caramel taste I was expecting. But it is still a wonderful partner for apples!

Apple Dip
Write a review
Print
Ingredients
  1. 1 (8 oz) pkg Cream Cheese, Softened
  2. 1/2 c. Brown sugar
  3. 1 tsp Vanilla
  4. 1 c. Sour cream
Instructions
  1. Mix all ingredients together with mixer and chill. Serve!
Notes
  1. I used 1/3 less fat cream cheese and fat free sour cream and this still tasted wonderful!
Adapted from The Four Ingredient Cookbook
Pennywise Cook http://www.pennywisecook.com/

Like this post? SHARE it!

Related Posts Plugin for WordPress, Blogger...

Parmesan Peas

Parmesan Peas


I’m not exactly sure what it is about peas that makes them seem so unappealing. Did you see what I did there? For most kids I think it may be because they are green. Both of my girls have a strong aversion to green food no matter what it is. So when my oldest came home from school one day and told me that she liked peas, you can just imagine my confusion. 

1. She ate peas. Willingly. Without bribery or threatening. 

2. She ate peas at school of all places. This is also the place that she discovered she likes green beans. (Which I promise are the only two green foods that she likes.) I mean. What are the schools doing to their green foods to make them so enticing? They have new standards for how healthy things have to be so I know it’s not that they are slathering it all in butter. 

3. I gotta come close to making them at least half as good as the school. Woah. What is this world coming to with the statement that I just made?

I came across this recipe for Parmesan Peas and I figured it was worth a shot. If it doesn’t work then I may need to call my daughter’s cafeteria. Again. What weird statements I’m making.

PArmesan Peas1


I liked these peas, but I have a feeling that they weren’t as amazing as my daughter is used to. I will be tweaking these a little as I make them more. But for the most part, they are really tasty! The most important tip that I can give is to make sure that you serve them immediately after making. They do not taste the same after they get cold and sit there for a while. Just from my experience anyways. 

Also, be sure to use freshly grated parmesan and not the powered stuff. It works, but is not near as good.

Parmesan Peas
Write a review
Print
Ingredients
  1. 16 oz Bag of Frozen Peas or 4 cups Fresh Peas
  2. 1 tbsp Butter
  3. 1/2 cup Freshly grated parmesan cheese
  4. Little squeeze of lemon juice
  5. Dash of pepper
Instructions
  1. Fill a big saucepan 2/3 of the way full and bring to a boil.
  2. Add the peas and cook for 3 minutes if fresh and 1 minute if frozen. This will be your call as to if you think they are ready enough. I like mine to be really tender.
  3. Remove from heat and save a little amount of the cooking water. Drain.
  4. Put them back in the saucepan and add a little of the reserved water. Add the butter. Stir until melted.
  5. Stir in the parmesan cheese and make sure that all the peas get coated.
  6. Squeeze a tad of lemon juice and add a dash of pepper.
  7. Serve immediately!
Adapted from Ezra Pound Cake
Pennywise Cook http://www.pennywisecook.com/

Like this post? SHARE it!

Related Posts Plugin for WordPress, Blogger...

Fun and Easy Crafts With Olives!

Olive Art

 My oldest has only recently figured out that she likes black olives. It was by mistake that she realized that she did, but I’ll take what I can get. She grabbed a big handful of “grapes” only to come tell me “momma, those aren’t grapes”. Thanks honey for letting me know. I fully expected her to leave them on my plate while saying the everso common “I don’t liiiiiiiike it”. To my surprise, she ate every one of them. Small victories people. Small victories. 

I haven’t done just a lot to foster her new relationship with black olives, but somehow it’s blossomed. She now gets them on her sub sandwiches and even requires them on her pizza. I just grin ear to ear when I hear her telling anyone about her love for olives. My husband can hardly believe it. 

I got to pick up some California Ripe Olives in order to create to super duper cute little characters. I was just thrilled at how easy and adorbs they turned out. But I honestly think that the very best part was eating the creations. There is just something about cheese and olives man. A match made in hors d’oeuvres  heaven. The versatile California Ripe Olive is the ideal ingredient for home chefs and food artists. Not that I consider myself a chef or a food artist even, but they are pretty versatile and are something easy I can add to most meals. 

 Olive Bumble Bees 1

California Ripe Olives are kid-friendly and the perfect option for creating tasty and creative food art for the back to school season. Think about lunch boxes and after school snacks. How cute would it be to put one of these little bumble bees in your kiddos lunch box? Sweet surprise at the lunch table. These may have been my favorite olive creatures.

Olive Penguins

 California Ripe Olives provide a pop of color, texture, and flavor to a variety of dishes—including fun and delicious food art. Like these penguins for instance. Kids won’t even realize that they are eating healthy! These little guys were so easy to make and even tastier to eat! California Ripe Olives are the perfect pantry staple. They are good right out of the can, but mixing it up with little guys like this makes them even more fun.

Olive Spiders

 California Ripe Olives are grown on over 1,000 multigenerational family farms that crisscross the warm inland valleys of California and processed by two family-owned canneries. I love knowing that what I’m feeding my family came from just another family. There’s just some kinda comfort that I get from family-owned companies. Aren’t these little spiders so cute? Perfect for Halloween since it’s just right around the corner!

There is a nifty sweepstakes happening and you’ll want to enter before it’s too late! The California Ripe Olives Back-To-School Sweepstakes runs August 18- September 12th. Follow California Ripe Olives on Facebook, visit the custom tab, and enter once per day for the chance to win an Amazon Kindle Fire HDX!

Want to make the cute little olive art from above? Here’s how:

California Ripe Olives Spiders
Write a review
Print
Ingredients
  1. California Ripe Olives
  2. Cream Cheese
  3. Round Crackers
Instructions
  1. Spread a little cream cheese (or dip of your choice) onto a cracker.
  2. Cut an olive in half and place one half on the cream cheese.
  3. Using a knife, cut the other half into 8 small thin pieces.
  4. Place the small pieces around the "body" olive on the cracker.
  5. Tah-dah!
Notes
  1. This one is super easy and they taste amazing! Perfect for Halloween!
Pennywise Cook http://www.pennywisecook.com/
California Ripe Olives Penguins
Write a review
Print
Ingredients
  1. California Ripe Olives
  2. 1 Big Carrot, sliced
  3. Cream Cheese
Instructions
  1. Cut a small wedge out of the carrot and set aside.
  2. Cut an olive just to the middle creating a small gap. Fill with cream cheese.
  3. Take your small carrot wedge and poke it into a new olive.
  4. Assemble your penguin but sticking a toothpick first down the olive with the beak (carrot wedge), then through the cream cheese filled olive, and then into the leftover carrot slice.
  5. Tah-dah!
Notes
  1. This one can get kinda messy with the cream cheese involved, but after assembling you can use a paper towel to wipe off the excess cream cheese.
Pennywise Cook http://www.pennywisecook.com/
California Ripe Olives Bumble Bees
Write a review
Print
Ingredients
  1. California Ripe Olives
  2. Cheddar Cheese Slices
  3. Provolone Cheese Slices
  4. Cream Cheese
Instructions
  1. Slice your olives into 4-5 sections.
  2. Using a small circular object, cut out circles to place between the olive slices.
  3. Place your cheese circles between the olive slices and then stick a toothpick down the middle to keep it all together.
  4. Using the same circular object, cut out circles from the provolone cheese.
  5. Place a small dab of cream cheese on the back of the top slice.
  6. Stick the provolone circles to the back like wings.
  7. Tah-dah!
Notes
  1. I just used things that I had on-hand to cut out the circles. I believe I used the bottom of a piping tip and it was just the right size.
  2. It doesn't have to be perfect! This is your creation to look however you'd like!
Pennywise Cook http://www.pennywisecook.com/
 

I was selected for this opportunity as a member of Clever Girls Collective and the content and opinions expressed here are all my own.


Like this post? SHARE it!

Related Posts Plugin for WordPress, Blogger...

Easy Slow Cooker Green Beans

green beans 1

Today’s recipe is one that came from my grandmother! She has always been innovative when it comes to cooking and making things easier and tastier. This one is one that she came up with when having to feed a crowd. Seems like she is always having a get together with family and friends. It doesn’t matter what time of day it is when I stop by to see her, she will offer me FOOD! That’s what grandmothers are for, right?

So this recipe. It’s SO easy and will feed a crowd. It’s easy on the wallet as well. You can make this to take to an event or serve right out of the slow cooker when you have folks over.

It’s a fix it and forget it kinda side dish that honestly, I could eat as a meal. My Addie doesn’t think fond of my veggies, but this is her absolute favorite. It’s almost bribe-worthy. Almost, I mean come on, they are green beans.

It starts with everything above. 1 LARGE can of green beans. It’s a 101 oz or 6 lbs, 5 oz can that you can get at Walmart, Kroger, or most grocery stores. Sam’s Club usually has the best price on these around $3.68 (ish). You will also need a 12 oz package of country ham seasoning pieces. This is fairly inexpensive too. I got this package for just $1.88. That makes this entire side dish around $6 bucks total. Not bad!

green beans 2

Ok, so start by opening up your can of green beans and draining out EVERY LAST DROP OF WATER. This is essential. The green beans will create their own water while cooking and if they have too much moisture, they will become mushy. Draining them gives just the right amount of juice.

green beans 3

This is so hard so far, right?

Refrain from complaining too much.

green beans 4

The country ham is already in pieces, but I usually cut it into smaller pieces. I also DO NOT remove the fat from the pieces. You could, if you were really serious about fat, but honestly it gives it even tastier flavor.

green beans 5


We had these last night and Addie was so excited to be getting her favorite beans. I’m pretty sure that I had 3 helpings and many bites of them while putting the leftovers away. Do you do that? It’s hard not to steal a few tastes while getting it all prepared for the refrigerator. Even though I was stuffed to the gills!

Let me know if you try these!

Slow Cooker Green Beans
Serves 15
A simple 2-ingredient slow cooker recipe for making A LOT of tasty green beans.
Write a review
Print
Prep Time
10 min
Total Time
8 hr 10 min
Prep Time
10 min
Total Time
8 hr 10 min
Ingredients
  1. 1 (6 lb, 5 oz) large can of Green Beans, DRAINED
  2. 1 (12 oz) package country ham seasoning pieces, cut into small pieces
  3. Pepper to taste
  4. Garlic powder to taste (optional)
Instructions
  1. Place drained green beans and chopped country ham pieces into slow cooker. Set to low and cook 8 hours.
  2. After a few hours, add pepper to taste.
Notes
  1. I usually add a little garlic powder to mine. I just eye ball it.
  2. You can also cook these on high for 4-5 hours in a pinch.
  3. You could also make these overnight for a gathering the next day if you wanted to. No one would ever know they cooked while you slept!
Pennywise Cook http://www.pennywisecook.com/

Like this post? SHARE it!

Related Posts Plugin for WordPress, Blogger...

Easy Spasagna

Spasagna

 It’s been an awfully crazy last few months here in the Pennywise Cook household. You may have noticed by my lack of posts. I’ll catch you up soon.

In the meantime, I have managed to create a really tasty spin on an original Ragu recipe that I wanted to share with you guys. I made a few changes to this recipe for Ragu No Boiling Lasagna that was a huge hit at our house. At one of our favorite restaurants around here, they have this dish that is a mix of lasagna and spaghetti and it is absolutely to die for. It has something to do with the way the noodles are mixed with the cheesy goodness that makes it so amazing.

You know me. I like a challenge.

Spasagna


If we’re being honest here, and I’m not ashamed of honesty, I kinda made it up as I went. And you never know if things like this will actually be edible so it was a 50/50 situation. This one made it in our Hall of Fame for yummy dishes!

Side story: As I’m preparing to take pictures of this tasty dish (and trying my darnedest not to eat it),  there wasn’t enough light inside so I took my Spasagna outside on the balcony to take pictures. My 2 year-old comes outside and shoots a very inquisitive look my way. Then in a very puzzled tone says, “Momma, why are you taking pictures of macaroni?”. I died laughing!

You know you’re a food blogger when….your 2 year-old asks why you’re taking pictures of macaroni! I won’t even get into the conversation I had with her informing her it wasn’t macaroni, but “spasagna”. Talk about a really confused toddler.

Ragu Tra-dish

 Back to the recipe! This one is SUPER easy. It uses Ragu Old World Style Traditional Sauce so you know it has to be simple. I love that stuff. I used the meat flavored kind since I didn’t plan to add any meat. Each jar of Ragú® Old World Style® Traditional Sauce is made with 11 juicy tomatoes making it its richest,  thickest recipe. It’s affordable (especially with coupons, y’all!), tastes great, and makes any recipe a breeze. Ragú® has the Authentic Italian taste American family’s love and a variety of great tasting, quick and easy to make family favorite recipes.

Besides that, there are just 4 other ingredients in this recipe. And it isn’t very time consuming either. That’s a big thing for us these days. My girls have no patience and neither do I!

Spasgna

You can visit Ragu’s facebook for additional quick, easy and delicious recipe ideas too. And be sure to enter the Ragú Better and Better Sweepstakes for a chance to win great Authentic Italian themed prizes and a grand prize trip to Venice for a family of four!

Easy Spasagna
Recipe Type: Main Dish
Author: Pennywise Cook
Spaghetti never tastes so much like lasagna! This twist on a traditional lasagna is an easy go-to meal for the family.
Ingredients
  • 1 package whole wheat spaghetti noodles
  • 1 jar Ragu Old World style Pasta sauce
  • 1 15 oz Ricotta Cheese
  • 1 and 1/2 c mozzarella cheese
  • 2 eggs
Instructions
  1. Preheat oven to 375°.
  2. Prepare 1 package whole wheat spaghetti noodles according to package directions.Be sure to season the water with a little salt before dropping your pasta!
  3. Once cooked, let cook in strainer.
  4. Meanwhile, in a large bowl, combine tub of ricotta cheese, 2 eggs, and 1 cup mozzarella cheese.
  5. Mix cheese mixture with cooled noodles and flatten into a greased baking dish.
  6. Sprinkle with 1/2 c. mozzarella cheese. Bake 10 minutes.
  7. Remove from oven and pour entire jar of Ragu over noodles. Bake an additional 10 minutes.
  8. Cut into squares and serve!
Notes
You can use regular noodles, but I prefer whole wheat for added nutrition!

Abbreviated Sweepstakes Rules: NO PURCHASE NECESSARY.  Legal residents of the 50 United States (D.C.) 18 years and older.  Ends 5/6/14.  To enter and for Official Rules, including odds, alternate method of entry, and prize descriptions, visit www.RaguSweeps.com.  Void where prohibited.

This is a sponsored post written by me on behalf of Ragu brought to you by Yummly. All of the opinions expressed are 100% my own.


Like this post? SHARE it!

Related Posts Plugin for WordPress, Blogger...