Crockpot Shrimp Creole

Ok, I’ll admit it. I’m lazy….sometimes. Some mornings I don’t want to get out of bed. I despise cleaning and sometimes let my dishes pile up. My husband shares my hate for dishwashing so there are days when we have a stand off to see who will clean them first. Those are usually the days when I don’t want to care about the dishes in the sink, but my secret cleaning OCD kicks in and I go on a very random rampage cleaning everything in sight.

My laziness comes in spurts.

When it comes to cooking, if there are too many ingredients or steps in a recipe then I pass. This busy moms gets distracted easily and a recipe with a gazillion ingredients simply won’t cut it. Hence the fact that many of my recipes are titled, 2-Ingredient This, 3-Ingredient That.

I also hate doing a lot of work for a recipe. If there 2 ingredients, but 1 involves seeding, peeling, poking, punching, baking, staking, grilling, patting, kneading, and THEN you can use it…I’m not interested. One of the ingredients that I’ve always considered high maintenance would be shrimp. I don’t really like to cook with cooked shrimp because I usually get it too rubbery. And raw shrimp has always seemed like too much work. Until recently that is.

I decided to pick up a bag of medium raw shrimp a few months ago because it’s low calorie and something that everyone in my family likes. Since then, I’ve made a variety of meals with shrimp. And you know what? The labor of peeling and shelling them hasn’t killed me! In fact, I love them now. They cook extremely quick no matter what method you use and they don’t need prior thawing. I’m notorious for forgetting to thaw out meat the night before.

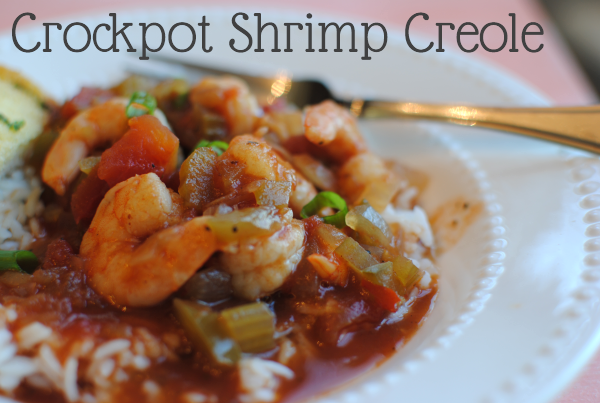
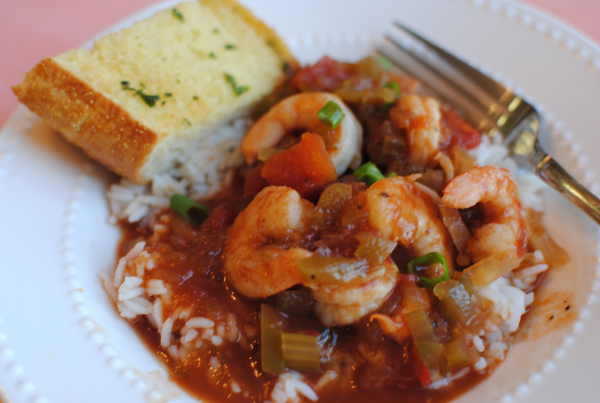
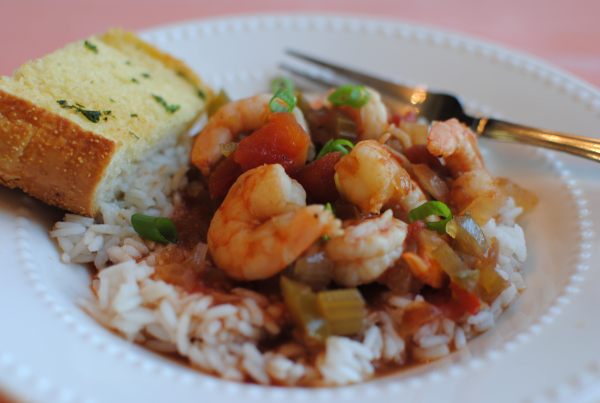
One of my recent and most favorite shrimp dishes was this Crockpot Shrimp Creole. I originally found this at Food.com, but it’s actually a Paula Deen recipe. It was amazing! Definitely makes the peeling and shelling worth it.

I made this while my husband’s parents were here and while we shopped all day. It’s so nice to come home and have dinner waiting, isn’t it? I hope you get a chance to make this and please tell me what you think!

I did adapt this recipe a bit. I added a little water to create more juice to pour over my rice. I also omitted hot sauce. We aren’t very spicy around here.
Crockpot Shrimp Creole

Crockpot Shrimp Creole

Nothing like a good shrimp creole for a comforting weeknight meal!

Ingredients

  • 2 tablespoon olive oil
  • 1/2 cup diced green bell peppers
  • 1/2 cup diced onions
  • 1/2 cup diced celery
  • 1 teaspoon chili powder
  • 1 (14-ounce) can tomatoes
  • 1 (8-ounce) can tomato sauce
  • 1 tomato can of water
  • 1 tablespoon Worcestershire sauce
  • 1 teaspoon white sugar
  • salt and pepper to taste
  • 1 1/2 lb peeled and deveined shrimp
  • green onions for garnish

Method

  1. Place all ingredients except the shrimp into the crockpot and set on LOW for 4-6 hours.
  2. In the last 15 minutes, add shrimp and let cook until orange.
  3. Serve!
http://www.pennywisecook.com/crockpot-shrimp-creole/


Like this post? SHARE it!

Related Posts Plugin for WordPress, Blogger...

Chili Cheese Fry Cupcakes

I think it’s about time that I shared a bad recipe with you. No, not bad as in it tastes like crap, but bad as in naughty. Oh yeah, you know what I’m talking about.

Try chili CHEESE fries. I’m feeling naughty just typing those words. Every now and then I like to take a break from my vegetable eating, low fat loving, and calorie watching to just make something so incredibly yummy that my toes curl. These Chili Cheese Fry Cupcakes come pretty darn close.

As you’d expect, I used ground turkey which makes me feel just a taddy bit better about them. I also used part skim low-moisture cheese which is also a little better. Besides that, all bets were off.

I started off by microwaving some store-bought steak fries until they were soft. Next time I will be making the fries from scratch in order for them to be softer. These ended up a bit crunchier than I would have preferred, but they were smothered in chili and cheese so I can’t complain too much.

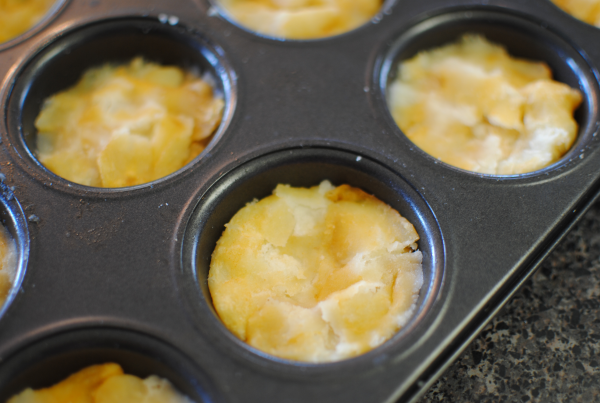
Once the fries are softened, you squish them into muffin tin wells to make the base of your “cupcake”. Believe it or not, but your muffin tin will take an entire bag of steak fries. Then it’s a matter of baking them a bit and letting them cool a minute before topping them with your fantastically easy homemade chili and melty cheese.

The result is nothing short of amazing. You have fries, chili, and cheese all in your hand. The only thing that could make this better would be….well,…….sour cream. (Which I unfortunately did not have otherwise I would have put a dollop on these)

I got the idea for these gems over at 1 Fine Cookie. I made the chili part up myself in an attempt to make it fast and wow did it come out well!

Chili Cheese Fry Cupcakes

Chili Cheese Fry Cupcakes

These cupcakes are anything but dainty. Chili, cheese, and fries come together to create the ultimate savory cupcake.

Ingredients

  • 1 Package Frozen Steak Fries (or create your own fries)
  • 1 Pound Ground Turkey
  • 1 Can Ranch Style Beans
  • 1 medium Onion, Chopped
  • 1 Can Rotel
  • 1 Tsp Chili Powder
  • 1 Tsp Garlic, Minced
  • Salt and Pepper to Taste
  • 2 Cups Shredded Cheddar Cheese

Method

  1. Preheat oven to 375 degrees.
  2. On a large microwavable plate, microwave steak fries for about 4 minutes or until soft. (You may have to do this in batches) Let cool.
  3. Squish and flatten equals amounts of fries into the muffin tin wells.
  4. Bake fries for about 25- 30 minutes. Do not overbake or else they will be hard as a rock.
  5. Meanwhile, brown ground beef with onion and garlic.
  6. Add in beans, rotel, chili powder, and salt and pepper to taste.
  7. Once potatoes are done, removed from muffin tin and allow to cool.
  8. Place a spoonful of chili on each of the fries. Next top with equal amounts shredded cheese.
  9. If desired, place cupcakes in the oven to allow the cheese to melt for a moment or two.
  10. Serve with sour cream and green onions if preferred!

Notes

If you do plan to make your own potato fries (I will do this next time!), parboil your fries a bit before placing them in the oven to crispy a little. Then squish them into the muffin tins before baking them one last time.

http://www.pennywisecook.com/chili-cheese-fry-cupcakes/


Like this post? SHARE it!

Related Posts Plugin for WordPress, Blogger...

Easy Taco Pizza

My littlest baby, Britton has begun to walk! And things are quickly changing around here. I’m running to take things out of her mouth that I wasn’t expecting her to be able to reach. I’m running to help her up when she stumbles. I’m basically, running. I love every minute of it. It’s so precious to see her starting her independence, but then come wobbling back to me so we can snuggle. I really love this age!

My other, on the other hand, is very much independent. She loves to help out in the kitchen and is finally helping out with cleaning her room. Well, that is with a little coaxing, bribing, and other shameless attempts to get her to clean. I do love meals that we can all make as a family so that everyone feels like they contributed.

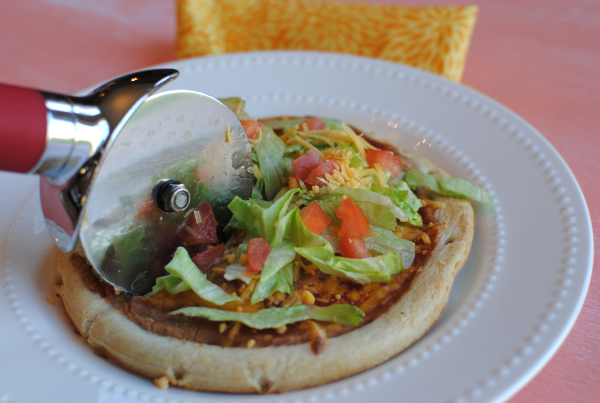
Today’s recipe is a very simple one and you may already make this at your house. But if you don’t and want a quick and easy meal that everyone will love, you might want to make this soon! My mom and I have recently noticed that Dollar Tree carries 2 packs of smaller pizza crusts, for $1 of course. I’ve been experimenting with all kinds of things to do with these crusts because they are so darn cheap. I thought….Taco Pizza! My husband hadn’t had it in so long that he had forgotten what all it included, but he was thrilled to find out what went on these beauties….beans.

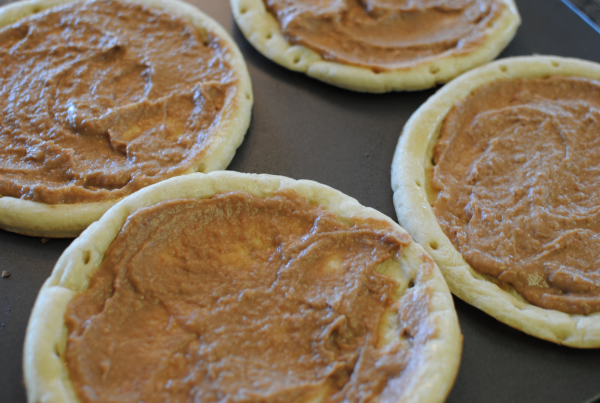
Yes beans are the single ingredient that make these pizzas taste like a taco. Well, that and the…..

Salsa. Those two take the place of your everyday pizza’s tomato sauce.

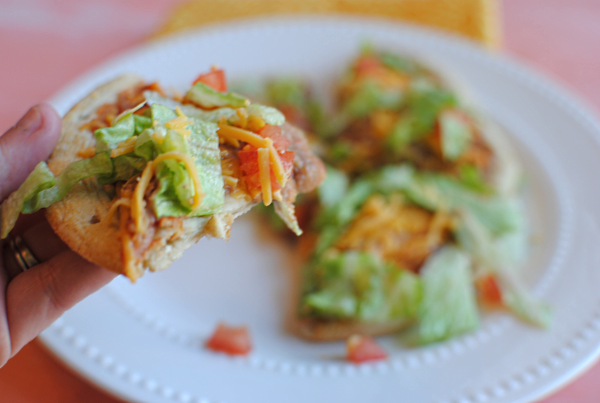
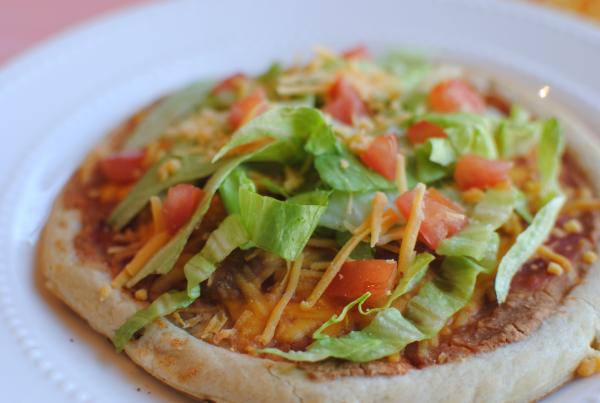
Then it’s just a matter of adding all the yummy stuff that your family likes on your tacos. A good amount of cheese, some tomatoes, and lettuce are a great choice. Even a dollop of sour cream.

You can either buy your refried beans or you can buy pinto beans and create your own with your own flavors. Heat up the pinto beans, place in a food processor with garlic, cumin, and chili powder. Either way, you should be able to find them for $1 or less. In fact, this whole meal should cost you less than $5 in total! I only had to buy 1 tomato to chop up for the top. I didn’t really even need that much since my family doesn’t really like them. But I enjoyed it.

You can most definitely make one big pizza with these ingredients instead of the smaller ones. I just have a very picky family so it’s easiest this way to please everyone.

Easy Taco Pizza

Easy Taco Pizza

Simple taco pizzas that the whole family will love!

Ingredients

  • 4 Small Pizza Crusts (or make your own!)
  • 1 Can Refried Beans
  • 1 Cup Salsa, Divided
  • 1 and 1/2 Cups Shredded Cheddar Cheese + 1/4 cup for topping
  • 1 Cup Lettuce
  • 1 Tomato, Chopped

Method

  1. Preheat oven to 350 degrees or the temp suggested by your pizza crust.
  2. Start by brushing your pizza crusts with olive oil.
  3. Equally disperse the refried beans among the 4 pizza crusts. Next equally disperse salsa.
  4. Add a layer of equals amounts of cheddar cheese to the tops.
  5. Bake pizzas for 8-10 minutes or the amount suggested by your pizza crust.
  6. When pizzas are finished, add equal amounts of lettuce and tomato to each pizza and top each equally with the remaining 1/4 c cheddar cheese.

Notes

There are endless possibilities to these pizzas. Add black beans, corn, chicken, taco meat, chilis, peppers, whatever you'd like! The refried beans are a must though!

http://www.pennywisecook.com/easy-taco-pizza/


Like this post? SHARE it!

Related Posts Plugin for WordPress, Blogger...

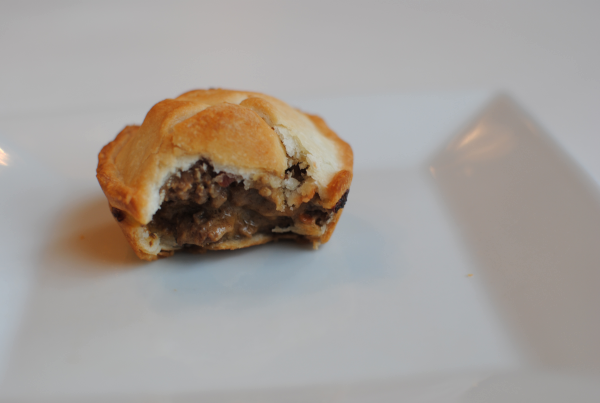
Mini Cheeseburger Pies

When my husband and I were dating like a million years ago (or so it feels), we actually went on dates to McDonald’s. Not only were both incredibly cheap tightwads, but my husband had a crazy obsession with none other than…..dom dom dom, McDonald’s! Yes, he was (and still is) a cheeseburger fanatic. I even had a cheeseburger birthday cake made a couple years ago. Needless to say that he is all-American and loves his American food.

He’s not always easy to please, but as long as he gets his cheeseburger every now and then he’s good! In honor of him, I made up these amazing Mini Cheeseburger Pies that honestly was a little unplanned. It was one of those days when I was feeling experimental and I was on a path to one idea and ended up with another. I’m glad that this is where I ended up! These were sooooo good.

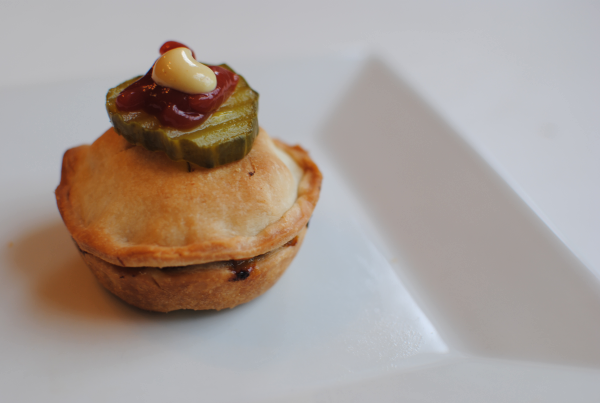
Using store bought pie crusts that I got 2 for $1.99 at Aldi, I filled them with a cheeseburger filling and topped them with whatever each family member wanted. My daughter Addie has just realized that she likes pickles. (I know right? Where has she been?! Pickles are yummy.) So she got those on her’s.

See? How adorable. What a great idea for a party. These aren’t too small but they also aren’t huge either so they could be used an appetizer also.

They are so simple too. I have a good feeling these would also freeze well.

Mini Cheeseburger Pies

Mini Cheeseburger Pies

This miniature version of cheeseburger pie is a perfect appetizer or party food!

Ingredients

  • 1 lb Ground Beef
  • 2 Premade Pie Crusts (or homemade if you prefer)
  • 1 Medium Onion, Chopped
  • 2 Tbsp Worcestershire Sauce
  • 1 Tbsp Ketchup
  • 1 Tbsp Djon or Yellow Mustard (whichever you prefer)
  • 2 Tsp Garlic, Minced
  • 4 oz Velveeta Cheese
  • Salt and Pepper
  • Bacon Pieces (Optional)

Method

  1. Preheat over to 450 degrees.
  2. In a large skillet over medium-high heat, brown mean with onion and garlic. Drain.
  3. Add worcestershire sauce, ketchup, mustard, and Velveeta. Stir until combined.
  4. Meanwhile, using a glass or biscuit cutter, cut 2 and 3/4 inch circles out of pie crusts. Place circles into a greased muffin tin using the leftover scraps to piece together more.
  5. Fill each crust with equal amounts of meat filling. Add bacon pieces last if desired.
  6. Place a second pie crust circle on top of each pie and press down around the edges to help it seal.
  7. Cut a T slit in the tops to prevent them from bubbling up.
  8. Bake for 12 minutes or until golden brown.
  9. Serve with your favorite cheeseburger condiments!
http://www.pennywisecook.com/mini-cheeseburger-pies/


Like this post? SHARE it!

Related Posts Plugin for WordPress, Blogger...

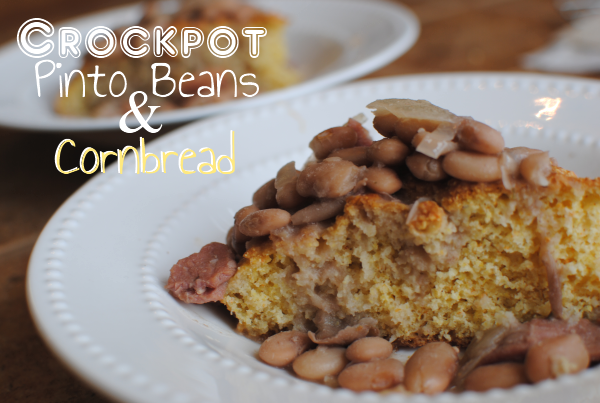
Crockpot Pinto Beans and Cornbread

There are a lot of meals that I remember my momma making when we were growing up. Some that I liked and some that I (as a kid with immature taste buds) I could have lived without. Of course, it’s the ones that I liked that I remember the most and now make for my family. This is one of those meals.

I want to start by pointing out that no, the cornbread is not cooked in the crockpot with the beans. Unfortunately, you’ll have to do some hard labor and bake your cornbread in the oven. When I made this the other night, I found a new cornbread recipe and it is absolutely divine. It’s so divine, that I plan on giving it it’s very own post. So stay tuned for that.

As I was saying, this meal takes me back to those comforting nights as a kid. Coming in from playing outside all day to have warm, hearty pinto beans served with crusty cornbread. They make the most amazing combination. This isn’t really even a “summer” dish, but I still make it in the summer anyways.

Start by soaking your bag of pinto beans in a big bowl overnight. This will soften them up and get them better prepared for cooking. This may sound like a difficult task, but really it’s not. Place your beans in a bowl covered in water and go to bed. Easy peasy!

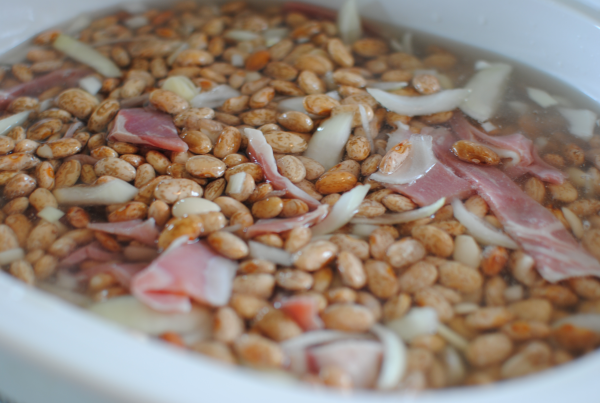
Then the next morning, drain that water and throw the beans in your crockpot with a chopped onion or two along with some nice and salty country ham pieces. DON’T season them yet. Since they are still quite hard, they won’t absorb any of that seasoning just yet so hold off on that salt and pepper.

Oh yeah, you can see where this is going.

In the meantime, between checking your email and watching Grey’s Anatomy (all that very important stuff that you do), bake up a batch of your favorite cornbread. Like I said, I have an amazing recipe that I will be sharing, but for now I have to leave you on the edge of your seat.

So bake that up and set it aside until your ready to eat up. You are now free to season the beans too!

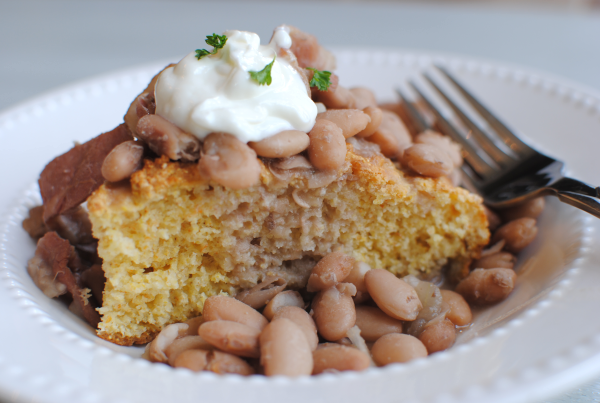
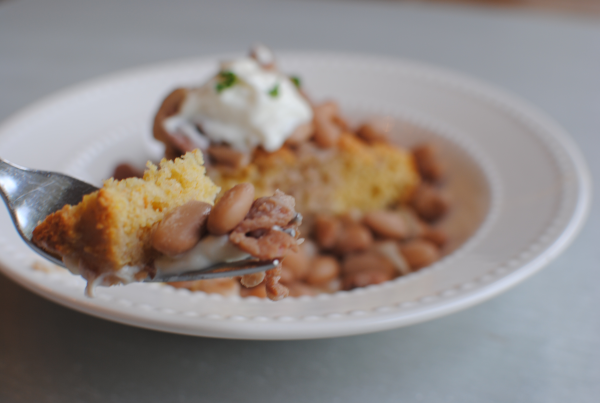
After a few hours you’ll have an incredible meal.

Crockpot Pinto Beans and Cornbread

Crockpot Pinto Beans and Cornbread

Hearty and comforting, pinto beans and cornbread make a match made in heaven.

Ingredients

  • 1 Bag Dry Pinto Beans
  • 1 Small Package Country Ham Pieces
  • 2 Medium Onions, Chopped
  • 1 Batch Cornbread (Your Choice)
  • Salt and Pepper to Taste

Method

  1. The night before you plan to eat your meal, place your pinto beans in a large bowl and cover with water. Let sit overnight.
  2. The next morning, drain beans and place in the crockpot along with chopped onions and country ham pieces. Fill crockpot with an inch or 2 of water above the beans. Let cook on low for 6-8 hours or high for 4-6 hours.
  3. Meanwhile prepare your cornbread of choice. Season beans with salt and pepper once they have been cooking and their lines have disappeared.
  4. To serve, pour beans over cornbread and let the juices soak in.

Notes

You'll notice that a couple of my pictures have sour cream on them. That was something new I was trying. Some people like sour cream on their pinto beans so I thought I'd try it out. It was eh to me. I could take it or leave it really.

Sometimes I even place my cornbread down in a mug and pour the beans over it in the mug. This is honestly one of the best ways to eat it!

http://www.pennywisecook.com/crockpot-pinto-beans-and-cornbread/


Like this post? SHARE it!

Related Posts Plugin for WordPress, Blogger...

Picnic Ideas: Crockpot Sub Sandwiches

I’ve been leaning on my crockpot the last few weeks. Soccer games, school events, church events, life is busy. It’s so nice to have a little appliance that does the hard work for you, isn’t it?

We were planning a trip to the park for dinner last week and I knew it was going to be a busy day. On the menu for our picnic was either going to be peanut butter and jelly or lunch meat sandwiches which are necessarily a bad choice, but are quite possibly a little lame. And sure we could have stopped by Subway and gotten $5 subs, but to be honest I’m a cheapo and didn’t want to spend the money. So when picking up groceries that week I grabbed some hoagie rolls so that we could make up our own subs.

It wasn’t until the day of the park outing that I got the bright idea to put these in the crockpot. On my cooking journey, I’m learning that just about anything can be put in a crockpot. So why the heck not place some yummy subs in the crockpot to cook away all day and get toasty, warm, and gooey?

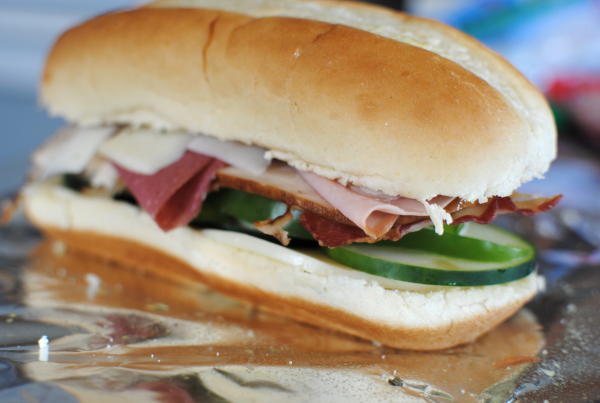
I started out by making up everybody’s sub their way. Mine consisted of a lot of good stuff like chicken breast, turkey, beef, cucumbers, onions, and more. And my daughter’s had just the meat and no cheese or anything else. This is one reason that I absolutely loved this idea. Each person can have whatever they want and yet they all cook at the same time.

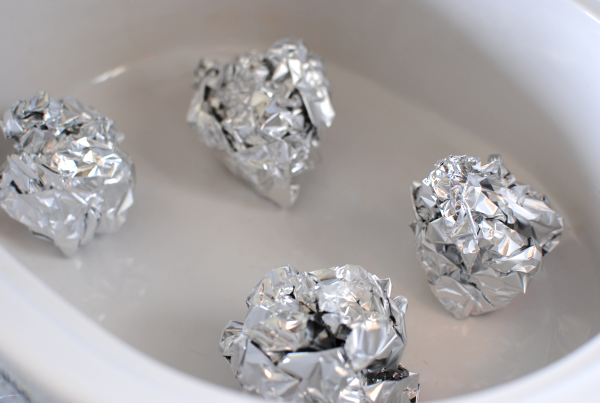
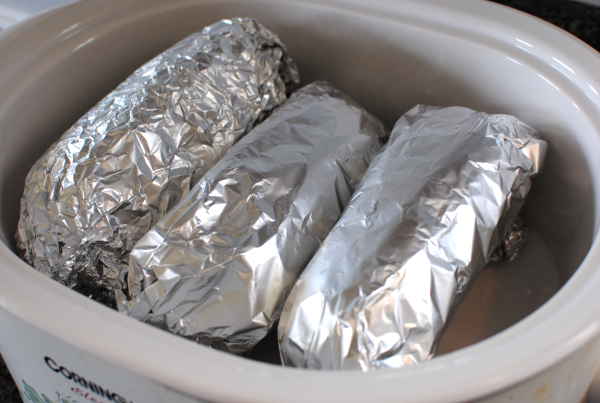
I placed some balls of aluminum foil in the bottom of the crockpot to avoid any burning. I think it’s best to keep them in the middle and away from the sides as well. They have a better chance at cooking evenly this way.


Here’s what they looked like in all of their foil splendor. At this point I was just crossing my fingers that when I went to remove them they wouldn’t be charred balls of mush. Hey, I’ve never done this before. I did my best not to look at them throughout the day and managed to only peek once. Only to find out that they were doing just fine.

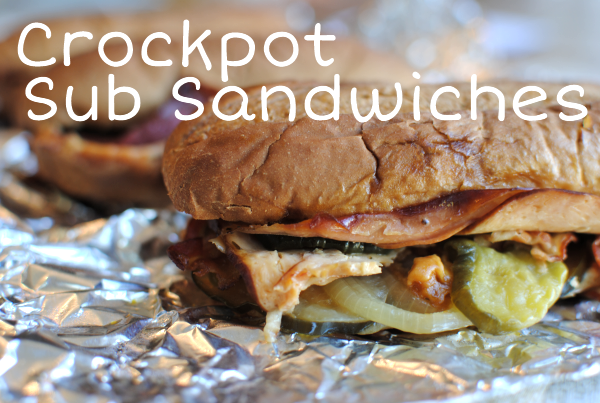
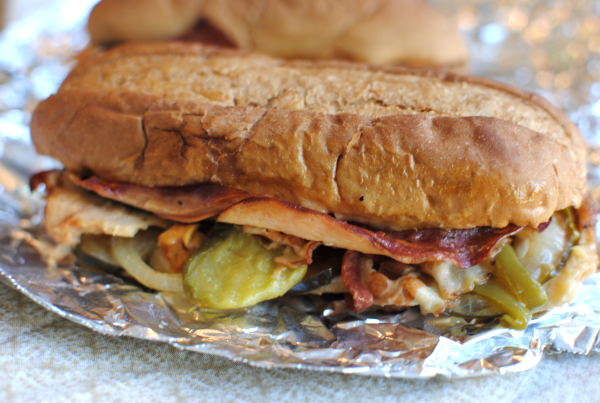
To my surprise, when it was time to leave for the picnic I popped them out and they were everything I’d imaged. Warm, gooey (cheese), browned, a little bit toasty, the onions were softened, and they looked fabulous. These will now always be favorite picnic food! I love that this is so versatile and you can change it up however you please.

Crockpot Sub Sandwiches

Crockpot Sub Sandwiches

Who needs Subway when you can make your own tasty subs at home in your crockpot?

Ingredients

  • Hoagie Buns
  • Lunchmeat of Choice (mine was smoked chicken breast, turkey, and sliced beef)
  • Cheeses of Choice (mine was provolone and a touch of mozzarella)
  • Veggies of Choice (mine was cucumbers, onions, green peppers, and pickles)

Method

  1. Create sub sandwiches according to your liking.
  2. Roll up balls of aluminum foil to place subs on in crockpot.
  3. Roll each sandwich in foil and place on the foil balls in crockpot making sure they aren't touching any of the sides.
  4. Cook on low for 4-6 hours.

Notes

If you put a lot of cheese, it will try to stick to the foil so be careful on how much you put on your sandwich.

I would wait until AFTER they have cooked to place any sauces or mayos on your sub. This can make them very soggy.

http://www.pennywisecook.com/picnic-ideas-crockpot-sub-sandwiches/


Like this post? SHARE it!

Related Posts Plugin for WordPress, Blogger...

Cilantro Lime Pesto Shrimp

You just know it’s summer when you can begin smelling people in your neighborhood grilling out. It’s such a awesome smoky smell. My husband is convinced that once the weather turns warm that it’s time to bust out the grill several times during the week. And I am completely fine with that. As long as we’re not eating gigantic steaks every night. Not only is that difficult on the wallet, but I do like a little variety now and then.

So needless to say, we’ve been getting a bit creative with what we grill. I think that it’s funny because unless it’s a steak or a huge tray full of hamburgers, hubby thinks it may not be worth turning on his grill for. Can you imagine what he thought when I suggested that we grill a few shrimp skewers?

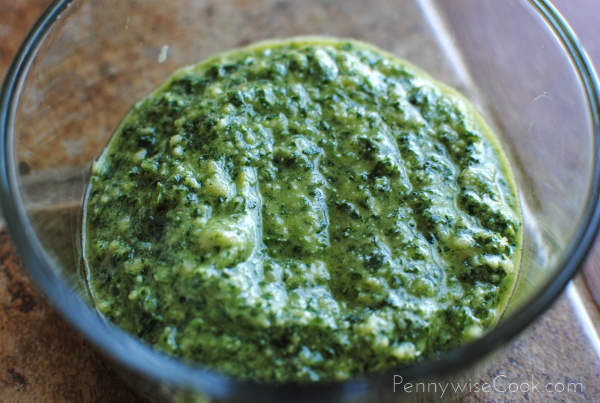
Not to mention that these so called shrimp would be covered and marinated in a word that I have yet to introduce to my clan….pesto. Ah yes pesto. The shiny, slimy, green concoction that people eat over pasta or as part of some fancy meal. I had my work cut out for me when I decided to go the pesto route. But I was determined and excited to give it a try.

Exchanging the regular greens in pesto with cilantro and instead of using those ridiculously expensive pine nuts, I used slivered almonds. Giving this sauce the once over, hubby literally just looked at it once. He was not too excited about it. However, little did he know that his very shrimp that night would be slathered, soaked, and bathed in that slimy green mixture.

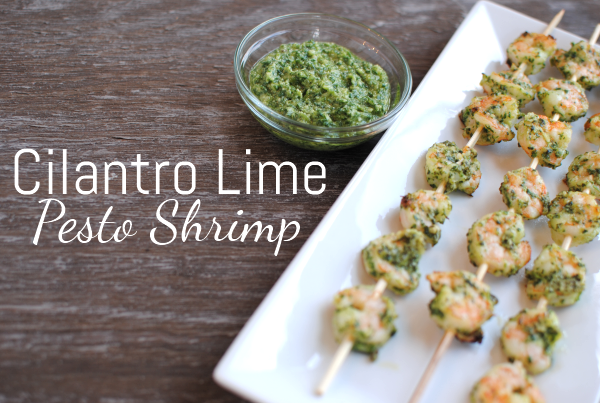
Not very long story short, he loved it! Can you believe it? I think one key factor in pesto that makes it appealing is the amount of parmesan cheese that you put in it. And the lime in this recipe really did wonders for the shrimp.

I even caught him dipping his marinated and grilled shrimp in the leftover pesto sauce! I can’t say as much for my daughter. I purposely left the pesto off of hers and she was content with her’s being plain. These were such fantastic and light shrimp that would be absolutely amazing on a shrimp taco.

Cilantro Lime Pesto Shrimp

Cilantro Lime Pesto Shrimp

Celebrate summer with this light and zesty cilantro lime shrimp!

Ingredients

  • 40-60 Medium shrimp, peeled and deveined
  • 2 Bunches cilantro
  • Zest of 1 Lime
  • Juice of 1 Lime
  • 2 Tbsp Slivered Almonds, toasted- optional
  • 1/4 cup Grated Parmesan cheese
  • 1- 1 and 1/2 C. Olive oil
  • Salt and Pepper to Taste

Method

  1. Soak skewers in water for at least 15 minutes prior to grilling shrimp.
  2. Place all ingredients except olive oil in food processor until chopped.
  3. Slowly drizzle in desired amount of olive oil.
  4. Place peeled shrimp into a bowl with HALF of the pesto. Set the rest aside.
  5. Marinate for at least 1 hour.
  6. Place the shrimp on skewers and grill for around 2 minutes on each side.
  7. Serve with remaining pesto.

Notes

Toasting the almonds is completely optional. I didn't actually toast mine and it still tasted great.

http://www.pennywisecook.com/cilantro-lime-pesto-shrimp/


Like this post? SHARE it!

Related Posts Plugin for WordPress, Blogger...

Crockpot Baked Potatoes

If I had a dime for every time that I’ve said Why didn’t I think of that, I would probably be rich. Do you ever have those duh moments when something so simple jumps right out at you that could’ve made your life easier years ago? Oh yeah, I have those all the time. You see my brain is a little foggy after birthing my 2 children. It’s permanent and I don’t expect it to go away anytime soon. Or at least that’s what I like to blame it on anyways.

I love me a big ole baked potato sometimes. I like to fill them with whatever I have in the fridge. Whether it’s lunch meat, herbs, or just plain old butter I just love baked potatoes. They have a place here called McAllister’s that serves the most gigantic potatoes. Those are my kinda potatoes.

Aldi had a 10 lb bag of russet potatoes on sale for only $.99 the other day. There were some that were huge so I thought what better to do with those than make baked potatoes. Then I thought about the hard labor of turning on the oven and waiting and waiting for the potatoes to cook. I did not look forward to that. So I got this bright idea to slow cook them in the crockpot.

I know. It’s genius really.

I may be the last person on earth who figured this out, but I’m quite happy about it to say the least.

If you figured this out a long time ago that’s great, just let me enjoy the moment.

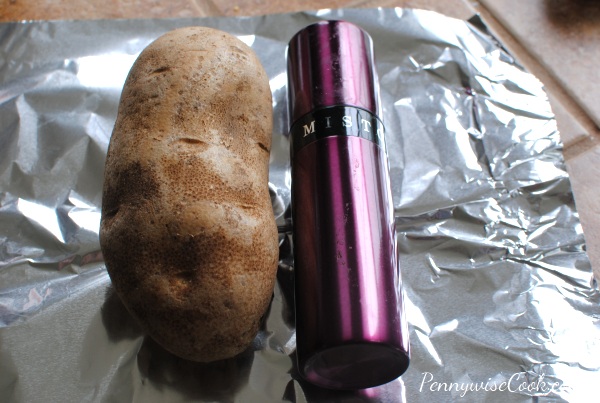
So I set out to try this new (less labor intensive) method of baking potatoes in the crockpot. First, just LOOK at the size of that potato. It is towering over my Misto isn’t it?

(Which by the way, if you don’t have a Misto you should really get one! They are so awesome. If you use olive oil a lot, you may never need cooking spray again. You can find one here at Amazon for around $10.)

Back to the potato. It’s large and in charge and I let my husband eat that one.

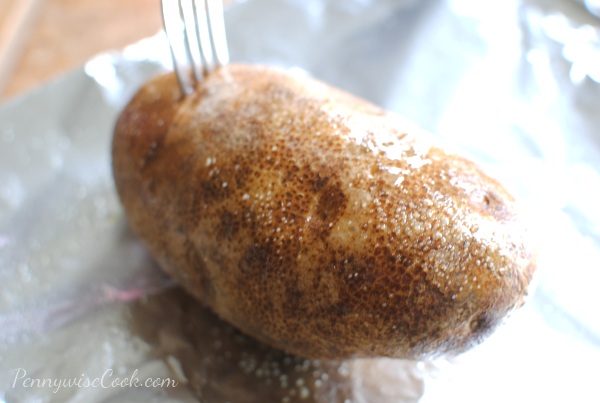
So I just prepared the potatoes much like I would the ones I put in the oven. Washed them, slathered them with olive oil, salted them….

….then poked them just like they were my facebook friend. (wow, that was bad) Then of course I rolled them up in foil and placed them in the crockpot.

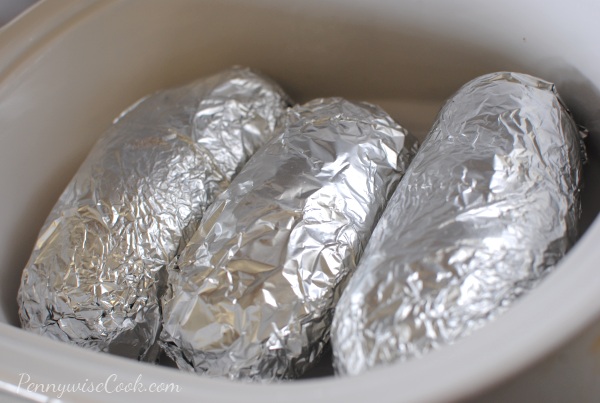
Look at those cute little potatoes all snug in the crockpot. This was so easy!

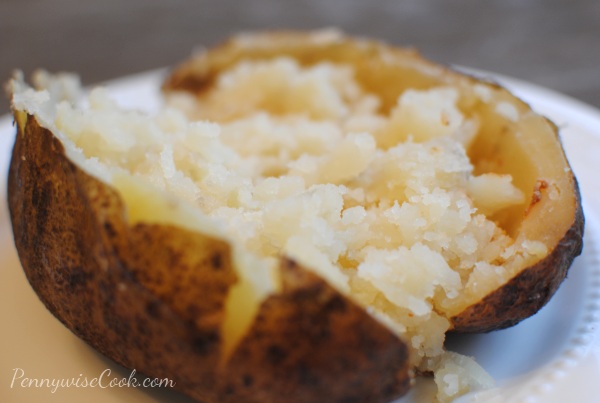
I’m not exactly sure how long that I cooked them because I was off doing more important things like Goodwill shopping or updating my facebook status. But I do think it was around 6 hours or so. This is what they looked like when they came out. PERFECT potatoes. And I didn’t break a sweat or barely lift a finger.

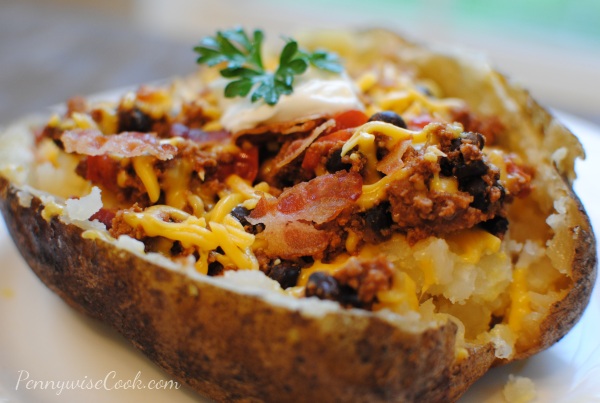
This is a life-changing epiphany in my household. My daughter even asked why we were having dinner so early that night. I felt like super mom. I did make up a quick little chili to put on top of these and broke up some microwaved bacon to go on top.

And I also placed a chub of ground turkey (in foil too) in the crockpot with the potatoes to see how it would cook with them so I didn’t even have to cook that and it worked! So that night, all I had to do was add a few things to the ground turkey to make the chili. The turkey did drip into the bottom of the crockpot, but since the potatoes were covered it wasn’t a big deal. Not sure if I will always do that.

Crockpot Baked Potatoes

Crockpot Baked Potatoes

You don't even have to turn on your oven for a hearty baked potato. Cook them in your crockpot!

Ingredients

    For the Potatoes
  • Russet Potatoes
  • Olive Oil (or Butter)
  • Salt to Taste
  • Foil for Wrapping
  • For the Chili
  • Not quite a whole lb of ground turkey
  • 1/2 Can of Black Beans
  • 1/2 Can Diced Tomatoes (or 8 oz can tomato sauce)
  • Chili Powder to Taste
  • Bacon Pieces for Topping
  • Shredded Cheddar Cheese for Topping

Method

    To make the Potatoes
  1. Wash the potatoes and rub them down with olive oil or butter. Salt and then poke holes in the top of each potato.
  2. Wrap in foil and place in slow cooker for 6-8 hours on low or 4-6 hours on high.
  3. To make the Chili
  4. Brown the ground turkey in a medium skillet Add in the black beans, tomatoes and chili powder and simmer until warm.
  5. Place on potatoes and top with bacon pieces and shredded cheese.

Notes

I would recommend cooking them on low just to make sure they get cooked really slowly and come out soft and fluffy inside.

Use whatever fillings that you see fit! The sky is the limit.

http://www.pennywisecook.com/crockpot-baked-potatoes/


Like this post? SHARE it!

Related Posts Plugin for WordPress, Blogger...

3-Ingredient Crockpot Ranch Porkchops

With busy nights, there are at least 3 nights per week that I plan on making a crockpot meal. I usually try to think of nights like soccer practice or small group when I know I’m not going to have time to cook up a big meal. My crockpot is like my best friend. It really does bring joy and happiness to my life. (Insert mushy crockpot love song here)

Take Easter for instance. We didn’t have a single plan (for once in our life). However, I was not about to spend the entire day cooking a meal. We really wanted to spend the day together enjoying each other’s company. Once again my crockpot stepped in to make life easy. I popped an entire chicken into it stuffed with rosemary and garlic and just let it go. 6 hours later after we were done playing outside, watching a little TV, and essentially getting a little tired of each other (what? doesn’t everybody?), the chicken was perfectly cooked and ready for our Easter dinner.

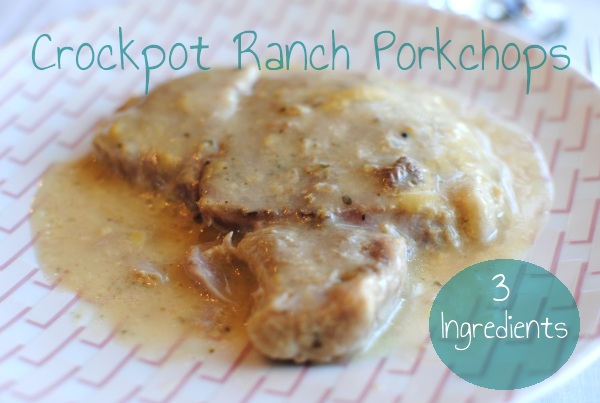
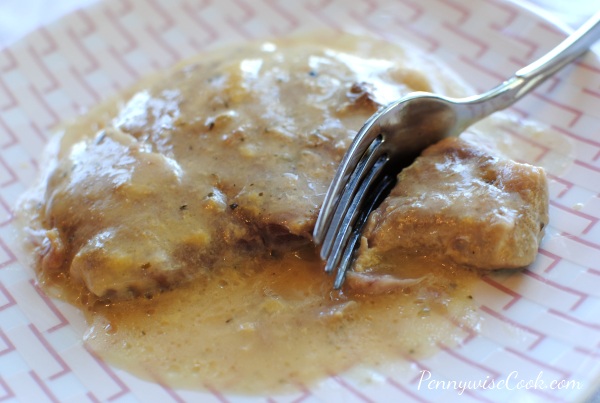
These porkchops are one of my new favorites for crockpot recipes! Only 3 ingredients and they are simply to most moist and tasty porkchops I might have ever had. No exaggeration.

I’m so thankful to have come across this recipe at Living Laughing and Loving!

You simply MUST try it!

3-Ingredient Crockpot Ranch Porkchops

3-Ingredient Crockpot Ranch Porkchops

With only 3 ingredients you can create the most moist and tasty porkchops ever!

Ingredients

  • Pork Chops
  • Ranch Seasoning Dry Mix Packet
  • 1 can Cream of Chicken plus 1 can water as needed (or 2 cans cream of chicken)

Method

  1. Combine all 3 ingredients in your crockpot and mix well.
  2. Cook on low for 4-6 hours.

Notes

I used only 1 can of cream of chicken with the 1 can water and it turned out perfect!

I cook 4 porkchops with this recipe.

This will also freeze well. Place all of the raw ingredients in a freezer bag together then run under warm water before placing in the crockpot when you're ready to cook!

http://www.pennywisecook.com/3-ingredient-crockpot-ranch-porkchops/


Like this post? SHARE it!

Related Posts Plugin for WordPress, Blogger...

Crockpot Italian Beef Sandwiches

We had a most fantastic weekend. My mom came into town and we did one of our favorite pass times…shopping. Thrift shopping always makes for a great day doesn’t it? To top it off, my oldest had her very first soccer game. She has been looking forward to that moment for weeks. She did so good! I’ve never been so proud of her.

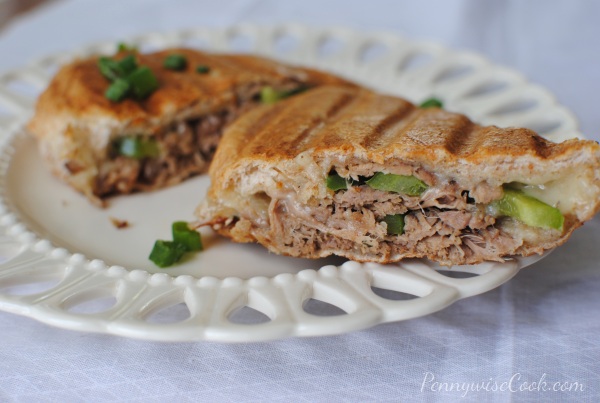
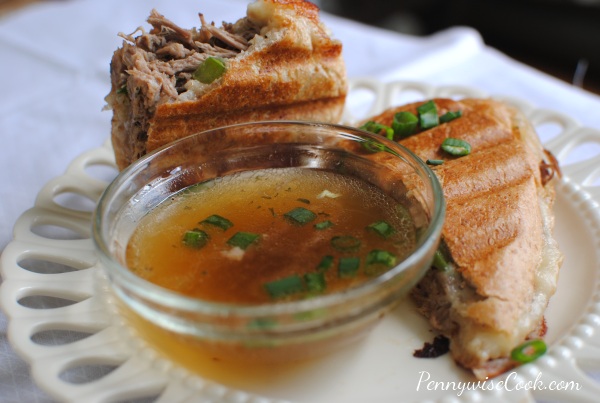
Not too long ago, I went on a Crockpot recipe mission. I have recipes that I’ve been making for years, but sometimes you just want to try something new and different. The Simple Dollar shared a few low ingredient recipes that caught my eye. This Shredded Beef Recipe sounded easy, fairly cheap, and right up my alley. So I put my own little twist on it and came up with these really tasty Italian Beef Sandwiches.

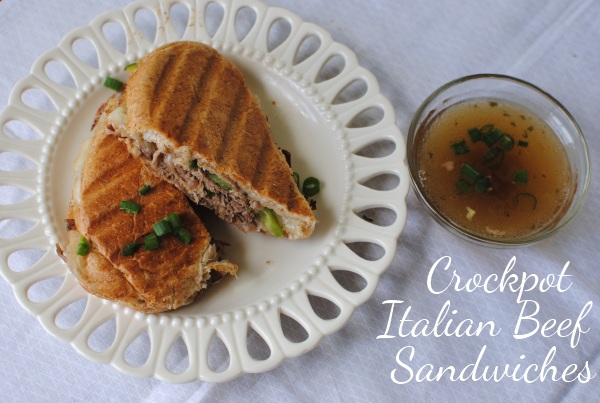
In thinking up a few changes to the shredded beef, I decided to make it a panini-style sandwich by adding provolone cheese and then popping it on the grill and flattening it.The most expensive ingredient was the brisket. I got the hoagie rolls on sale at Kroger and of course the green bell pepper was less than $1. The provolone cheese was around $2.99 at Aldi.

It was a hit around here and I hope that you like them too!

Adapted from The Simple Dollar‘s recipe.

Crockpot Italian Beef Sandwiches

Crockpot Italian Beef Sandwiches

Use your slow cooker to create yummy Italian Beef Sandwiches.

Ingredients

  • 2 pounds beef brisket
  • 1 tablespoon olive oil
  • 2 1/2 cups beef broth or beef stock
  • 2 cloves minced garlic
  • 1 chopped red onion
  • 1 Green Bell Pepper, sliced into long strips
  • 6 Slices Provolone Cheese
  • Spray Butter
  • 6 Hoagie Buns

Method

  1. Place all ingredients in the crockpot except for cheese and buns. Cook on low for 6-8 hours or on high for 4-6 hours.
  2. In the last 30 minutes, shred the beef and place back in crockpot.
  3. Place cheese on each bun and then place shredded beef. Spray with butter spray and grill on George Foreman or panini press until toasted.
  4. Serve with leftover sauce/broth from cockpot.

Notes

If you like your bell peppers a little crunchy, wait until later on in the cooking time to place them in the crockpot.

http://www.pennywisecook.com/crockpot-italian-beef-sandwiches/


Like this post? SHARE it!

Related Posts Plugin for WordPress, Blogger...