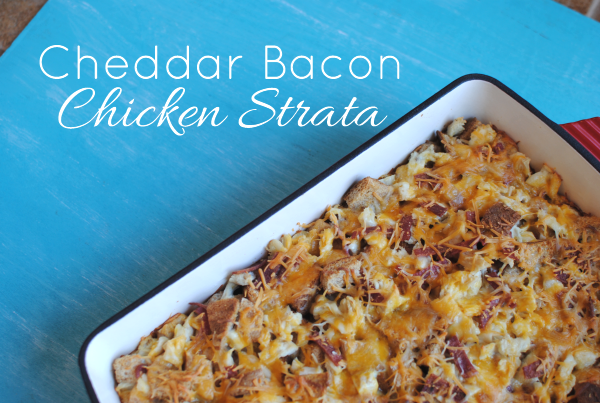
Cheddar Bacon Chicken Strata

Over the weekend, my husband threw me a surprise birthday party. My birthday was Wednesday so I wasn’t expecting anything, but I knew that something was going on. He made up a very silly story to cover up why he didn’t get me mug hooks one day when he went out to “get some fresh air”. He came back and I asked for my mug hooks and he said that Lowes had a hook shortage. LOL Of all places on earth to have a hook shortage.

He surprised me with a big party, my sister and the kiddos came all the way from 2 hours away, and this fabulous cake.

What do you think? Is that not so thoughtful and perfect? The penny idea was spot on. I reached over and pinched my penny…cake a few times. 🙂

One meal idea that I always know will be a winner on basically any night of the week is breakfast. I love to cook breakfast for dinner because I know that there will be absolutely no opposition to eggs, bacon, biscuits, cheese, and all of that yummy stuff. It’s so effortless to whip up and makes the house smell incredible.

I found this recipe over at Spark People and decided to add a little bacon to it. Because if you ask me, that was the only thing missing from it. I used turkey bacon as to not add too much more fat. It’s got about 207 calories per serving without the bacon and since I didn’t use that much bacon so I don’t think that it tainted the calories that much.

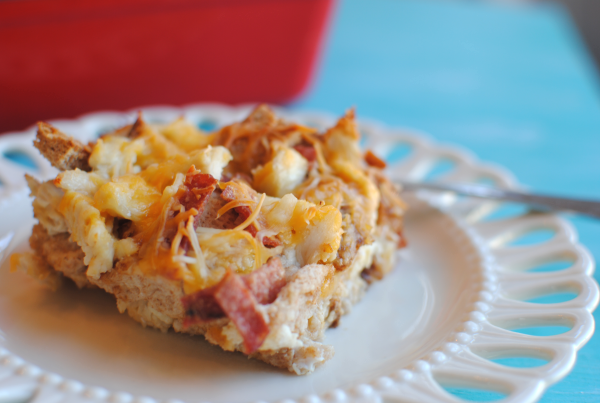
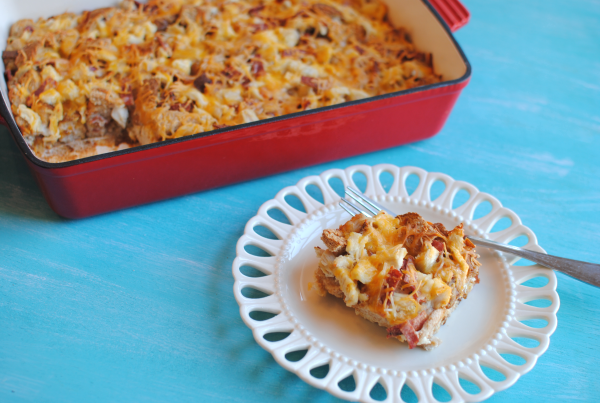
Believe me, you cannot tell that this dish is lower calorie. I mean just look at that. Having chicken in it makes more filling so you won’t have to feel as if you’re not providing enough substance if you make it for dinner.

My favorite part? It’s kinda like a crockpot meal. You put it all together in the morning (or the night before for breakfast or brunch) and let it set and get it’s yumminess on all day. Then when you’re ready to eat, pop it in the oven and bake it to perfection. Simple as pie!

And like I said, it makes my life easier when I know that everyone in my family will like it!

Cheddar Bacon Chicken Strata
Recipe Type: Breakfast, Brunch, Main Dish
Author: Adapted from Spark People Recipes BOWLER729
Perfect for brunch (or dinner), this easy strata is a great make ahead meal that will please even the pickiest eaters.
Ingredients
  • 10 Slices Whole Wheat Bread, Cubed
  • 1 and 1/2 c. Fat Free Cheddar Cheese
  • 1 and 1/2 c. Cooked Chicken, Cubed
  • 8 Pieces Turkey Bacon, Crumbled
  • 5 Egg Whites
  • 2 c. Skim Milk
Instructions
  1. Place half of bread cubes into bottom of a 9×13 greased dish. Add 1/2 of cubed chicken and half of turkey bacon. Top this layer with 1 cup of shredded cheese.
  2. Add other half of bread crumbs, chicken, and bacon.
  3. Beat eggs with the milk and evenly pour over to moisten. Top with remaining 1/2 cup cheese.
  4. Cover and refrigerate for at least 2 hours to overnight.
  5. Preheat oven to 325 degrees. Bake for 45 minutes or until a knife inserted comes out clean.
  6. Let stand 10 minutes before serving.

Like this post? SHARE it!

Related Posts Plugin for WordPress, Blogger...

Crockpot French Dip Paninis

I met a sweet girl the other day who was pretty far along in her pregnancy. She already had a little boy and was expecting a brand new little girl soon. We got into talking about cooking (as I cannot help but do) and she described her desire to cook but the lack of time that she had to devote to it. I told her about my love for the crockpot and she made a statement that had my jaw on the floor. She said that she had only ever made one meal in the crockpot.

I know, I know. You can pick your jaw up off the floor now.

It is a little hard to believe, but I think that the norm may be that people think that crockpot means work. When in reality, it’s the opposite. When I’m planning my meals for the week, I plan crockpot meals on those nights that I know will be hectic and too busy for cooking up a meal. If I was smart, I’d make a crockpot meal every night because inevitably most nights end up crazy around here. But the nights that I do make them, it makes life oh so much easier.

Take these super yummy French Dip Paninis for instance. A french dip is definitely a slow cooking process. What makes them so dadgum yummy is that they are tender and juicy so the crockpot is the absolutely perfect way for making the perfect french dip.

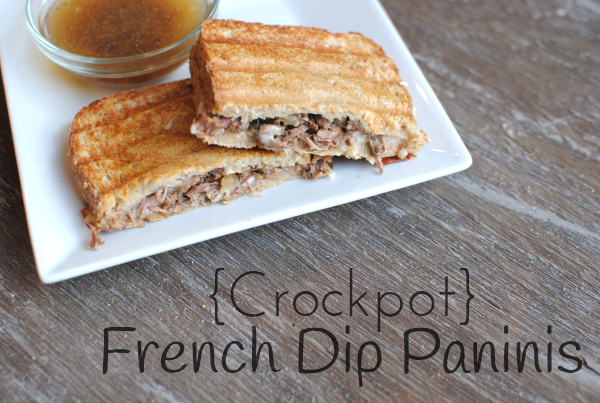
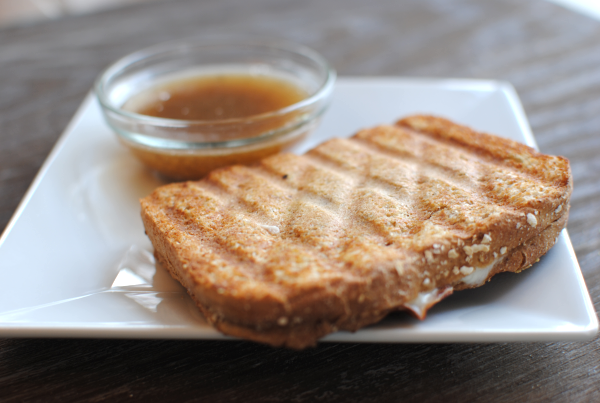
Looking at this panini, you’d never even know that it was packed full of slow cooked, juicy, tender beef and covered in melted provolone cheese…

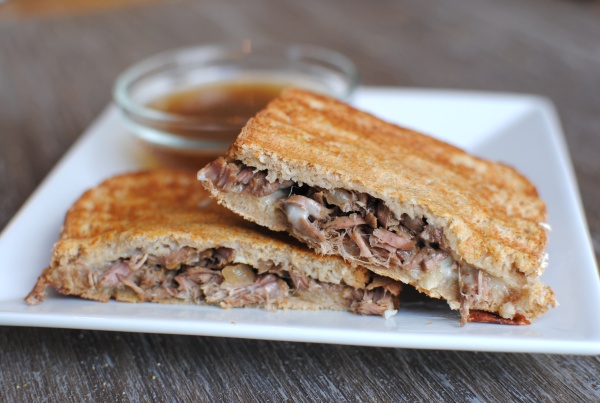
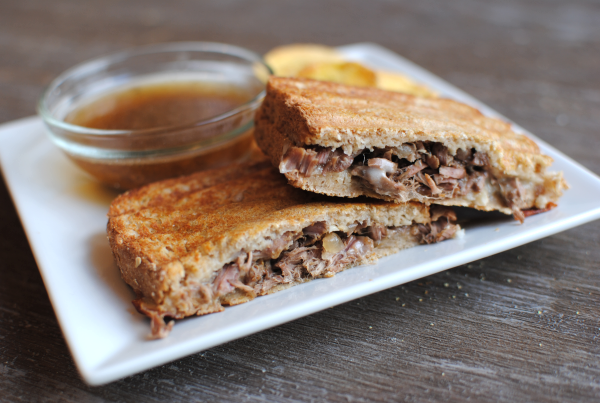
Ah yes, here’s a better view. You can even see a few onions peeking out. I originally planned these to be crockpot subs, but alas the clearance onion buns that I got at Walmart that day were molded by the time I was putting sandwiches together! So I settled on our wheat bread and sprayed it a few times with I Can’t Believe It’s Not Butter. Then I grilled it a few moments on the George Foreman grill.

No need for an expensive panini press, use your George!

And when it comes to meat to make these french dips, use whatever you can find cheap at the store. I used sirloin tip steak this time, but I may use chuck roast next time. I just grab whatever I can find a good deal on. After the slow cooking, it will all pretty much taste the same.

These are a huge hit and a go-to meal for those nights when you don’t want to do any real work in the kitchen.

Crockpot French Dip Paninis
Recipe Type: Main Dish, Crockpot, Lunch
Author: Pennywise Cook
A french dip is as easy as pie when you make them in your crockpot!
Ingredients
  • 1.25- 1.5 lbs Cut of Beef (Your Choice)- Could use Round Steak, Chuck Roast, Sirloin Tip, etc.
  • 2 c. Low-Sodim Beef Broth
  • 1 Medium Onion, Sliced to Thick Rounds
  • 2 Cloves Garlic, Roughly Chopped
  • 2 Tbsp Worcestershire Sauce
  • Salt and Pepper
  • 1/2 Tsp Italian Seasoning
  • 8 Slices Wheat Bread
  • 4 Slices Provolone Cheese
  • Butter Spray
Instructions
  1. Placed onions into the bottom of crockpot. Mix together beef broth, garlic, Worcestershire sauce, salt, pepper, and Italian seasoning.
  2. Place beef onto onions and pour broth mixture over beef.
  3. Let cook on low for 5-6 hours. 30 minutes or so before eating, take out beef and shred and continue cooking.
  4. To make panini, place a scoopful of beef (drained) onto piece of bread. Top with a slice of cheese then second piece of bread. Spray a few times with butter spray on each piece then place on panini press or George grill for a minute or two.
Notes

To be completely honest, I can’t remember if I used 1 or 2 cups of beef broth. I’m pretty sure that I came back and added that second cup because I was concerned that the beef needed more liquid to cook in. You might add 1 cup and see if that is enough and if not add the 2nd cup. Forgive me, forgot to update my recipe as I was going along.

You could also use a can of beef consume in place of the beef broth for a thicker consistency. I plan to try that out very soon. If you do before I do, let me know what you think!


Like this post? SHARE it!

Related Posts Plugin for WordPress, Blogger...

White Bean Cheddar Burgers

First of all, Happy 4th of July! I love summer and the 4th of July always tells me it’s definitely summer! Well that and the ridiculous sweat provoking heat. Either way, today is a great day to celebrate our independence and enjoy our freedom. If you got the day off, enjoy your time! And if you didn’t well shame on your boss. 😉

What better thing to cook today than a burger, right?

I tell you, this cooking stuff has its highs and lows. I get a lot of ideas all the time and it’s like the gears in my brain start turning trying to think of ways to make something new or different. Just the other night I made something that was not very good. The idea of it was brilliant, but the execution was not so much. Hubby said it was good and even took the leftovers for lunch the next day, even when I insisted on chunking them. But He was just being sweet. I’m sure of it. 🙂

While undoubtedly, I have some cooking failures lows, I also have some things that end up really great! Today’s recipe is one of them.

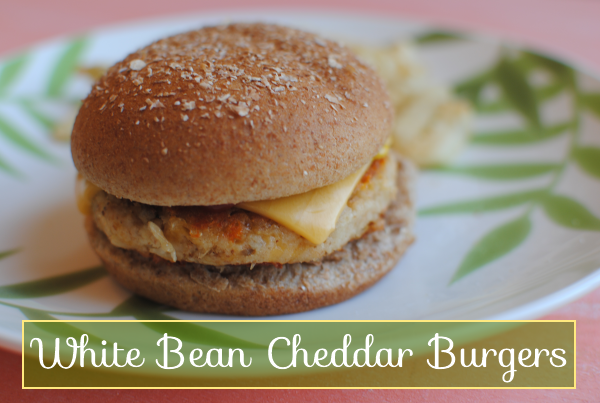
You may never think about a black bean burger again. This my friends is my absolute favorite new burger. I saw mention of the words “white” bean burger the other day in passing. Without even looking at the recipe, I knew that I could create one similar to my black bean burger but creamier, as white beans tend to be. Normally I kinda jot down what I might put in the recipe, but this time I decided to wait until it was time to start making them to jot down the ingredients. You know, a little bit of this and a little bit of that.

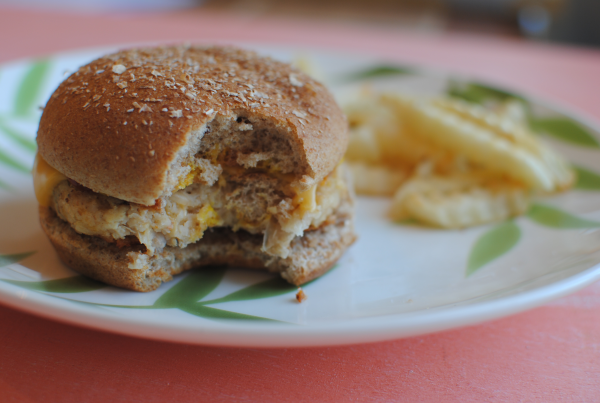
What my brain (and food processor) produced was yummy y’all! I’m so excited about these burgers! Not only are they made with the creamiest beans, they are loaded with cheese and even have an added bonus- mushrooms! If you’re not a mushroom person, please don’t write these burgers off just yet. I’m not a huge mushroom fan either. You cannot even tell that they are there. It’s a great way to get the kids to eat them without suspecting a thing.

White Bean Cheddar Burgers
Recipe Type: Main Dish, Burger
Author: Pennywise Cook
Take a break from the ordinary and enjoy a meaty white bean and cheddar burger!
Ingredients
  • 1 (19 oz) Can Cannelini Beans, Rinsed and Drained
  • 1/4 c. Mushrooms, chopped
  • 1/4 c. Bread Crumbs
  • 1 Egg White
  • 2 Tbsp Olive Oil
  • 1/2 c. Shredded Cheddar Cheese
  • 1 Tsp Minced Garlic
  • 1/4 Tsp Salt
  • Dash of Pepper
  • Dash of Onion Powder
Instructions
  1. Place all ingredients in a food processor and pulse until combined well.
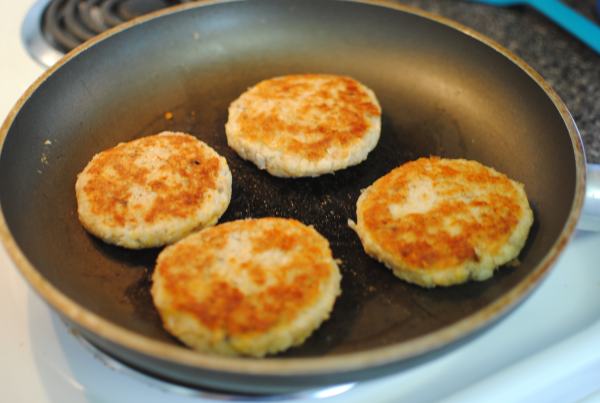
  2. Heat olive oil in a skillet over medium high heat. Form “meat” into 4 patties and place into skillet.
  3. Cook for about 4-7 minutes on each side until browned.
  4. Serve with your favorite toppings!
Notes

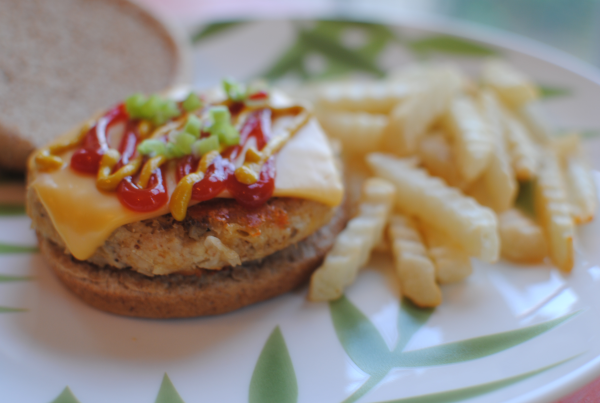
I put green onions on top of my burger and it went really well. If you like green onions, it would be a fantastic addition to add 2 tbsp chopped green onion to your burger “meat”!

I used cannelini beans, but you could also use any other white bean such as great northern beans or even pinto beans.

I used jarred mushroom pieces or you could use canned.

If you are concerned about what a “dash” is, then just use about 1/8 tsp.


Like this post? SHARE it!

Related Posts Plugin for WordPress, Blogger...

Cauliflower Chicken Fried “Rice”

We have this little Chinese buffet right around the corner from where I live that is all you can eat for $5.98. We’re talking lo mein, shrimp, wontons, those amazing Chinese donuts, and we mustn’t forget- chicken fried rice. That’s why I love those buffets, on occasion of course. Where else can you stuff your face until it’s time to unbutton your pants for just $5.98?

Or take it from me, just wear elastic pants next time…

Since I don’t go into the gut-busting buffets too often, I sometimes just make my favorite Chinese dishes at home. One of the easiest is chicken fried rice. I mean come on, it’s the perfect way to use up leftover rice and chicken. It makes one of those double duty meals that starts as one thing and turns into another. That’s a smart or shall I say, pennywise move.

Cauliflower is one of my favorite vegetables. Not only for it’s affordability, but for it’s taste and ability to pretty much adapt itself to any dish. Take for instance the Doughless Pizza Crust. Whodathunk that you could turn cauliflower into pizza and make it taste good?

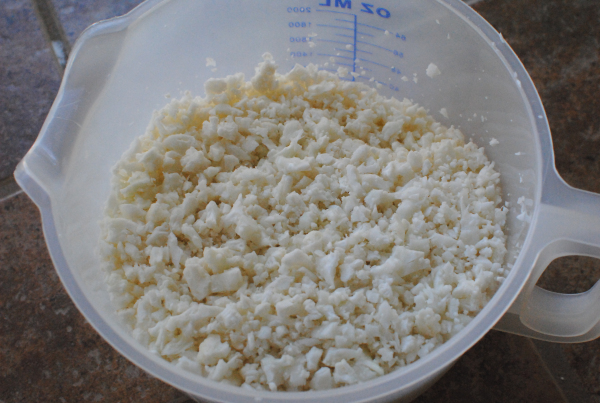
When you make up the “riced” cauliflower for the pizza crust, this is what it looks like. It’s basically very finely ground. It reminded me of rice. Hey! I wonder if that’s where the term “riced” came from? Ah yes, we are learning together here folks!

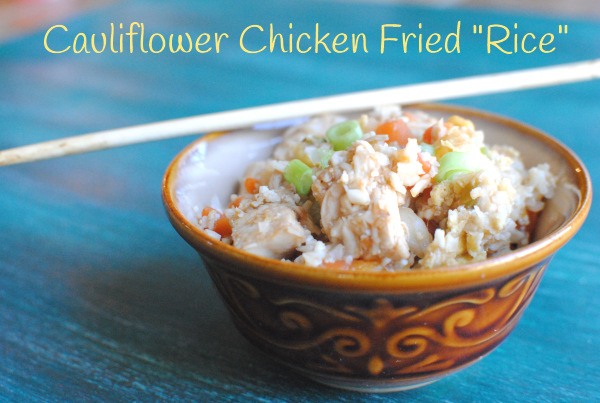
This brought me to  thinking about fried rice and how you could easily just throw some grilled chicken into the cauliflower and add some seasonings and such to make a mock chicken fried rice.

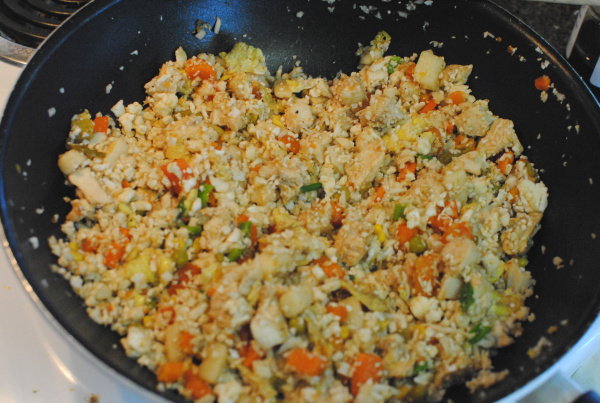
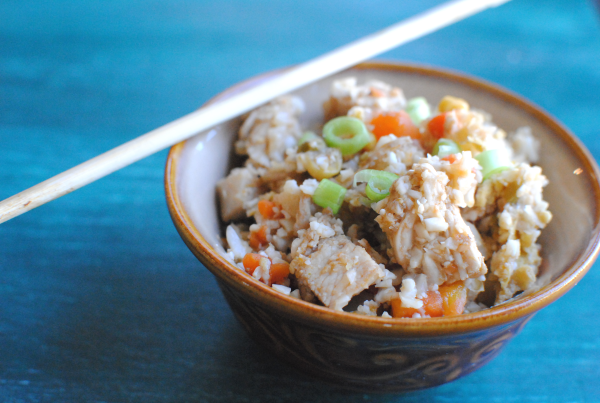
Voila! It totally worked! I did not even COOK the cauliflower before putting it in. I had originally planned to microwave it like you do with the pizza crust, but I got to thinking that might make the cauliflower too soft. I then decided to place it in the fridge for a little while to get it cold. I made the rest of the veggies and chicken and then added the cauliflower very last.

I tend to think in terms of calories. Weighing out the calories for the difference in rice and cauliflower, you’ll save about 168 calories per cup using cauliflower. And if you’re a carb person, the difference is a whopping 39 carbs less in a cup of cauliflower! So needless to say, it’s a healthier choice.

Don’t expect it to taste exactly like rice. That would require a magic wand, but this does come close if you ask me. Definitely as satisfying and scrumptious.

If you try this, PLEASE tell me what you think! I’d love to hear your thoughts as I just whipped this together the other night.

Cauliflower Chicken Fried “Rice”
Recipe Type: Main Dish, Side Dish
Author: Pennywise Cook
A healthier alternative to starchy rice, try this cauliflower chicken fried “rice” instead! You won’t miss the rice!
Ingredients
  • 3 Cups, Riced Cauliflower
  • 1 Large Boneless, Skinless Chicken Breast cut into bite-size pieces
  • 1 Tsp Olive Oil
  • 1 Can Mixed Vegetables (or Frozen and thawed), drained
  • 1 Egg, Beaten
  • 1/2 Tsp Minced Garlic
  • Pepper
  • 2 Tbsp Soy Sauce
  • 1/2 Tbsp Teriyaki Sauce
  • 1/2 Tsp Sesame Oil
  • 2 Green Onions, Chopped
Instructions
  1. “Rice” your cauliflower by placing in the food processor or blender and making it finely ground. Place in the refrigerator until ready to use.
  2. In the oil, pan sear the chicken breast along with the garlic. Add pepper. Push to one side of skillet and cook the egg.
  3. Add in the cauliflower, veggies, soy sauce, teriyaki, and sesame oil. Cook over medium heat until heated through.
  4. Top with green onions and serve!
Notes

I used canned veggies and it turned out ok. Frozen would be even better since they have more variations on the veggie combinations.

The colder that your cauliflower is, the better.

This would also be great even without the chicken!


Like this post? SHARE it!

Related Posts Plugin for WordPress, Blogger...

Basil Ricotta Mac and Cheese

Isn’t it funny how there is never enough time in the day? I can have a completely clear day planned with maybe one thing on my to-do list and half the time I don’t even get that one thing accomplished. Of course, I do have a tendency to go off on tangents. My husband makes fun of me beceause I can barely get a sentence out. In fact, the other day I was telling him something and in the middle of my sentence remembered something else and began to tell him about that instead. He looked at me with the funniest face and said, “Did you just interupt yourself?”. I stopped and thought about it for a moment and then decided yes, I did in fact interupt myself! Leave it to me!

Much like my thoughts getting side-tracked, I easily get distracted when I’m cleaning the house. I’ll be cleaning one thing and come across something that just bothers me and I have to clean that. All the while forgetting about my original intention. It may take me the whole day (and sometimes week) to get the original mission accomplished.

A near future goal of mine is to create a cleaning list for the week. I’ll let you know how that works out. 🙂

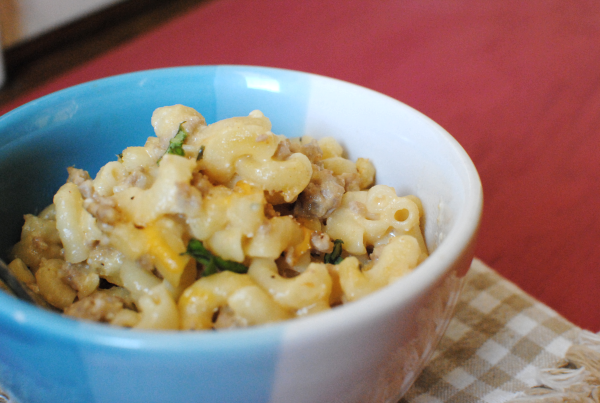
Needless to say, time gets away from me sometimes. And on those days, we either have a fend for yourself night for dinner or I whip something up that doesn’t need a lot of work. Mac and cheese is always a great go-to option. Always a pleaser for the kiddos and the picky husband as well.

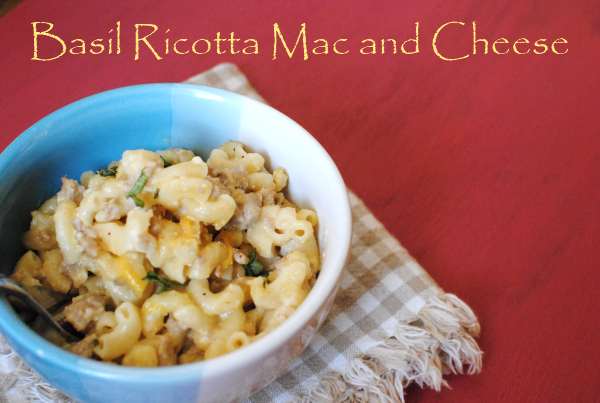
It’s not exactly the best grown up meal. So when I was having a “day” the other night I decided to liven it up a bit and use up some ricotta cheese that I had in the refrigerator and add a little bit of basil. And to make it more of a meal I added some ground turkey. It was fantastic and even pleased my 5 year old!

Hey, maybe she’ll eat her peas now. Nah….

Basil Ricotta Mac and Cheese
Recipe Type: Pasta, Main Dish
Author: Pennywise Cook
This grown up version of everyday mac and cheese is sure to please everyone!
Ingredients
  • 2/3 Box Elbow Macaroni
  • 1 lb Ground Turkey
  • 1/4 c. Flour
  • 2 c. Milk
  • 2 c. Shredded Cheddar Cheese + additional for topping
  • 1/4 c. Bread Crumbs
  • 1/2 c. Ricotta Cheese
  • 1/2 Tsp Onion Powder
  • 1/2 Tsp Garlic Powder
  • 1 Tsp Basil, Chopped
  • Salt and Pepper to Taste
Instructions
  1. {reheat oven to 350 degrees.
  2. Prepare macaroni a couple minutes less than directed on the box. Drain and set aside.
  3. Meanwhile, brown ground turkey and stir in ricotta cheese. Add in seasonings and basil.
  4. In a saucepan, stir together flour and milk and cook to a boil until thickened. Then stir in shredded cheese. Mix well.
  5. Mix together pasta, ground turkey mixture, and cheese mixture. Pour into a greased baking dish and top with additional shredded cheese and bread crumbs. Bake for about 10 minutes until cheese is melted and breadcrumbs begin to crisp.


Like this post? SHARE it!

Related Posts Plugin for WordPress, Blogger...

Loaded Potato Cheesecake

Aside from my sweets, potatoes are my other downfall. Give them to me in any form possible and I will eat them happily. When I was pregnant with both my girls, I craved nothing but potatoes. All I wanted was fries, mashed potatoes, and mostly fully loaded potatoes. You know, the ones slathered in a pound of artery-clogging butter, a double donkey dollop of daisy, and of course massive amounts of cheddar cheese and bacon. There is just nothing that compares to this kind of happiness.

Besides cheesecake….

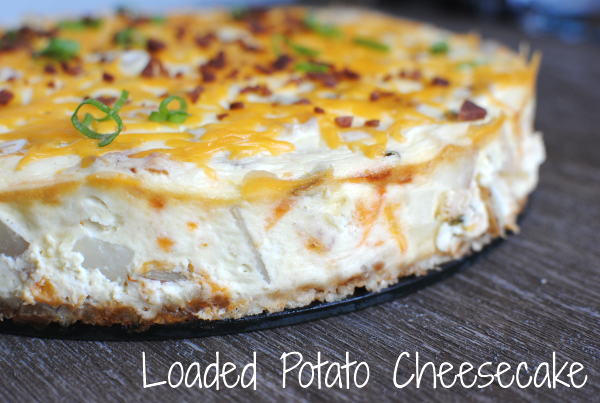
Which brings me to my epiphany. I sat there looking at leftover potatoes on my counter. I have a tendency to let them go bad so I vowed to use them up somehow, someway. And I always have cream cheese on-hand. I thought to myself, are there savory cheesecakes? And if so, are there loaded potato cheesecakes? I began a mission on “The Google” as my sister calls it, to see if there had ever been such a recipe. I mean come on, cream cheese makes mashed potatoes delicious so why not build the potatoes into the cream cheese and call it a savory cheesecake?

To my utmost surprise, I could not find a single recipe for Loaded Potato Cheesecake. What is the world thinking? Cue the gears a turnin in my noggin’. I got out my handy dandy notebook and began this recipe.

And what do you know? It actually turned out incredible!!! This simply doesn’t happen to me on the first time y’all. It just doesn’t.

Not me. Not ever.

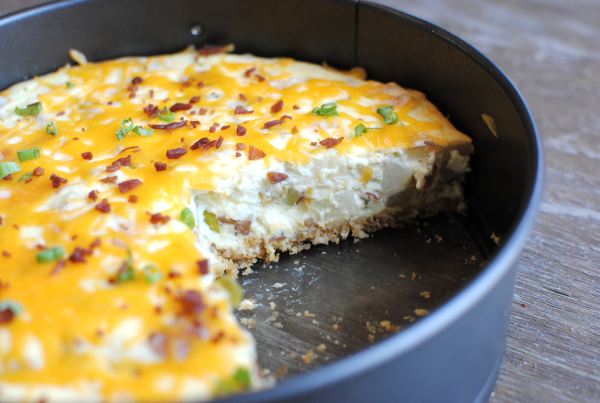
I will try something 5-10 times before getting it right. I guess the moons have aligned and the kitchen gods decided to cut me some slack and save my sanity because this one turned out just right. One of my main concerns was the crust. I was so sure that it was going to end up really soggy. But no, It turned out just right and just makes each bite perfect.

This may never happen again so enjoy!

Loaded Potato Cheesecake
Recipe Type: Appetizer, Main, Vegetable
Author: Pennywise Cook
This savory dish is a great twist on everyday cheesecake. Impressive and tasty at the same time!
Ingredients
  • 1 and 1/4 c. Ritz Crackers, Crushed
  • 1/3 c. Shredded Cheddar Cheese + 1/2 c. + 1/4 c.
  • 3 Tbsp Butter, Melted + Additional 2 Tbsp, Melted
  • 2 Packages Reduced Fat Cream Cheese, Softened
  • 3 Medium Red Potatoes (about 3 cups), washed, chopped into bite-size pieces and boiled until soft
  • 1 c. Reduced Fat Sour Cream
  • 2 Eggs, at Room Temp
  • 3 Green Onions, Chopped
  • 4 Pieces Bacon, Cooked and crumbled
Instructions
  1. Preheat oven to 350 degrees.
  2. In a small bowl combine Ritz Crackers, shredded cheese, and 3 tbsp melted butter. Press into a greased 9″ springform pan. Set aside.
  3. Beat cream cheese until fluffy. Add in eggs one at a time, beating cream cheese after adding each egg.
  4. Add in sour cream, salt, and 2 tbsp melted butter. Combine well. Gently fold in potatoes, green onions, bacon, and 1/2 c. shredded cheese.
  5. Pour into pan. Bake at 350 degrees for 15 minutes. Then Reduce heat to 225 and bake for 1 hour and 15 minutes.
  6. In the last 10 minutes, top with additional shredded cheese and allow to melt.
  7. Cool and serve!
Notes

As you can see, I tried to lighten it up as much as I can. While some things just won’t work in reduced fat form, this dish does not taste like it contains anything healthy at all!

It’s a crowd pleaser for sure.


Like this post? SHARE it!

Related Posts Plugin for WordPress, Blogger...

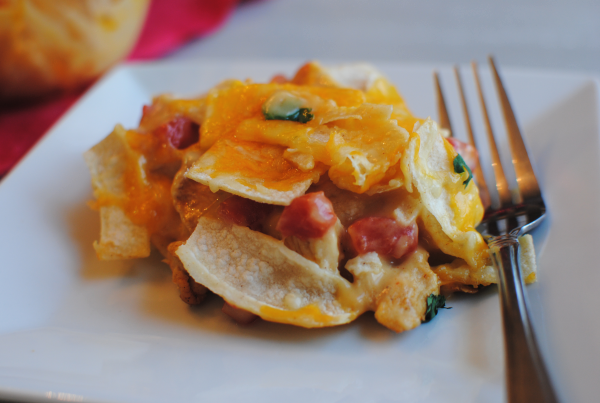
Easy Chicken Tortilla Casserole

We went on a bike ride last night with the girls. I love riding during the sunset. I feel all nostalgic and corny riding off into the sunset like a cowboy.

Don’t you always get that feeling when you ride your bike in the evening? No? Just me? I digress…

You know that saying:

I can only please one person per day. Today is not your day. Tomorrow isn’t looking good either.

There are many days when I feel like just saying that to folks. Especially my picky eaters. It’s not always easy pleasing those who don’t like green or even red things on their plate. It’s a matter of trial and error and you just try different things until you find something they like! And sometimes you just say eat it or starve! 😉

Luckily most children grow out of their I don’t like that stage as their taste buds mature. Even I remember tons of things I never used to like that I love now. For instance of all things, onion bagels. I remember my momma forcing me to eat an onion bagel one morning and it was traumatizing to say the least. I mean come on, why else would I remember this? But now I love them. That is if I can find them in the store. Where are those things anyways? Have they stopped making them?

Today’s recipe is one that most every person will love. Simple enough for those who hate to cook, but fancy enough to make if you have company coming. It’s quite tasty too!

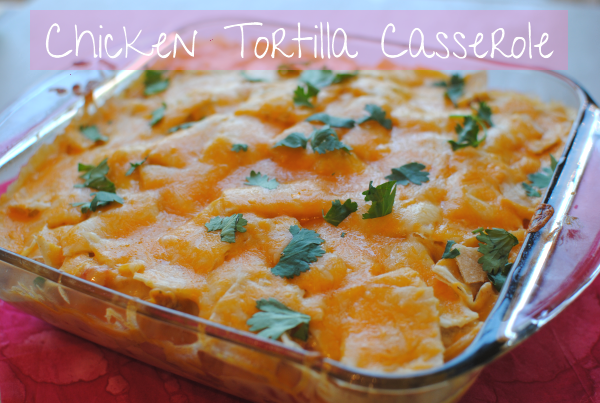
This Chicken Tortilla Casserole is brimming with juicy chicken breast, spicy rotel, and corn tortillas are what this whole dish is all about.

One word of warning. Use MILD rotel if your family doesn’t like things hot. We used original and it was way too spicy for us. I will be using mild next time.

Recipe adapted from Homemaking Challenged.

Easy Chicken Tortilla Casserole
Simple ingredients lead to a pleasing chicken meal even for the pickiest of eaters!
Ingredients
  • 2 Large Boneless, Skinless Chicken Breasts, Cut into Bite-size Pieces
  • 1 (10 oz) Can Rotel
  • 2 Cans Cream of Chicken Soup
  • 12 (6 in) Corn Tortillas, Cut into bite-size pieces.
  • 1/2 Tbsp Chili Powder
  • 1 Cup Mexican Blend Shredded Cheese
  • 1 Tbsp Olive Oil
  • 1 Tsp Garlic, Minced
Instructions
  1. Preheat oven to 350 degrees.
  2. In a large skillet brown chicken pieces in oil with chili powder and garlic. Remove from heat.
  3. Meanwhile in a large bowl, mix 2 cans cream of chicken with 1 can rotel.
  4. In bottom of a greased 8×8 baking dish, place 1/3 tortilla pieces. Place half of chicken on top evenly. Place 1/2 the cream of chicken mixture over top.
  5. Repeat layers ending with tortilla pieces. Cover with foil and bake for 40 minutes.
  6. Place shredded cheese on top and bake an additional 5 minutes once cheese melts.
Notes

This might even be possible with canned chicken in a pinch.

You could also make this ahead the night before and then bake when ready to serve! It could freeze well too.

If you want to get fancy like me and add cilantro on top you can. I won’t hold you back…


Like this post? SHARE it!

Related Posts Plugin for WordPress, Blogger...

Strawberry Salsa Chicken

Take me or leave me, but I like weird things to eat. Well, what some might call weird anyways. I was making a hot dog the other night and was so excited while I prepared my ingredients. My husband watched as I drug out the relish, mustard, and ketchup. Then I decided that it wasn’t complete without chopped onions. Almost in awe of my condiment concoction, he asked “Did you chop that entire onion just for a little for your hot dog?”. Why yes, I in fact had chopped a very small amount of onion just for my hot dog. That’s how me and my dogs roll you know. He thinks I’m a bit odd, but I know there are others out there like me.

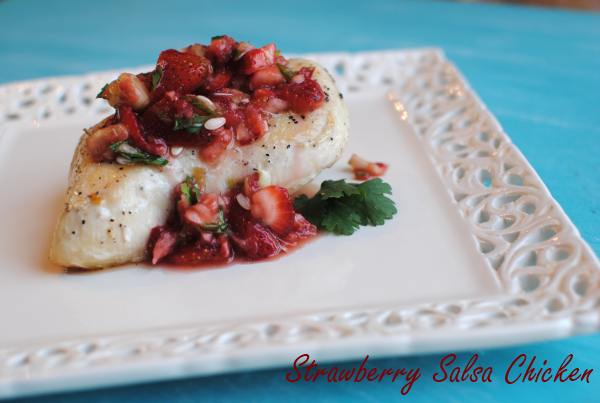
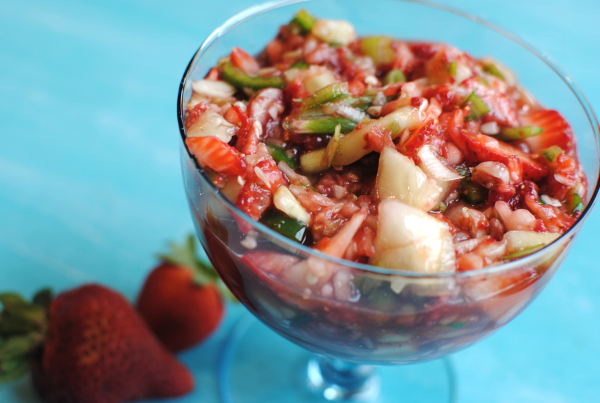
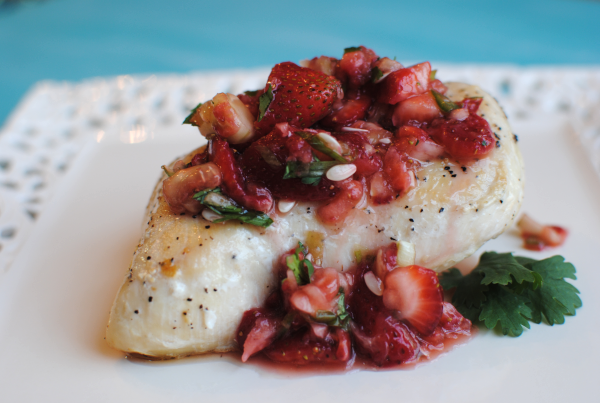
Like someone else who might like strawberry salsa? That’s another weird thing that might be perplexing to some. We’re talking replacing your tomatoes with juicy and summery strawberries instead. It’s absolutely divine I tell you. I had no idea that it would be so incredible.

And then I ate it with chicken.

Just imagine me kissing my fingers like the Italians do. It’s that marvelous.

Complete with cool and crisp cucumbers, lime juice, brown sugar and even jalapeno, I can almost guarantee that you will like this. Oh and if you don’t like hot salsa, don’t worry. The one jalapeno that is in this will not be hot. It’s really the one thing that makes this a “salsa”.

I’ve also learned a fancy smancy teqnique for making oven baked chicken PERFECT. The key is to brown it in a skillet a few minutes on each side. Not enough to cook it through, but just enough to get it browned a bit. Then finish it off in the oven. Works everytime to get the most perfectly cooked chicken ever.

AND I also highly recommend pounding your meat first. Yes, it seems like a lot of work but trust me. You will not only enjoy the task, but you’ll also enjoy the chicken a lot more than going without. I told my mom about this recently and she always beats her chicken first now! Just do it next time and you’ll see.

Ready for the most perfect summer chicken recipe ever? See below!

Strawberry Salsa Chicken

Strawberry Salsa Chicken

Celebrate summer with this baked chicken with strawberry salsa!

Ingredients

  • Boneless, Skinless Chicken Breasts
  • 1 Tbsp Olive Oil
  • 1 and 1/2 c. Strawberries, Chopped
  • 1/2 c. Cucumber, Chopped
  • 2 Green Onions, Chopped
  • 1 Jalapeno, Chopped
  • 1 Tbsp Cilantro, Chopped
  • The Juice of 1 Lime
  • 2 Tbsp Brown Sugar

Method

  1. Preheat oven to 350 degrees. Season chicken with salt and pepper. Brown chicken over medium high heat in oil for a few moments on each side. Just until browned, no need to cook through. Bake 20 minutes.
  2. Meanwhile, mix all salsa ingredients and combine well. Place in refrigerator until chicken is done.
  3. Remove chicken from oven. Serve salsa over chicken!

Notes

There's no much to it! Simple as pie.

The salsa would be divine with tortilla chips too!

Enjoy!

http://www.pennywisecook.com/strawberry-salsa-chicken/

Question of the day: What do you like on your hot dogs?


Like this post? SHARE it!

Related Posts Plugin for WordPress, Blogger...

Kitchen Tip: Shaping Sliders

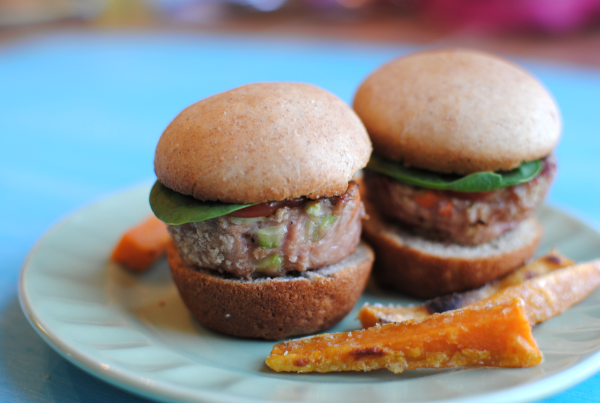
Sliders have become more and more popular over the years haven’t they? It seems a lot of the mainstream restaurants have some type on slider on the menu. I am in absolute love with the Ruby Tuesday Turkey Rubies. They are amazing. When I’m craving them, it’s not always possible to go out to eat with a very busy 1 and 4 year old. I could order them to go, but what’s the point in eating out if you’re going to eat at home? We rarely get food to go.

To make sliders at home, you may think that you have to have one of those fancy slider grills or shapers. But in reality, it’s as easy as a little kitchen trick involving of all things, muffin tins and cupcake liners. I saw this idea and new I had to try it when I made up these Asian Turkey Sliders one night.

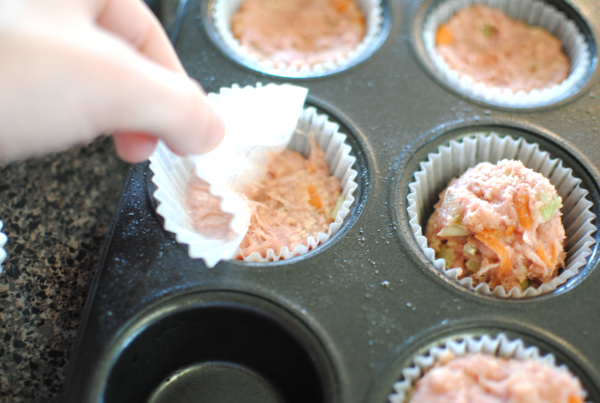
Start by placing cupcake liners into your muffin tins like so. No need to use fancy ones, just ones that you might have leftover. (Try not to get jealous of my ugly white Dollar Tree cupcake liners) If you want to make sliders a lot, you might even consider having a set of liners just for making sliders!

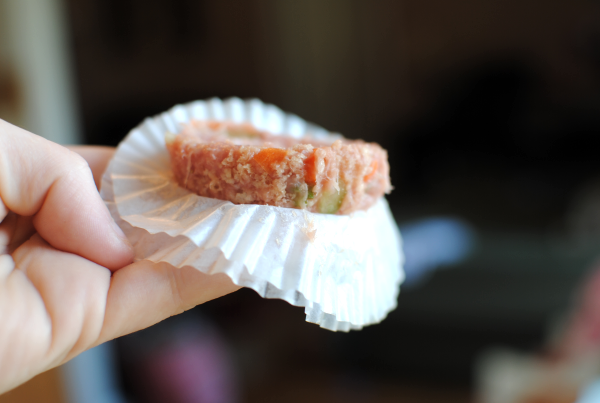
Then using a new cupcake liner for each slider, simply press them into that patty shape in the tin. I know my meat may look a little weird, remember it’s Asian turkey! 🙂

After that fairly simple process you’ll have all uniform and tidy slider patties ready for the grill or skillet! Love finding shortcuts in the kitchen like this that make life easier. And with sliders, the possibilites are endless. I mean come on, they are just tiny hamburgers and there are TONS of variations of hamburgers.

I will say that using these Perfect Wheat Dinner Rolls as a slider bun would be a great idea. 🙂

Question of the Day: Have you ever made sliders before?


Like this post? SHARE it!

Related Posts Plugin for WordPress, Blogger...

Simple Taco Pie

I was spending time with my mom recently when we dipped into her recipe box. It’s funny how back when I was a teenager I’d see that box and it wouldn’t mean a thing. These days it’s like a goldmine to me! There’s nothing like tried and true recipe that has been tested and passed around. I was in heaven going through many of the recipes that I remember and some that I don’t. Though my mom was quick to tell stories about them. Isn’t it great how food can always find it’s way into a memory?

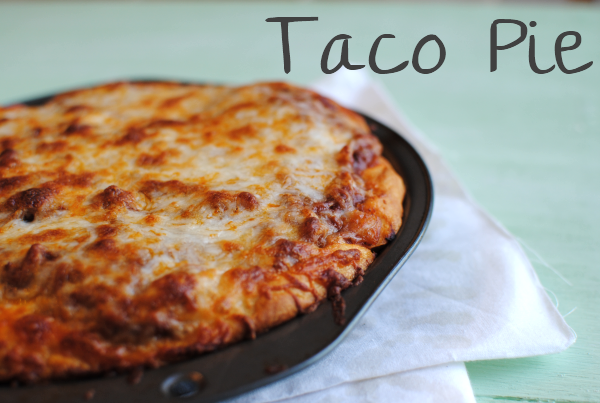
This Taco Pie recipe was among many that I got from my mom that weekend. I’m pretty sure that it’s Jennifer’s (my mom’s friend) recipe, but there’s no name listed so I’m going to go with that. Jennifer if you’re reading, it was fabulous! While the pie itself doesn’t exactly taste just like a taco, your toppings will give it that total taco flavor. But I honestly didn’t mind because it was so tasty!

My 5 year old even got seconds…this is a HUGE deal at our table. 😉

And this pie was so incredibly easy that I made it in like 30 minutes flat!

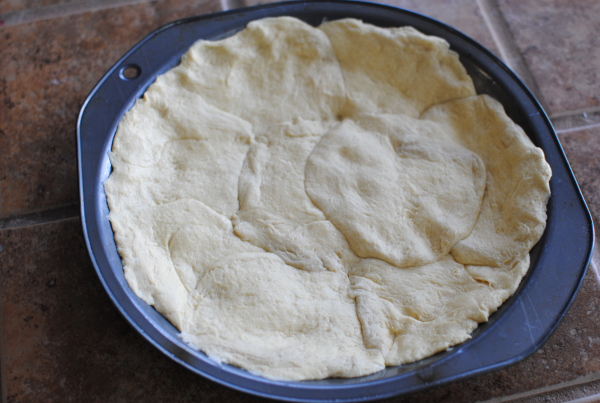
We get a little help from the store by grabbing a tube of biscuit dough. The Pillsbury brand tends to go on sale for $1 so keep your eyes open. Push the biscuits down into a pie pan and use your fingers to pinch it together to make it like a complete crust.

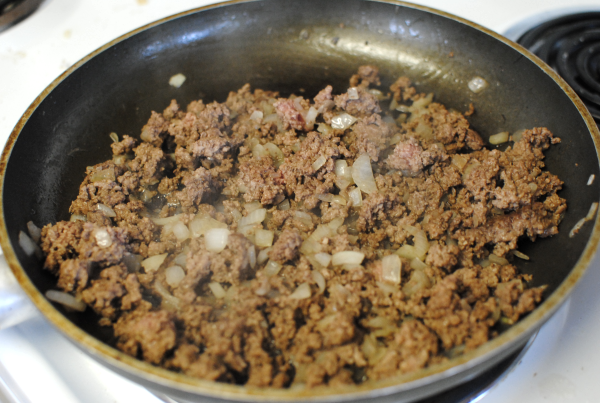
Brown a pound of ground turkey or lean ground beef along with a small chopped onion.

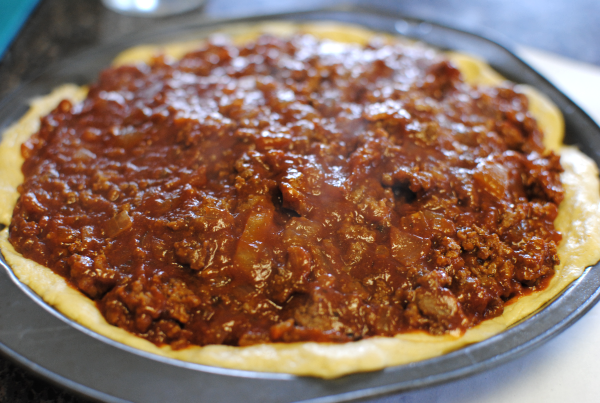
Then it’s just a matter of draining the meat, adding a bit of water and tomato paste and simmering for a while. Then scoop into your biscuit pie crust, top it with some mozzarella cheese and bake for 15.

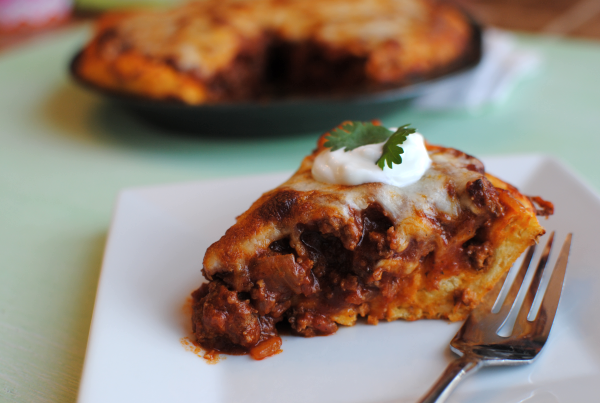
The only odd thing I found about this was the mozzarella cheese. I would normally expect cheddar on a taco, but I don’t think that this recipe would have been as tasty with cheddar.

Simple Taco Pie

Simple Taco Pie

This simple yet delicious meal is ready in under 30 minutes!

Ingredients

  • 8-10 oz Package Refrigerated Biscuits
  • 1 lb Ground Turkey or Lean Beef
  • 1 Small Onion, Chopped
  • 3/4 c. Water
  • 6 oz Can Tomato Paste
  • 1 Package Taco Seasoning
  • 1 Cup Shredded Mozzarella Cheese
  • Taco Toppings like tomatoes, lettuce, sour cream etc (optional)

Method

  1. Preheat oven to 400 degrees.
  2. Spray pie pan with cooking spray. Place the biscuits into a pie pan evenly around all sides and on bottom. Pinch with your fingers to create a complete pie crust.
  3. Brown the meat and onion until no longer pink and drain.
  4. Add water, seasoning, and tomato paste and bring to a boil. Then reduce heat and simmer for 10 minutes.
  5. Spoon meat mixture onto biscuit pie crust and top with cheese.
  6. Bake for 15 minutes or until cheese begins to brown.
  7. Top with lettuce, green onions, tomatoes, sour cream, whatever you like!

Notes

I think it would be nice to add in some black beans to the meat mixture. Or if you're a vegetarian, you could omit the meat all together!

http://www.pennywisecook.com/simple-taco-pie/


Like this post? SHARE it!

Related Posts Plugin for WordPress, Blogger...