Archives for September 2013

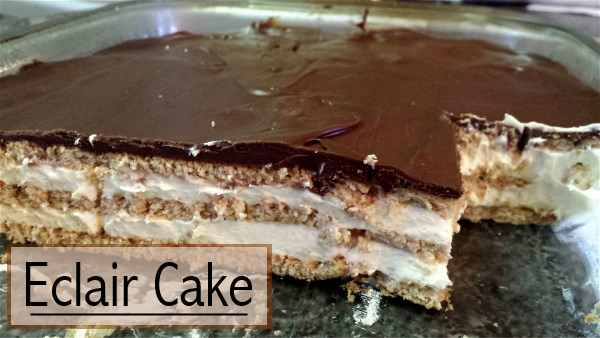
Eclair Cake- It’s So Stinkin’ Good

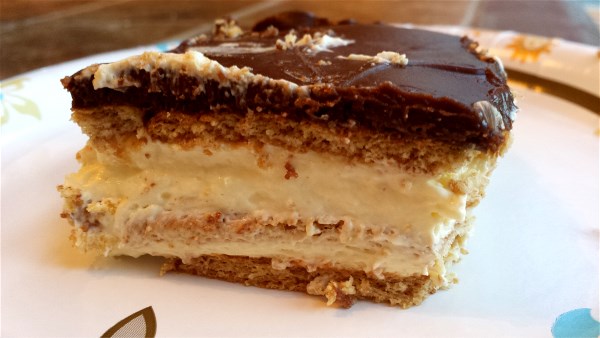
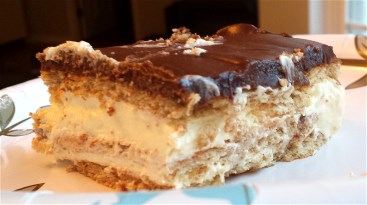
Let me begin by apologizing for the lower-than-normal quality pictures. You have to understand that I’ve made this cake a few times in the past few weeks and it was brought to my attention that I had to share it with you and therefore, I haven’t gotten a chance to take better pictures. Not to mention that each time I make it, the entire cake is gone before I can come close to taking pictures.

It’s that good y’all…

My mom had a recipe in her collection from years and years ago for Eclair Cake and she just raved about it. She used to have it all the time, but hadn’t made it in a long time. I recently came across a recipe that seemed similar and decided to make it for a family that we were taking a meal to. I knew my family wasn’t going to be happy with me if I left them out so I made one for us too.

Man oh man was this cake a hit! But I should’ve known because this cake is awfully similar to the Strawberry Icebox Cake that I make. There is just something about graham crackers and pudding in the refrigerator.

I think that the best part about this cake (aside from how amazingly tasty it is) is how easy it is to make! 5 ingredients, 10 minutes, and BOOM I’m mom and wife of the year.

And to think, you didn’t even have to turn on the oven!

Make this cake. This is an order. You will not be upset. I promise.

The only difference in my mom’s recipe and this one is basically the frosting part. Her’s had a bunch of ingredients and required extra refrigeration. I’m sure it tasted amazing, but I really like the use of frosting and according to my husband and girls, it’s the very best part!

Eclair Cake- It’s So Stinkin’ Good

Recipe Type: Dessert

Author: Pennywise Cook

This no-bake Eclair cake will be gone in no time!

Ingredients

  • 1 Package Honey Graham Crackers
  • 2 Packages Instant French Vanilla Pudding
  • 3 c. Cold Milk
  • 1 (8 oz) Tub Whipped Cream
  • 1 tub Chocolate Frosting

Instructions

  1. In a mixing bowl, combine 2 packages french vanilla pudding and milk. Mix until completely dissolved, about 1-2 minutes. Fold in whipped cream until combined well.
  2. Meanwhile, line a 9×13 dish with graham crackers.
  3. Pour half of the pudding mixture over the graham crackers and spread evenly.
  4. Place another layer of graham crackers. Pour the rest of the pudding mixture over the top of the second layer and spread evenly.
  5. Place another layer of graham crackers on top.
  6. Take the top off the frosting and remove the foil cover. Place the tub in the microwave for 40 seconds or until melted.
  7. Pour over the last graham cracker layer and spread evenly.
  8. Place in the refrigerator for 1-2 hours and serve!

I could not find where I originally found this recipe (so sorry!), but the same one is found at All Recipes.


Like this post? SHARE it!

Related Posts Plugin for WordPress, Blogger...

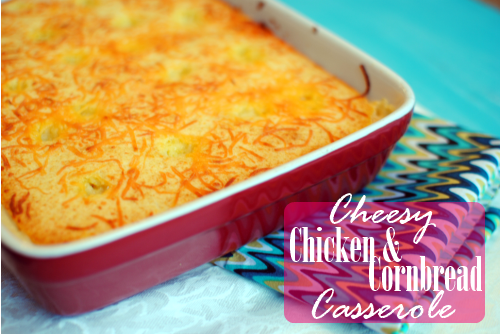
Cheesy Chicken and Cornbread Casserole


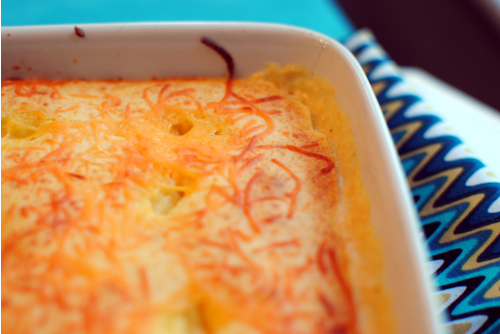
What is it about the word casserole? What exactly is a casserole? Let me consult The Google: a kind of stew or side dish that is cooked slowly in an oven. Though these days, almost anything can be considered a casserole. It doesn’t even matter the ingredients, does it?

Have some tomatoes and potatoes? Throw them in a dish, bake and you have a tomato potato casserole! I think that’s why I like casseroles so much. They are so forgiving. Well, most of them anyways. I’ve had my share of casserole failures… I just love that they are so simple and quick. Throw together what you have on-hand and bake at 350 degrees and you’ve got dinner. Casseroles were made for weeknights when momma has to grow a 3rd arm to get everything done. Who am I kidding? I grow my 3rd arm around 8am each day at breakfast…

Especially now that school has started, dinner isn’t always first thing on my mind. School doesn’t just mean the start of classes. It can also mean sports, extra-curriculars, homework, Bible study, and anything else that you can possible occupy lots of time with. My girls are still young so I’m not always a chicken with my head cut off, but I do have to say that 1st grade homework is no joke! It may not be hard, but keeping my 1st grader focused can be a chore.

Enough to build up an appetite…

For a casserole maybe?

I’ve always been a fan of those casseroles where you top it with a bread of some sort. We always used to make the chili with the cornbread on top when we were newlyweds. I’m going to be honest here and admit that it was from a box, but don’t judge. Who hasn’t made a gourmet dinner from a box while they were a newlywed? I’m also going to admit that I use boxed meals here at least once a week. You can’t have a 2 year-old and not make a little mac and cheese from a box. You just can’t. Well I can’t anyways.

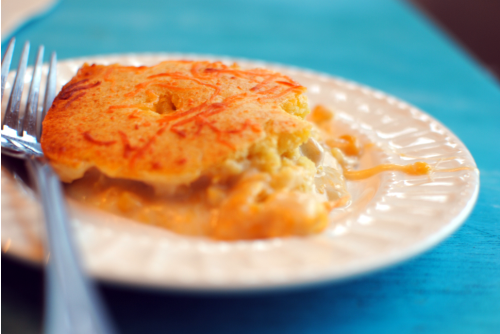
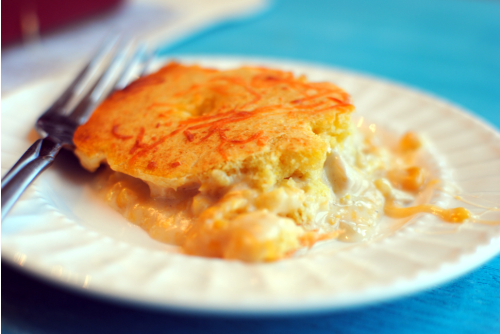
Casseroles! Yes, casseroles. This one was a result of throwing together a lot of things that we really enjoy and doing everything that I could to avoid putting in those “cream of” soups”. It seems like every casserole contains that ingredient.

Not this one! I used fresh chicken, but if you have leftover rotisserie chicken or perhaps some grilled chicken, this would be an awesome way to use it up. Otherwise whatever kinda chicken you can find on sale will work. I’m all about cheap. Though I’m not sure that the canned stuff…

You can find a ton of ideas for casseroles over at Country Crock. Some interesting facts about Country Crock:

  • Have 0g trans fat per serving
  • Contain no partially hydrogenated oils (Yipee!)
  • Have no cholesterol
  • Are 70% less fat than butter per serving (WOW)
  • Have 30% fewer calories than butter per serving

Cheesy Chicken and Cornbread Casserole
Recipe Type: Main Dish, Chicken
Author: Pennywise Cook
Who doesn’t enjoy a simple and quick chicken casserole?
Ingredients
  • 3/4 lb Chicken Breast/Tenders, cut into bite-size pieces (about 3 breasts)
  • 1 tsp garlic, minced
  • 1 tsp dried onion
  • 1 tbsp olive oil
  • 1 10.5 oz can cream corn
  • 1 c. shredded cheddar cheese + 1/4. c for topping (if desired)
  • 1 c. sour cream
  • 1 tbsp butter, cut into small pieces for dotting the top (if desired)
  • cornbread mix created according to package
  • s & p to taste
Instructions
  1. Preheat oven to degree listed on cornbread mix. Spray a 9×13 dish with non-stick cooking spray.
  2. Heat olive oil in a skillet over medium high heat. Add in chicken, garlic, onion, and s&p. Cook until chicken is not longer pink.
  3. Meanwhile, in a large bowl, combine cream corn, 1 c. cheddar cheese and sour cream until well mixed. Add in chicken. (Now would be a great time to create your cornbread batter!)
  4. Pour mixture into 9×13 dish and spread evenly. Top with cornbread batter and spread evenly. Sprinkle with the other 1/4 c. cheddar cheese and dot with butter.
  5. Place in oven and cook the time listed on your cornbread mix.
  6. Remove from oven, let cool, and serve!
Notes

You are more than welcome to make your own cornbread for the top, just be sure to have the ingredients necessary when you start you casserole!

I used a slightly smaller dish than a 9×13 for mine. I can’t tell you what size because I honestly have no idea, but I think that a 9×13 will be similar. If not, then a square dish might work. I have yet to try this in a different size dish.


I was selected for this opportunity as a member of Clever Girls Collective and the content and opinions expressed here are all my own.


Like this post? SHARE it!

Related Posts Plugin for WordPress, Blogger...

2-Ingredient Pumpkin Muffins

Alright, fess up all you pumpkin junkies. I see you everywhere drinking your Starbucks Pumpkin Spice Lattes and  swirling your Pumpkin Spice coffee creamer and eating your Pumpkin Pie ice cream. We are only 9 days into the month of September and you’re  already in full swing.

If only seeing a pumpkin meant that the weather automatically got cooler!

Now, I think one of the smartest inventions was pumpkin in a can. Gone are the days of needing to cut open a pumpkin and scrape all of the insides to create a puree for recipes.

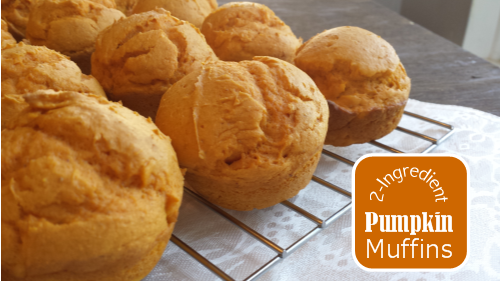
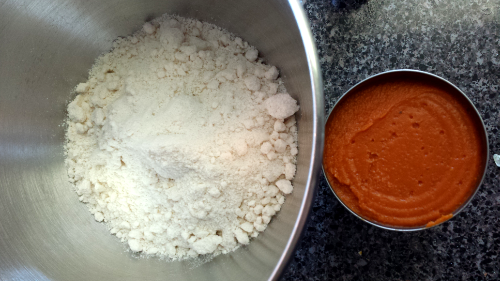
Your can of pumpkin is one of only TWO ingredients that you’ll need to make these Pumpkin Muffins!

I also wanted to mention, for you healthy folks like myself, there are only about 140 calories per muffin! Because you’re not adding a lot of extra calories with oil and eggs, these are actually pretty healthy!

The other ingredient is cake mix. Can you say cheap? I think I paid a total of $2.25 for these muffins. My kinda treat, cheap and sweet.

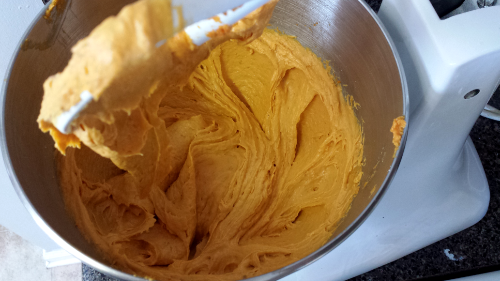
It takes a whirl in the mixer or about 50 strokes by hand to whip the muffin batter up.

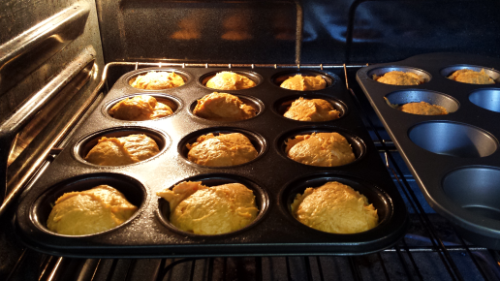
Put your muffins in the oven!

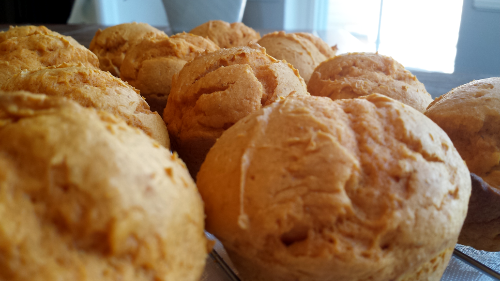
These are probably some of the fluffiest most light and airy muffins that I make.

And heavens, if you crack one open when it’s still warm and slather it with butter, you will be in heaven y’all.

Pumpkin heaven…

Pumpkin or cinnamon cream cheese would be so incredible with these I’m sure. I enjoyed warming them up with butter and sprinkling a little cinnamon on them!

Though you don’t exactly need much instruction because these are so dang easy, here’s the recipe.

2-Ingredient Pumpkin Muffins
Recipe Type: Breakfast, Snack
2 simple ingredients come together to make the ultimate fall snack- Pumpkin Muffins.
Ingredients
  • 1 Box Yellow Cake Mix
  • 1 (standard) Can Pumpkin Puree
Instructions
  1. Preheat oven to 350°.
  2. Grease a couple muffin pans.
  3. Mix cake mix and pumpkin puree together.
  4. Fill muffin cup about 2/3 the way full. (Should make about 15 regular size muffins)
  5. Bake for 15-18 minutes.
  6. Allow to cool and eat!
Serving size: 1 Calories: 140
Notes

These would be super tasty with the addition of 1/2 cup chocolate chips!

Recipe courtesy of Melissa at This Girl’s Life Blog.


Like this post? SHARE it!

Related Posts Plugin for WordPress, Blogger...

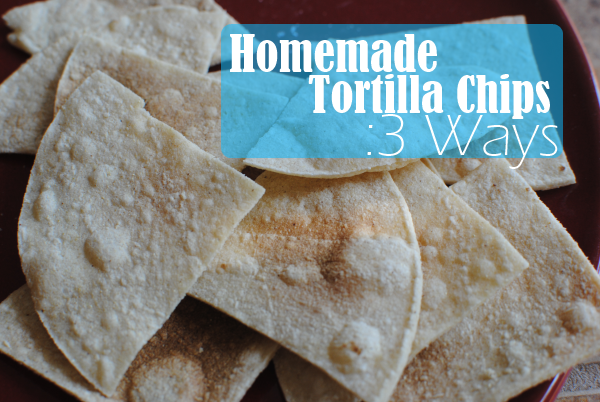
Homemade Tortilla Chips: 3 Ways

First of all, just let me say HELLO THERE! I’ve been just a little preoccupied lately with some personal things and have neglected you. I know…bad blogger, bad. But I’m going to work real hard to make it up to you…I promise.

I thought I’d start this back-to-school season with a simple recipe for something that everyone likes, tortilla chips! The reason that I ever made these in the first place can be credited to my husband. Bless his heart, he almost never gets an urge to cook anything. So when he came to me and said he wanted to “cook up” some homemade tortilla chips, I was ON IT!

There could not be a simpler thing to make that tastes so very close to what you buy in the store. And they are so much cheaper this way as well. One big bag of corn tortillas will run you between $1- $2, but will make the equivalent to probably 2-3 bags of tortilla chips from the store.

Plus, YOU get to take the credit for calling them homemade!

Here are 3 different ways to make your crunchy corn tortilla beauties. I’ll tell you my favorite when we’re done…

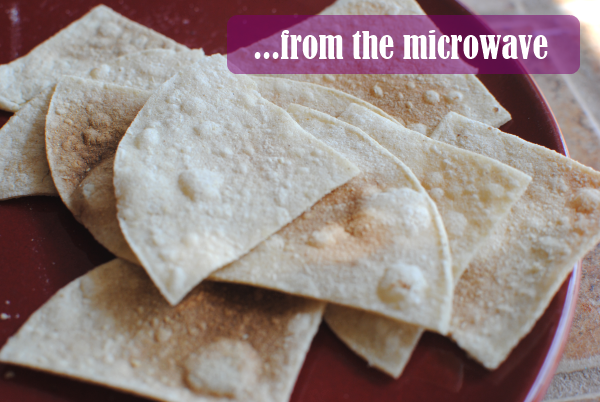
As you can probably imagine, this is the quickest and easiest method for making your chips. No preheating, no baking sheet, no chips, and no oil. Are you paying attention? Of course you need chips, you silly head. Get it together!

Just making sure you’re paying attention…

You’re going to need to make these in batches, a tortilla or two at a time.

1) Cut the tortillas into desired chip size.

2) Place tortilla pieces evenly (not overlapping) on a large microwave-safe plate.

3) Heat 45 seconds. Remove and flip. Heat another 45 seconds.

4) Remove from microwave, salt (if desired) and let sit for a minute or two. They will crisp even more!

Voila! It’s simple. Each microwave is different, so your microwave may need less or perhaps more cooking time to get them just right. You want the chips to brown, but not burn so be sure to keep your eye on the batches as you make them.

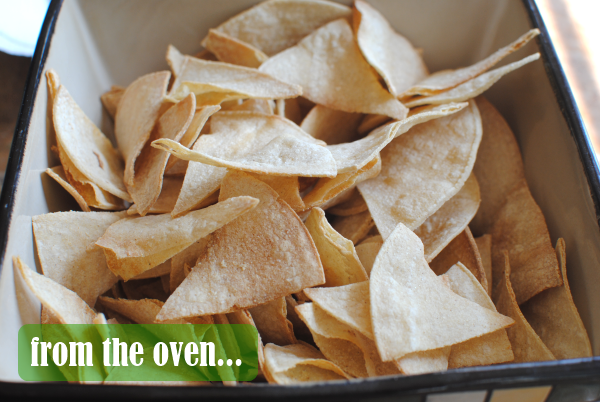
Ok, I said I was going to wait until the end to tell you my favorite method, but I’m sure by now that you realize I have no patience. And if you didn’t know that, you do now! This was my favorite method. The perfect crispness with a light and airy feel. These taste most like what you buy at the store. To me anyways..

Let’s do this:

1) Preheat oven to 350°.

2) Cut your tortillas into desired size.

3) Place pieces evenly over baking sheet. No need to grease it.

4) Bake for 6-8 minutes. Flip chips over and bake for another 6-8 minutes until golden and crispy.

5) Remove from oven. Season and serve! They will crisp a little more as they cool.

Once again, you’ll want to be sure to keep an eye on them. If they are turning dark brown, they are close to burning. You want them golden, not brown.


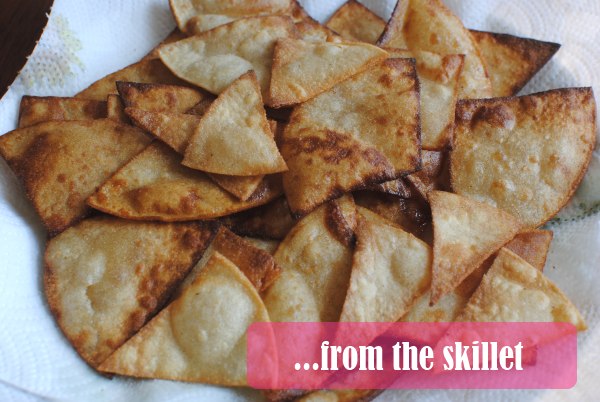
The last method is from your skillet or fryer! This is still a really simple way to make them. It’s also fairly quick. It’s just not as healthy as the other methods. My husband liked these the best!

1) Cut tortillas into desired size pieces. Place a few paper towels on a large plate to dry the chips when they finish frying.

2) Pour enough oil of choice (I used vegetable oil) into skillet that it goes 2/3 the way to the top. You need enough for the chips to swim in. Heat to medium-high. I didn’t check the temperature of my oil, I just made sure that the oil bubbled when I placed my wooden spoon in it.

3) Place 4-5 chips at a time into the oil. You don’t want to overcrowd, so make sure they aren’t overlapping. Fry them for approximately 2 minutes flipping them over to brown both sides if desired. I did this at first, but got lazy and quit flipping eventually. The chips lived.

4) Place on paper towels and continue frying in batches.

Voila!

All of these methods can be adjusted based on your microwave, oven, and oil temperature. You may even come up with tricks and techniques to make them better. This is just a good starting point for making your own homemade tortilla chips.

Let me know what you think about these in the comments below! 🙂


Like this post? SHARE it!

Related Posts Plugin for WordPress, Blogger...