Salted Caramel Apple Spice Cupcakes- Cook for the Cure

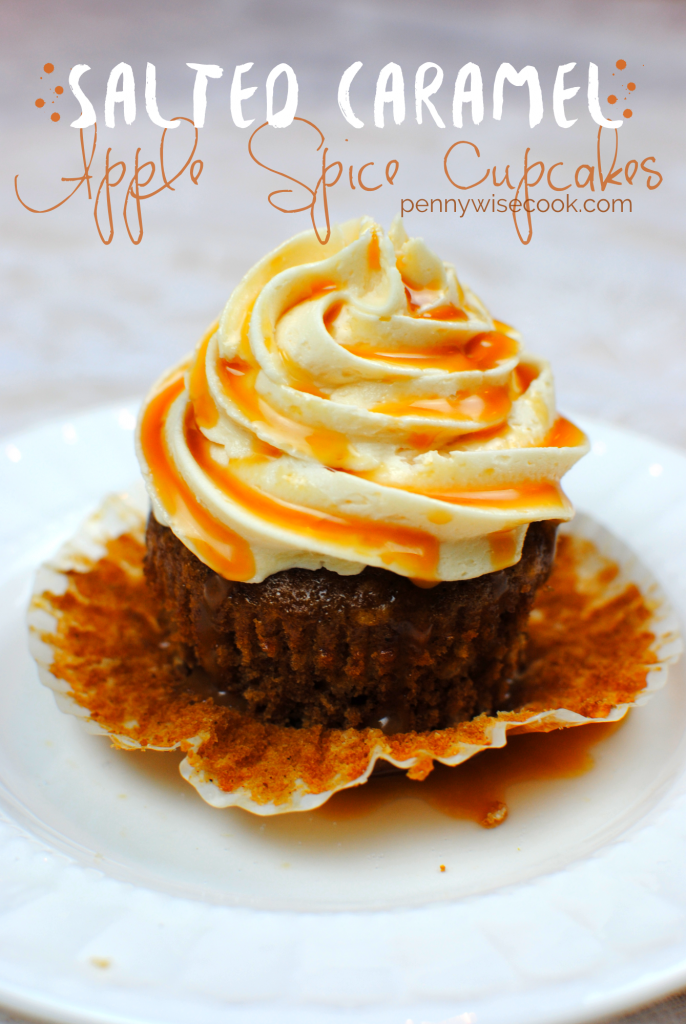
Title Image

I’m not sure that this cupcake even needs a post. We could just go with that picture and be done. But there is so much to talk about including Cook for the Cure!

These are insane. These are what I call, fall in your mouth. What is it about fall that is so amazing? Could it be the colors? The cooler weather? No, I think it’s the FLAVORS. Yummy goodness that gives us that warm, cozy, nostalgic feeling.

These cupcakes will give you all of that.

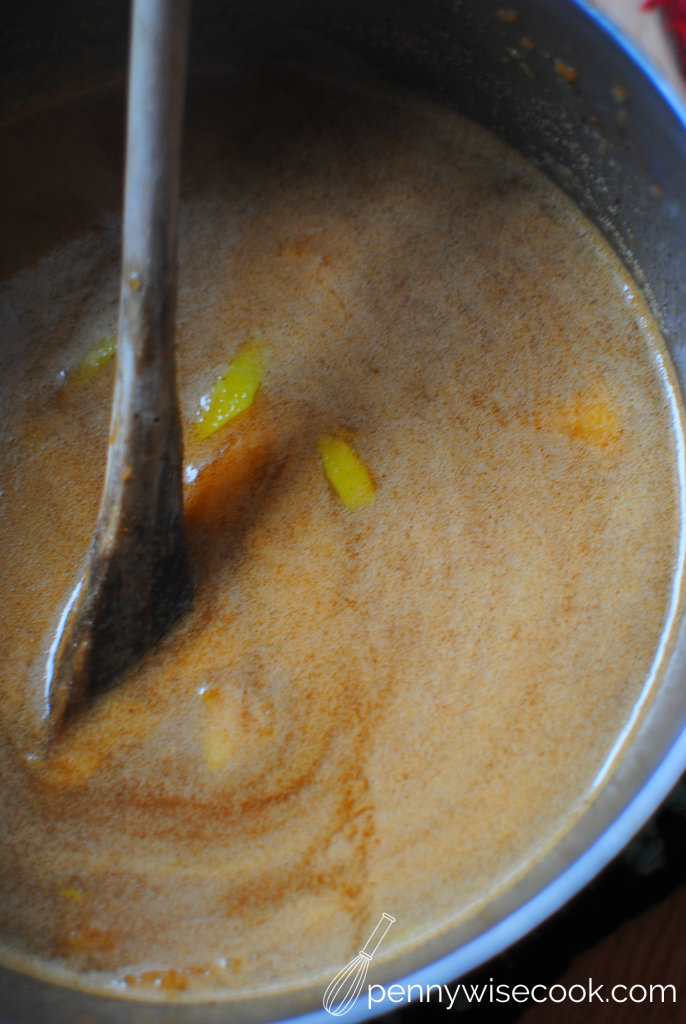
Apple Spice Mixture

It all starts with what may seem like a way to fill your home with the smell of apple spice, but this is actually the beginning of your Apple Spice Cupcake batter. 

I had never made batter this way before, so it was new to me. But I welcomed the warm, fall smells and spent an embarrassingly long amount of time hovered over the pot.

The mixture contains grated apples (the start of the show!) along with so many of our favorite fall spices including nutmeg, cinnamon, and ground cloves.

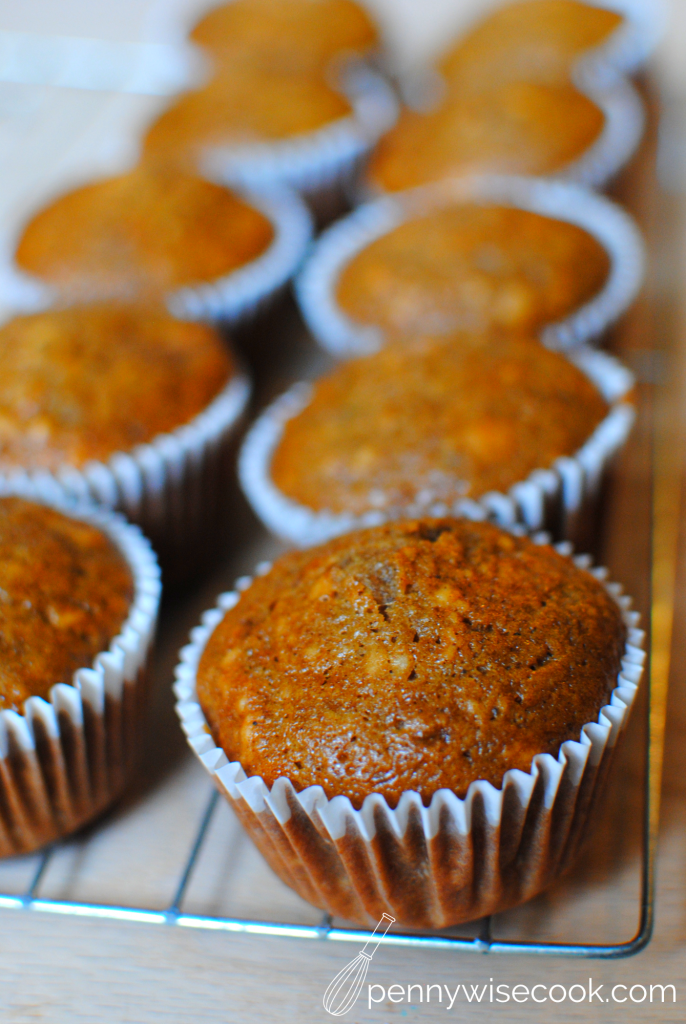
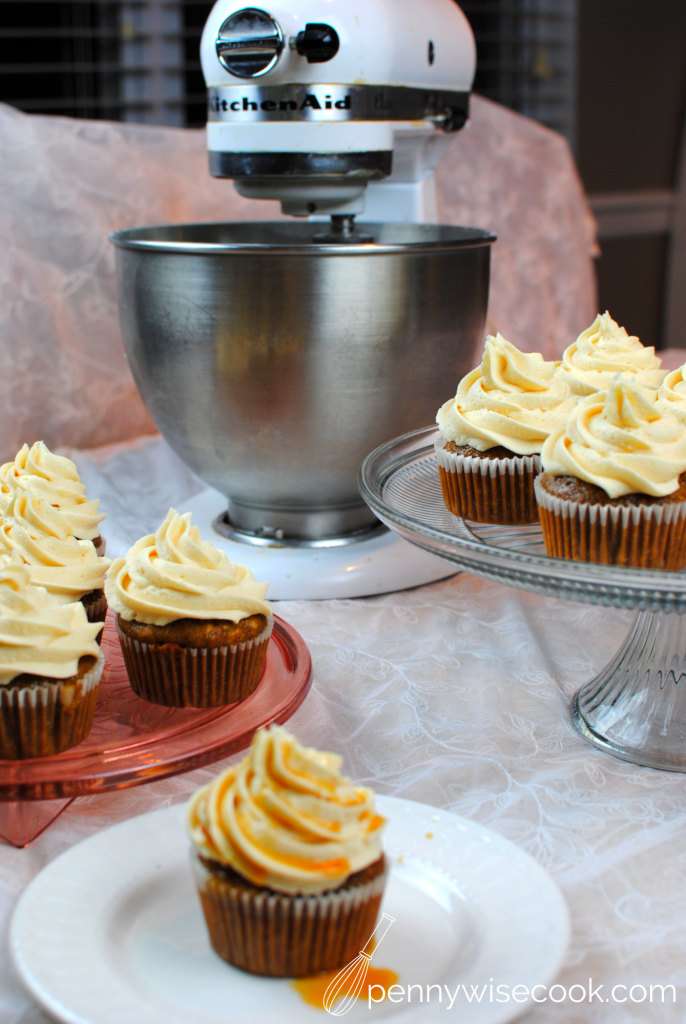
Completed Cupcake

I said it before, but I really feel like these taste like fall in your mouth. I told my husband that a couple of times and when he finally tried them, he gleefully stated, “These taste like fall in your mouth!”. Maybe not gleefully. He doesn’t exactly get gleeful, but they were quite tasty and maybe he couldn’t contain his excitement? I didn’t bake 10,000 cupcakes, but I did make so many that I had to give some away!

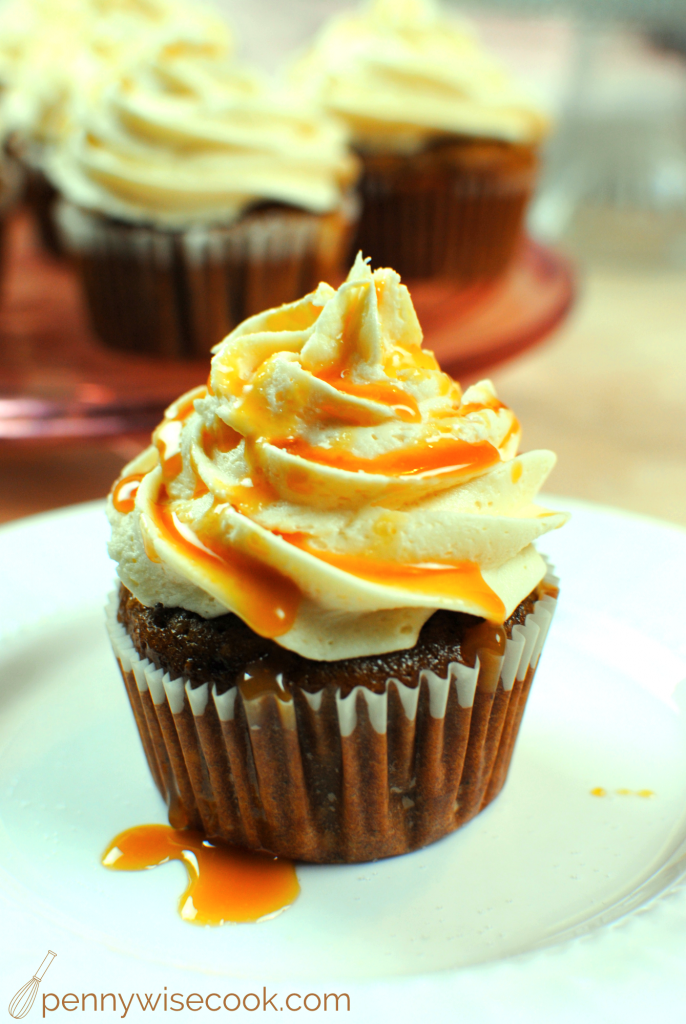
Now, what really makes them pop is the Salted Caramel Buttercream that you put on top!

Cupcake

Oh. my. goodness. Can I get an amen?

This buttercream literally starts by making salted caramel. (Of which I burned the first time, so beware)

You add in all the regular goodness of buttercream like, oh I don’t know, butter. And powdered sugar and you have the sweetness to bring out the spice in the cupcakes. SO GOOD.

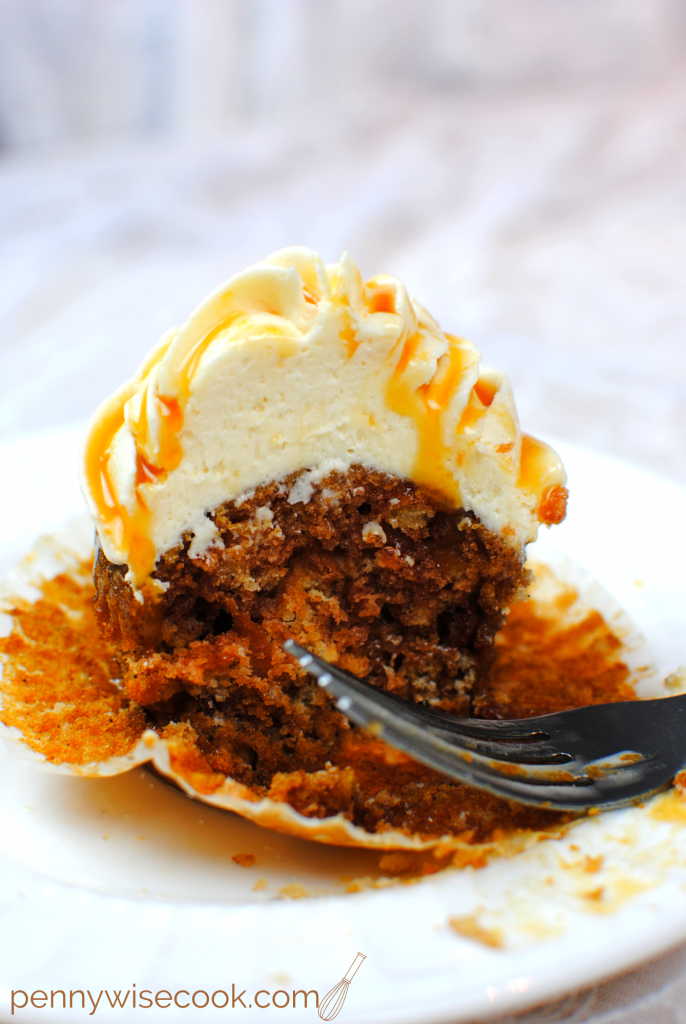
Bite Out of Cupcake

Oh yes, oh yes, oh yes.

You will NEED to find the recipe below!

_______________________________________________________________________

I want to talk to you about an AWESOME opportunity with Cook for the Cure to support Breast Cancer Awareness brought to us by hhgregg and KitchenAid! The cupcakes above are apart of the 10,000 Cupcakes: One Great Cause campaign to bring awareness about breast cancer this month.

KitchenAid

I am already a fan of KitchenAid and to know that they are supporting such a fantastic cause makes me love them even more.

KitchenAid will donate $1 to the Susan G Komen Foundation for every person who takes pictures of their cupcakes and uses the hashtags #10000cupcakes & #donate, and tagging @KitchenAidUSA and @KitchenAid. How awesome is that?!

So, the question is how can YOU get involved? Here are some ways:

  • Participate in 10,000 Cupcakes! Bake your own cupcakes and share an original picture of YOUR creation on your Twitter and Instagram channels using the hashtags: #10000cupcakes & #donate and tagging @KitchenAidUSA. KitchenAid will donate $1 to support the fight against breast cancer.
  • Host a party! You can host a party to benefit the Cook for the Cure cause any time of the year. Whether it’s an office potluck, a family cookout or weekend brunch, encourage your friends and family to donate to Susan G. Komen®. You can find out more information about how to Host-A-Party here!
  • Check out hhgregg and how they are a part of the Cook for the Cure campaign!
  • You can get KitchenAid small appliances over at hhgregg and believe me, with a KitchenAid you won’t be disappointed! You can even get a PINK KitchenAid Stand Mixer!

Now for the recipe for my Salted Caramel Apple Spice Cupcakes!

Apple Spice Cupcakes
Yields 24
Fall in your mouth, these cupcakes will make you all warm and fuzzy inside.
Write a review
Print
Ingredients
  1. 2 Green Apples, skin on, grated
  2. 2 c. sugar
  3. 2 c. water
  4. 1 c. butter
  5. 2 tsp cinnamon
  6. 2 tsp nutmeg
  7. 1/2 ground cloves
  8. 3 and 1/2 c.. flour
  9. 2 tsp baking soda
Instructions
  1. Preheat oven to 350 degrees. Line muffin tins with liners.
  2. Place the grated apples, sugar, water, butter, cinnamon, nutmeg and cloves into a large sauce pot and bring to a boil. Cool. (I let mine cool for at least 30 minutes)
  3. Add flour and baking soda. (batter will be sorta chunky)
  4. Bake until middle bounces back. (About 15 minutes depending on your oven)
Pennywise Cook http://www.pennywisecook.com/

Salted Caramel Buttercream
Yields 24
Write a review
Print
Ingredients
  1. 1/4 sugar
  2. 2 tbsp water
  3. 1/4 c. heavy cream (+ additional if needed)
  4. 1 tsp vanilla extract
  5. 1 and 1/2 sticks unsalted butter, room temp
  6. 1/2 tsp salt
  7. 1 c. powdered sugar (+ additional if needed)
Instructions
  1. Stir together sugar and water in a small sauce pot and bring to a boil. Keep cooking, without stirring, until mixture begins to turn dark amber. About 6 minutes. (This will happen fast once it begins to turn. DO NOT let it become dark brown)
  2. Remove from heat and SLOWLY add in the vanilla and cream. Stir constantly while you do this. Once smooth, set aside to let cool.
  3. Combine the butter and salt in stand mixer bowl and beat until fluffy. Reduce speed and add powdered sugar.
  4. Scrape down the side of the bowl and then add the caramel. Beat all until completely incorporated.
  5. (You may need to add more powdered sugar to make the buttercream thicker. I added approximately another cup and 1/2. You may also add a tablespoon more heavy cream to smooth it out. This was trial and error for me with the frosting. Make it to your liking.)
Notes
  1. When serving, you may drizzle each cupcake with caramel sauce to make them pretty! 🙂
Pennywise Cook http://www.pennywisecook.com/


Like this post? SHARE it!

Related Posts Plugin for WordPress, Blogger...

Summer is a Piece of Cake!

Welp, Memorial Day has come and gone which means WELCOME SUMMER! Wahoo! I got to sleep in this morning until about, oh, 7:15. That’s good right? The kids slept in, but me? No. I’m still stuck in let’s get going, get your shoes on, eat your breakfast mode. I’m hoping that nonsense will wear off soon. I’ve got to at least work up to sleeping to 8:00, don’t ya think?

My youngest turned 2 this weekend! It’s hard to believe that she is already 2. Her favorite show is Mickey Mouse Clubhouse, so naturally that became the theme of her party. I had a TON of fun putting it together. Don’t worry, I have a post all about it coming up.

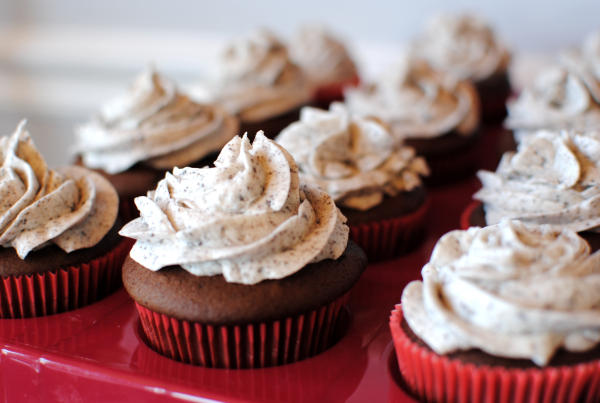
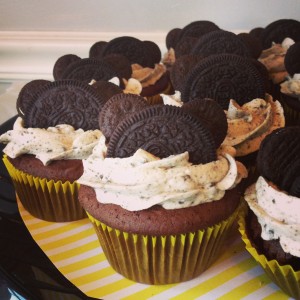
I wanted to share with you my Cookies N Cream Cupcakes. While I didn’t put together a step by step with these, they were really simple. I used Devil’s Food Cake Mix for the cupcakes. Only, I added a sweet surprise. Before baking, I placed a chocolate sandwich cookie in the bottom of each liner and then a dollop of marshmallow cream on top. THEN I plopped cake batter in. So they baked up with a cookie and filling inside!

For the frosting, I made a simple buttercream (no shortening in this one) and added about 1/2 cup of crushed chocolate sandwich cookies to the mix. Then piped it on and voila! These were so incredibly tasty. The cookie inside became soft after a while which I thought I wouldn’t like, but I found them to be even tastier that way.


Of course, I had to Mickeytize them for the party. Here’s a sneak peek of the Mickey fun! More on that later…

I think summer is one of the best times to create cool cakes. Not just because most of us have a little more time on our hands, but because the kids can help out! That is, if they can tear themselves away from the TV and video games…

Betty Crocker has got some really cute ideas for summer cakes. And you know that Betty Crocker likes to make things easy for us moms. There are some really cute cake ideas on the Betty Crocker website. I LOVE the Watermelon Cake. I think I’ll be trying that one out this summer. Considering that most of my family doesn’t like really watermelon, maybe they’d like it in cake form? I also find the butterfly cake to be adorable. It looks a little complicated, but Betty Crocker even provides a template for making it. How helpful!

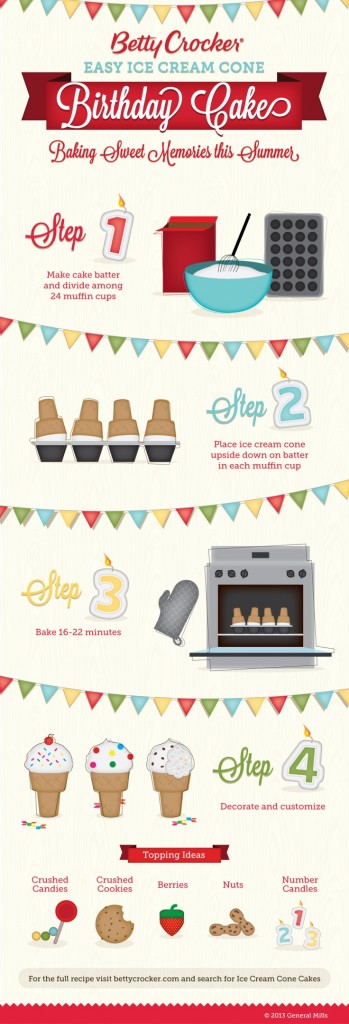
Have you seen the cupcakes made in ice cream cones yet? It’s a popular pin on Pinterest right now. Check out the infographic that Betty Crocker put together about how to easily put those cuties together.


Have you made the ice cream cone cupcakes before? I haven’t yet braved them so I’d love to hear your thoughts!

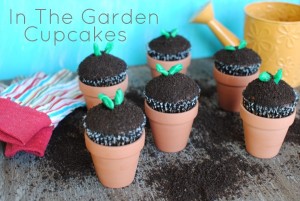
I made these In The Garden Cupcakes last year. They were a blast to make. You can find out how to make them here.

I’m full of inspiration for making cakes this summer now! You can find more summer cake inspiration from Betty Crocker!

This is a sponsored post written by me on behalf of Betty Crocker. All opinions expressed are 100% my own.


Like this post? SHARE it!

Related Posts Plugin for WordPress, Blogger...

Stuffed Pizza Cupcakes

I’ve finally started Christmas shopping. Last year I had most of it done by the very first week in December. Yeah, I was a little nuts wasn’t I? Nuts or extremely genius I’d say. This year, I’m probably going to do a lot of my shopping online. Since I’ve stopped blogging at Saving with Amy, I’m very much less in-tune with the current deals and steals across the web.

It’s a weird feeling not being on top of the latest deals.

But my sanity is currently intact so I’m not going to complain. It took a long time to make my decision to quit blogging deals and in the end, it was best for me and my family. And now I get to spend my time making yummy food and fun DIY projects to share with you!

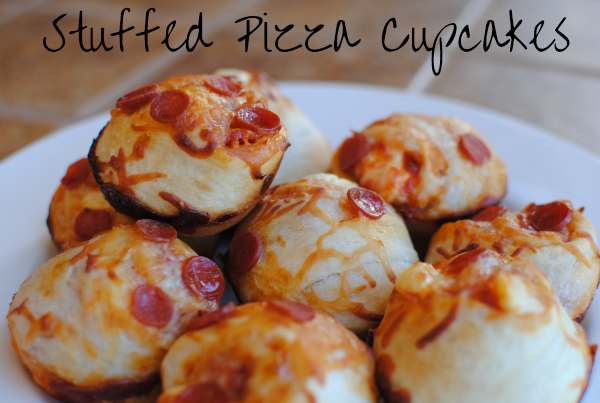
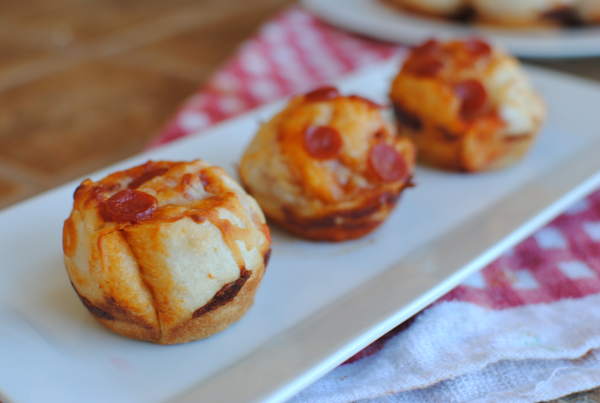
These, my friends, might just be your family’s new favorite snack. When I made these, I had no idea how excited that my family would get about them. They have been requested over and over again. Hubby even wants me to make some for him to take for lunches.

There is nothing better than making something that is requested a second time. Well at least in my book anyways.

I made these earlier in the day and just reheated them for dinner and they were perfect. You could just make them on demand, but I needed the daylight for my pictures. But it goes to show that these are great for making ahead of time for a party or lunches.

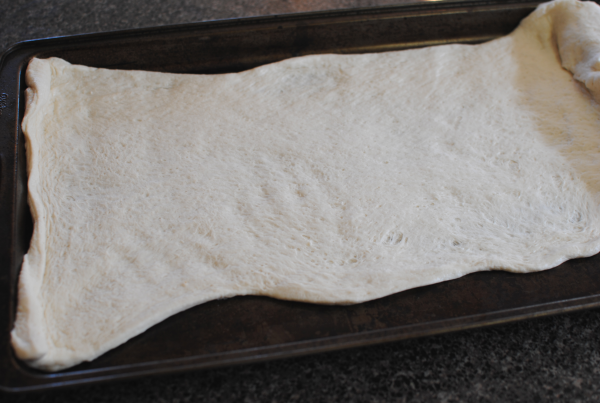
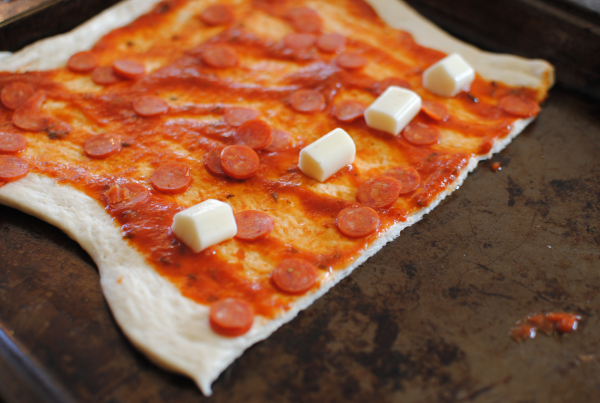
You start by rolling out a store-bought pizza dough. Get it as long and flat as you can. It doesn’t have to be perfect.

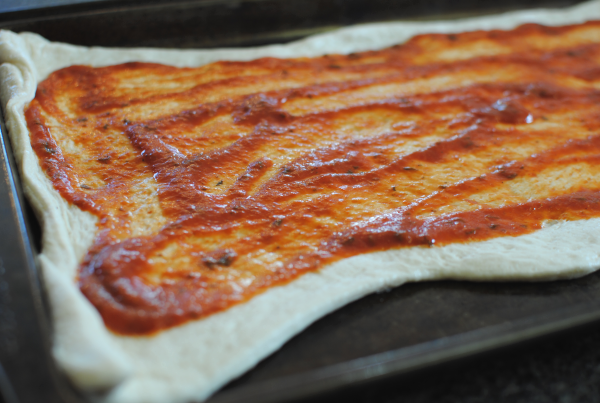
Next, spread about 1/2 a jar of pizza sauce over the entire pizza dough, leaving about an inch around the edges.

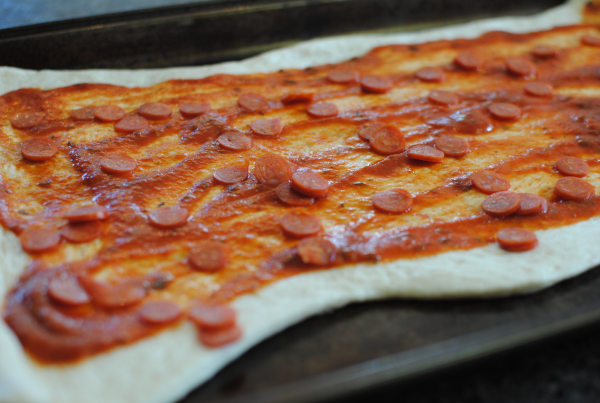
Then sprinkle the entire thing with mini pepperonis. I was going to use the regular size, but when I came across these, I thought they might work better for this. And I was right! So glad that I used the smaller. It made it possible to get a bite of pepperoni in each bite without them trying to separate.

Then cut the dough in half.

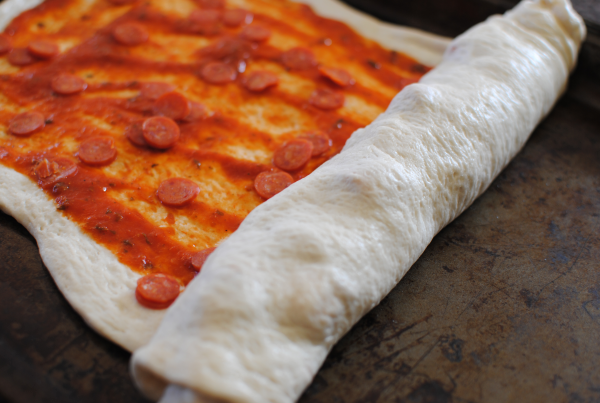
Place about 4-5 pieces of cut up string cheese across the dough like this.

Then proceed to roll the dough up. Once rolled, cut it into 1 inch pieces doing your best to keep all the fillings inside.

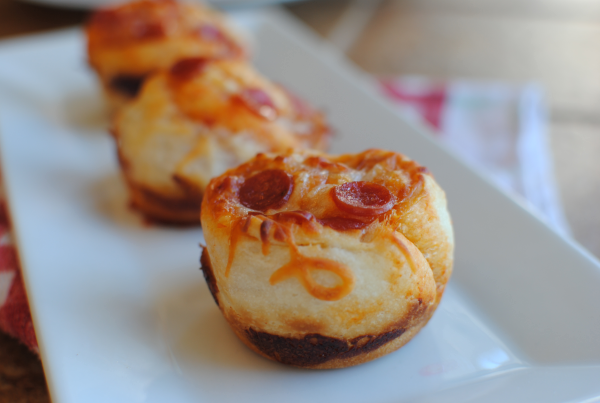
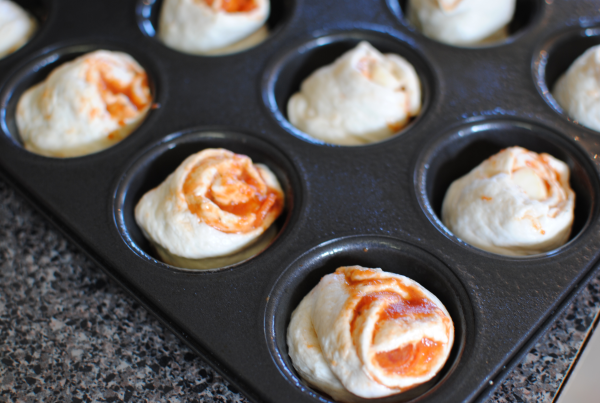
Place the rolled up pieces into a greased muffin pan with the swirled part facing up.

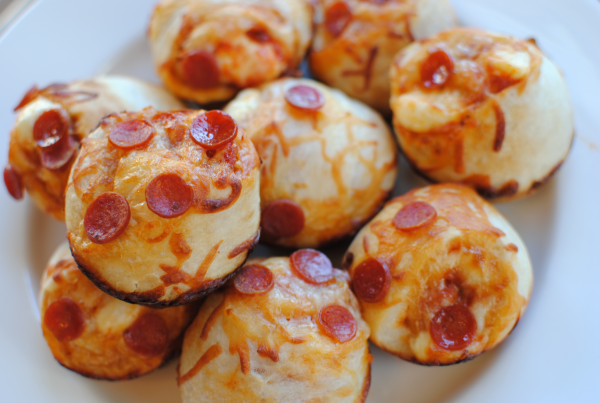
You’ll top with a little more mini pepperonis and some shredded cheese before baking. Then bake them up and you’re done!

SO amazingly yummy! Everyone will be bound to love these. Come on, pizza dough filled with sauce, pepperoni, and cheese? I think so!

Stuffed Pizza Cupcakes
Recipe Type: Main Dish, Snack
Author: Pennywise Cook
5 simple ingredients lead to the tastiest of all cupcakes. STUFFED Pizza Cupcakes!
Ingredients
  • 1 pkg Store-Bought Pizza Dough
  • 1/2 Jar Pizza Sauce
  • 1 c. Mini Pepperonis, Divided
  • 1/2 c. Shredded Mozzarella Cheese
  • 6 Mozzarella String Cheese, cut into 1 inch pieces
Instructions
  1. Preheat oven according to pizza dough’s directions.
  2. Begin by rolling out the pizza dough flat. Spread the pizza sauce over the dough, leaving 1 inch around the edges. Sprinkle with 1/2 c. mini pepperonis. Cut the dough in half.
  3. Lay 4-5 pieces of string cheese across the dough, adding more as you roll. Do this with both of the pizza doughs.
  4. Cut into 1 inch pieces and place in a greased muffin pan with the swirled side up.
  5. Bake according to your pizza dough’s directions checking after about 12 minutes. When tops begin to brown, remove from oven.
  6. Use a knife to separate from the pan and cool.

Like this post? SHARE it!

Related Posts Plugin for WordPress, Blogger...

Coconut Poke Cupcakes

I want to preface this post today with a warning to my sister. If you are reading….STOP right here.

And for everyone else, you might wonder why I say this to my sister. It’s because I’m going to expose a little family secret today. One that in her undisclosed amount of years on this earth, she has never found out. My grandmother has always made this incredible coconut cake almost every year around the holidays. It usually marks a special occasion. My sister always requests it and it just makes her day when she gets a piece.

To my surprise, I was told this family “recipe” around her birthday this year. My mom shared it with a coworker who made one of these cakes just for my sister’s birthday. She thought it tasted exactly like my grandmother’s coconut cake. No wonder, it’s actually very simple to make.  I realize that many people don’t like coconut, but if you are one of the few that do, you’ll want to learn about this cake. It’s soooo yummy and soft and will definitely put a smile on your face. My grandmother usually makes this in cake form, but to narrow the portion sizes (I can’t help myself), I made them into cupcakes this time around.

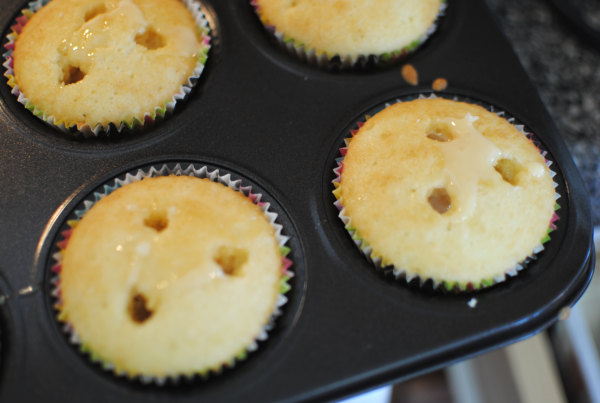
It starts with your favorite white cake mix. Yes, that’s right. Save yourself the hassle and let Betty Crocker help you out for once. I actually used the Coconut Supreme version this time around to give it more coconut flavor. Bake the cupcakes according to the package and while they are still warm, use a wooden spoon to poke 3 holes in the middle of each.

Pop open a can of sweetened condensed milk (I use fat free) and drizzle some down in each of the holes in each cupcake. As you drizzle, it will absorb and will seem to disappear. Don’t go overboard though or you can cause the cupcake to get extremely mushy.

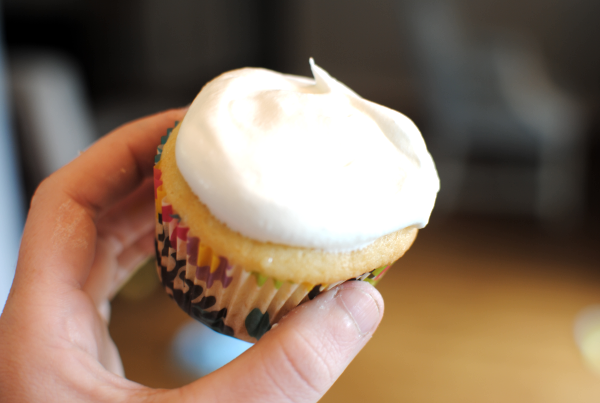
Place a dollop of whipped topping on each cupcake and even it out just a bit.

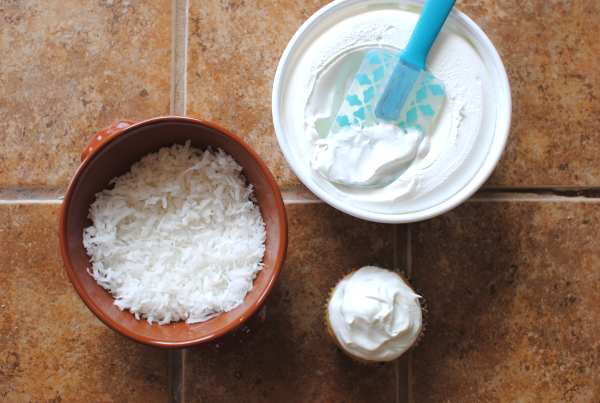
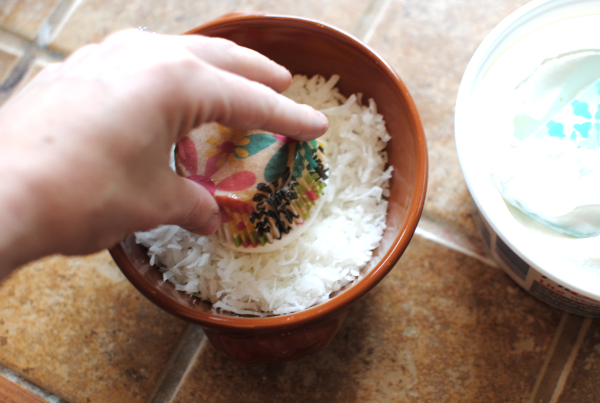
It’s time for the cupcake to take a coconut bath….

Dip that baby into the coconut and let it settle into the whipped topping. Don’t push too hard, it doesn’t take much for the coconut to catch on.

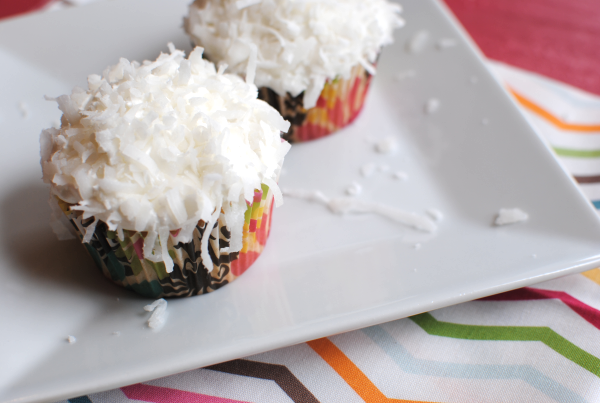
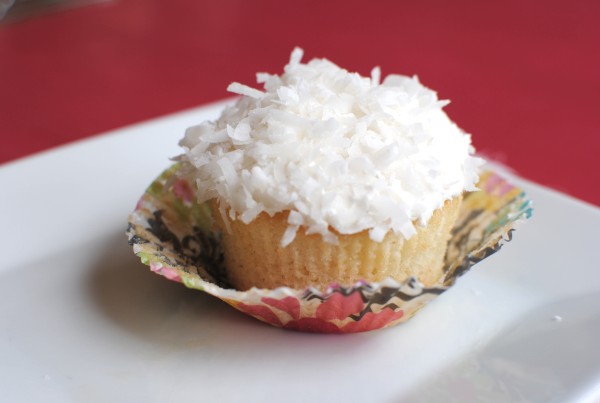
Oh my heavens, that’s it! From the outside you can’t even tell that it’s got a gooey and yummy center. But the fluffy, white coconut top is enough to get me to dive in.

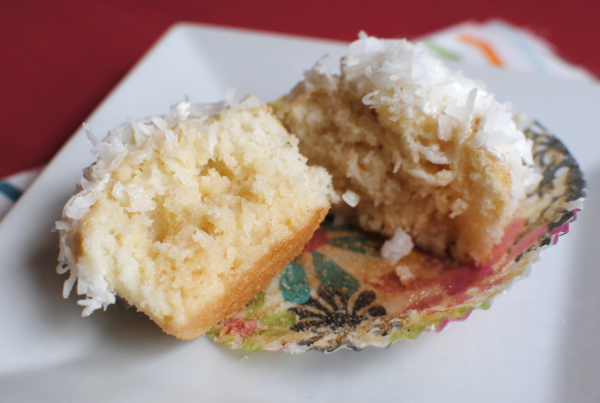
And when you do, you’ll see how moist the inside is. It’s like a fluffy cloud of coconut heaven y’all.

To my sister if you did continue to read on, I’m very sorry to have spilled the beans on this beloved cake. But I thought it necessary to share it’s simpleness with the world. It’ll be a blessing to coconut lovers like us everywhere. 🙂

Coconut Poke Cupcakes
Recipe Type: Dessert
Author: Grandma Johnson
This simple method creates a fluffy coconut cupcake made in heaven!
Ingredients
  • 1 Box White Cake Mix (Or Coconut Supreme if you’re feeling frisky)
  • 1 Can Sweetened Condensed Milk
  • 1 8oz Tub Whipped Topping
  • 1-2 Cups Coconut Flakes
Instructions
  1. Cook cupcakes according to package directions. DO NOT LET COOL.
  2. While cupcakes are still warm, poke each about 3 times most of the way down. Drizzle some sweetened condensed milk equally among them all being careful not to overdo it. The sweetened condensed milk will be absorbed so it may not look like it’s going in, but it is.
  3. Place a dollop of cool whip on top of each cupcake spreading it out a bit.
  4. Place the coconut flakes in a bowl and dip each whipped topping covered cupcake in the coconut flakes to coat.
  5. Serve! And keep refrigerated.

Like this post? SHARE it!

Related Posts Plugin for WordPress, Blogger...

Peanut Butter Banana Cupcakes

I can almost say without a doubt that Elvis and I would have got along great. Besides the fact that he was easy on the eyes (younger years), he also had great taste. I’ve toured Graceland before and Elvis’s style was definitely unique and modern for his time. My favorite room, of course, was the Jungle Room.


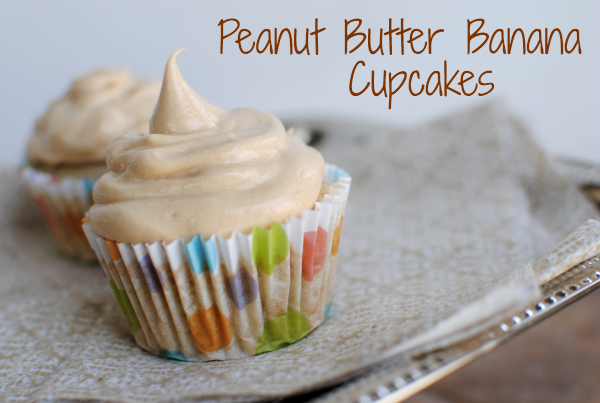
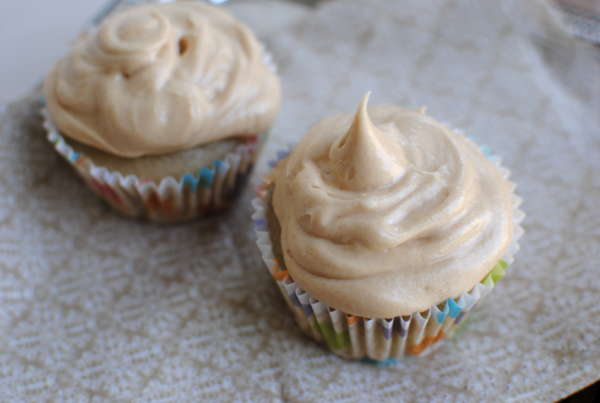
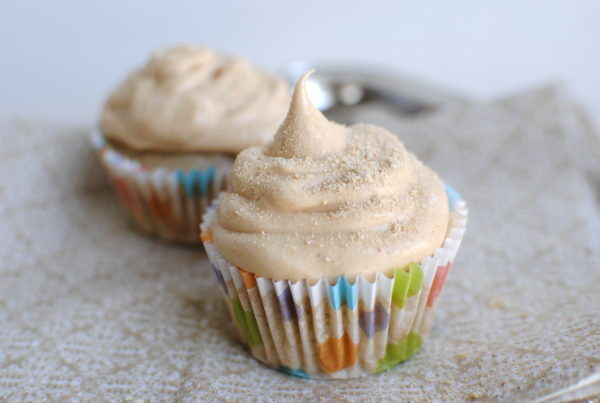
Though the King of Rock and Roll is gone, his influence on taste has stuck around. Take these incredible Peanut Butter Banana Cupcakes for instance. Fit for a king and rockin’ and rollin’ with flavor, you just can’t go wrong with the creamy combination of peanut butter and banana.


These cupcakes are almost like a poundcake. I didn’t expect to have such dense cupcakes, but the more that I ate them, they grew on me. The banana taste in these comes directly from real bananas with no artificial flavoring. I think that’s what makes these so good.

Oh yeah….

And that peanut butter frosting.

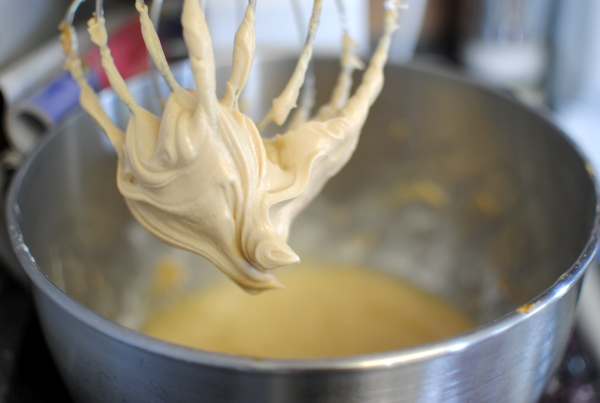
This frosting by far is one of my favorite frostings that I’ve made. Not because others have made are not as good, but this is one that I could just sit and eat out of the bowl all day.

And I did. I have no shame.

This peanut butter frosting is the key to completing such a royally-inspired cupcake. And though you’d expect to spend a long time baking up a completely from scratch cupcake, it’s also very easy. And frugal at the same time.

Most ingredients in this cupcake are things you might have on-hand. You may have to grab some bananas at the store if you don’t usually keep those around. And those will put you out like what….$1?

Banana Cupcake recipe inspired by gourmetgeema at grouprecipes.com. Peanut butter frosting recipe inspired by hutchison at recipes.sparkpeople.com.

Peanut Butter Banana Cupcakes

Peanut Butter Banana Cupcakes

Creamy banana cupcakes topped with a smooth and decadent peanut butter frosting are fit for a king! Of rock and roll that is!

Ingredients

    For the Cupcakes
  • 1/2 c. Butter
  • 1/2 c. Domino Light or Splenda
  • 1/2 c. Sugar
  • 1 egg, slightly beaten
  • 1 and 1/2 c. flour
  • 1/4 tsp Salt
  • 1 c. Bananas (very ripe), mashed
  • 1 tsp Vanilla
  • For the Peanut Butter Frosting
  • 2 c. Powdered Sugar
  • 1/4 c. Skim Milk
  • 1/4 c. Butter
  • 1/2 c. Peanut Butter
  • 1 tsp Vanilla
  • Graham Cracker Crumbs for sprinkling (optional)

Method

    For the Cupcakes
  1. Preheat the oven to 350 degrees. Add all ingredients to a large bowl and mix until well combined.
  2. Fill cupcake tins 1/2 full and bake for 15-20 minutes.
  3. Let cool.
  4. For the Frosting
  5. In a large bowl, cream butter, milk, and peanut butter together. Slowly add in the powdered sugar. Add vanilla and whip until combined well. Frost cooled cupcakes.
  6. Sprinkle with graham cracker crumbs (optional).

Notes

The cupcakes don't get really brown on top like most cupcakes do. The banana in them tend to keep them light. Don't let this fool you when you are timing them in the oven. Be sure to use a toothpick to tell if they are cooked through and remove them right away. They can become extremely hard if overcooked.

http://www.pennywisecook.com/peanut-butter-banana-cupcakes/


Like this post? SHARE it!

Related Posts Plugin for WordPress, Blogger...