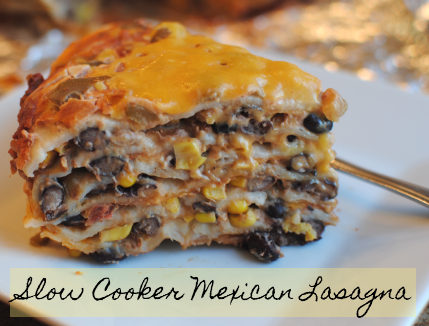
Slow Cooker Mexican Lasagna

I’m not always a patient person.

Ok, I take that back. I’m never a patient person.

I know it’s a virtue and all, but why did something so difficult have to be a virtue? Couldn’t one of the virtues be to eat lots of chocolate? I could really follow that virtue without any hesitation.

The crockpot is my best friend when it comes to impatience. You all know how much I really love that thing. Popping dinner into the crockpot in the morning and not looking at it again until that evening when it’s time to eat is truly the best way to go.

I got a hankering the other night.

A mexican hankering.

I honestly wanted this mexican lasagna that my friend Laurie has made for me a few times. It’s really tasty and seemed easy enough to make. But since I’m cursed with impatience, instead of giving her a call or even a text message, I just made up my own in hopes to coming somewhere close to her’s. I kinda had inklings on what ingredients might have been in it so I just went to work adding things as I thought would taste good.

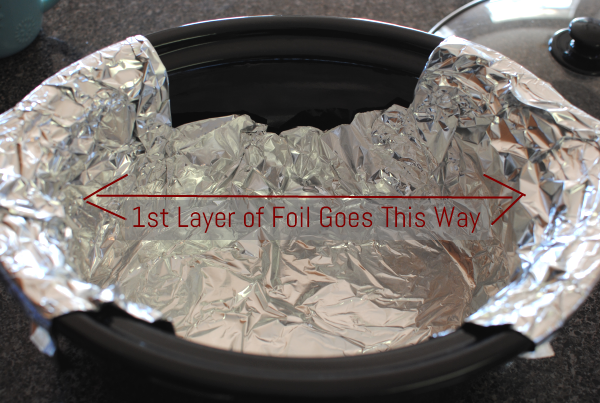
I want to introduce you to the Slow Cooker Sling. No, it’s not something that you have to go out and buy at Bed, Bath, and Beyond. It’s something you can make in 2 seconds. This is the easiest way to remove your mexican lasagna without mess. It also makes it super easy to cut into pretty pie pieces.

Take a piece of long foil LONGER than your crockpot and let the ends hang out. Push it into the crockpot and form it into all the nooks and crannies.

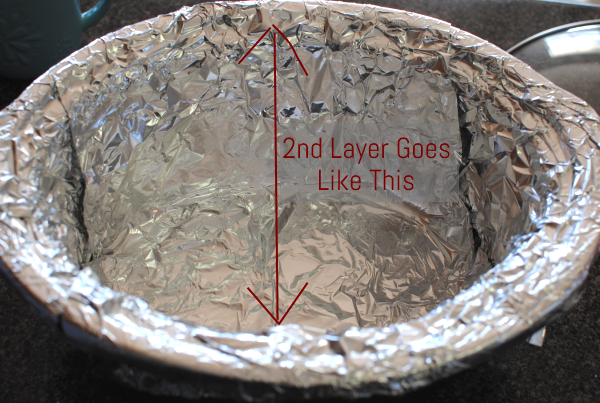
Then take another layer of foil and go the other way with it. Depending on your crockpot, it may not need to be as long as the first piece. Once again, form it into your nooks and crannies. We wouldn’t want to leave any nooks or crannies out!

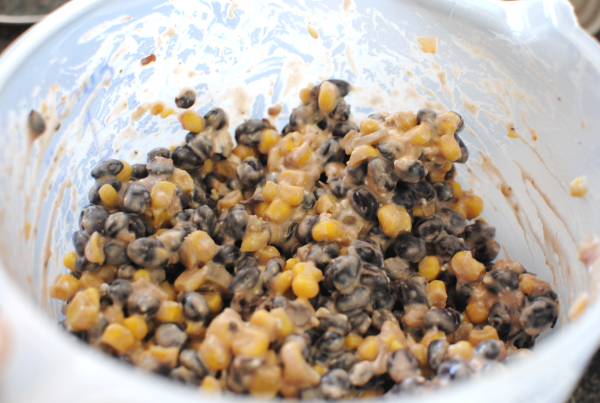
Then it’s time to whip up the filling for our lasagna. This is SO simple and incredibly tasty. It took everything in me to keep from eating all the filling. Unlike some crockpot meals, you’ll be happy to know that there is NO chopping and NO browning of meat in these steps.

That means it’s really easy y’all.

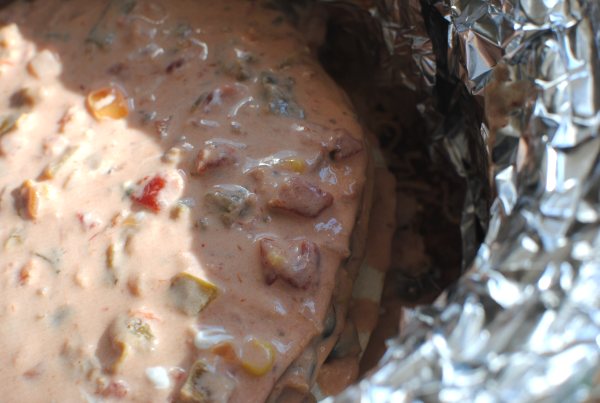
Flash forward past your laborious mexican lasagna stacking and it’s ready for the easy part…waiting. But the waiting is easy! Go play outside or enjoy a movie, or go to work. You know, whatever you normally do.

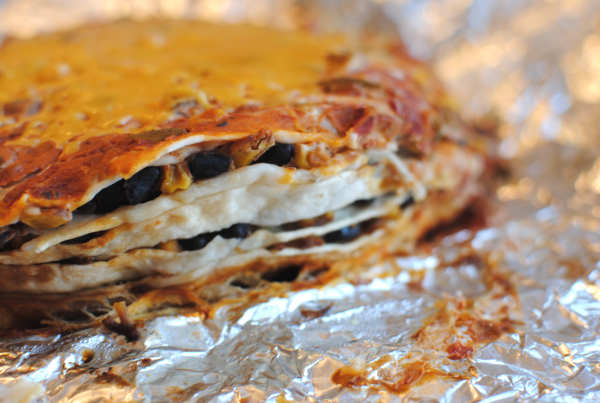
When you come home, plop a little shredded cheese on top to melt up and get ooey gooey. Then use your handy foil sling to pull it out.

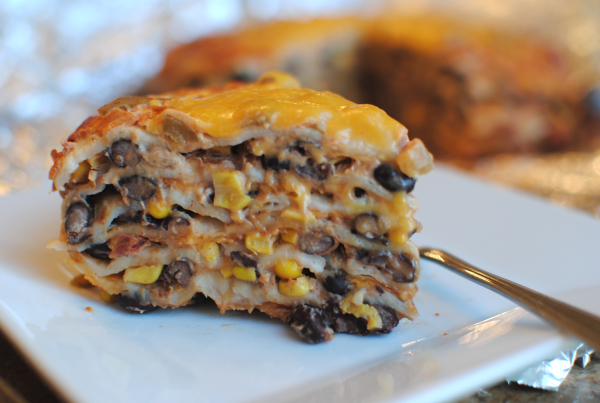
NOTICE: Objects on foil are bigger than they appear! It may seem small when you first get it out, but I assure you, when you start to slice it into pieces it will be much bigger.

Yeah, like this big. Each and every single bite is heavenly.

When I first started making this I was considering calling it Mile High Enchilada Pie because it slices like pie. But when my daughter was describing it, she said “Momma, is this pasta?”. That’s how soft the tortillas get. They are almost like pasta which taste a lot like noodles and hence the “lasagna” name.

I don’t know if this is exactly like my friend Laurie’s but it’s quite tasty anyways! We ate every single leftover and I will be making this one on a regular basis!

Let me know if you make this. I’d love to hear your thoughts!

Slow Cooker Mexican Lasanga
Recipe Type: Main Dish, Slow Cooker
Author: Pennywise Cook
No cutting, no chopping, no browning, no baking. Just a simple slow cooker mexican lasagna for a busy weeknight meal!
Ingredients
  • 28 oz Can Black Beans
  • 4 oz Cream Cheese, Softened
  • 1 can Corn
  • 1 Jar Salsa, Divided
  • 1/4 tsp Cumin
  • 1/2 tsp Chili Powder
  • Dash Salt
  • 6 Flour Tortillas
  • 1 and 1/2 c. Shredded Cheese- Divided
  • 1/4 c. Sour Cream
Instructions
  1. Begin by creating your foil sling in the bottom of your crockpot.
  2. In a large bowl mix the filling together- black beans, cream cheese, corn, 1/3 c. salsa, cumin, chili powder, and salt.
  3. In bottom of the crockpot pour 2/3 c. salsa. Place 1 tortilla on bottom. Top with 1/2 c. filling, then 1/4 c. shredded cheese.
  4. Layer another tortilla then 1/2 c. filling and another 1/4 c. shredded cheese. Continue until you have a total of 5 layers and 6 total tortillas. End with the tortilla.
  5. On top, mix the rest of the jar of salsa with 1/4 c. sour cream to create a creamy mixture. Cover and cook on low for 6-8 hours.
  6. When close to done cooking, top with 1/4 c. shredded cheese and allow to melt. Remove with sling and slice into pieces to serve.
Notes

You can adjust how hot or mild you make this by using your preferred heat salsa.


Like this post? SHARE it!

Related Posts Plugin for WordPress, Blogger...

Taco Stuffed Peppers

Preface- Sorry for so many red pepper recipes. It was not planned this way, but makes a nice theme anyways. 🙂

Have you ever noticed how when you place the word pizza in a recipe title, it’s usually a big hit. I find that tacos are a very close second. It’s hard not to like something with the flavor of pizza or tacos inside. And when it’s time to get the kids eating a little better, you have to get creative in what you fix.

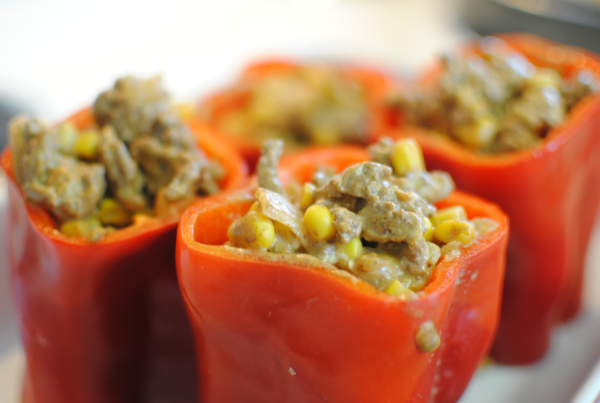
I debuted stuffed peppers with my family only within the past year. Hubby has never been fond of sweet peppers before. It’s key that the filling be really great to get him to eat it. Popping the peppers in the oven for a little bit of time before filling them will get them started in the cooking process and soften them up just a bit.

The taco filling inside these babies is SO yummy. Onions, beef (or turkey), taco seasoning, and corn provide the perfect taco-y-ness. I just love the words that I make up. Don’t you? That one almost sounds like one my 5 year old would make up!

It’s really the cream cheese that makes them so tasty. I think, anyways.

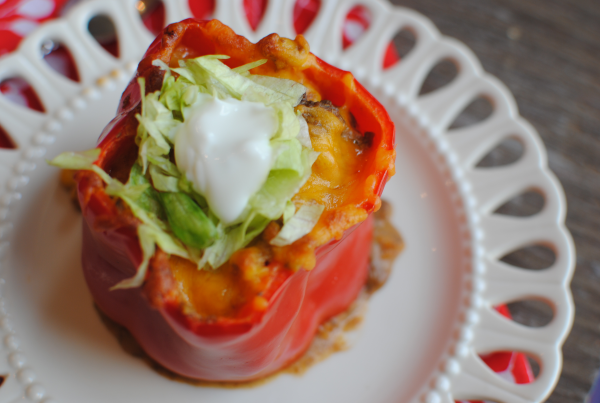
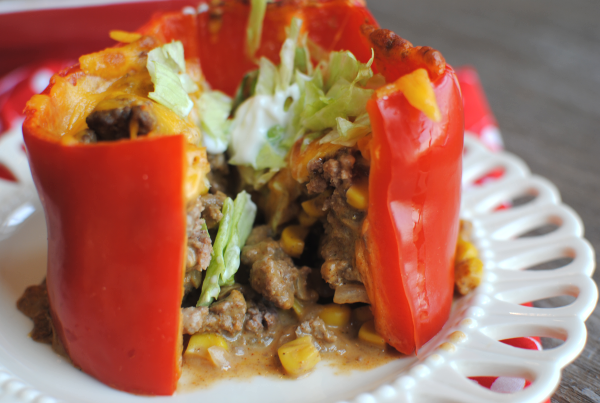
You can top them with whatever taco fixin’s you’d normally like. The sky’s the limit! I had mine with lettuce and sour cream.

One tip that seemed to make it easier for me was to cut both ends off your peppers. Normally I’d leave the bottom but because there were seeds still hiding and since I don’t like to eat the tough ends, it only made sends to cut it flat on the bottom. Just be sure to use a spatula to carefully move it onto your plate without losing the yummy filling.

These peppers weren’t as soft as I would like them to be. Next time I’ll be making sure that I leave them to cook a bit longer. I used a knife to cut the pepper into strips to eat with my filling. But in a perfect world, the pepper would be much softer and easy to use a fork to gather bites along with the filling.

Enjoy the recipe!

Taco Stuffed Peppers
Recipe Type: Main Dish
Author: Pennywise Cook
Shake up your taco night with stuffed peppers instead!
Ingredients
  • 4 Red Bell Peppers
  • 1 lb Lean Ground Beef
  • 1 Medium Onion, Chopped
  • 1 Pkg Taco Seasoning
  • 1/4 Water
  • 1 Can Whole Kernel Corn
  • 4 oz Cream Cheese
  • 1/2 Cup Shredded Reduced-Fat Cheddar Cheese
Instructions
  1. Preheat oven to 350°.
  2. Cut ends off bell peppers and remove seeds. Place in baking dish and bake for 15 minutes.
  3. In a skillet over medium-high heat, brown ground beef with onion. Once browned, reduce heat. Stir in taco seasoning, water, corn, and cream cheese. Mix well and simmer until cream cheese is completely melted.
  4. Meanwhile, remove peppers from oven and fill each with equal amounts filling. Bake for 30 minutes.
  5. Remove from oven and top with equal amounts shredded cheese. Return to oven to bake for another 10 minutes.
  6. Cool.

Like this post? SHARE it!

Related Posts Plugin for WordPress, Blogger...

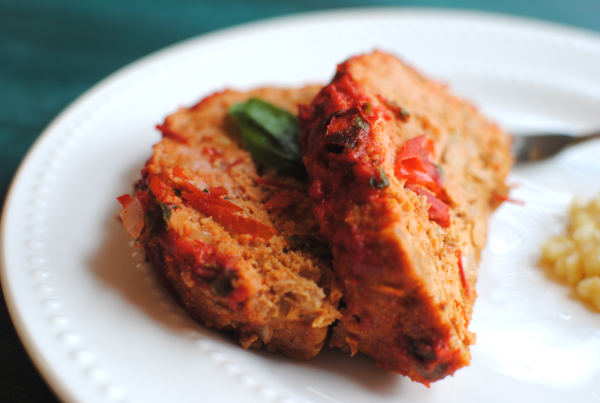
Roasted Red Pepper Basil Meatloaf

I’ve told you before how I don’t make meatloaf very often. I’m working on that now that I have been made aware that my family apparently loves it. Who knew?!

My garden has been very fertile in the basil department lately so I knew that I had to whip something up that involved sweet and fragrant basil. I’m not sure why meatloaf came to mind, but it did, so I went with it. Determined to get away from that stereotypical ketchup flavor, I decided to go with something else that shared the same fiery red color.

Red peppers. Yes. Those would be perfect.

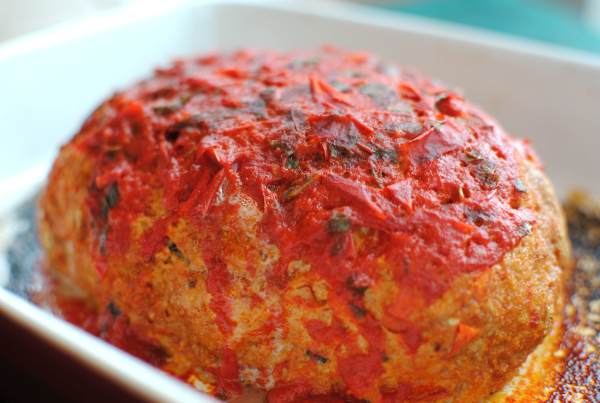
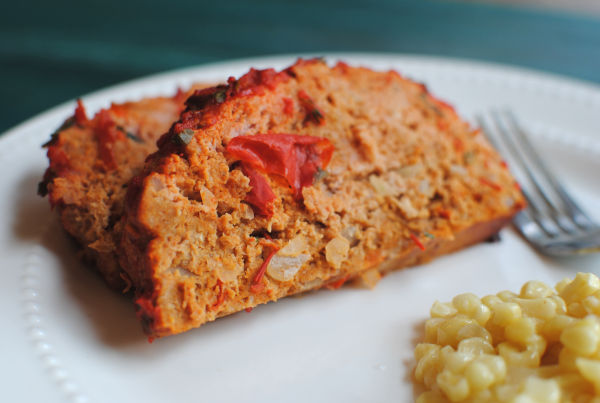
But going off the result of a recent stuffed red pepper experiment in my home, I knew that they would have to be roasted and pretty much beyond recognition. At least for this family to eat them. So I pulverized them. Or in other words, pureed them along with the basil and made a sauce to go inside and on top of my meatloaf.

The result was nothing short of amazing. They took the bait y’all! I watched my 5 year old an entire piece of this meatloaf. I kid you not.

Albeit, she did say when she was finished “mommy, I didn’t like this meatloaf but I ate it all.” Hmmm, makes a lot of sense. It’s not as if I was forcing her to eat it! Nevertheless, my husband even ate the leftovers for lunch the next day so it must have been at least edible otherwise he would’ve left it there “for others to eat”.

The only issue I’d have to say I had with this meatloaf was the sauce needed a little pep. Maybe just a little more salt and pepper and I could’ve pureed it just a tad bit more. But aside from that, I was fairly impressed with its fanciness compared to your average ketchup meatloaf. (Even though that’s also very tasty!)

If you’re brave enough to try this one or your family, or perhaps need a change from ketchup you might try this one out!

Enjoy!

Roasted Red Pepper Basil Meatloaf
Recipe Type: Main Dish
Author: Pennywise Cook
A change from your everyday ketchup meatloaf, this one lends its fanciness from roasted red peppers and fragrant basil!
Ingredients
  • 1 lb Ground Turkey
  • 1/2 c. Onion, Finely Chopped- Minced
  • 1 Egg White
  • 4 Large Basil Leaves, Chopped (or about 3 tbsp)
  • Dash salt & pepper
  • 2 Tsp Minced Garlic
  • 1 Jar Roasted Red Peppers
  • 1 and 1/2 c. Bread Crumbs
Instructions
  1. Preheat oven to 350°.
  2. In a food processor or blender, puree the red peppers and basil together along with salt & pepper.(Should make about 1 cup sauce)
  3. In a large bowl, combine ground turkey, onion, garlic, egg white, basil, bread crumbs, and 1/2 red pepper sauce.
  4. Form into a loaf in a small baking dish or loaf pan.
  5. Bake for 40 minutes. Remove from oven and pour the other 1/2 c. red pepper sauce over top.
  6. Continue baking for another 15 minutes or so. Internal temp should reach at least 170°.
Notes

Feel free to play with the spices in this one!


Like this post? SHARE it!

Related Posts Plugin for WordPress, Blogger...

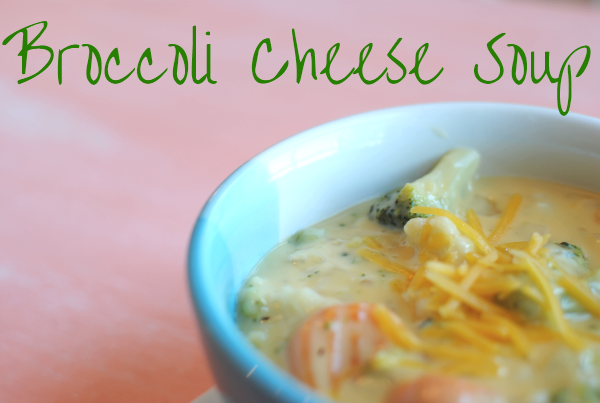
Broccoli Cheese Soup

How was your 3-day weekend? Get a little R&R in? I was kinda forced into some R&R this weekend when a very random illness struck. It wasn’t something that had been going around as far as I know, but thankfully it’s going away fairly quickly. We didn’t have big plans for the holiday so it was nice to have some time to just be lazy.

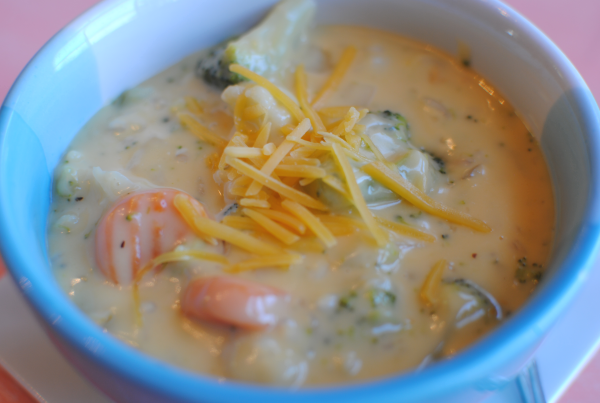
One of my favorite comfort foods is broccoli cheese soup. There is just nothing like the thick, cheesy, stick-to-your-ribs soup. Especially when it starts to get cold outside. But honestly, I could care less what time of year it is. I’ll eat it any day!

There are some really great recipes out there for this kinda soup. Just about anywhere you look, somebody has their own version. But they all come down to the same ingredients: broccoli and cheese! Most of which contain Velveeta. There’s nothing wrong with that, but sometimes I do like to skip the processed blocks of cheese and use the good stuff. So I adapted my potato soup recipe to include a little more cheese and swapped out the potatoes to create this yummy version of broccoli cheese soup!

I also added barley for added fiber!

This has got to be one of the easiest soups out there to make. It tastes like it’s slow-cooked but only takes minutes. My absolute favorite kind of recipes.

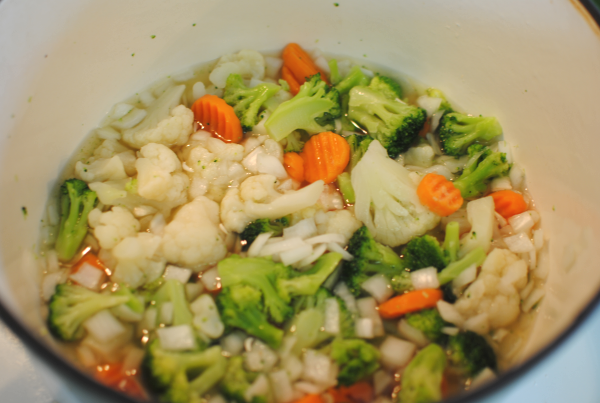
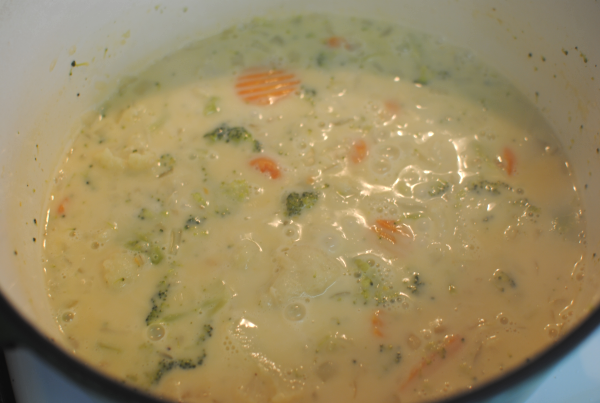
You start with a 16 oz package of frozen broccoli and carrots, broccoli and cauliflower, or broccoli and both! Whatever you can find at the store for cheap. Throw that into a pot along with a chopped onion, your barley, and can of chicken broth. The veggies just simmer away. Believe it or not, but this is the most time-consuming part of the entire process! (Besides chopping the onion, of course)

Whisk together cornstarch and part of a can of evaporated milk to begin your thickening agent and add that in.

We’re starting to get creamy y’all.

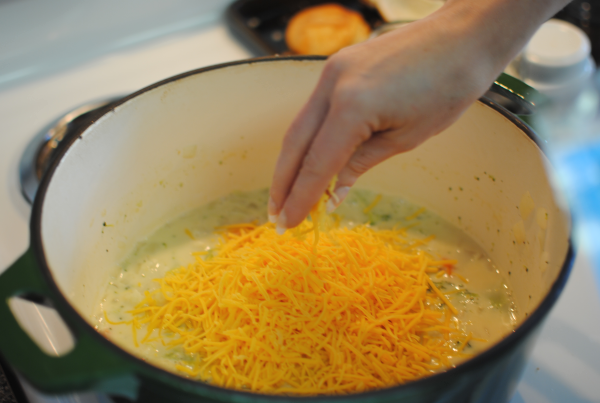
Pour in the rest of your milk and then it’s time to get cheesy.

Oh yeah. Cheeeeeeeeese always makes things better.

That’s 2 cups right there. Let that melt and you’re ready to serve! This goes really great in a bread bowl or along with some yummy rolls.

I’m not sure why it makes me happy to know that there’s no Velveeta in it, but it does! Somehow it just feels healthier.

I’m sure there’s a recipe that you love or that you’ve heard of. I urge you to give this one a try next time you’re in the mood for a warm, broccoli cheese soup.

Broccoli Cheese Soup
Recipe Type: Main Dish, Soup
Author: Pennywise Cook
It is possible to make broccoli cheese soup without Velveeta! Try this recipe for a tasty alternative!
Ingredients
  • 16 oz Package Frozen Broccoli (or variation of broccoli and cauliflower or carrots)
  • 1 Medium onion, chopped
  • 1 can Reduced-sodium, fat-free chicken broth
  • 1/4 c. Barley (Kroger has this for around $1)
  • Dash pepper
  • 3 tbsp cornstarch
  • 1 can fat-free evaporated milk, divided
  • 2 c. reduced-fat shredded cheddar cheese
Instructions
  1. In a large pot, combine frozen veggies, onion, chicken broth, barley, and pepper. Bring to boil, then simmer for about 20 minutes.
  2. Combine 3 tbsp cornstarch with 1/4 c. evaporated milk. Pour into veggie mixture and stir well. Pour in the rest of the evaporated milk. Bring to a boil and let cook for about 2 minutes.
  3. Remove from heat. Stir in cheese and serve!
Notes

Makes a great meal for having a vegetarian friend over!


Like this post? SHARE it!

Related Posts Plugin for WordPress, Blogger...

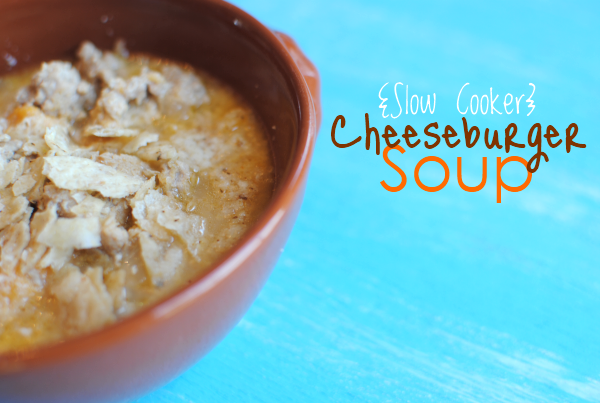
Slow Cooker Cheeseburger Soup

There’s a time and a place for soup. At least at my house it’s that way. When planning meals, soup is never an option. I honestly think that my family would rather eat cardboard than eat such a thing called soup. It’s not because soup is such a bad thing. It’s probably just because when put up against a hearty casserole or grilled steak, soup just doesn’t compare. And therefore usually ends up being bypassed and never even a consideration. This is something that I’d loved to change here in my family.

I love soup! For many reasons too. You can make huge amounts at once, it freezes well, and best of all it’s cheap to make! All of my favorite traits of a good meal. So when I came across this Weight Watchers Cheeseburger Soup recipe, I knew I had to make it.

It’s contains the word, cheeseburger. I knew my family would have to love it.

It’s really easy to make. I healthified mine up a bit with ground turkey in place of the beef. The fam didn’t even know it. I take that back. They know me enough by now that all I use is ground turkey so maybe they did know. Either way, they didn’t care! It turned out really yummy and there are plenty of reasons why I love this particular soup. Not only was it cheap, but I made it in the crockpot so there was no slaving over the stove all evening.

Not to mention that it’s low-calorie. I mean come on, something that the family will eat that’s actually low-cal too? It’s a winner!

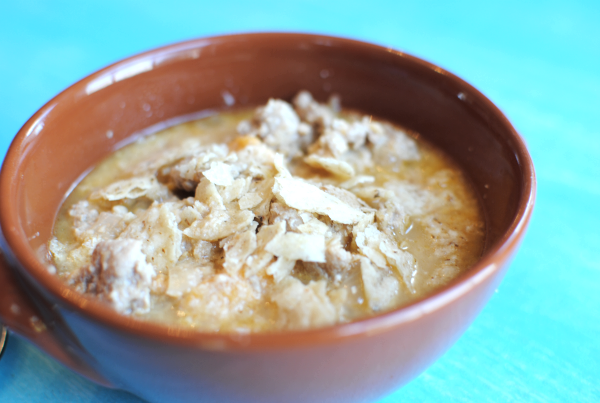
I made a few small changes to the recipe and it turned out really good. Mine doesn’t look near as yummy as theirs does, but I can assure you that it was just as tasty I’m sure!


Recipe adapted from Weight Watchers.

Slow Cooker Cheeseburger Soup
Author: Adapted from Weight Watchers
A meal that the whole family will love, this cheeseburger soup is easy and low-calorie too!
Ingredients
  • Cooking Spray or Crockpot Liner
  • 1 and 1/2 tsp Minced Garlic
  • 1 Medium Onion, Chopped
  • 1 lb Ground Turkey (see notes)
  • 2 Tbsp Flour
  • 3 Cups Low-Sodium Chicken Broth (see notes)
  • 1 c. Reduced Fat Evaporated Milk
  • 8 oz Cubed Cheese (I used Colby Jack)
  • 1/2 Tsp Paprika
  • Salt and Pepper to Taste
  • Tortilla Chips for crumbling on top
Instructions
  1. Spray a skillet with cooking spray. Saute garlic and onions until tender. Spray the inside of a slow cooker with cooking spray and pour the garlic and onions into it.
  2. In same skillet, brown the ground turkey and break into small crumbles as it cooks. Pour off any grease and place into slow cooker.
  3. In a cup, combine 2 tbsp flour with 1/2 cup broth until there are no more lumps.Pour into the same skillet. Then add remaining 2 and 1/2 cup broth.Bring to a simmer making sure to scrape up the browned bits on the bottom of the skillet. Pour into the slow cooker.
  4. Add evaporated milk, cheese, paprika, and salt & pepper to the slow cooker and stir. Cook on low for 2-3 hours.
  5. Serve with broken up chips on top.
Notes

I used a pound of ground turkey in this soup, but after making it and seeing how “soupy” it actually was, I would probably add another 1/2 pound next time. If you like your soups like this meaty, you might consider it.

This recipe originally called for chicken broth. I think that I will try part beef broth next time since after all, it is cheeseBURGER soup. Seems to me there needs to be more beefiness.

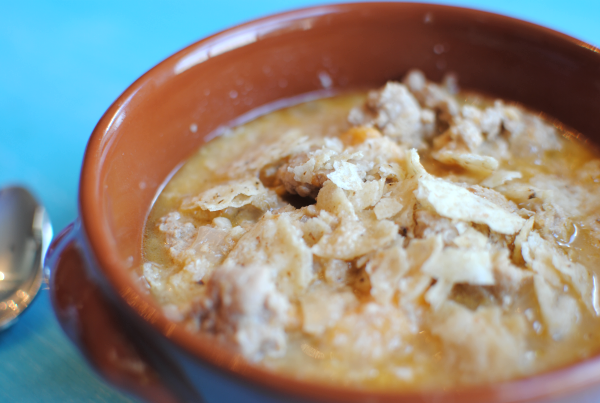
And honestly, the picture of this soup does not do it justice. It’s a lot more appetizing than the picture lets on. 🙂

Just notes from my brain about this dish! Enjoy!


Like this post? SHARE it!

Related Posts Plugin for WordPress, Blogger...

Cheesy Broccoli Tuna Casserole

Today I’m going to address a meaty ingredient that folks often overlook when it comes to making meals.

Canned tuna.

No, it’s not glamorous. Quite the contrary, the very thought of it is not appealing at all to me. When I pop open a can, I feel like I’m about to feed a cat, not make dinner. But undeniably, it’s a cheap meat. I don’t really mind the taste, as long as it’s covered with cheese or mayonnaise or mustard. I even love a good old-fashion tuna sandwich every now and then. Will my husband eat one? No. Will my kiddo eat one? No.

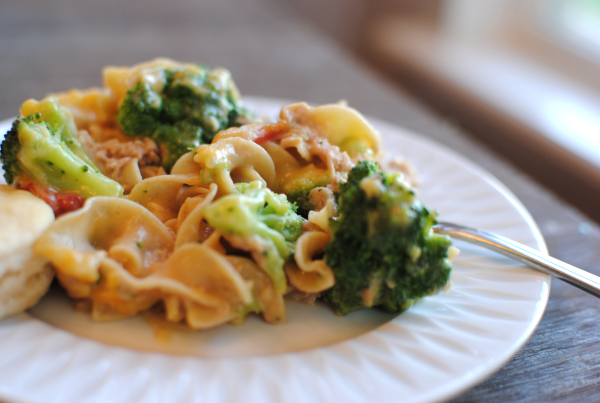
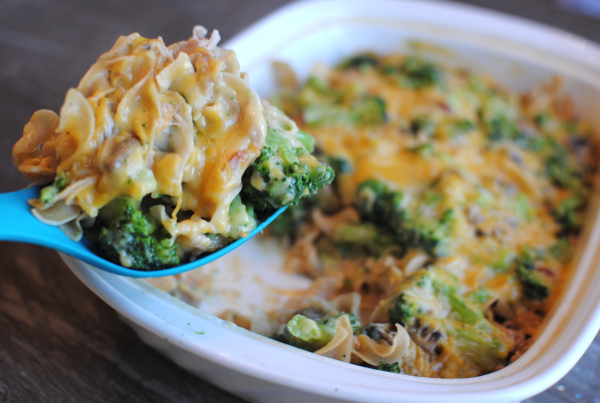
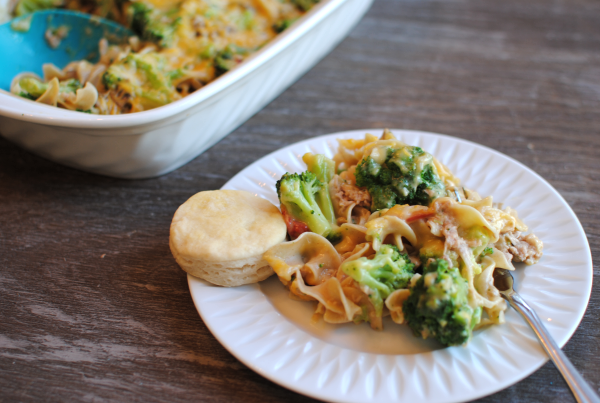
Enter Cheesy Broccoli Tuna Casserole. I adapted this recipe a little from this cookbook.

I’ll go ahead and warn you though, if you have tuna haters who can’t stand tuna, this probably won’t change their tune. It’s not one of those kinda casseroles. But it is quite tasty and a great way to save a little money using affordable pasta, meat, and veggies.

One of my favorite things about this dish is that you can microwave it instead of firing up the oven. That’s always a plus to me.

It’s funny, my daughter was eating it and she couldn’t quite put her finger on what was in it. She was blind-sided by the yummy cheese and broccoli (this is what makes this one so sneaky!) and didn’t realize that there was tuna inside. She then said “Ew, fish!” and gave me the oh-so-famous “I don’t like it.”. I told her to just pick out what she didn’t like. She once again stated that she didn’t like the tuna part.

Later on, washing the dishes I found nothing but pieces of mushroom on her plate. She didn’t even know that she was actually eating the tuna and not eating the mushrooms. So the moral of this story is that from now on, I’ll make this dish without mushrooms.

And p.s.- be prepared to have your entire kitchen smell like tuna. If you figure out a way to avoid that, please let me know!

Cheesy Broccoli Tuna Casserole
Recipe Type: Main Dish
Author: Adapted from 366 Low-Fat Brand-Name Recipes in Minutes Cookbook
Affordable canned tuna makes up a very simple yet tasty supper!
Ingredients
  • 10- 12 oz Wide Egg Noodles
  • 10.75 oz Can of Cheddar Cheese Soup
  • 5 oz Evaporated Milk
  • 1 tsp Onion Flakes
  • 2 Cans Tuna packed in water, drained
  • 4 oz Mushroom Pieces, Drained (optional)
  • 16 oz Frozen Broccoli, Thawed (I used steamfresh)
Instructions
  1. Preheat oven to 350 degrees. In a large pot, boil noodles according to package directions. Drain and set aside.
  2. In a small bowl, combine cheddar cheese soup and evaporated milk. Add onion flakes and mushrooms.
  3. Layer 1/2 the noodles in the bottom of a 9×13 baking dish. Crumble 1 can of tuna over the top of the noodles. Add 1/2 of the broccoli and then pour 1 cup of the sauce on top of that. Repeat layers ending with the rest of the sauce.
  4. Top with a sprinkle of shredded cheese if desired.
  5. Bake for 20 minutes.
  6. Microwave version- assemble as above. Then microwave on high for 8 minutes. Then reduce power to 50% and microwave another 5 minutes.

Like this post? SHARE it!

Related Posts Plugin for WordPress, Blogger...

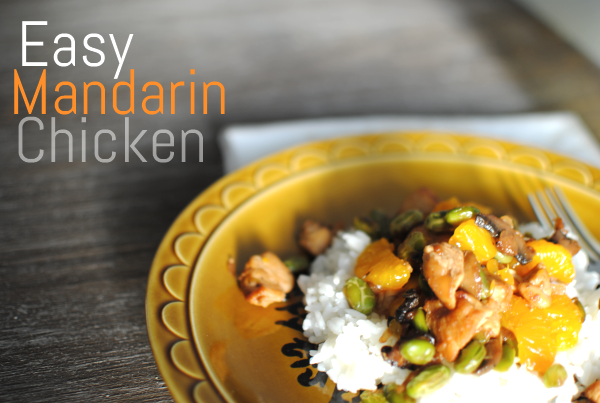
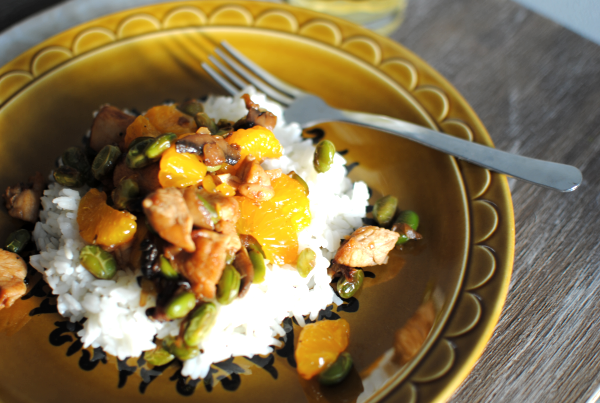
Easy Mandarin Chicken

My girls have recently discovered mandarin oranges. Ever since I was a kid, I’ve always loved fruit in any form. Even canned fruit strikes my fancy every now and then. I picked up a few cans of mandarin oranges the other day to see if my girls would enjoy it as much as I used to. I think ended up rekindling my love for the fruit myself. And as expected, they absolutely loved them. I really need to find myself a good sale to stock up on them.

In keeping with their latest obsession, I decided to make something that showcased two things that I know they’ll both like. Chicken and the new-found love, mandarin oranges.

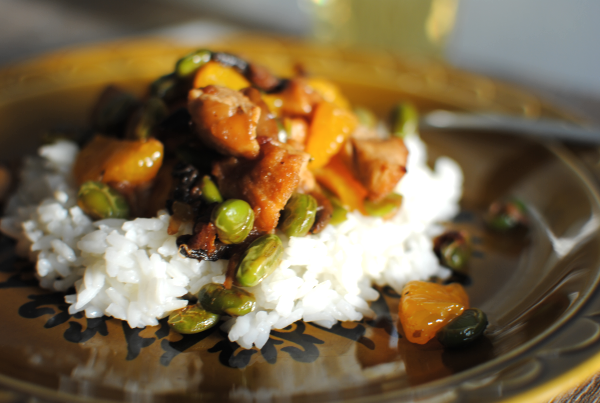
To my utmost surprise, my ENTIRE family (including my incredibly picky husband and 5-year old) loved this meal! The 1-year old even cleaned her plate.  I cleaned mine and an entire 2nd plate as well. Hubby was really concerned about the sweet oranges being used with savory chicken, but when he was done he told me that he thought it worked really well together. SCORE!

I used edemame to kick up the nutrition and hid mushrooms with the onions. The mushrooms were quite stealth and the kiddos loved the edemame! In fact, Addie asked me at one point what kinda beans they were. I told her edemame and she replied “I really like edemame!”.

Those are words that I never expected to come out of my 5-year old’s mouth…

By the time dinner was over, I was floored. This was a meal that the whole family loved and it was actually healthy and good for them. That only happens in my dreams and on commercials doesn’t it?

Recipe adapted from 366 Low-Fat Brand-Name Recipes in Minutes Cookbook.

Easy Mandarin Chicken
Recipe Type: Main Dish
In just minutes, you’ll have a mouth-watering Asian meal with little effort!
Ingredients
  • 1 11 oz Can Mandarin Oranges
  • 2 & 1/2 tbsp Soy Sauce
  • 2 Boneless, Skinless Chicken Breasts, Cut into Bite-size Pieces
  • 1 Tbsp Canola Oil
  • 1/4 Tsp Garlic Powder
  • 1 Cup Chopped Onion
  • 1 & 1/2 c. Frozen Edemame
  • 8 Baby Bella Mushrooms, Sliced
Instructions
  1. Drain oranges, reserving 3 tbsp of the liquid. Mix together the reserved liquid with the soy sauce and set aside.
  2. Heat oil in a large skillet and cook chicken in the oil over medium-high heat until chicken is no longer pink. Remove chicken from skillet. Add in the onions, edemame and mushrooms. Cook until onions are tender.
  3. Add the chicken back in along with the soy sauce mixture. Cook and stir to heat all of it through.
  4. Gently stir in the mandarin oranges right before serving.
  5. Goes well over rice!
Notes

If your group is not a fan of edemame, you can always use frozen snap peas in their place.

Teriyaki sauce can also be substituted in soy sauce’s place.

The addition of a couple drop of sesame oil would also make a nice addition.

Be prepared for a quick meal! This one takes no time at all to whip up!


Like this post? SHARE it!

Related Posts Plugin for WordPress, Blogger...

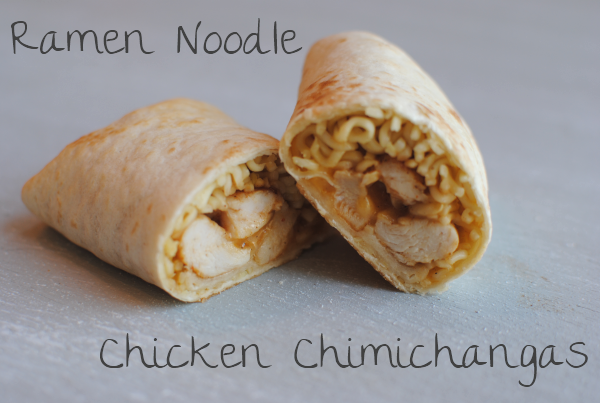
Ramen Noodle Chicken Chimichangas

Ramen Noodle Chicken Chimichangas 9 Ramen Noodle Chicken Chimichangas

We’re going to go low budget today. We’re talking way low budget. Like Ramen Noodle budget low. You know what I’m talking about…the magical noodles that come in handy when money is tight or you just don’t want to cook. I got this idea from my step brother who was low on ingredients for a chimichanga and came up with this concoction. He shared one with me and I was pleasantly surprised at how yummy they were.

I have to admit that the thought of Ramen noodles in a chimichanga didn’t exactly sound that amazing to me. But once I tried, I was actually excited to make my own. Even if you’re not too keen on putting Ramen noodles in your chimichanga, you can at least see below from instructions on how to fold a chimichanga. But I think you’ll want to give these a chance y’all. They are surely worth it!

Price breakdown:

4 Flour Tortillas $.40
4 Fresh Chicken Tenders $.80
1 Package Chicken Ramen Noodles $.18
2 Cups Shredded Cheese $1.79
Total= $.79 per chimichanga

Ramen Noodle Chicken Chimichangas 1 Ramen Noodle Chicken Chimichangas

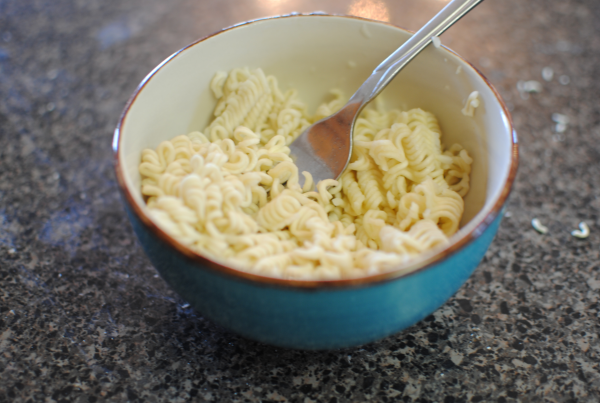
It all starts with those college-esq Ramen noodles. Which by the way, are quite tasty! I haven’t made them in so long and when these came out of my microwave, I seriously had to stop myself from eating them all. Cook them up according to the package including the seasoning. Easy and cheap way to get that great flavor inside the chimi.

Ramen Noodle Chicken Chimichangas 2 Ramen Noodle Chicken Chimichangas

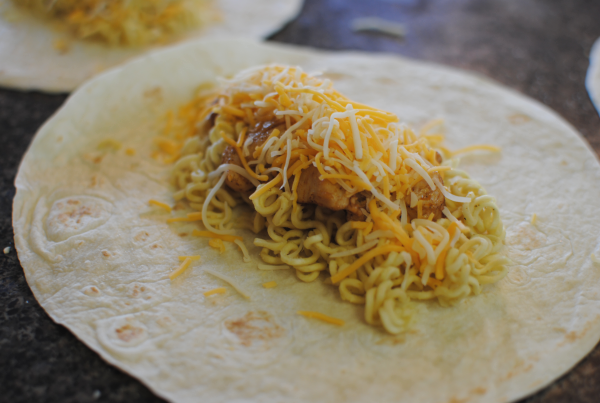
On each tortilla, you place some of those Ramen noodles along with some seasoned grilled chicken and shredded cheese. YUM!

Then it’s time to roooooooooll them up for baking.

Ramen Noodle Chicken Chimichangas 3 Ramen Noodle Chicken Chimichangas

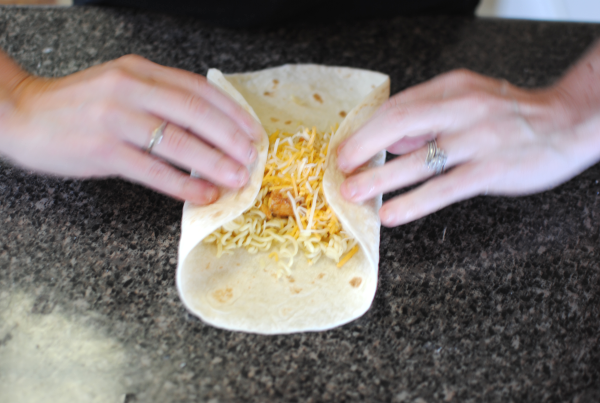
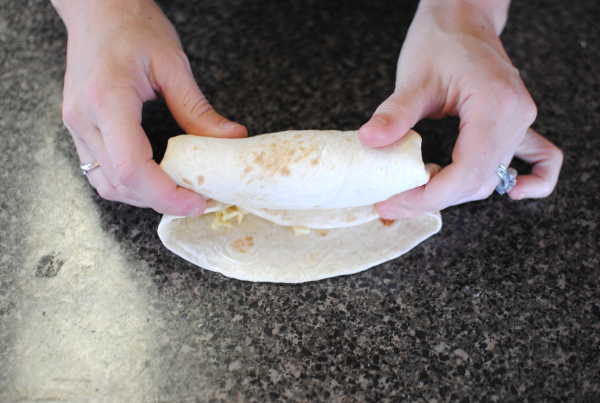
Lay your tortilla flat. Fold the sides in towards the middle.

Ramen Noodle Chicken Chimichangas 4 Ramen Noodle Chicken Chimichangas

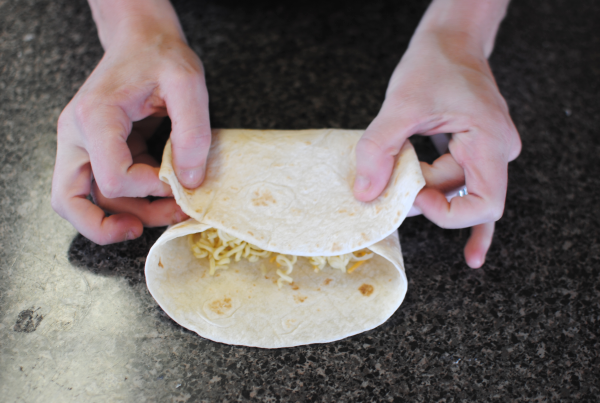
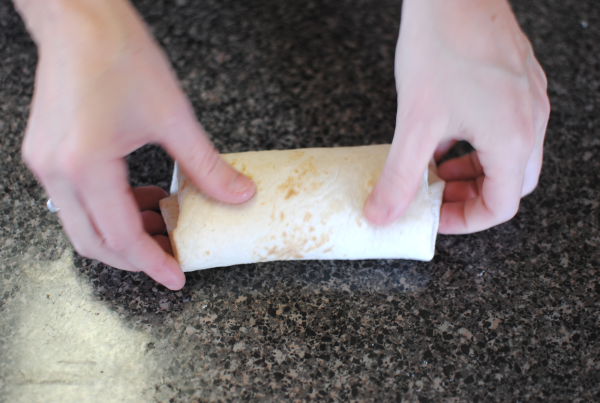
Then fold the bottom towards the top, but only halfway. Fold the edge towards the inside and begin to roll.

Ramen Noodle Chicken Chimichangas 5 Ramen Noodle Chicken Chimichangas

…like so.

Ramen Noodle Chicken Chimichangas 6 Ramen Noodle Chicken Chimichangas

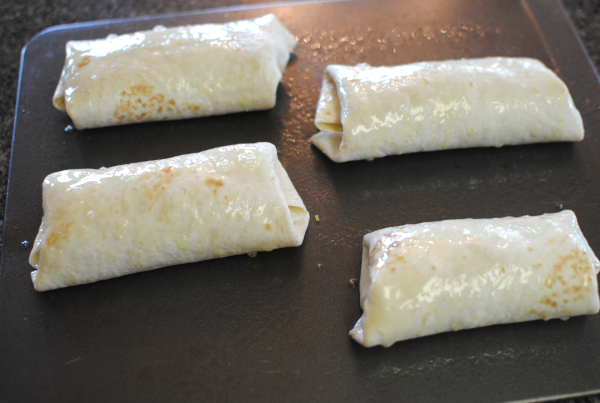
Once you get the rolling down, it will look like this. Place them seam side down on your baking sheet.

Ramen Noodle Chicken Chimichangas 7 Ramen Noodle Chicken Chimichangas

Spray them with a little cooking spray to help them brown and get a little crunchy.

Ramen Noodle Chicken Chimichangas 8 Ramen Noodle Chicken Chimichangas

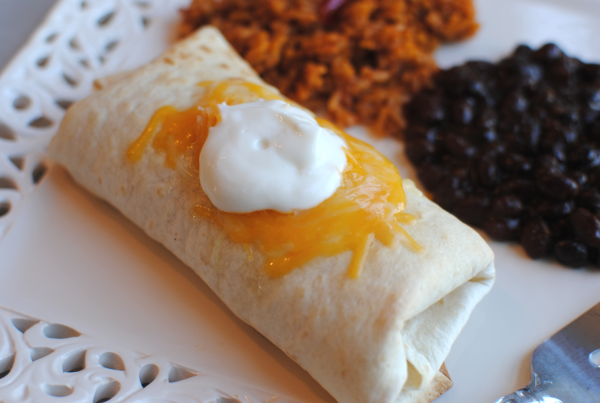
Serve with your favorite fix-in’s like more cheese or sour cream on top and viola. So easy, cheap, and great for freezing too!

Ramen Noodle Chicken Chimichangas
Recipe Type: Main Dish
Author: Pennywise Cook
Serves: 4
Using a low budget ingredient, Ramen noodles make a great addition to chicken chimichangas!
Ingredients
  • 4 Flour Tortillas
  • 4 Fresh Chicken Tenders, Cut into Bite-Size Pieces
  • 1 Pkg Chicken Flavored Ramen Noodles
  • 1 Tbsp Olive Oil
  • 1 Tsp Minced Garlic
  • 1/2 Tbsp Chili Powder
  • 8 Tbsp Shredded Cheddar Cheese
  • Cooking Oil
Instructions
  1. Preheat oven to 350 degrees.
  2. Cook Ramen Noodles according to the package directions. Drain all liquid from the noodles and set aside.
  3. Meanwhile, in a skillet heated to medium-high cook chicken in olive oil along with the minced garlic and chili powder until no longer pink.
  4. On each tortilla place 1/4 of the Ramen noodles, 1/4 of the to chicken, and 2 tbsp shredded cheese.
  5. Roll up into chimichangas and place seam side down on a greased baking sheet.
  6. Spray tops with cooking spray and bake for 10-15 minutes until browned and crunchy.
Notes

If you like spicy things, you can use jalapeno cheese like my step brother to add a little kick!


Like this post? SHARE it!

Related Posts Plugin for WordPress, Blogger...

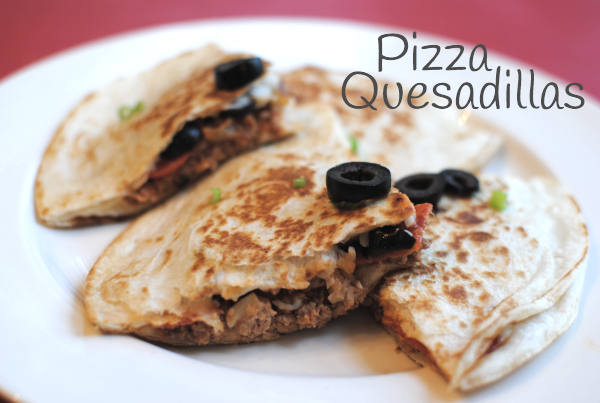
Pizza Quesadillas

Every now and then to change lunch up just a bit, I make what my little girl what she likes to call “pizza tacos”. I use a tortilla and spoon on some pizza sauce (or sometimes just tomato sauce) along with some pepperoni and mozzarella cheese. I roll them up and microwave them for a few seconds to help the cheese melt. It makes a really tasty lunch. After making one for her the other day I got to thinking about how the same might taste good in a quesadilla.

The idea eventually made its way to my menu plan and I was excited about that night. It was another one of those dinners that I knew everyone would love.

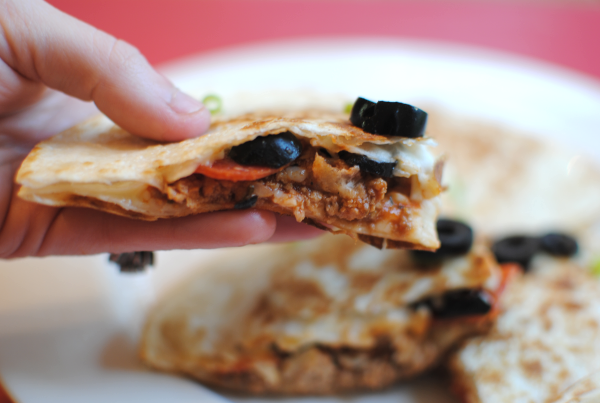
One of the best things about making these quesadillas is that you can customize them to the eater’s liking. For instance, I like my pizzas with everything on them. Well, minus any small fish or fungi. My daughter and husband? Not so much. Strictly cheese and pepperoni. But I did add some meat to the mix for substance since this is for dinner after all.

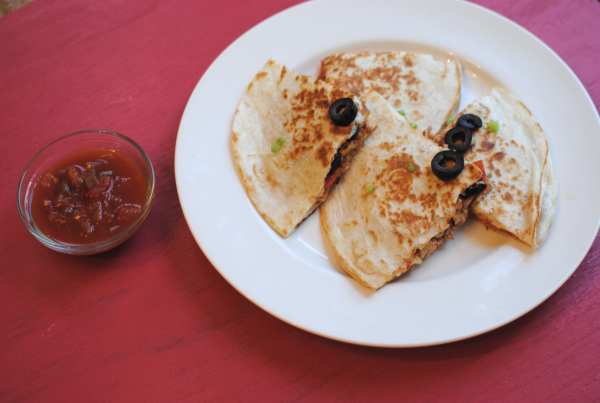
These were a major hit with the fam. I even told my hubby that I have to hand it to myself, they are pretty good. I dunked mine in salsa although some might find that a little weird. Pizza and salsa don’t exactly go together, but they tasted fine to me. You could dip them in more pizza sauce. I’m sure that would be tasty.

Oh yeah. That’s obviously a picture of my quesadilla with olives and all. Feel free to leave those off if you must.

Here’s the recipe.

Pizza Quesadillas
Recipe Type: Main Dish
Author: Pennywise Cook
Serves: 4
Make this every day Mexican dish and make it Italian. These Pizza Quesadillas are extra tasty!
Ingredients
  • 1 lb Ground Turkey
  • 1 Tsp Minced Garlic
  • 1 Tsp Onion Flakes
  • 1 Tsp Dried Oregano
  • 1/2 Tsp Dried Basil
  • 1 Cup Pasta Sauce
  • Sliced Olives
  • Pepperoni
  • 2-3 c. Shredded Mozzarella Cheese
  • 8 Medium tortillas
  • Cooking Spray
Instructions
  1. Brown ground turkey with garlic, onion flakes, oregano, and basil. Add pasta sauce and cook for about 5 minutes.
  2. Heat a skillet to medium high heat. Spray with cooking spray. On a tortilla place about 1/3 c. shredded cheese, then some of the meat mixture, then top with optional olives and pepperoni. End with cheese and top with second tortilla. Place into heated skillet for about 2-3 minutes.
  3. Spray top tortilla with cooking spray then flip the entire quesadilla with spatula.
  4. Repeat for next 3 quesadillas.
Notes

This makes about 4 quesadillas that make 4 squares each. They are surprisingly filling too!


Like this post? SHARE it!

Related Posts Plugin for WordPress, Blogger...

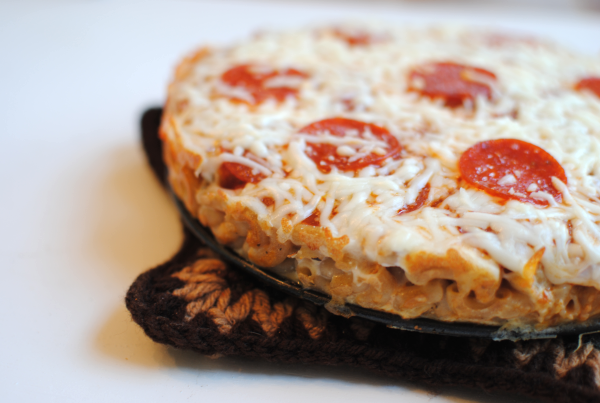
Macaroni Crust Pizza

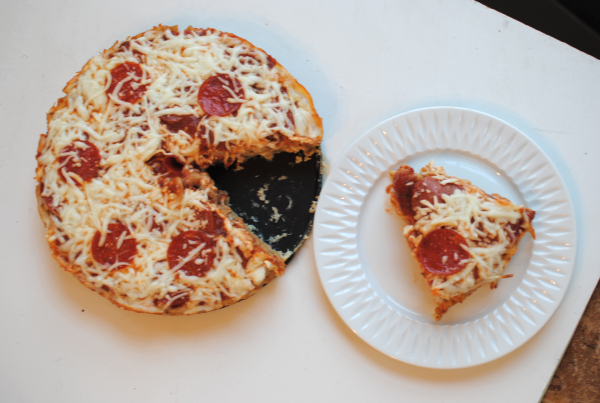
One of the cheapest meals that I know how to make is pasta. You can always find a deal on dry pasta just about anywhere you go. Have a coupon? That’s even better! My favorite is when Publix puts pasta BOGO and you can get it next to nothing. I usually stock up and when I need something quick or easy during the week, it’s a no-brainer.

My favorite part of pasta is that it is SO versatile. You can basically make it into anything or put anything in it. This is what makes it so great for budget meals and for those who have picky eaters in the fam.

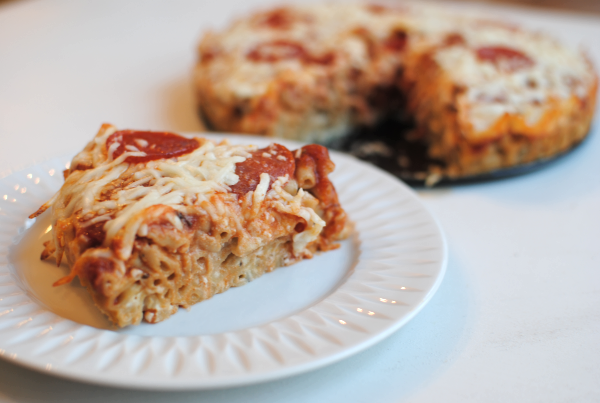
I can’t take credit for today’s recipe. I adapted this recipe from The Dieter’s Cookbook from 1982. I can’t believe that I’ve never thought of this. I’ve made pizza pasta many times before, but never thought of making macaroni the “crust” of a pizza. I cannot stress to you how much my family liked this. Easy, cheap, and incredibly tasty you really do have to try this one y’all!

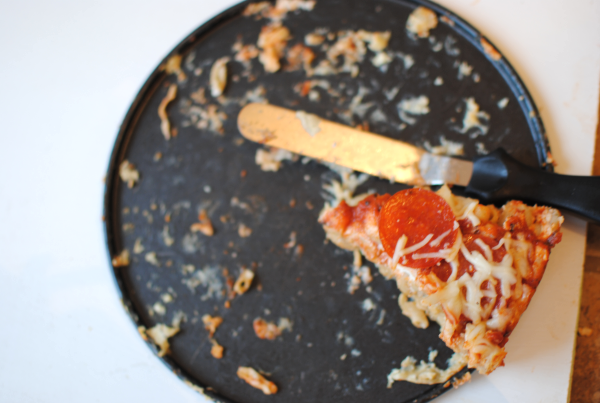
I take that back. Remember how I said that I couldn’t describe to you how much my family liked this? Well instead, here’s an illustration! This is all that was left from one sitting of this Macaroni Crust Pizza. It is that good.

And it’s actually a decent recipe for those watching their calories. Well, as long as you don’t eat as much as we did. 🙂

Just make it. Then come back here and leave a comment about your family’s reaction!

Macaroni Crust Pizza
Recipe Type: Main Dish, Pasta
Author: Pennywise Cook adapted from The Dieter’s Cookbook 1982
This cheap and easy meal is a tasty twist on regular pizza!
Ingredients
  • 2 c. Elbow Macaroni
  • 2 Eggs, Beaten
  • 1/2 c. Mozzarella Cheese
  • 1/4 c. Parmesan Cheese, Grated
  • 2 oz Pepperoni
  • 1/4 c. Skim Milk
  • 1/2 Tsp Dried Basil
  • 1/2 Tsp Dried Oregano
  • 1/8 Tsp Pepper
  • For Topping
  • 1 Egg, Beaten
  • 1/2 c. Reduced-Fat Ricotta Cheese
  • 1 Jar (8 oz) Pizza Sauce
  • 1 c. Mozzarella Cheese
Instructions
  1. Preheat oven to 375 degrees. In a large saucepan, cook macaroni according to package. Drain well.
  2. In a mixing bowl, combine 2 eggs, 1/2 c. mozzarella cheese, Parmesan Cheese, milk, basil, milk, and pepper. Add macaroni to this mixture and combine well.
  3. In a greased springform pan, place the macaroni mixture into a “crust” form. Bake for 10 minutes.
  4. Meanwhile, in a bowl combine the 1 egg and ricotta cheese. Once “crust” is out of the oven, pour this mixture over the top and evenly spread. Pour the pizza sauce over the top and sprinkle with mozzarella cheese. Top with pepperoni.
  5. Return to oven for 10- 15 minutes or until heated through. Let stand 10 minutes before slicing.
Notes

This could easily be made without any meat for vegetarians!


Like this post? SHARE it!

Related Posts Plugin for WordPress, Blogger...