Crockpot Chicken Tortilla Soup

Today is my daughter’s last day of school. I can already hear the words “I’m booooooored mom”. You’d think that we live in a box without any toys, coloring books, or that all addicting boob tube contraption they call a TV. My goal is to do whatever I possibly can to try and keep those words from seaping out of my kiddo’s mouth.

So we’ll plan playdates, trips to the splash pad, fun at the Y, and anything and everything else that I can come up with to combat bordem.

Dinner sometimes plays second fiddle in the summer around here. The sun is out later and we’re outside enjoying our days which means either mom has to miss out on the fun to cook or mom has to get creative. So creative I’ll get! This recipe is one that I put together in a pinch and is super simple to make.

Who doesn’t like making dinner in the crockpot? Most of the ingredients in this recipe are from cans which also makes for easy prep. This reminds me of a 7 can soup with a little twist. One ingredient that I’ve always kinda been leary of, is canned chicken. I don’t use it that often because, well, it’s called canned chicken. It smells a lot like tuna to me in the can which most of the time turns me off. But every now and then I’ll place it in a recipe that makes the chicken transform with the other flavors. And sometimes it actually tastes great. Hey, don’t knock it ’til ya tried it! If you’re not too keen on the canned chicken idea, use leftover rotisserie chicken or something along those lines if you’d like.

I love the crunch of the crispy tortilla strips on top at the very end. If you’re lucky enough, you’ll find some colorful ones like I did!

 It’s your turn: Do your kids get bored during the summer? Or do they enjoy the freedom?

Crockpot Chicken Tortilla Soup
 
Recipe Type: Soup, Main Dish, Crockpot
Author: Pennywise Cook

A few cans and seasonings and you’re on your way to a tasty Chicken Tortilla Soup!
Ingredients
  • 1 onion, chopped
  • 2 tsp garlic, minced
  • 1 (14 oz) can vegetable broth- could also use chicken
  • 1 (15.5 oz) can black beans, drained & rinsed
  • 1 (15.25 oz) can whole kernel corn, drained
  • 1 (12.5 oz) can chunk chicken breast, drained
  • 1 (10.5 oz) can cream of celery soup
  • 1 (10 oz) can rotel
  • 1 rotel can of water
  • 1 tsp coriander
  • 1/2 tsp cumin
  • 1 tsp chili powder
  • salt & pepper to taste
  • 1 c. tortilla strips for topping
Instructions
  1. Place all ingredients into crockpot and cook on high for 4-6 hours or low for 6-8 hours.
 
Notes

– The first time I made this, I sauted my onion and garlic before placing it in the crockpot. You can do this first if you are going to be cooking your soup for less time. If not, they should soften up enough while cooking.
– If you would rather, you can use chicken broth in place of the vegetable broth
– If you have leftover chicken, you can use that in place of the canned chicken
– Finally, if you prefer, you can use more broth in place of the water in the rotel can. I found it tastes just as good with the water.


Like this post? SHARE it!

Related Posts Plugin for WordPress, Blogger...

Crockpot Chicken Tacos

Well hello there! Long time no….er….blog?

As I was preparing the pictures for this post, even my husband made the comment about my lack of my snapping of photos of our dinners. Yes, I am usually known as the papparazi of food around here, but for the past couple of months there have been some awesome things happening around here and needless to say, I’ve been just a bit preoccupied.

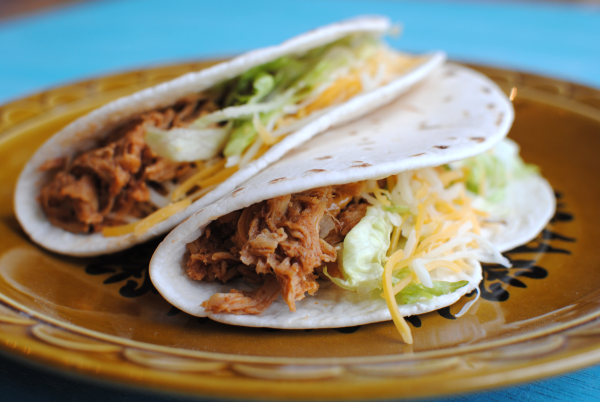
But have no fear! I have a recipe today. One that even the least of cooks can throw together in minutes and makes for a family pleasing meal. Crockpot Chicken Tacos only take 3 ingredients and one of them is water. Your HUSBAND could make these.

He might get a big head afterwards. Just tell him that he did fabulous on dinner and that you adore his culinary skills. You didn’t realize that Crockpot Chicken Tacos could help you stroke your husband’s ego did you?

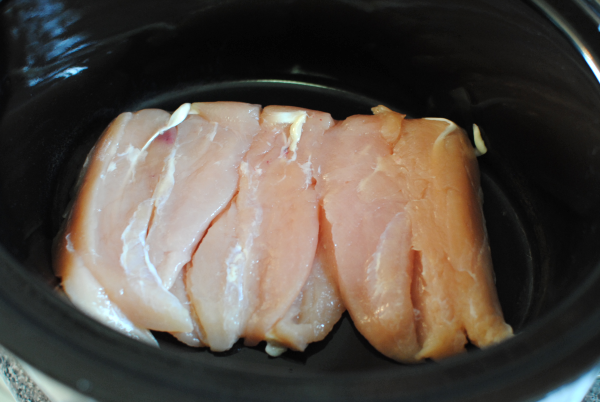
The most important ingredient in this one is, well, chicken! You need about a pound to a pound and 1/2. I used fresh because I got some on clearance, but frozen will also work. You’ll just need to adjust your crockpot setting depending on how fast you’d like it to cook.

Use tenderloins, breasts, thighs, whatever you’d like. It’s going to get tender and you’ll shred it anyways.

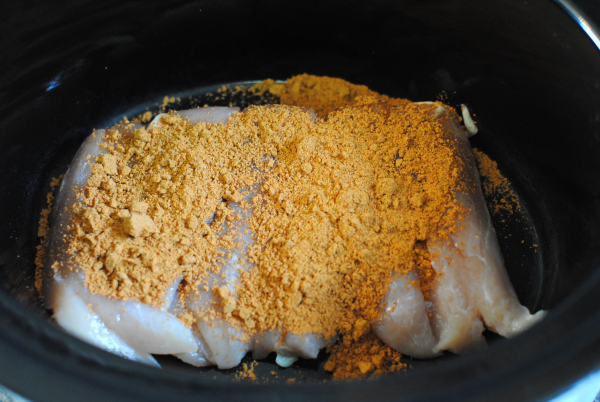
Brace yourself, this is where it gets a little tough. You must open a packet of taco seasoning and sprinkle over the chicken. I know, I know. How could I ask you to do such a laborious thing? Well suck it up. You’ll live.

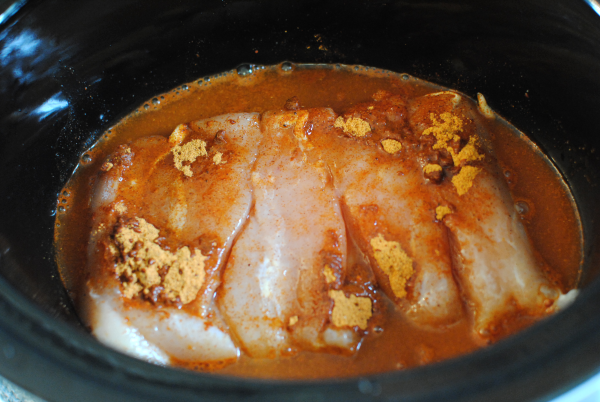
Here’s the last step. Add the amount of water listed on your taco seasoning packet to the crockpot.

Place the top on your crockpot and walk away. Go update your status. Take out the trash. Clip your toenails (you know who you are). Hey look, now you have time to make a dessert! Might I suggest Salted Caramel Brownies

I usually let it cook for about 6 hours on low when I’m using fresh chicken. Towards the end of the cooking, I usually add just a tad bit more water and then shred up the chicken. It’s so tender that just stirring it usually shreds it without hassle.

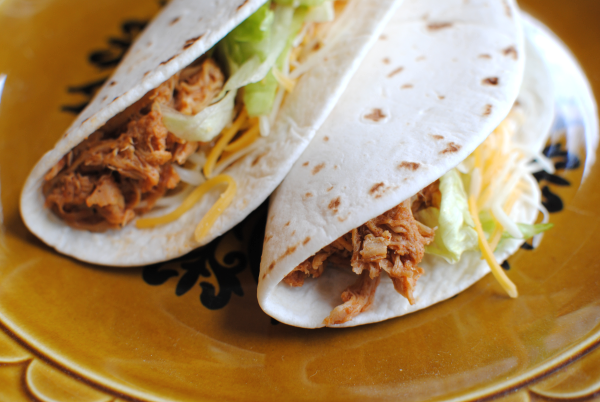
Add your favorite toppings and enjoy.

We’ve started having what we’re calling Taco Tuesday. Some form of taco will be made on Tuesdays. Whether casserole, soup, or plain tacos, that’s our theme. And beef is good, but sometimes chicken feels a bit healthier. Plus, it’s a nice change.

Crockpot Chicken Tacos
 
Recipe Type: Main, Crockpot
Author: Pennywise Cook

With only 3 ingredients (one of which is water) and a crockpot, you can have chicken tacos for dinner tonight!
Ingredients
  • 1- 1.5 pounds fresh or frozen chicken breasts, tenders, or thighs (your choice)
  • 1 package taco seasoning
  • Water listed on taco seasoning packet + a bit more
  • Toppings of your choice
Instructions
  1. Place fresh or frozen chicken into crockpot.
  2. Sprinkle with taco seasoning.
  3. Add the amount of water listed on the seasoning packet.
  4. Cook on low for about 6 hours (fresh chicken) or medium/high for 6 hours (frozen).
  5. Add a little water, about 1/4 cup towards the end. Let absorb then stir and shred.
  6. Serve with tortillas or shells and add your favorite toppings!


Like this post? SHARE it!

Related Posts Plugin for WordPress, Blogger...

Stuffed Pizza Cupcakes

I’ve finally started Christmas shopping. Last year I had most of it done by the very first week in December. Yeah, I was a little nuts wasn’t I? Nuts or extremely genius I’d say. This year, I’m probably going to do a lot of my shopping online. Since I’ve stopped blogging at Saving with Amy, I’m very much less in-tune with the current deals and steals across the web.

It’s a weird feeling not being on top of the latest deals.

But my sanity is currently intact so I’m not going to complain. It took a long time to make my decision to quit blogging deals and in the end, it was best for me and my family. And now I get to spend my time making yummy food and fun DIY projects to share with you!

These, my friends, might just be your family’s new favorite snack. When I made these, I had no idea how excited that my family would get about them. They have been requested over and over again. Hubby even wants me to make some for him to take for lunches.

There is nothing better than making something that is requested a second time. Well at least in my book anyways.

I made these earlier in the day and just reheated them for dinner and they were perfect. You could just make them on demand, but I needed the daylight for my pictures. But it goes to show that these are great for making ahead of time for a party or lunches.

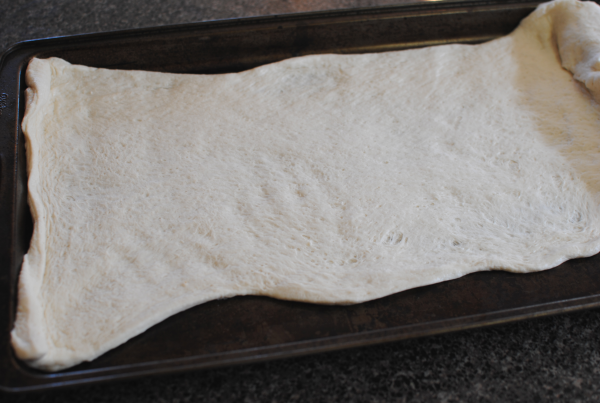
You start by rolling out a store-bought pizza dough. Get it as long and flat as you can. It doesn’t have to be perfect.

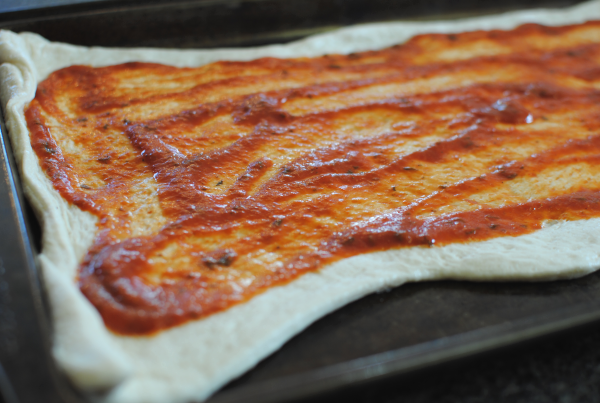
Next, spread about 1/2 a jar of pizza sauce over the entire pizza dough, leaving about an inch around the edges.

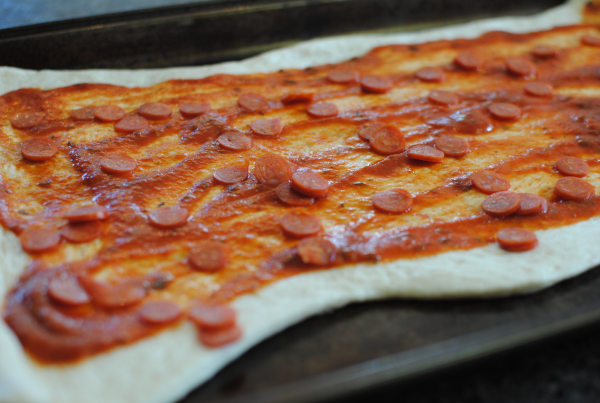
Then sprinkle the entire thing with mini pepperonis. I was going to use the regular size, but when I came across these, I thought they might work better for this. And I was right! So glad that I used the smaller. It made it possible to get a bite of pepperoni in each bite without them trying to separate.

Then cut the dough in half.

Place about 4-5 pieces of cut up string cheese across the dough like this.

Then proceed to roll the dough up. Once rolled, cut it into 1 inch pieces doing your best to keep all the fillings inside.

Place the rolled up pieces into a greased muffin pan with the swirled part facing up.

You’ll top with a little more mini pepperonis and some shredded cheese before baking. Then bake them up and you’re done!

SO amazingly yummy! Everyone will be bound to love these. Come on, pizza dough filled with sauce, pepperoni, and cheese? I think so!

Stuffed Pizza Cupcakes
Recipe Type: Main Dish, Snack
Author: Pennywise Cook
5 simple ingredients lead to the tastiest of all cupcakes. STUFFED Pizza Cupcakes!
Ingredients
  • 1 pkg Store-Bought Pizza Dough
  • 1/2 Jar Pizza Sauce
  • 1 c. Mini Pepperonis, Divided
  • 1/2 c. Shredded Mozzarella Cheese
  • 6 Mozzarella String Cheese, cut into 1 inch pieces
Instructions
  1. Preheat oven according to pizza dough’s directions.
  2. Begin by rolling out the pizza dough flat. Spread the pizza sauce over the dough, leaving 1 inch around the edges. Sprinkle with 1/2 c. mini pepperonis. Cut the dough in half.
  3. Lay 4-5 pieces of string cheese across the dough, adding more as you roll. Do this with both of the pizza doughs.
  4. Cut into 1 inch pieces and place in a greased muffin pan with the swirled side up.
  5. Bake according to your pizza dough’s directions checking after about 12 minutes. When tops begin to brown, remove from oven.
  6. Use a knife to separate from the pan and cool.

Like this post? SHARE it!

Related Posts Plugin for WordPress, Blogger...

Easy Vegetable Beef Soup

I sincerely apologize for not getting on here last week and wishing you guys a very Happy Thanksgiving! I’m normally a lot better about that, but this year I decided to truly disconnect from the outside world. Well, everything except for Words with Friends. I’m not sure that I could live without that.

So even though this is very late and you’re probably tired of hearing it, HAPPY THANKSGIVING! And now I can officially move on into the Christmas season. I’m just not the type to feel Christmas-y until I’ve digested my turkey and dressing. Anyone else feel that way?

We had a very fun-filled Thanksgiving with family and friends. I got to see my best friend from high school and even ran a 5k on Thanksgiving morning. It really was a great Thanksgiving. I hope that you enjoyed yours as much as I did!

I’ve got another recipe for you today that comes from my momma. It’s funny how our cooking skills and what we learn in the kitchen usually comes from those we are closest to. When I was little, watching my mom cook was nothing but dinner for my belly. But these days I look back on those days as valuable knowledge. And it’s especially fun to cook with her now.

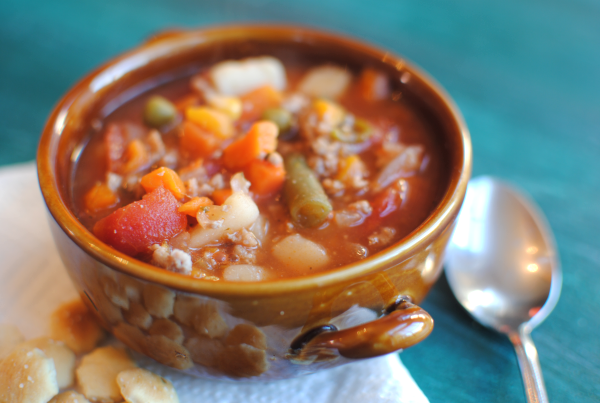
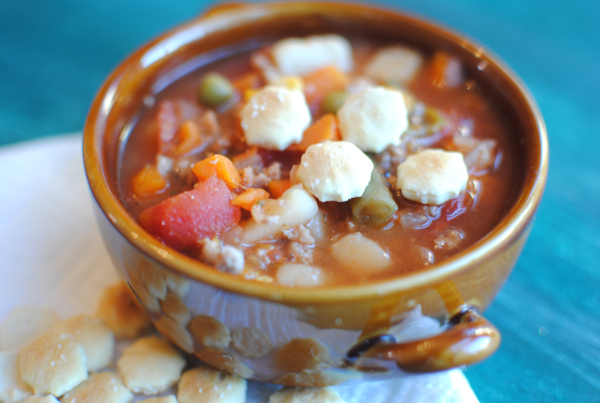
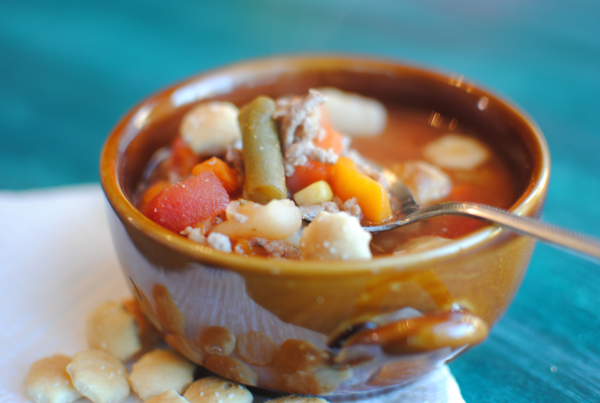
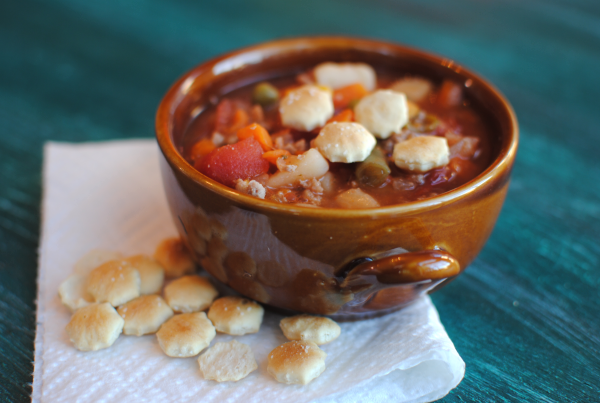
This Vegetable Beef soup is a regular when I visit my mom and also here in our home. It’s simple, it’s fast, and it’s incredibly tasty.

The absolutely perfect soup to warm your soul on a chilly night.

This soup can be whipped up in no time. Even on those last minute weeknights when you have no idea what to make for supper. In fact, most of the ingredients are things you’ll probably already have on-hand.

The bulk of this recipe is the beef and plain old canned veggies. It really doesn’t get much easier than cracking open a can or two and making a soup that tastes like you’ve been working hard on it all day long.

I can’t wait for you to try this recipe out! Let me know what you think if you do…

Easy Vegetable Beef Soup
Recipe Type: Main Dish, Soup
Author: Pennywise Cook’s Momma
Warm up on chilly nights with this super easy, yet tasty vegetable beef soup!
Ingredients
  • 1 lb Lean Ground Beef
  • 1 Medium Onion, Chopped
  • 4 Cans Veg-All
  • 1 (28 oz) Can Diced Tomatoes, Undrained
  • 1 (15 oz) Can Tomato Sauce
  • 6 Beef Bouillon Cubes
  • 6 Cups Water
  • 1 and 1/2 tsp Garlic Powder
  • 1/2 tsp Salt
  • 1/4 tsp Pepper
  • 1 tsp Italian Seasoning
Instructions
  1. In a large dutch oven or soup pot, brown ground beef along with onion. Drain.
  2. Stir in the remaining ingredients and heat over medium heat until boiling. Reduce heat and simmer for 10-15 minutes.
  3. Serve with crackers and enjoy!

Like this post? SHARE it!

Related Posts Plugin for WordPress, Blogger...

My Momma’s Chili

The day has finally come when I get to share with you one of my favorite recipes of all time. Now that it’s getting chillier outside, it’s time to make up a big pot of chili! I look forward to this part of the year practically all year long.

This my friends, is my momma’s chili recipe. She’s been making it for us since I can remember and it’s the best that I’ve ever eaten. It could be that I’m biased because, well, it is my momma’s. But I’m going to say that this isn’t the case because I’ve tried a lot of chili in my time. I even had the opportunity to go to Cincinnati recently and try the “world famous” Skyline Chili.  It was just ok to me. I don’t really understand the hype behind it to be honest.

Maybe I’m just a southern gal, but I like my chili to be extra chunky. It’s got to be hearty and fill me up and keep me warm. After all, what’s the point in eating chili otherwise?

I asked you guys on the Pennywise Cook Facebook Community recently if you enjoy your chili with corn chips or cornbread. I guess I should’ve included crackers because many of you said that’s what you eat yours with.

I have grown up eating chili with corn chips. I just couldn’t imagine eating chili any other way. They are like peanut butter and jelly to me. However, it was pointed out that this is almost more like a Frito Pie rather than chili. So if you prefer, eat your chili with whatever you’d like. Cornbread, crackers, corn chips, or nothing at all!

No matter what you eat your chili with, I highly recommend this recipe if you’re going to make chili. It’s full of flavor and perfect for a weekday or weekend meal. Plus a pot of this stuff will last you all week! That’s one of my favorite things about making up a big pot. We’ll have lunches covered for days. And because it’s so good, you won’t hardly get tired of eating it.

This is a crockpot-friendly meal, but I can assure you that it comes together rather quickly. The key is to brown your ground beef along with the onion, green pepper, and garlic. This saves so much time. Then it’s just a matter of heating everything else through.

You may never make another chili recipe again…

My Momma’s Chili
Recipe Type: Main Dish
Author: Pennywise Cook’s Momma!
This chili recipe is hearty and filling and may be the last chili recipe you ever make!
Ingredients
  • 1 lb Lean Ground Beef
  • 1 Onion, Chopped
  • 1 Green Pepper, Chopped
  • 3 tsp Minced Garlic
  • 28 oz Can Diced Tomatoes (undrained)
  • 6 oz Can Tomato Paste
  • 3 cans water
  • 15 oz Can Light Kidney Beans (drained)
  • 15.5 oz Can Pinto Beans (drained)
  • 3 Tbsp Chili Powder
  • 1 Tsp Salt
  • 1/4 Tsp Pepper
  • 1/2 Tsp Garlic Powder
  • 1 Tsp Cumin
  • Dash salt and pepper
Instructions
  1. In a large pot or dutch oven, brown ground beef along with onion, green pepper and garlic. Add salt and pepper to taste. Drain if needed.
  2. Stir in diced tomatoes, tomato paste, 3 tomato paste cans of water, kidney beans, pinto beans. Heat oven medium high for about 10 minutes.
  3. Stir in chili powder, salt, pepper, garlic powder, and cumin. Stir well and bring to a boil. Lower heat and simmer for about 5-10 minutes or until heated through.

Like this post? SHARE it!

Related Posts Plugin for WordPress, Blogger...

Chili Cheese Pizza

If any of you, or those that you know, are being affected by Sandy, we are praying for you. I hope that you are safe. This is some crazy storm.

When it comes to chili, there are those that eat their chili with cornbread and there are those that eat theirs with corn chips. This might just spark a controversy. It’s hard to get someone to cross the line between chips and bread when they have been eating their chili this way for years.

And then of course there are those who theirs with saltines or perhaps the Ohioans who eat theirs oven spaghetti. However you do prefer to eat your chili, I want to suggest that you try this awesome and SIMPLE recipe for Chili Cheese Pizza.

You may just have to convert to be a corn bread eater to enjoy this pizza. But I promise you, you won’t miss those corn chips.

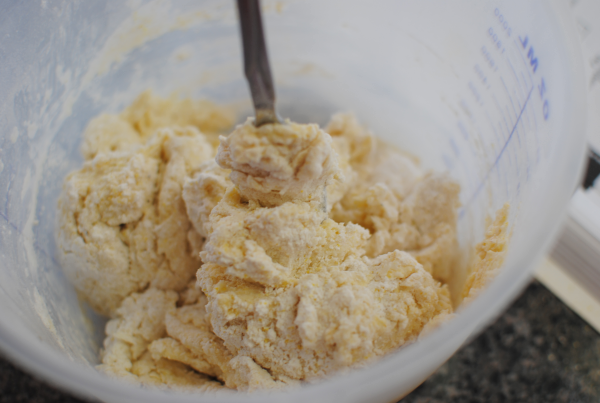
This recipe starts by mixing up a very simple cornbread dough that will be the crust of the pizza.

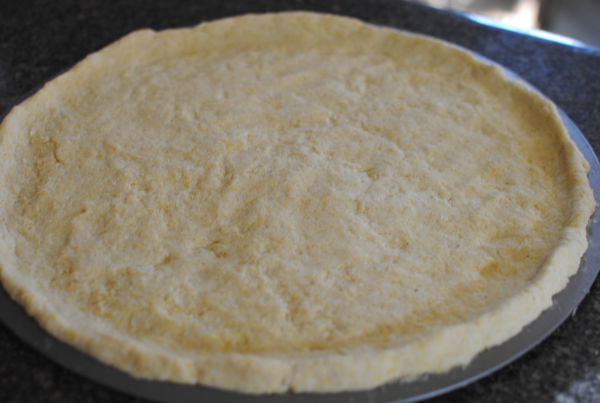
Roll it out and onto a pizza pan. The key to keeping all of the chili inside the pizza is to make ridges around the edges. Just take your fingers and squish up a ridge that goes all the way around.

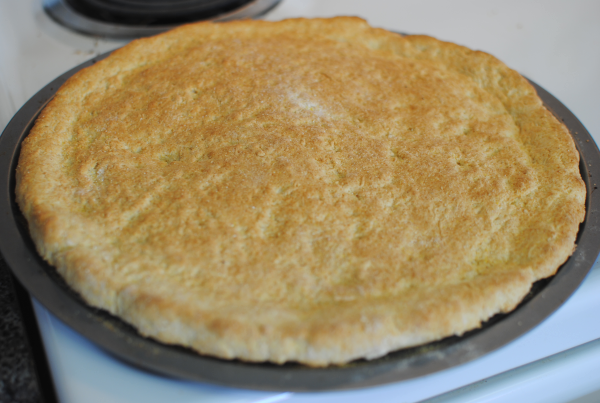
Once the crust bakes up, you’ll have a small ridge around the edges that will hopefully do it’s job and keep the yummy chili inside the pizza. This isn’t like a gigantic loaf of corn bread. It’s much flatter than cornbread and makes the perfect pizza crust.

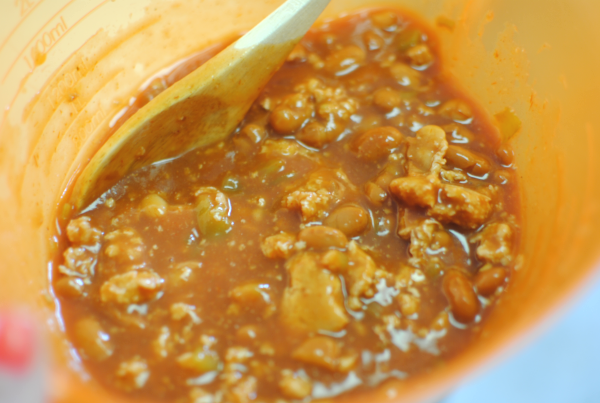
Whipping up the chili part is really simple as well. When I first read over this recipe, I didn’t get the impression that this was going to be chili. The recipe seemed to go a different direction. But once I made it and tasted, it’s just a very simple chili recipe. It includes taco sauce which I’ve never put in my chili, but turned out pretty good.

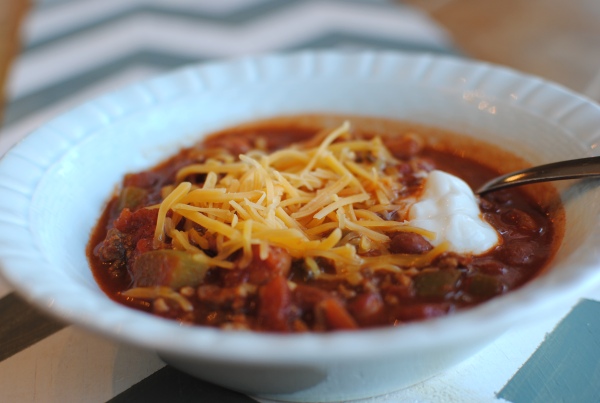
Place all of that incredibly tasty chili over your homemade pizza crust.

It’s already looking like heaven on a pizza pan…

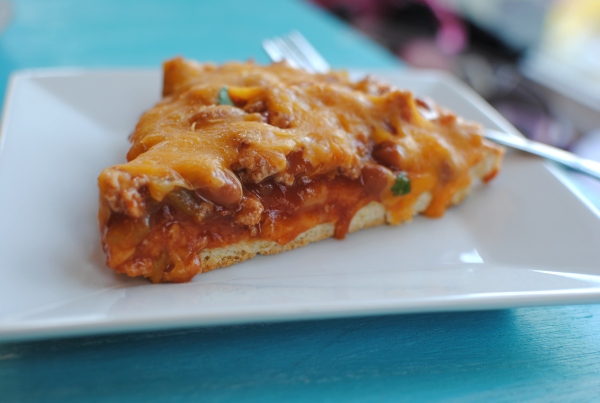
Cover that chili with mounds of cheese. No, NOW it’s looking like heaven on a pizza pan…

Oh. Em. Gee. When it comes out of the oven, it is nothing short of an amazing site. You’ve got your corn bread, chili, and cheese all in one place. No spoon needed! Just the two utensils that God blessed us with…your hands!

You may eventually need a fork to capture those pesky beans that try to get away from ya. But this pizza can mostly be eaten just like a regular pizza. And it is oh so tasty!

Oh yes, and P.S.-

Recipe from Butter Busters Cookbook.

Chili Cheese Pizza
Recipe Type: Main Dish
Author: Butter Busters Cookbook (1994)
No need for a spoon, this Chili Cheese Pizza has it all in one piece of pizza!
Ingredients
  • 1 cup + 1 tbsp Cornmeal
  • 1 and 1/2 c. Flour
  • 1 tbsp Baking Powder
  • 1/2 tsp Salt
  • 3/4 c. Milk
  • 1/4 c. Melted Butter (light)
  • 1 (12 oz) jar Taco Sauce
  • 1 can (15.5 oz) Milk Mexican Style Chili Beans (undrained)
  • 1/2 lb Ground Turkey
  • 1 can (4 oz) Green Chilies (drained)
  • 2 c. Reduced-Fat Shredded Cheddar Cheese
Instructions
  1. Preheat oven to 450°. Spray a 14″ pizza pan with non-stick cooking spray. Sprinkle the 1 tbsp of cornmeal all over the pizza pan. Combine 1/2 c. cornmeal, flour, baking powder, and salt in a medium bowl. Add the milk and melted butter. With a fork, stir until the mixture starts to form a ball. Remove the dough from the bowl and press into pizza pan. Shape the edges to form a ridge around the outside. Bake for 15 minutes.
  2. Meanwhile, cook the ground turkey in a microwave for 5 minutes on high. Take out and stir. Cover and cook for 1-3 minutes more. Drain off any excess fat. In a bowl, combine turkey, beans, green chilies, and taco sauce. Pour mixture over the cooked crust. Sprinkle the cheese over the entire pizza.
  3. Bake for 10 minutes or until the cheese is melted.
  4. Slice and serve!
Notes

The recipe calls for the ground turkey to be cooked in the microwave, but feel free to brown it in a skillet if you prefer. You could even do this step ahead of time to save time.


Like this post? SHARE it!

Related Posts Plugin for WordPress, Blogger...

Simple Sausage Mac

Are you ready for Halloween yet? Well you better get that way because it’s on Wednesday! Can you really believe that we have already reached the end of October? I’d really love for someone to explain to me where the rest of this month has slipped away to. Maybe I’m just getting old or maybe time is speeding up. Either way, I’m going to hold on tight.

The weather is finally starting to cool off around here. I absolutely love the fall. Well, let me just say I love being cozy. I hate being cold, but I love being cozy. I’ve got a bunch of warm and comforting recipes coming up that I can’t wait to share with you. The fall is really when I have the most fun cooking. You can make up a big pot of something that sticks to your bones.

One of the first “comfort foods” that comes to mind practically anytime I hear that phrase is macaroni and cheese. It doesn’t get much more comforting than that. I’ve seen mac & cheese turn a frown completely upside down! Especially when it’s homemade. The boxes are good, but homemade is better.

And you know that here in the south, macaroni and cheese is considered a vegetable at most meat and threes….

The only issue that I’ve ever had with macaroni and cheese is that it’s so good that I eat too much. Well that and the fact that it needs a little bulking up so that it can be worthy of being called a meal. After all, we wouldn’t want to make mac & cheese only a side dish. It’s worthy of being the main attraction with a little adjustment.

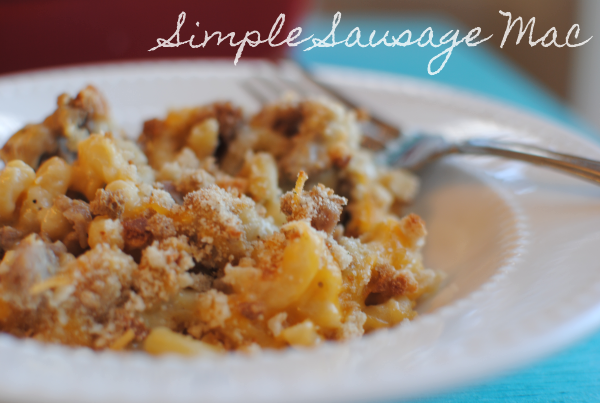
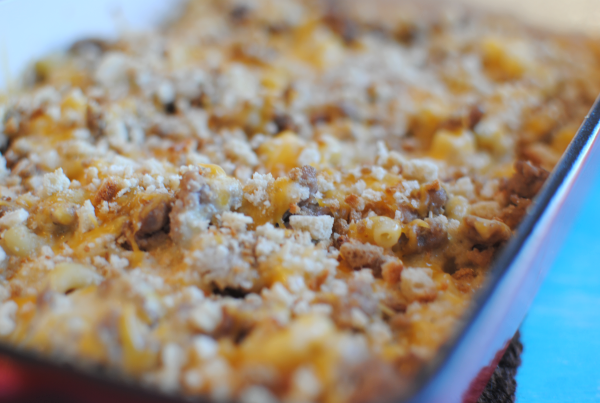
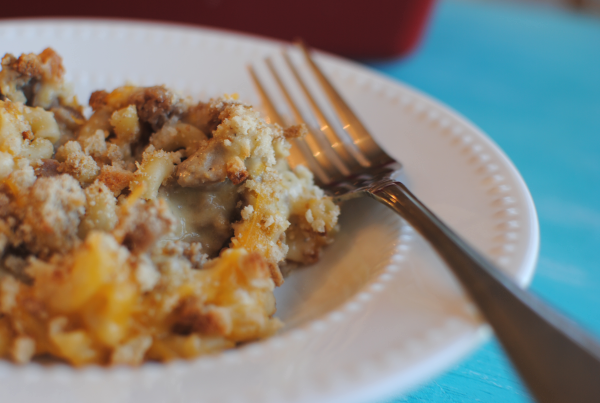
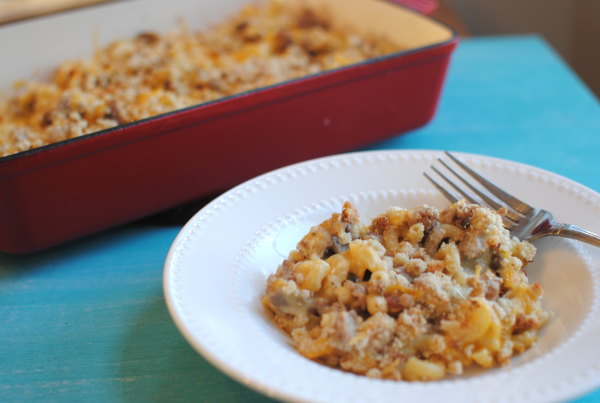
One of my favorite things about this macaroni and cheese is the secret topping. No longer a secret because I’m about to share it with you! We’re heading for Thanksgiving and there will be deals out the wazoo on stuffing mix. THAT my friend is a little something extra that can give macaroni and cheese a little spice. Breadcrumbs are great, but stuffing mix adds a little more crunch and even some nice flavor. I used Stove Top’s version for this. You can use whatever you’d like of course.

I bulked this up with sausage to give it a little flavor and to make it meaty. So yummy and extra comforting. I’d almost make this for a brunch!

Recipe adapted from Butter Busters Cookbook.

Simple Sausage Mac
Recipe Type: Side Dish, Main Dish
Author: Adapted from Butter Busters Cookbook
Bulk up your everyday mac & cheese and make it meaty. Perfect for dinner any night of the week!
Ingredients
  • 1 lb Turkey Sausage, Browned and Drained
  • 3 tbsp Melted Butter (light)
  • 1 and 1/2 tbsp flour
  • 1/2 tsp salt
  • 1/2 tsp pepper
  • 2 cups Skim Milk
  • 1 tbsp Melted Butter (light)
  • 2 cups Elbow Macaroni, Cooked
  • 1 tbsp Onion, Grated
  • 1/2 tsp salt
  • 1/4 tsp pepper
  • 2 cups Reduced fat Shredded Cheddar Cheese
  • 1/2 c. Crushed Cubed Style Stuffing Mix
Instructions
  1. Preheat oven to 350°.
  2. Combine 3 tbsp melted butter, flour, salt, and pepper in a small sauce pan. Slowly add skim milk and whisk well. Bring to boil, then lower temp until thickens. Set aside.
  3. Spray a 2 quart baking dish with non-stick cooking spray. Place half of the macaroni in the dish. Spread half of the cooked sausage over the noodles. Sprinkle half of the grated onion, salt, pepper, sauce, and cheese. Repeat layer. Drizzle 1 tbsp melted butter over top. Sprinkle with remaining cheese. Sprinkle crushed stuffing over the top. Cover and baked for 30 minutes. Then uncover and bake an additional 10 minutes.

Like this post? SHARE it!

Related Posts Plugin for WordPress, Blogger...

Oven Roasted Pork Tenderloin

You don’t have to have read this blog for very long to know that I’m a crockpot girl. My life would probably be over if mine were to die or perhaps if I lost it. Don’t put the latter past me. I’m a scatter-brained mess. But there comes a time in every cook’s life when you have to do things the hard way. You know, in the oven or on the stove. And that’s alright, it’s not the end of the world. And sometimes, you can even create some really great things in the oven.

Like this amazing pork tenderloin for instance.

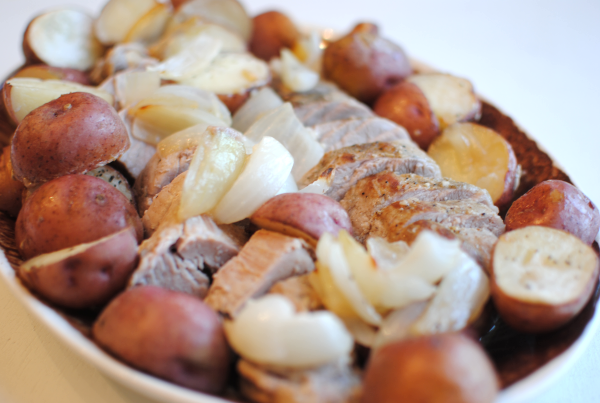
Need something to feed a crowd and make an impression? A pork tenderloin might just do the trick. Surrounded by roasted potatoes and onions, this meal looks fit for a king. Or whatever you prefer to call your husband!

There are probably thousands of ways to make a roast on the internet. You’ll find some wonderful recipes and you may even have your own tried and true recipe. This is my favorite version from the oven.

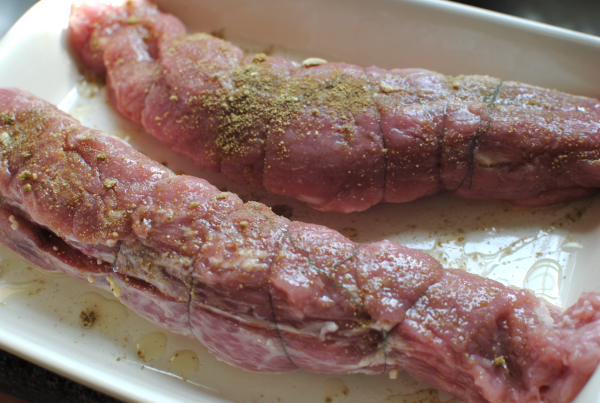
Sometimes I like to stuff my pork tenderloin with garlic and parmesan cheese. It breaks up the middle of the meat and adds a tenderness along with flavor inside. You simply butterfly the tenderloin and insert whatever tasty ingredients that you like. Now is also the time to season it up. I used rubbed sage, onion powder, and a drizzle of olive oil.

Confession: I haven’t worked very much with rubbed sage before. I’m not familiar with it’s pairings and flavor. However, the moment that I smelled it, I knew it would make a great seasoning for this pork and I was right! I really like rubbed sage.

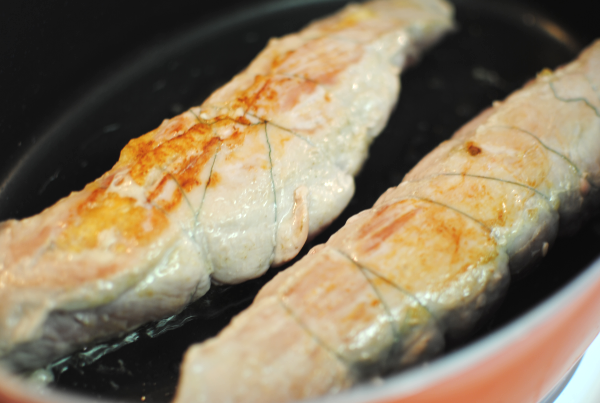
Then use butcher’s twine, or sewing thread like I did, and tie it back up. Now you’re ready for browning.

Some say that this is the key to creating a perfect pork tenderloin. Browning the meat on the outside before finishing the inside in the oven. I’d agree with them on that. Most meats just have a tendency to look more appealing browned.

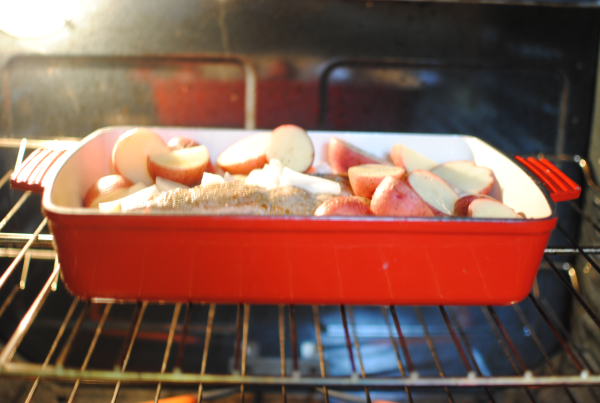
Chop up your favorite veggies. The sky is really the limit here. I made mine with red potatoes and large chunks of onion. You could also do apples and sweet potatoes. Root veggies taste wonderful with the flavor of the tenderloin. Place the meat into a baking dish surrounded by your veggies. Season the veggies and drizzle with olive oil. Or you can add a splash of white wine. I did both!

Pop it into the oven and let it go.

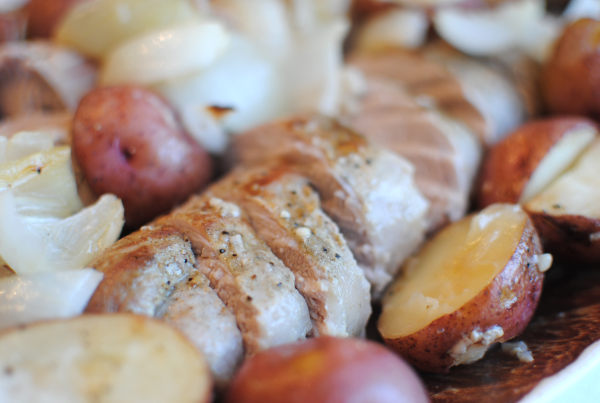
Turns out perfect every time! So simple and plenty to go around. I also wanted to point out that you can easily make a tasty gravy to pour over everyone’s slices! So simple and uses the juices from the roast with all that yummy flavor. See the recipe below.

Can you possibly go wrong with meat and potatoes?


Oven Roasted Pork Tenderloin
Recipe Type: Main Dish
Author: Pennywise Cook
You just can’t go wrong with mouth-watering, juicy pork tenderloin and roasted veggies!
Ingredients
  • 2 Pork Tenderloins (Most come packaged in twos)
  • 1 Medium Onion, Cut into large pieces
  • 8-10 Medium Red Potatoes, Cut in half
  • 4 Tsp Minced Garlic
  • 4 Tsp Parmesan Cheese
  • 1/2 Tsp Rubbed Sage
  • 1/2 Tsp Onion Powder
  • Drizzle of Olive Oil
  • 1/4 c. White Wine
  • Salt and pepper
  • For the Gravy:
  • 2-3 tbsp flour
  • water
Instructions
  1. Preheat oven to 400°.
  2. In a small bowl, combine minced garlic and parmesan cheese. (Should be paste-like) Set aside.
  3. To butterfly meat, cut a slit in the tenderloins lengthwise but not all the way through. Use a meat mallet to flatten each tenderloin. Fill each tenderloin with equal amounts garlic parmesan paste. Use butcher’s twine or thread (or whatever you have on-hand) to tie up your tenderloins.
  4. Heat a skillet oven medium high heat. Mix together rubbed sage and onion powder and rub the tenderloins down with them. Drizzle skillet with olive oil. Brown each tenderloin on each side for 4-5 minutes until just browned but not completely cooked. Remove and place into a large roasting dish.
  5. Arrange potatoes and onions (or veggies of your choice) around meat. Season with salt and pepper. Pour white wine over the entire pan.
  6. Place in oven and cook for 20-30 minutes or until internal temp reaches 165°. Remove from oven and let the meat rest for 10 minutes before slicing into pieces.
  7. For the Gravy (optional)
  8. Pour off the juices from the bottom of the roasting pan into a skillet. Heat and add flour, mixing well. Slowly add in water until desired consistency. Lower heat until thickened. Pour over meat.

Like this post? SHARE it!

Related Posts Plugin for WordPress, Blogger...

Simple Baked Risotto

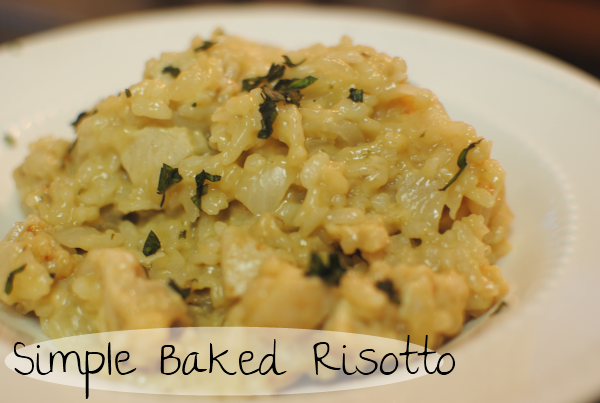
Please excuse the incredibly horrible picture. Once again, it was another night pic with horrible lighting. We’re going to have to start eating dinner at lunchtime!

Rewind back a few years. I’m sitting in my living room watching (a favorite of our’s) Hell’s Kitchen. Like most episodes, all I hear is screaming about the risotto. But in my head, I’m thinking what in the heck is risotto? Maybe I’m just a bit sheltered or perhaps it’s not common, but I had never ever heard of it before. To me, it seemed like a bunch of rice.

In reality, that’s really all that it is. Just a really creamy and rich Italian rice that has to be stirred a lot. Creamy you say? Yes, creamy because of cheese and broth. Are you listening yet?

It wasn’t until I took a trip to England that I got to actually enjoy a bowl of creamy risotto. It was at this glorious place that I got to try it. This is the Piazza inside the Corn Exchange in Leeds. It is one of the most beautiful places that I’ve ever stepped foot inside. Starting in the 1800’s as a place for the trading of corn, it’s now a popular shopping center with a fine dining restaurant down below.

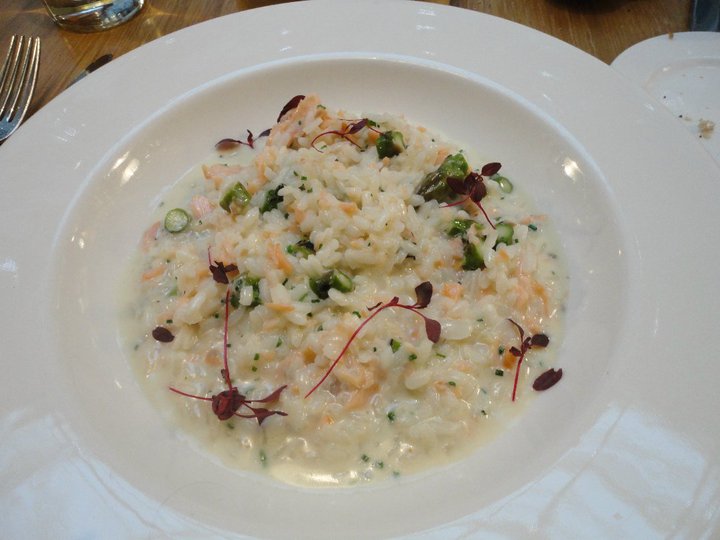
This is a picture of the Smoked Salmon Risotto with Chargrilled Asparagus that I had when we ate there. Doesn’t it look divine? My risotto didn’t look quite as amazing, but it did make me reminisce a bit about my trip.

Here we were watching the changing of the guards at Buckingham Palace. One of the coolest experiences that I may ever have! I even messed with a few of the fuzzy-headed guards while we were there. In case you were wondering…..no. They did not move a muscle.

If I could, I’d be back in England in a heartbeat. So much history and interesting places to see. Oh yeah, and the food was incredible too!

Risotto is generally cooked in large skillet and tended to for a while. I just don’t have the patience, so I took the easy way out…..in the oven. The entire family loved it! I was complimented not once, but twice for this one (it’s a big deal at our house). The version that I made ended up being the main course since I put chicken in it. Though for many, it might just be a side dish. I did take a very big shortcut with this. I used Tyson grilled chicken cubes from the refrigerated section of the store. You could also use a rotisserie chicken if you want to pull it off the bone. Or perhaps just cook up your own chicken breast. Either way, chicken adds a meaty touch.

I don’t consider myself to be an expert at risotto (or anything dish at that, well maybe pb&j). I’ve got some perfecting to accomplish on this one for sure. But it sure is tasty work!

Recipe adapted from My Recipes.

Simple Baked Risotto
Recipe Type: Side, Main Dish
Forget stirring, whip up creamy risotto by utilizing the oven instead of your elbow!
Ingredients
  • 1 and 1/2 c. Arborio Rice (or other short grain rice)
  • 2 cups cooked and cubed chicken
  • 1 small onion, chopped
  • 2 Minced Garlic Cloves
  • 1/2 c. White Wine
  • 2 and 1/2 c. Chicken Broth
  • 2 tbsp Butter
  • 3/4 tsp salt
  • 1/8 tsp pepper
  • 1/2 tsp Italian Seasoning
  • 1/2 c. Parmesan cheese
  • 1/2 c. Mozzarella Cheese
Instructions
  1. Preheat oven to 400°.
  2. In a large high-sided skillet or dutch oven, melt butter. Place rice, garlic, and onion into pot and saute for about 3-4 minutes.
  3. Stir in the wine, chicken broth, salt & pepper, italian seasoning and transfer to the oven. Bake for about 30-35 minutes until most liquid has been absorbed. Remove from oven.
  4. Stir in the chicken and cheese until the cheese is melted. Serve immediately.
Notes

The texture should be creamy with a little liquid. Though mine ended up a bit sticky. Gonna work on it a bit more.

Have YOU ever made risotto, be it baked or the traditional way? I’d love to hear how it turned out!


Like this post? SHARE it!

Related Posts Plugin for WordPress, Blogger...

Sloppy Joe Stuffed Shells

I am always on the lookout for ways to change up everyday meals. Meatloaf and pizza are good. Don’t get me wrong. But sometimes, they just get old and boring. I have a lot of fun experimenting with food. It’s kind of a hobby of mine. It’s why this blog exists!

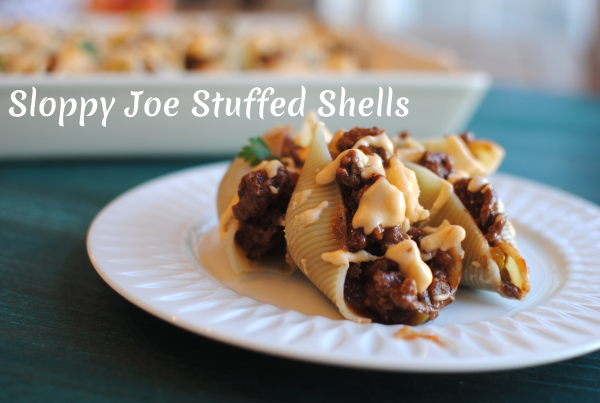
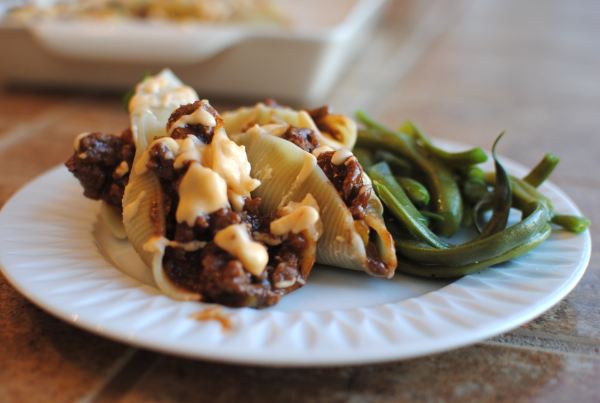
Stuffed shells are a family favorite. There are so many variations and concoctions that you can stuff them with. My latest creation? Sloppy Joe Stuffed Shells.

Sloppy Joes are so simple to whip up on a week night for dinner, but guess what? They are sloppy! (whodathunkit?) I was thinking that if we could eat them in shells, they might stay contained and actually be easy to eat.

Hey, we could get rid of that sloppy and just call them Joes! Joe Stuffed Shells……hmmm. Nah. You could possibly call them Not-So-Sloppy Joe Stuffed Shells. That’s too long. I give up. We’ll stick with Sloppy Joe Stuffed Shells.

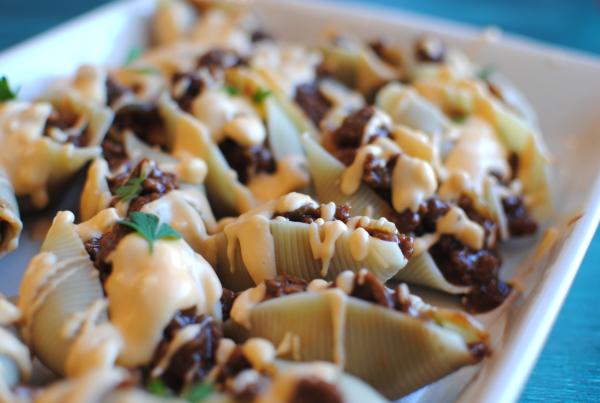
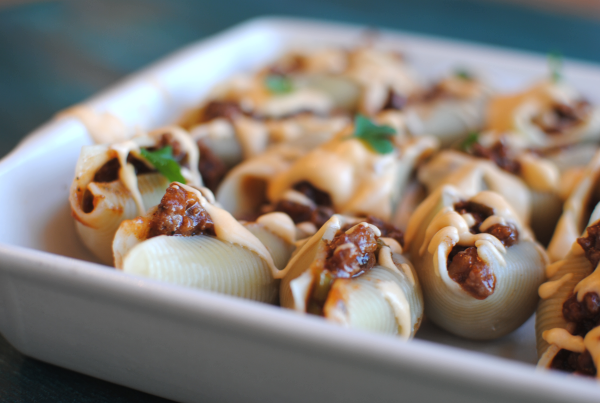
These aren’t made with the canned Sloppy Joe sauce. It’s homemade and extra easy. I even got to use a green pepper from my garden in it. I’m sure that you’re wondering about the cheese sauce on top there. Well, you see, my husband likes to add cheese to just about everything. And following suit, he asked if I could drizzle some cheese sauce on top of the shells too. I did this for him. Feel free to add it if you like, but they are still just as great without the cheese sauce.

Just as I suspected, these were quite neat to eat! Much neater than a messy old Sloppy Joe Sandwich. My husband isn’t a huge fan of Sloppy Joes themselves. We came to the conclusion after this meal that it was in fact, because they are sloppy. The shells make it really easy to keep all the yummy and sweet meat inside. Which means that you’ll most likely end up eating them with your fingers.

We did and we’re not ashamed!

The best part about this meal is that it’s super affordable. With the meat of your choice (ie ground beef, ground turkey, even chicken!), a few handy sauces, and simple spices, these shells comes together in no time and don’t even require baking.

Sloppy Joe Stuffed Shells
Recipe Type: Main Dish,
Author: Pennywise Cook
Believe it or not, Sloppy Joes don’t have to be sloppy when you make them in shells like this!
Ingredients
  • 1/2 Package Jumbo Shells (you can make an entire box, but you won’t need it)
  • 1 lb Extra lean Ground Beef
  • 1/2 c. Onion, chopped
  • 1/2 c. Green Onion, Chopped
  • 1 Clove Garlic, minced
  • 1/4 tsp salt
  • 1/2 c. Ketchup
  • 1/2 c. BBQ sauce (your choice)
  • 2 tbsp Brown Sugar (I used Splenda Brown)
  • 1/2 tsp Italian Seasoning
  • For Cheese Sauce
  • 2 tbsp Butter
  • 1/4 c. Skim Milk
  • 4 oz Cream Cheese
  • 1 c. Shredded Cheddar Cheese (Reduced Fat)
Instructions
  1. Prepare noodles according to package. Drain and set aside to cool.
  2. In a large skillet, brown ground beef with onion and green pepper. Drain and add in all other ingredients. Simmer for 5-10 minutes or until warmed through.
  3. Stuff shells with meat mixture.
  4. For cheese sauce- melt butter in a small sauce pan. Add the skim milk. Melt in the cream cheese stirring until smooth. Add in shredded cheese until melted and smooth. Drizzle over stuffed shells.
Notes

These could even make little appetizers at a party!


Like this post? SHARE it!

Related Posts Plugin for WordPress, Blogger...