Archives for March 2012

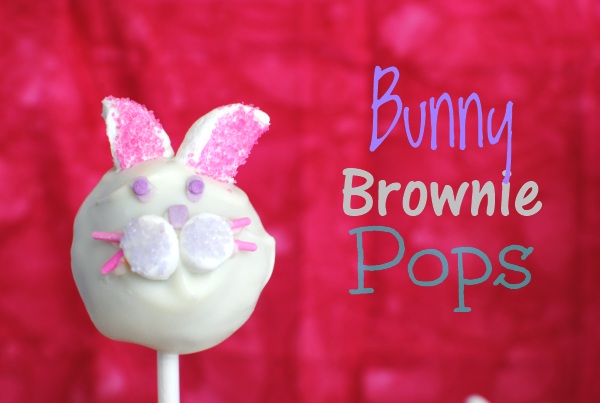
Bunny Brownie Pops

TGIF! Are you as glad that it’s Friday as I am? I can’t wait to get out and about and enjoy the warm weather this weekend. After this week’s Easter treats you better believe I’m going to get out and try to work some of this off.


I hope that you’ve enjoyed Easter Week! I absolutely love making themed cupcakes and special characters so this has been a blast. I’m already looking forward to getting some super cute treats together for my Addie and Britton’s birthdays in May. (Yes, BOTH are in May- lucky me!) But before we say goodbye to our less than healthy sweetfest this week, let me share just one more with you.

How about a little chocolate brownie underneath a cute little bunny head? That kinda sounds funny, but I assure you that it’s more than tasty! These brownie pops are a lot like cake pops only chocolate-ier. If you were wondering, no that’s not a word. But yes, I will use it anyways.

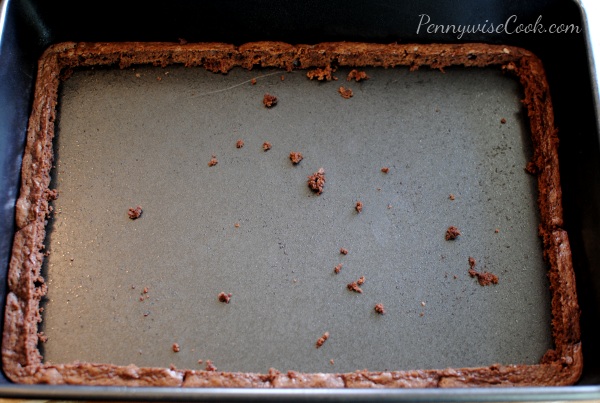
I made up a batch of your everyday brownies. Nothing special, in fact these were Pillsbury. I got them free a while back, so I thought why not. When you’re making yours you’ll want to cook them just undercooked so they are fudgey and easy to squish. I ended up cutting the edges off since they were a bit hard.

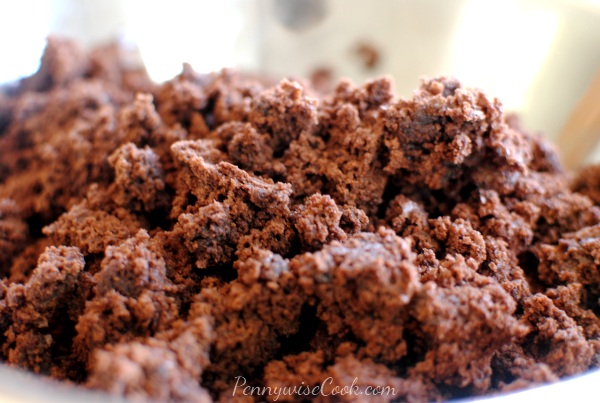
I crumbled up the brownies into a bowl and got them ready for squishing!

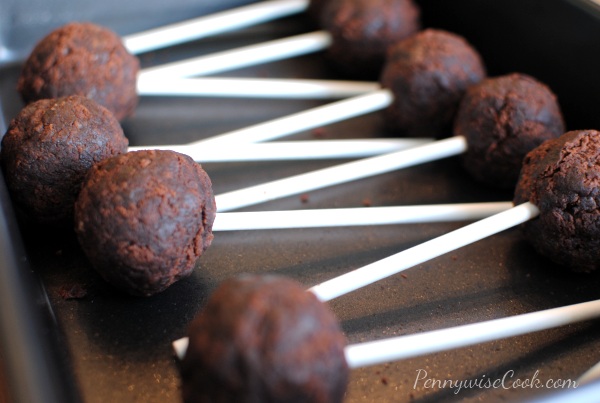
Then I commenced with the squishing. I rolled them into semi-circular balls. As close to a circle as I could get them. Then I popped them in the freezer for a while to get them nice and hard for dipping!

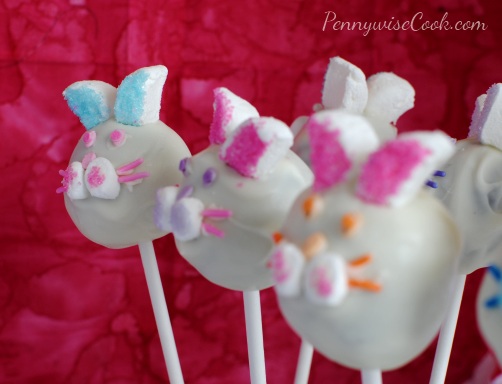
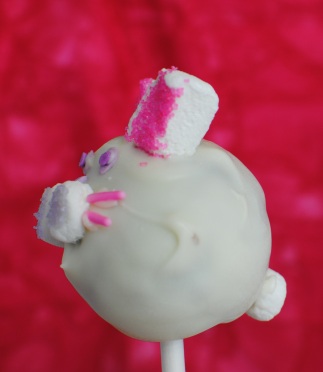
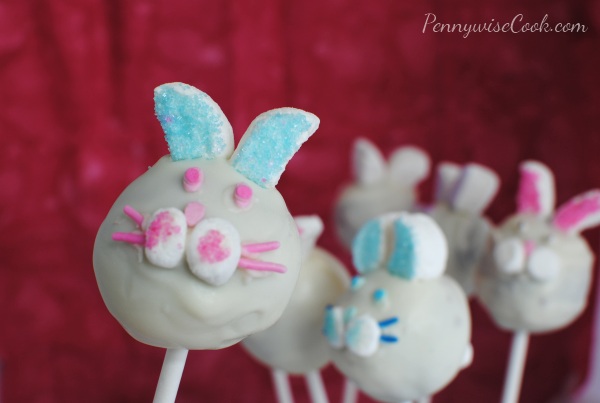
Using large marshmallows, I cut them in half and dipped them in colored sugar to make the middle of their ears. Each bunny got different color eyes and whiskers with sprinkles. I had to get creative really because I didn’t have anything fancy or “made for bunnies” supplies. All of my decorations besides the marshmallows were some type of sprinkle. I’m pretty sure at one point they were looking like little kitties to me.

It was at that point that I added little cotton tails so they would no doubt look like bunnies and not kitties. πŸ™‚

This little bunny is looking at you saying Happy Easter! πŸ™‚ In the end these may not have looked amazing, but they were Easter-y and above all, delicious! Your family will definitely love them.

I got this idea over at Karis Cooking, but used what I had to make mine work. Here’s what I did in case you want to make some Easter lovelies!

Bunny Brownie Pops

Bunny Brownie Pops

Ingredients

  • 1 Package Brownie Mix (Or your favorite recipe)
  • 1 Package White Candy Melts (or color of choice)
  • Lollipop Sticks
  • Large Marshmallows
  • Small Marshmallows (for bunny tails if desired)
  • Colored Sugar
  • Sprinkles or other Decorations

Method

  1. Make up the brownies according to the directions baking until just undercooked. While baking take large marshmallows and cut in half. Dip the sticky parts into colored sugar and set aside for assembly later.
  2. Let cool completely and then crumble.
  3. Form brownies into desired size balls then place lollipop stick into each one. Put in the freezer for around an hour or so.
  4. Melt candy melts according to package directions. Remove brownie balls from the freezer.
  5. Dip brownies completely into candy melts. While candy melts are still soft, apply all decorations, marshmallows ears and tails, and eyes.
  6. Let cool and they are ready to serve!

Notes

For the ears- I do suggest cutting the bottoms of the ears off to make them easier to apply to the rounded top of the bunny's head.

When dipping the balls, try using a very deep cup or mug. This makes it easy for the entire ball to get coated at one resulting in a prettier appearance.

If you have some type of foam or support to set these in while working with them, that would really help! I used a foam piece for making flower arrangements to hold them.

http://www.pennywisecook.com/bunny-brownie-pops/


Like this post? SHARE it!

Related Posts Plugin for WordPress, Blogger...

Rice Krispie Treat Speckled Eggs

I do apologize for having the same exact little image at the top of all the posts this week. But I made it and it’s cute. So there. But really, isn’t it festive? Kinda like all of these sweets this week, aren’t they just yummy!

I was just telling someone the other day that one of the best parts of having a food blog is that you get to eat all of the goodies. On the other hand, the worst part of having a food blog is that you eat all of the goodies. I saw something recently that said, “I like running. I like running because I like dessert.” That’s me! And just as much as I’m running to work the dessert off, I’m running back home to eat more.

To continue Easter Treats Week I’ve got a pretty familiar treat for you. Rice krispie treats. They aren’t usually an Easter treat, but with a little imagination (and sprinkles) you can turn them into morsels that are fit to sit next to your Easter ham.

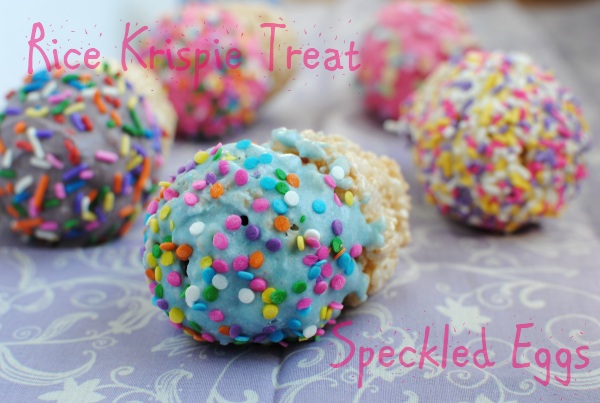
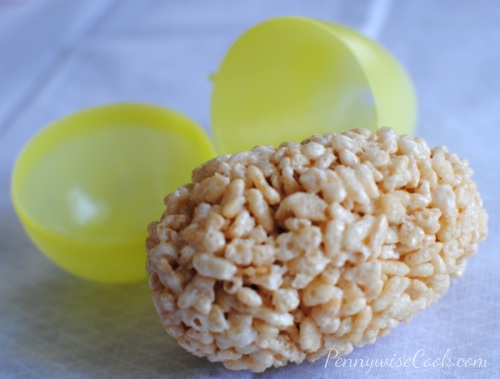
It really is a simple as making your favorite rice krispie treat recipe (I’ve got one for you below) and then before it sets, shoving them into the middle of a large plastic egg to mold. Pop it out and VOILA! You have a treat in the shape of an egg. And at this point, you could just eat it like that or you can doll them up and go sprinkle crazy like we did.

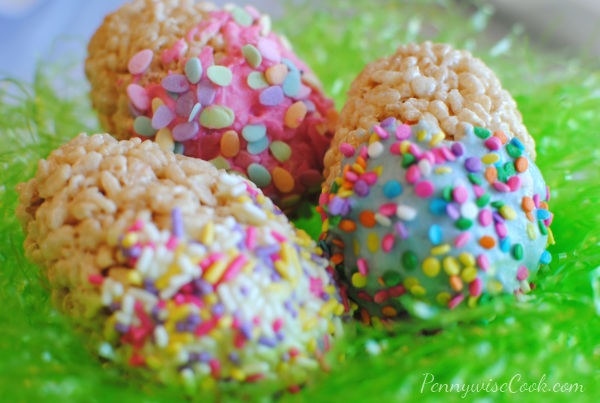
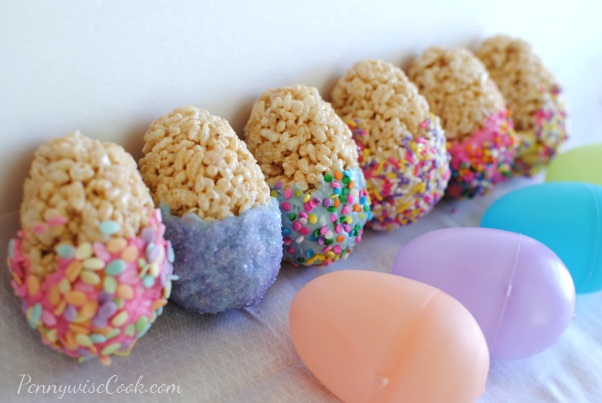
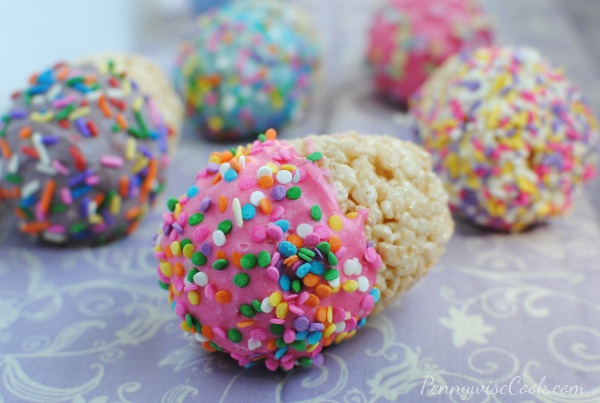
We tried out a few different varieties and combinations of colors and sprinkles on our eggs. I think the favorite turned out to be the pink chocolate coating with colorful decoration. Although it was hard to tell.

Just about every egg that we made, Addie wanted to eat right then and there. But you know, I couldn’t let her eat them yet because I had to take pictures for you. That’s how the cookie crumbles around here. Nobody eats until mommy gets her pictures! Kinda sad really, but you wouldn’t want pictures of an empty plate would you? Nah.

We used the white candy coating bark to make these and used food coloring to make our colors. You can feel free to use white chocolate chips or candy melts if you prefer. It would all taste just as yummy. As for decoration, the sky is the limit! Sprinkles, colored sugars, cookie crumbs, whatever you’d like. We didn’t completely cover ours in the candy bark because I was trying to cut down on mess. If you’re using sprinkles, you can’t exactly avoid a mess, but be prepared to sweep!

Rice Krispie Treat Speckled Eggs

Rice Krispie Treat Speckled Eggs

Make your favorite every day treat into your favorite Easter time snack with these Rice Krispie Treat Speckled Eggs.

Ingredients

  • 3 Tbsp Butter
  • 4 Cups Mini Marshmallows
  • 6 Cups Krispy Rice Cereal
  • Candy Coating Bark or Candy Melts/White Chocolate Chips
  • Sprinkles
  • Large Plastic Egg (for molding)
  • Cooking Spray

Method

  1. In a large saucepan, melt butter over low heat. Stir in marshmallows and until melted. Remove from heat.
  2. Add the Rice Krispies and stir until well coated.
  3. Spray inside of plastic egg and yours hands with cooking spray. Mold even amounts of the egg into the egg. Let sit for a little bit to help them set a bit.
  4. Melt candy bark according to package or in microwave.
  5. Dip the eggs in the candy coating and then sprinkle them with sprinkles. Let cool and serve.
http://www.pennywisecook.com/rice-krispie-treat-speckled-eggs/


Like this post? SHARE it!

Related Posts Plugin for WordPress, Blogger...

Peeps in Sprinkle Tutus

I must say that Easter is usually my weakness when it comes to candy. Yes I do love Halloween candy, but jelly beans aren’t around when it spooky time. I love jelly beans, it doesn’t really matter what kind they are. I especially love the Starburst and Lifesaver jelly beans. I take that back. I do not like the ones that taste like licorice. I usually leave those at the bottom of the bag.

The other day Addie and I were at one of our favorite places, Dollar Tree. We picked up another one of my favorite Easter candy, Peeps! Where are my Peeps fans? Those cute little fluffy marshmallow bunnies and chicks contribute to my sugar highs every Easter. I can’t ever pass them up in the store. It almost doesn’t feel like Easter until I’ve consumed twenty one. A lot of people hate them because they are basically complete sugar, but I have a major sweet tooth.

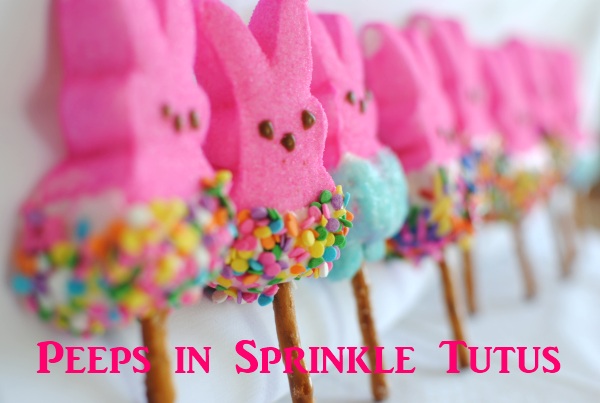
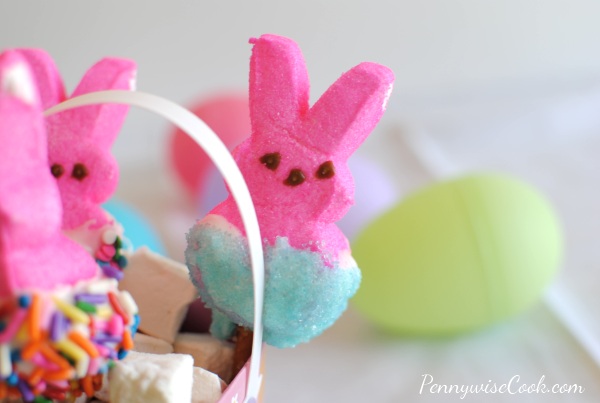
I picked up some of the cutest spring time sprinkles at Aldi the other day for only $2.99. They came with 6 different colors of sprinkles and sugar so we decided to embellish our Peeps Bunnies a little. Yep, that one in focus is totally looking at you. I didn’t even plan that. It’s saying, “I know I look so adorable and delicious, but don’t eat me!

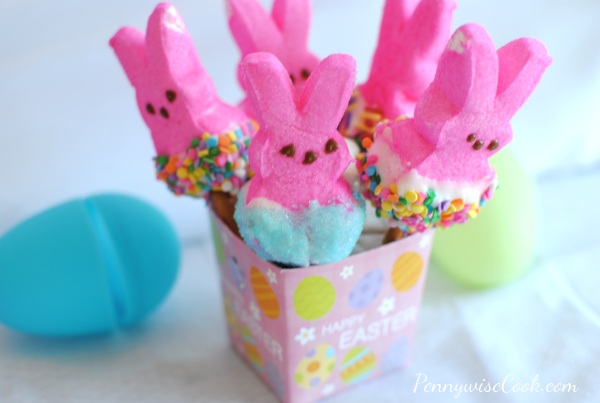
We dipped their little bottoms in a bit of melted white candy bark and then dipped them in sprinkles! Addie exclaimed, “Momma, they are wearing tutus!”. Alas the name- Peeps in Sprinkle Tutus.

We added a pretzel stick for them to stand up on. I put these in a little treat box filled with mini marshmallows that says Happy Easter. It made a nice way to display them. They ended up being the most adorable and colorful Easter treats. And they surely satisfied my insanely ridiculous sweet tooth.

I really love how colorful these are. Sprinkles always add a nice and cheery touch to any food, especially Easter treats!


Like this post? SHARE it!

Related Posts Plugin for WordPress, Blogger...

White Chocolate Pretzel Ducks

Easter Treats Week


What is cuter for Easter than little ducks? Well, besides bunnies of course. While they aren’t always typical Easter animals, they sure do fit in well with the yellow and pastel colors of this holiday.

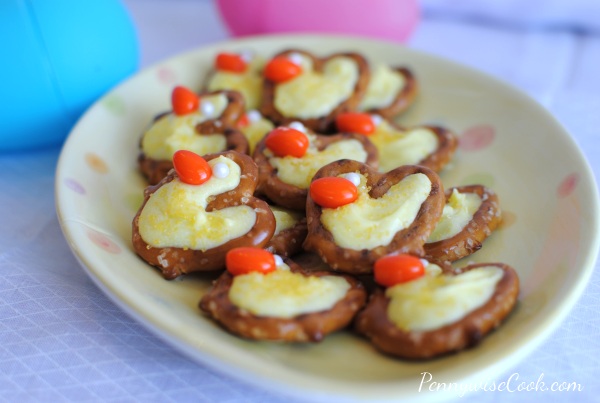
Today’s Easter treat is White Chocolate Pretzel Ducks! Made of simple things like pretzel twists, white chocolate and a couple of sugary embellishments you can create these in little time.

I found this idea over at The Sugar Buzz Pantry and knew that I had to try them out. Boy were they easy! She used a sunflower seed for the beak, but I used an orange mint kinda like a tic tac for mine. I used a sugar pearl for the eyes.

1) Lay out your pretzel twists on a piece of wax paper.

2) Melt white chocolate chips or white candy coating bark in the microwave. If using the white candy bark, I only needed 2 blocks for mine. Tint it yellow (or whatever color you want your ducks).

3) Using a Ziploc bag with the tip snipped off, pipe some chocolate into the holes of the pretzel covering the middle of the pretzel.

4) While still soft, place your eye and beak.

5) Let set until firm.

Or if you’d prefer to just write on your ducks, Amazon carries Wilton Food Writing Markers that have edible colors. Or just get creative with what you have. That’s what I did!


Like this post? SHARE it!

Related Posts Plugin for WordPress, Blogger...

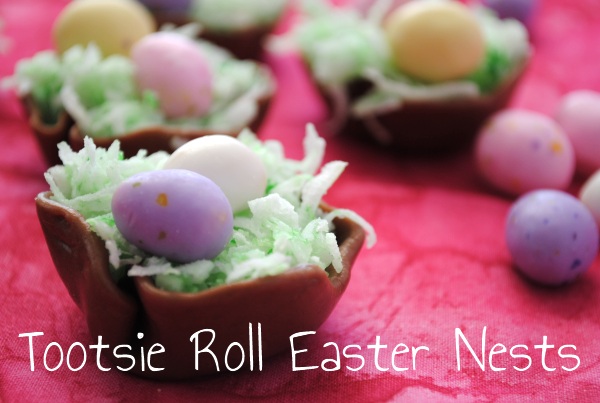
Easter Treats Week: Tootsie Roll Easter Nests

I can’t believe that next Sunday is already Easter. And how about this weather folks? Did we totally skip winter this year? Last year it was so late, so this year it feels quite early. I guess that’s alright, because we get to do Easter crafts! I love the colors of Easter. Spring-y and fun, they just lift spirits and make you smile. So I thought I would do a mini-series this week on cute little treats that you can make at home for Easter! While I do believe in the real meaning of Easter, I do love to indulge in some fun with eggs and bunnies for the kiddos.

These little treats were so easy and turned out so cute. I picked up most of the ingredients for about $3 at Dollar Tree.

I started out by placing the Tootsie Rolls between two sheets of wax paper. I microwaved them until just soft. You don’t want them to melt otherwise they will be too sticky and you won’t be able to get them off the wax paper.

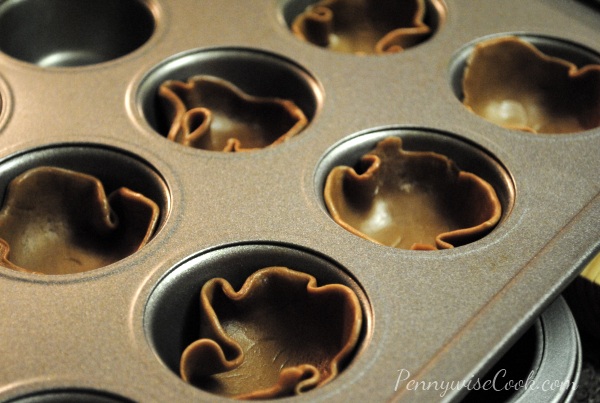
Once they are softened, squish them until fairly thin. Line a mini muffin pan with them and let them ruffle around the edges. I then placed them in the refrigerator for a bit to harden a little.

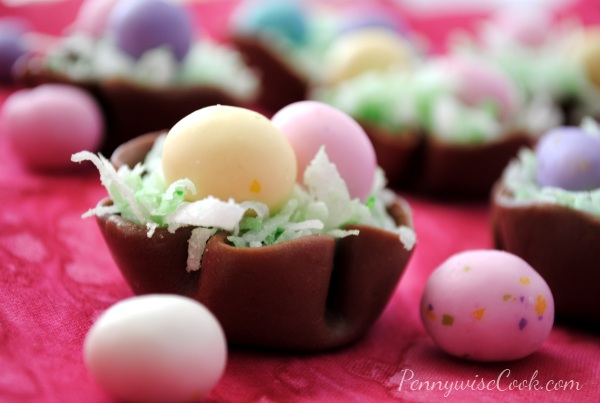
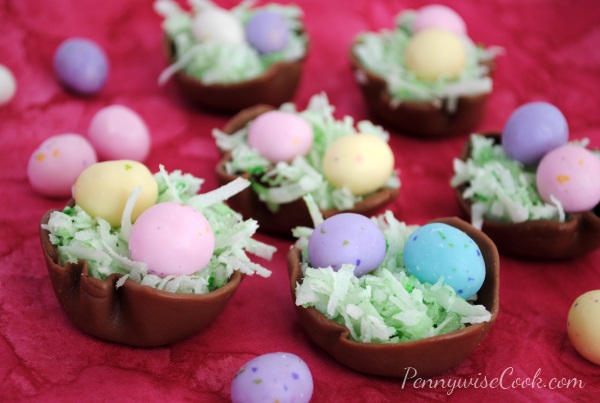
I added a couple of drops of green food coloring to some shredded coconut (bought at Dollar Tree) and plopped a couple of malted milk eggs to the top and tah dah!

After very little effort, you have these little Easter nests that are as tasty as they are cute. I think they would make a nice addition to our Easter egg hunt this year!

Do let me know if you make these!

What are your Easter plans this year?


Like this post? SHARE it!

Related Posts Plugin for WordPress, Blogger...

Simple Omelet Muffins

Even on the weekends, we’re not big breakfast people around here. Yes I know it’s the most important meal of the day, but the morning is also the most important time of day (especially on the weekends) to be lazy! I’d rather cook a big breakfast for dinner than get up and slave in the morning. Yes I would consider pouring a bowl of Cap ‘N Crunch slaving too! πŸ™‚

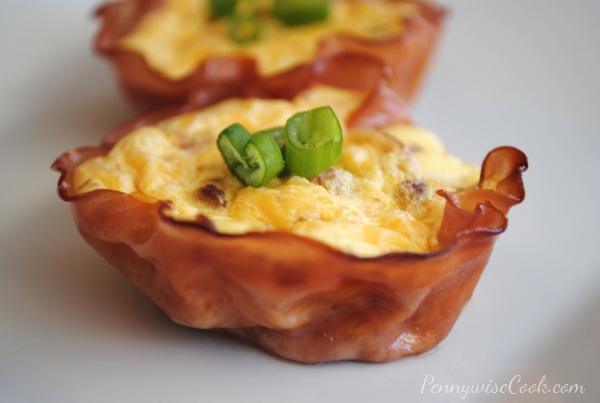
However, I saw something on Pinterest a while back that really sparked my interest. It was for “Eggs Baked in Ham Cups“. We just kinda adapted it to our liking. I like my omelets scrambled with lots of yummy sausage and bacon and cheese!

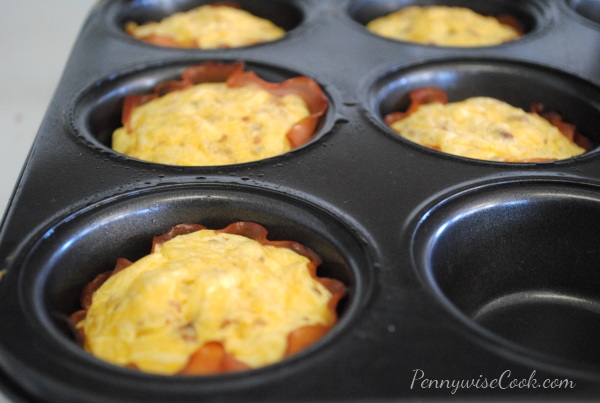
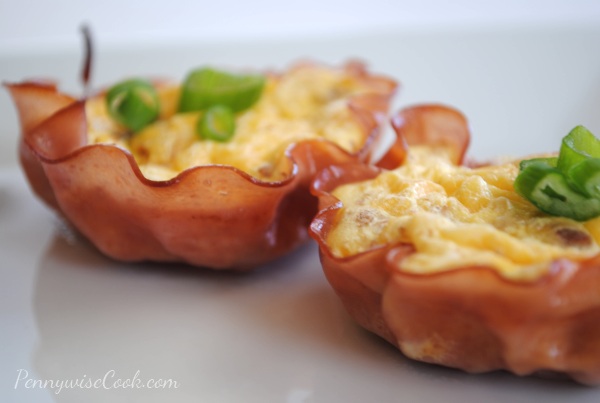
Place your slices of lunchmeat into the muffin tin along with your favorite egg fixin’s and you’ve got an omelet muffin. Super yummy and my favorite part- cheap! I found the smaller packages of smoked turkey breast (and other types) at Kroger for around $.97. These would make such great little additions to a fancy brunch.

You can add or take away whatever you’d like when putting together your omelet muffins, but I’ll share how I made mine in case you need the inspiration.

Simple Omelet Muffins

Simple Omelet Muffins

A simple way to change up your morning omelet by making it a muffin.

Ingredients

  • 12 Slices Lunch meat (Ham or Turkey are great)
  • 4 Eggs (beaten)
  • Chopped Bacon or Bacon Bits
  • 3-4 Links Sausage, Cooked and Crumbled
  • 1/4 c. Shredded Cheddar Cheese

Method

  1. Preheat the oven to 375 degrees. Spray your muffin pan with nonstick cooking spray.
  2. Place a piece of lunch meat into the muffin cups. Let them ruffle up around the edges.
  3. Fill each cup with equal amounts of beaten egg, followed by equal amounts of bacon bits, sausage, and cheese.
  4. Bake for around 15 minutes until your eggs are firm.
http://www.pennywisecook.com/simple-omelet-muffins/


Like this post? SHARE it!

Related Posts Plugin for WordPress, Blogger...

Tutorial: No-Sew Fabric Flowers

I’ve never really considered myself a very crafty person. I’ve always wanted to be one of those people just whipping the coolest things up with only a needle and thread. My mother-in-law and her mother crochet really well and they are always making the most incredible and detailed things. From doilies to sweaters and shrugs, they have got the craft thing down. Me on the other hand, you’d never want to wear the sweater that I have crocheted.

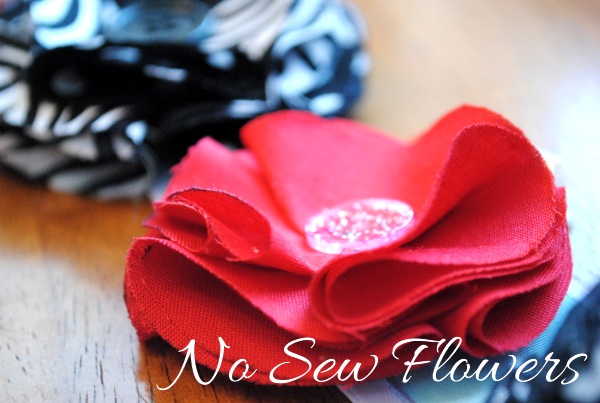
Have you seen people walking around with super cute little flowers all over the place? Seems like everyone has one on their headbands or pinned to their shirts. With spring here, I wanted to bloom too! Little did I know that these cute little flowers are actually quite simple to make. I think I could use a sewing machine if my life depended on it, but it doesn’t so I just won’t. πŸ˜‰ Anywho, these flowers ladies and gentlemen are darling and fun to make. The day I found out about them (Ruffles and Stuff), I made 3. The next day I made 2 more. Soon, I’ll have one for every outfit!
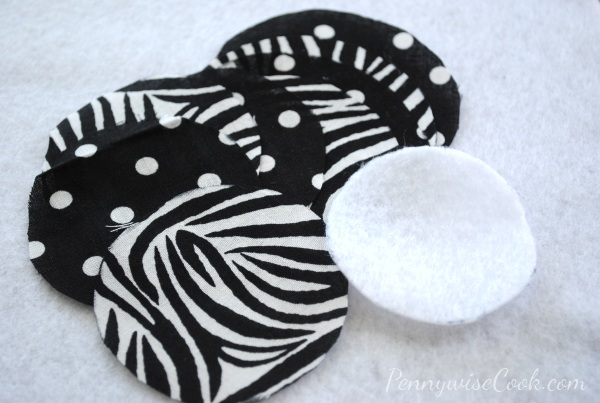
Let’s start with how to make them:


What You Need:

  • 7-8 Equal Size Fabric Circles- Walmart carries 1/4th yard pieces of the cutest fabric in squares for only $.97! You can make lots of these flowers with them. My circles are 3 inches.
  • 1 Smaller Felt Circle (about half the size of the others)
  • Hot glue gun
  • Hair Clip or Barrett (Optional depending on the use)
  • Scissors

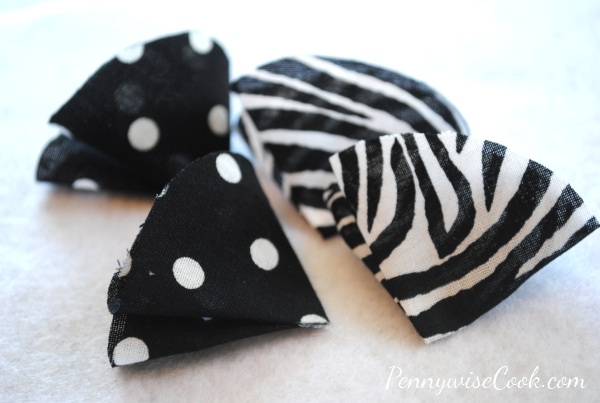
1) Start out by folding a circle in half, then in half again. They will look like this. I usually put a drop of glue in the very corner just to keep it together, but it’s not completely necessary.

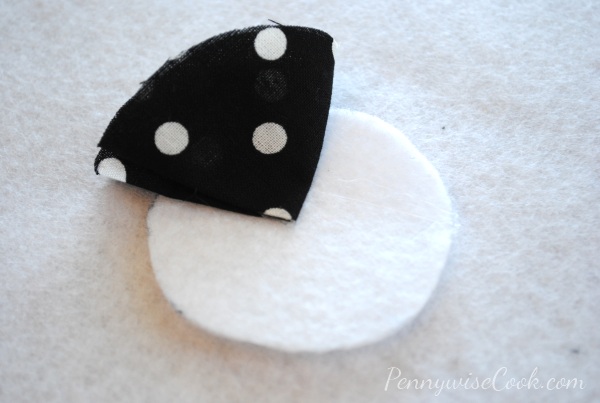
2) Glue that circle to the middle of the felt circle taking up 1/4th of it.

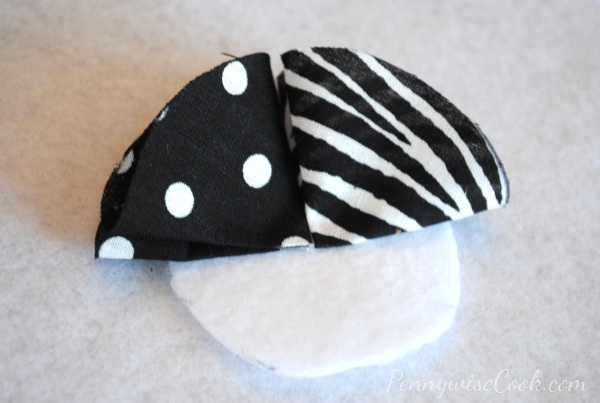
3) Continue this with the next 3 until you have 4 circles glued to that felt.

It will look like this…….TAH DAH!

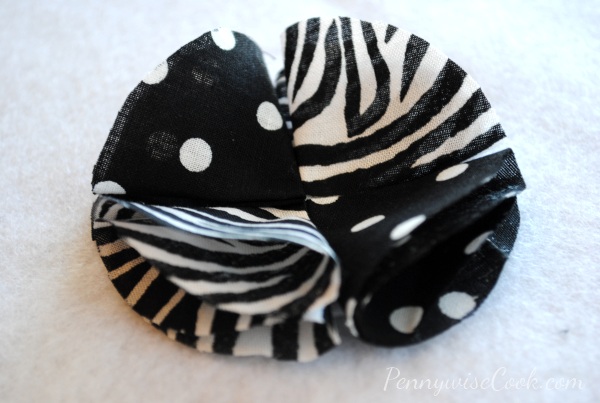
4) Once that layer is done, offset the next layer and glue it on top of the last.

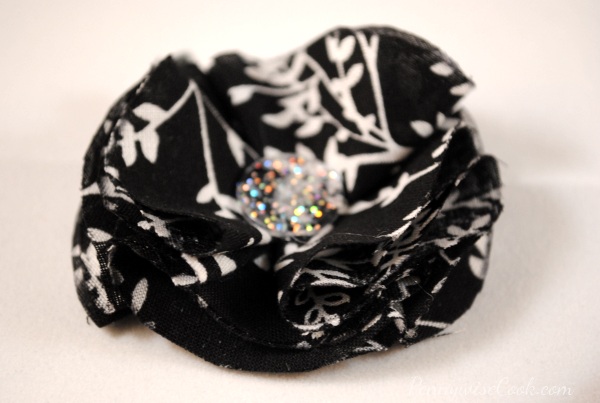
5) Glue on your button or fancy bead and fluff to your perfection. Then glue on your hair clip if necessary.

It will end up looking somewhat like this. Yours may be prettier!

Note- I didn’t take a picture of this, but if you are gluing on a hair clip be sure to glue felt to felt. Meaning cut a little piece of felt, attach it to the clip, then attach it to the back of the flower. This will ensure that it stays glued well to the flower.

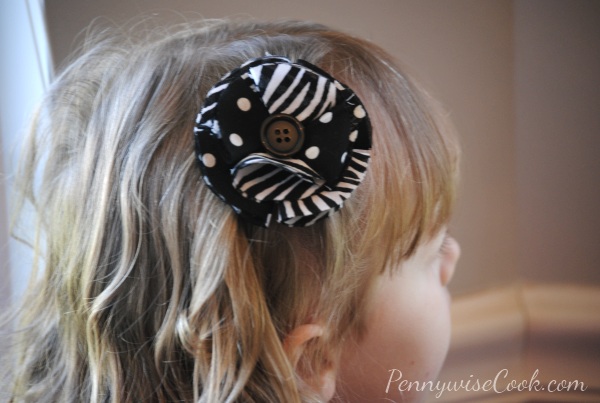
And when you’re done, you have to go get your 4 year-old to model it for you like Addie did. πŸ™‚

Super adorable and the color and fabric possibilities are endless. Plus, I really love that these are really inexpensive to make. Just from my experience, here’s an idea of what things will cost to make these.

  • Fabric: $.97 (makes several)
  • Felt: $.20 (makes several)
  • Mini Glue Gun (if you don’t have one): $3.00
  • Hair Clips: $2.00 (makes several)

All in all, you’re looking at less than $10 to make several homemade flowers. Plus, you get to pick out exactly what you want, not settling for something that you don’t at a store somewhere.

Now, go! Make some incredible no sew fabric flowers that are better looking than mine. πŸ™‚


Like this post? SHARE it!

Related Posts Plugin for WordPress, Blogger...

No-Bake Strawberry Icebox Cake

It’s been a bit of a crazy week around here. It’s like it appointment season or something. We’ve had all kinds of appointments lately. And that means driving around a lot of leaving the house a complete mess between events and plans. That ended today. I was determined to get this place in order. When it gets warmer outside I always get a bit crazy on the house. There’s something in the air that compels me to do this.

Do you do a big spring clean?

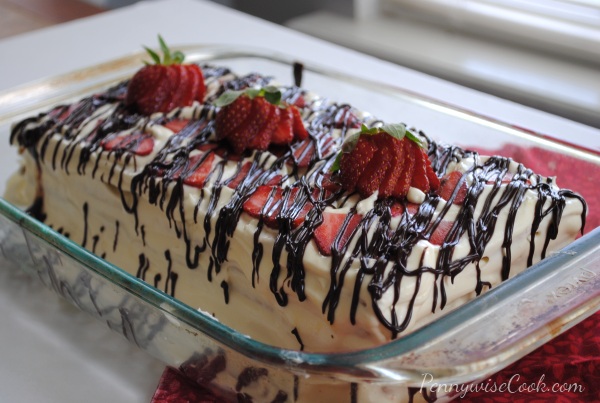
You know it’s spring when strawberries start getting cheaper. Aldi had them priced at $.49 the other day when I was in there. I about fell out on the floor when I saw that price. So of course, I did my little happy dance walking out with a few pounds of fresh strawberries. I knew I had to make something incredible. I came across this amazing looking No-Bake Strawberry Icebox Cake at The Kitchn and I immediately knew this was what I was going to whip up. It just does not get better than a cool, refreshing cake with strawberries, whipped cream, graham crackers all drizzled with chocolate. I made a few changes to that recipe to make it a little easier.

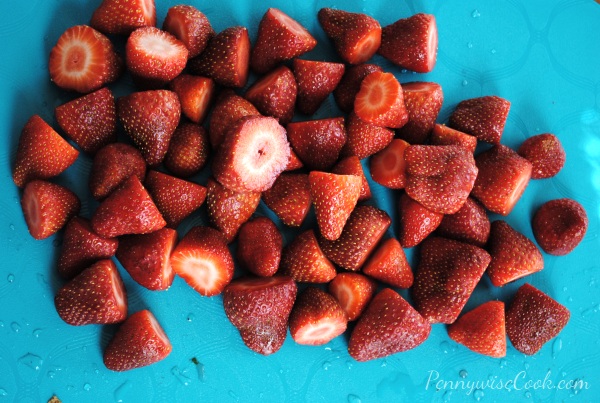
Strawberries are such a beautiful site aren’t they? I was cutting their stems off and just had to snap this picture. Can’t you almost taste them? Reminds me of summer.

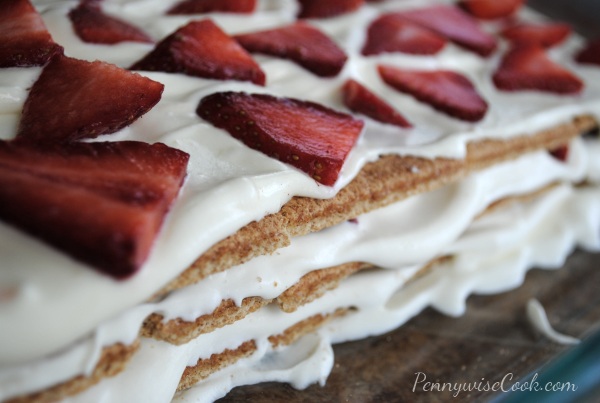
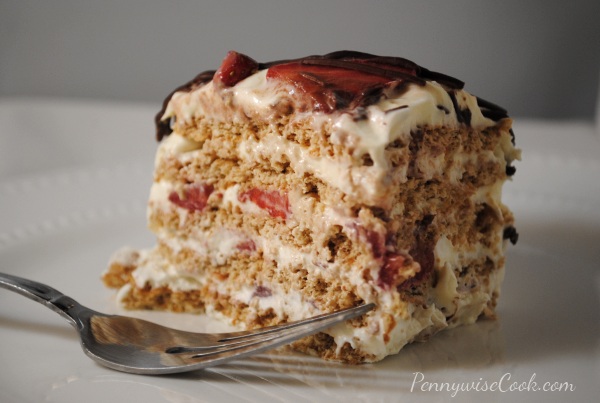
This cake is SO incredibly easy to make. I think it’s kinda funny that it’s called a cake. It doesn’t need any eggs, sugar, or even flour. It’s a simple process of layering a yummy combination of pudding and whipped cream with slices of fresh strawberries and graham crackers. That’s pretty much it! The idea is that as this sits in the refrigerator (“icebox”) that the graham crackers will soften up and become like cake. And they do!

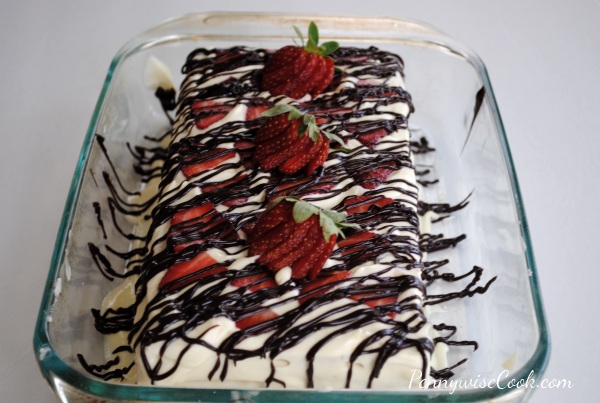
Here’s a picture to give you an idea. This cake just simply doesn’t last at my house. It makes a HUGE 9×13 pan of yumminess, but we always go through it within a couple days. I don’t feel bad though, I always use reduced fat graham crackers, sugar free whipped cream, and sugar free pudding mix. So you could call this healthy too!

This cake makes a really great dessert to serve when you have company. It looks fancy, tastes amazing, won’t bust your diet, and best of all you won’t break a sweat making it! I highly encourage you to try this one. You won’t regret it, I promise!

Adapted from The Kitchn’s recipe.

No-Bake Strawberry Icebox Cake

No-Bake Strawberry Icebox Cake

This yummy No-Bake Strawberry Icebox Cake is easy, fun, and especially yummy. Looks fancy without a lot of work!

Ingredients

  • 1 pound fresh strawberries, washed
  • 1 tub whipped cream, divided
  • 1 Package Vanilla (or your choice of white pudding)
  • 2 Cups Cold Milk
  • 24 whole graham crackers
  • 1/4 c. semi sweet chocolate chips

Method

  1. Take a couple of the best looking strawberries out for garnish later on. Remove the stems and cut the strawberries into thin slices.
  2. Make up the pudding according to the package. Most will call for 2 cups cold milk. Place in the refrigerator to set a few minutes. Once thickened, gently fold in the whipped cream. Reserve 2 tablespoons for the chocolate topping.
  3. Spread a spoonful of the whipped cream on the bottom of a 9x13 pan. Place 5 graham crackers across in a line.
  4. Lightly cover the graham crackers with more whipped cream. Add a single layer of strawberries across. Then top them with more graham crackers. Repeat this process until you have 4 layers. On the 4th layer use the rest of the whipped cream leftover by covering the sides if desired. Finish the layers off with strawberries.
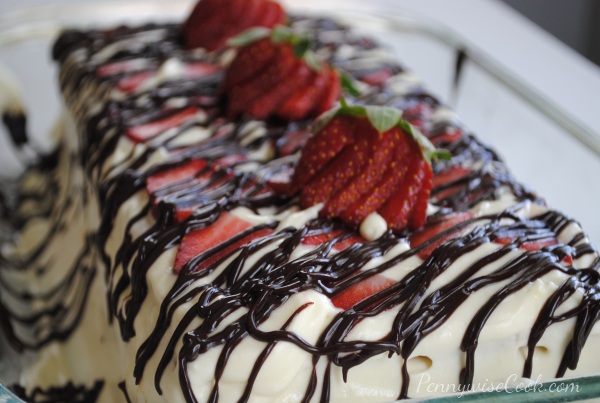
  5. For the topping, melt the chocolate chips in a double boiler. You could also microwave them if you feel confident. Mix in the 2 tablespoons of whipped cream that was reserved until smooth and shiny. Place the chocolate into a ziploc bag and snip off the very tip. Drizzle the chocolate across the cake.
  6. Top with your whole strawberries for garnish and refrigerate cake for at least 4 hours.

Notes

When it comes to pudding for this cake, I think white chocolate is a winner! You could also use cheesecake. That might be really yummy too.

Note- I don't completely cover each layer in strawberries. I just evenly distribute a little here and there. The other recipe called for 2 pounds, but I liked it just fine with 1 pound.

Feel free to use whatever type chocolate chips that you'd like. I'm going to be making one of these soon with white chocolate chips. I think that would be yummy with the white chocolate pudding.

http://www.pennywisecook.com/no-bake-strawberry-icebox-cake/


Like this post? SHARE it!

Related Posts Plugin for WordPress, Blogger...

4 Ingredient Artisan Bread

My mom used to have a bread business that she ran out of our home. I remember the smell of fresh bread baking in the oven. It’s the most glorious smell. Not to mention that it tastes amazing too.

I’m not a bread baker, but every now and then I get the itch to make up a loaf. Instead of entertaining the idea of laboring to make it myself, I usually just buy a fresh made loaf at my local grocery store’s bakery counter. Not this time. I became a bread warrior on a random Tuesday afternoon and decided it was time.

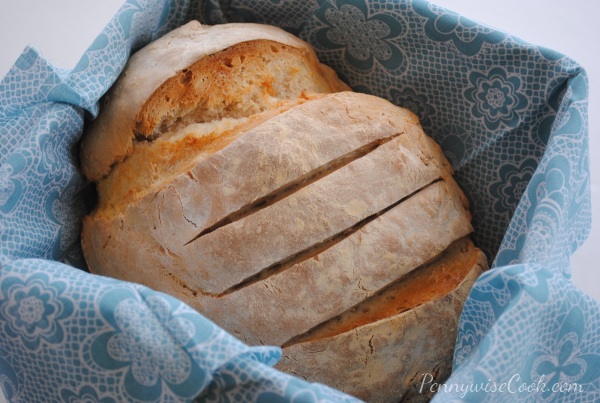
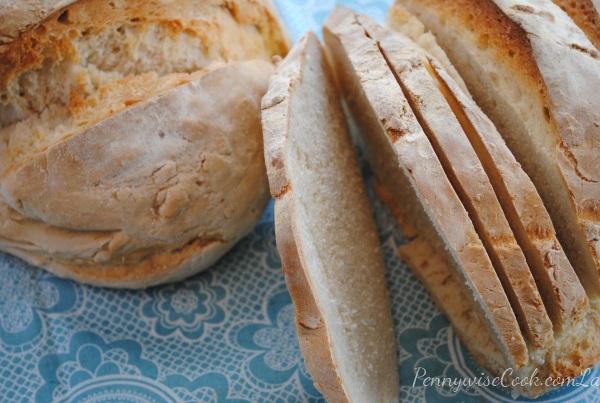
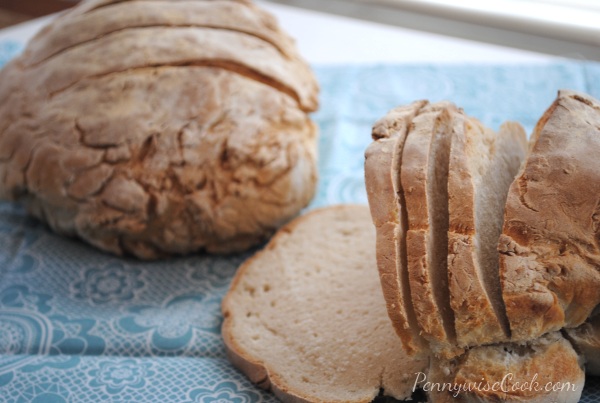
This 4 Ingredient Artisan Bread recipe was super easy, especially with my KitchenAid mixer and dough hook. Love that thing! The “labor” wasn’t near as bad as I would have expected with homemade bread. The waiting for the rising was the worst part, but I have kiddos that keep me occupied so I survived the waiting.

This bread made the perfect complement to our warm meal that night. It made two loaves and I shared the other with our neighbor.

Recipe thanks to JoCooks!

4 Ingredient Artisan Bread

4 Ingredient Artisan Bread

This easy recipe is great for making a nice crusty bread for soup!

Ingredients

  • 3 cups of lukewarm water
  • 1 1/2 tbsp active dry yeast
  • 1 1/2 tbsp salt
  • 6 1/2 cups all purpose flour

Method

  1. In a medium bowl add the warm water, salt and yeast and stir together.
  2. In the bowl of your mixer add all the flour, then pour the yeast mixture over the flour and mix using the dough hook of your mixer, until it’s all well incorporated.
  3. Place the dough in a large plastic container, it needs room to rise, and put the lid on it, but do not close completely, there needs to be one corner left open to let the gases escape. You could also use a large bowl, covered well with plastic wrap and poke a couple small holes in the top using toothpicks.
  4. Let the dough rise for 2 hours.
  5. The dough will be very sticky and elastic. It is recommended to bake this on a stone, however a regular baking sheet will work just fine. Cover the baking sheet, or stone with parchment paper.
  6. Add some flour to your hands, and divide the dough in two pieces. Add more flour to your hands as necessary. Shape the dough into the desired shape for your bread and place it seam down on the baking sheet. Sprinkle some more flour on top of the loaves. Let the loaves rest for another 30 minutes so that they can rise a bit.
  7. Preheat oven to 450 F degrees. Before placing the bread in the oven, add a pan with a cup of water and place it in the bottom rack. Slash the top of your bread, to allow gases to escape.
  8. Bake for 30 to 35 minutes. The water will allow for the bread to form a nice crusty top.
  9. Cool before serving.
http://www.pennywisecook.com/4-ingredient-artisan-bread/

Save on the ingredients in this recipe:

  • $0.40/1 Fleischmann’s Yeast, exp. 4/8/12 (SS 12/04/11)
  • $0.40/1 Fleischmann’s Yeast, exp. 4/15/12 (SS 11/06/11)
  • $1/1 Ultragrain All-Purpose Flour with Whole Grain, exp. 4/30/12 (SS 11/06/11 R)

Like this post? SHARE it!

Related Posts Plugin for WordPress, Blogger...

Milky Way Granola Bars

You guys know how I get my cravings. Usually they spark a recipe invention and interesting concoctions. They are sometimes fabulous and other times complete fails. The other night I got a wild hair. I came across a recipe for making cookies out of Reeses cups and an egg. So I thought I wonder if I can do the same with Milky Ways. Had I been using my brain it would have been obvious that the Milky Ways wouldn’t work because they are caramel and chocolate rather than peanut butter, but I had tunnel vision and was a bit determined.

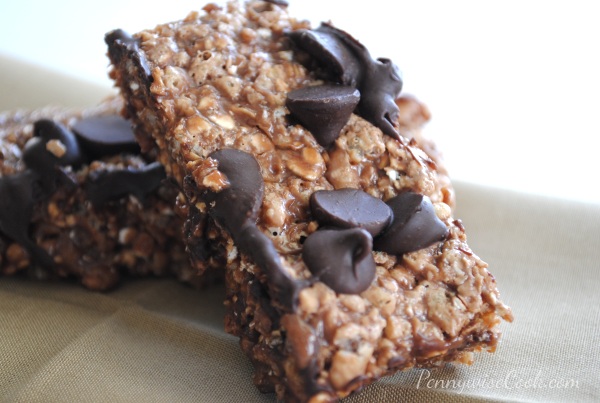
So I set out to create Milky Way cookies by placing 24 fun-size Milky Way candy bars into the food processor with one egg. The result? very smooth and creamy chocolate-y and caramel-y mush. There was no way this was making a cookie. So I got innovative and created these granola bars out of the mush and boy were they tasty!

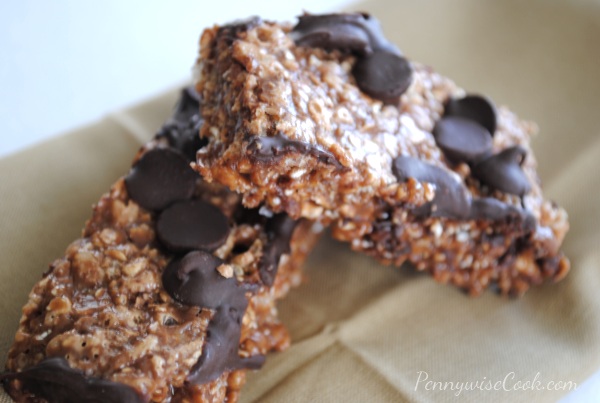
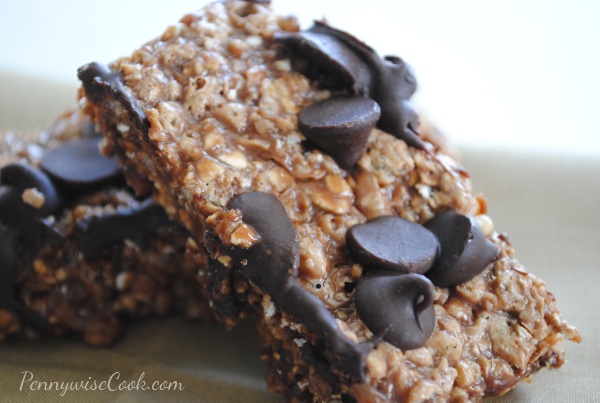
These Milky Way Granola Bars kinda resemble Little Debbie Star Crunches if you’ve ever had those. They are some of my favorite cookies.

Crunchy with a touch of caramel and chocolate, these aren’t your average granola bars. Don’t expect them to fill you up with protein or replace a meal, these aren’t exactly healthy. But we can pretend they are since they are, after all…..granola bars.

Milky Way Granola Bars

Milky Way Granola Bars

A twist on your average granola bar, these are indulgent and include a favorite candy bar!

Ingredients

  • 3 Packages of Fun-Size Milky Way Candy Bars (24 Total)
  • 2 c. Rice Krispies
  • 1 c. Quick Cooking Oats
  • 1 Egg
  • 1/4 c. Chocolate Chips

Method

  1. Preheat oven to 350 degrees. Spray a baking dish with nonstick cooking spray and set aside.
  2. Unwrap all the Milk Way candy bars and place in a microwave safe bowl. Microwave for about 45 seconds or until a little soft. You don't want to get them melted just a little softened so you can chop them in the food processor.
  3. Place the candy bars in the food processor and chop until there are no longer any big pieces. Add the egg and chop until smooth.
  4. In a large bowl, pour the smooth candy bar mixture along with the rice krispies and oats and mix well. Flatten into your baking dish using the back of your spoon.
  5. Sprinkle the chocolate chips evenly across.
  6. Bake for about 12 minutes. Let cool completely before cutting.

Notes

When flattening these into your baking dish, I find it helps to spray the back of my spoon or hand with cooking spray before hand. It keeps them from sticking.

After they bake, you might place them in the freezer or refrigerator for 15 minutes to give them a head start on hardening if you are in a hurry.

I find these stay together pretty well.

http://www.pennywisecook.com/milky-way-granola-bars/


Like this post? SHARE it!

Related Posts Plugin for WordPress, Blogger...