Basil Ricotta Mac and Cheese

Isn’t it funny how there is never enough time in the day? I can have a completely clear day planned with maybe one thing on my to-do list and half the time I don’t even get that one thing accomplished. Of course, I do have a tendency to go off on tangents. My husband makes fun of me beceause I can barely get a sentence out. In fact, the other day I was telling him something and in the middle of my sentence remembered something else and began to tell him about that instead. He looked at me with the funniest face and said, “Did you just interupt yourself?”. I stopped and thought about it for a moment and then decided yes, I did in fact interupt myself! Leave it to me!

Much like my thoughts getting side-tracked, I easily get distracted when I’m cleaning the house. I’ll be cleaning one thing and come across something that just bothers me and I have to clean that. All the while forgetting about my original intention. It may take me the whole day (and sometimes week) to get the original mission accomplished.

A near future goal of mine is to create a cleaning list for the week. I’ll let you know how that works out. 🙂

Needless to say, time gets away from me sometimes. And on those days, we either have a fend for yourself night for dinner or I whip something up that doesn’t need a lot of work. Mac and cheese is always a great go-to option. Always a pleaser for the kiddos and the picky husband as well.

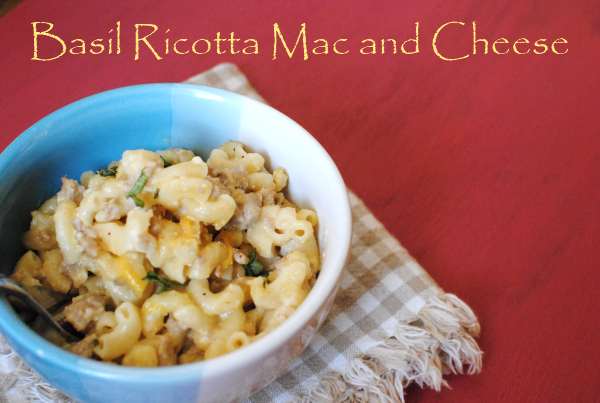
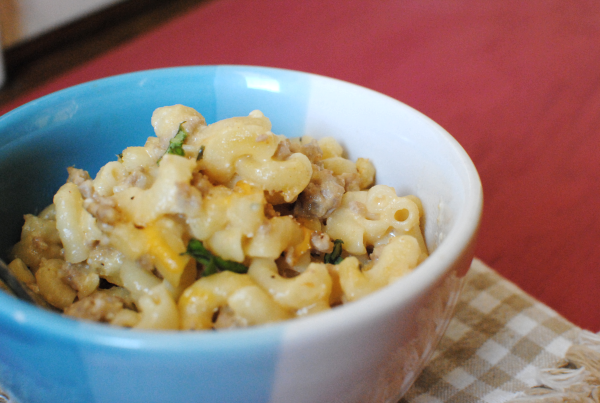
It’s not exactly the best grown up meal. So when I was having a “day” the other night I decided to liven it up a bit and use up some ricotta cheese that I had in the refrigerator and add a little bit of basil. And to make it more of a meal I added some ground turkey. It was fantastic and even pleased my 5 year old!

Hey, maybe she’ll eat her peas now. Nah….

Basil Ricotta Mac and Cheese
Recipe Type: Pasta, Main Dish
Author: Pennywise Cook
This grown up version of everyday mac and cheese is sure to please everyone!
Ingredients
  • 2/3 Box Elbow Macaroni
  • 1 lb Ground Turkey
  • 1/4 c. Flour
  • 2 c. Milk
  • 2 c. Shredded Cheddar Cheese + additional for topping
  • 1/4 c. Bread Crumbs
  • 1/2 c. Ricotta Cheese
  • 1/2 Tsp Onion Powder
  • 1/2 Tsp Garlic Powder
  • 1 Tsp Basil, Chopped
  • Salt and Pepper to Taste
Instructions
  1. {reheat oven to 350 degrees.
  2. Prepare macaroni a couple minutes less than directed on the box. Drain and set aside.
  3. Meanwhile, brown ground turkey and stir in ricotta cheese. Add in seasonings and basil.
  4. In a saucepan, stir together flour and milk and cook to a boil until thickened. Then stir in shredded cheese. Mix well.
  5. Mix together pasta, ground turkey mixture, and cheese mixture. Pour into a greased baking dish and top with additional shredded cheese and bread crumbs. Bake for about 10 minutes until cheese is melted and breadcrumbs begin to crisp.


Like this post? SHARE it!

Related Posts Plugin for WordPress, Blogger...

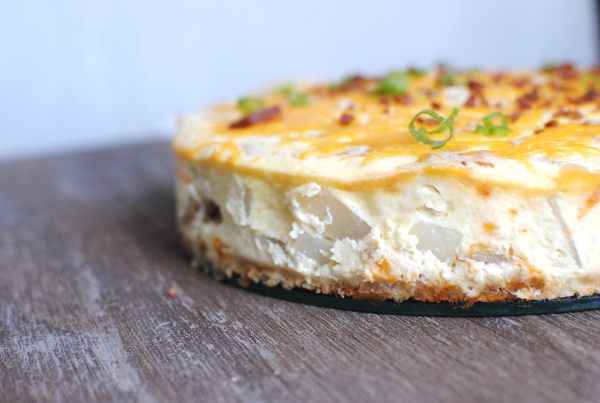
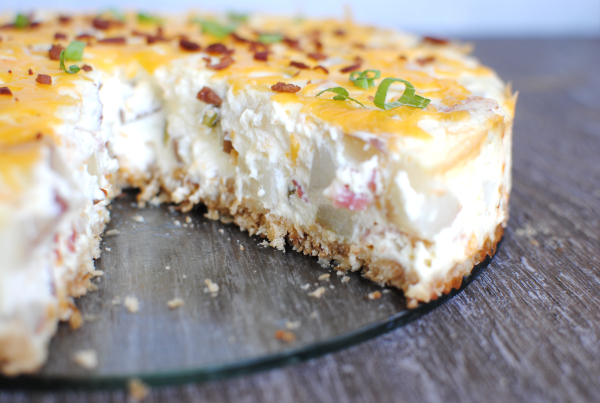
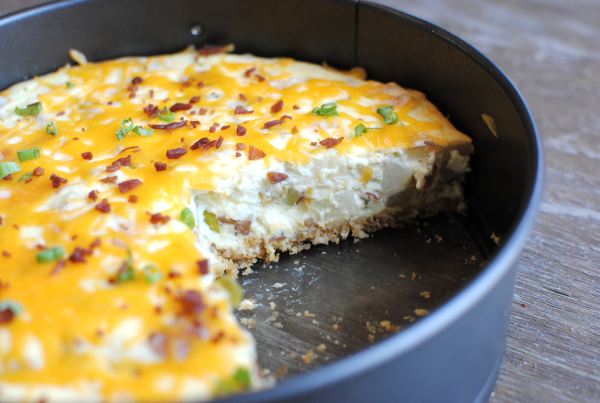
Loaded Potato Cheesecake

Aside from my sweets, potatoes are my other downfall. Give them to me in any form possible and I will eat them happily. When I was pregnant with both my girls, I craved nothing but potatoes. All I wanted was fries, mashed potatoes, and mostly fully loaded potatoes. You know, the ones slathered in a pound of artery-clogging butter, a double donkey dollop of daisy, and of course massive amounts of cheddar cheese and bacon. There is just nothing that compares to this kind of happiness.

Besides cheesecake….

Which brings me to my epiphany. I sat there looking at leftover potatoes on my counter. I have a tendency to let them go bad so I vowed to use them up somehow, someway. And I always have cream cheese on-hand. I thought to myself, are there savory cheesecakes? And if so, are there loaded potato cheesecakes? I began a mission on “The Google” as my sister calls it, to see if there had ever been such a recipe. I mean come on, cream cheese makes mashed potatoes delicious so why not build the potatoes into the cream cheese and call it a savory cheesecake?

To my utmost surprise, I could not find a single recipe for Loaded Potato Cheesecake. What is the world thinking? Cue the gears a turnin in my noggin’. I got out my handy dandy notebook and began this recipe.

And what do you know? It actually turned out incredible!!! This simply doesn’t happen to me on the first time y’all. It just doesn’t.

Not me. Not ever.

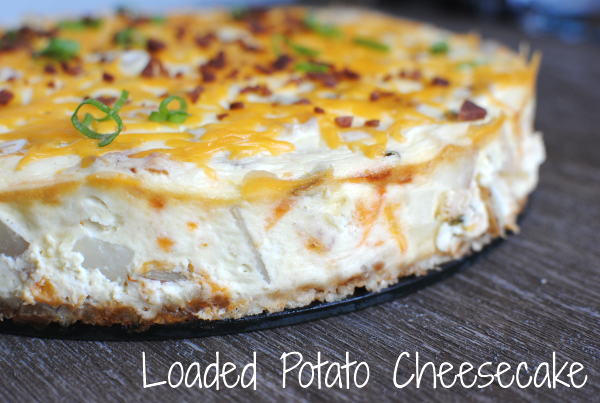
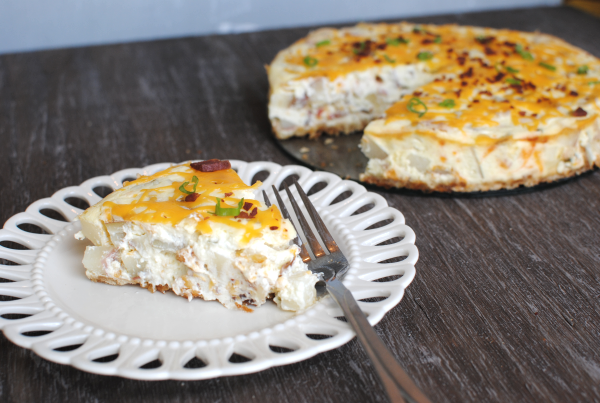
I will try something 5-10 times before getting it right. I guess the moons have aligned and the kitchen gods decided to cut me some slack and save my sanity because this one turned out just right. One of my main concerns was the crust. I was so sure that it was going to end up really soggy. But no, It turned out just right and just makes each bite perfect.

This may never happen again so enjoy!

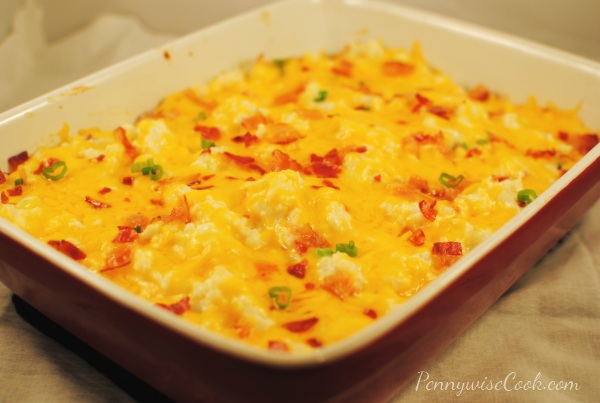
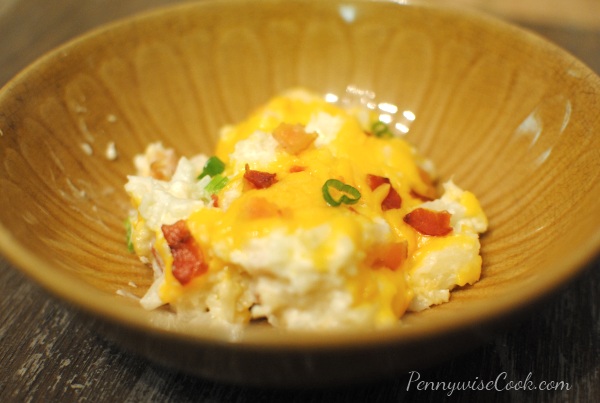
Loaded Potato Cheesecake
Recipe Type: Appetizer, Main, Vegetable
Author: Pennywise Cook
This savory dish is a great twist on everyday cheesecake. Impressive and tasty at the same time!
Ingredients
  • 1 and 1/4 c. Ritz Crackers, Crushed
  • 1/3 c. Shredded Cheddar Cheese + 1/2 c. + 1/4 c.
  • 3 Tbsp Butter, Melted + Additional 2 Tbsp, Melted
  • 2 Packages Reduced Fat Cream Cheese, Softened
  • 3 Medium Red Potatoes (about 3 cups), washed, chopped into bite-size pieces and boiled until soft
  • 1 c. Reduced Fat Sour Cream
  • 2 Eggs, at Room Temp
  • 3 Green Onions, Chopped
  • 4 Pieces Bacon, Cooked and crumbled
Instructions
  1. Preheat oven to 350 degrees.
  2. In a small bowl combine Ritz Crackers, shredded cheese, and 3 tbsp melted butter. Press into a greased 9″ springform pan. Set aside.
  3. Beat cream cheese until fluffy. Add in eggs one at a time, beating cream cheese after adding each egg.
  4. Add in sour cream, salt, and 2 tbsp melted butter. Combine well. Gently fold in potatoes, green onions, bacon, and 1/2 c. shredded cheese.
  5. Pour into pan. Bake at 350 degrees for 15 minutes. Then Reduce heat to 225 and bake for 1 hour and 15 minutes.
  6. In the last 10 minutes, top with additional shredded cheese and allow to melt.
  7. Cool and serve!
Notes

As you can see, I tried to lighten it up as much as I can. While some things just won’t work in reduced fat form, this dish does not taste like it contains anything healthy at all!

It’s a crowd pleaser for sure.


Like this post? SHARE it!

Related Posts Plugin for WordPress, Blogger...

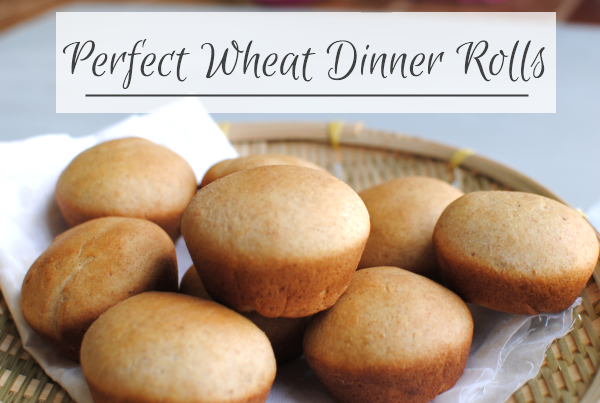
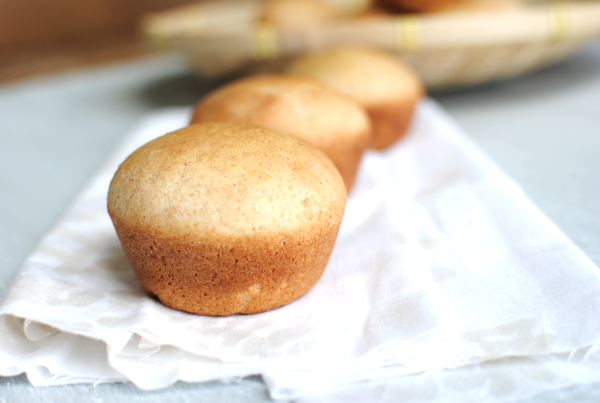
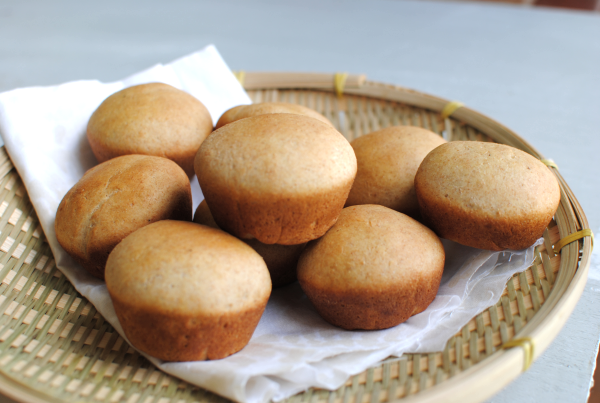
Perfect Wheat Dinner Rolls

I can’t think of anything better than a soft, warm dinner roll with melted butter slathered onto it to eat with my dinner. I’m a big fan of Sister Schuberts yeast rolls, but they aren’t so great for my hips so I avoid them at all costs. I can remember there was a point at which we had those with almost every meal at our house. We love them that much. Now I like to make sure we don’t double dose on carbs so I watch how many I include in our meals.

But rolls simply call my name sometimes. They taunt me with their bready and golden pillows of perfection. I smell their sweet, comforting scent that’s fill up the kitchen and feel compelled to grab the butter.

They remind me of potato chips in a way. There’s almost no way that I can eat just one. That’s why I at least try to make them a little more nutritious by making them wheat. I came across this Whole Wheat Rolls recipe at Salad in a Jar that looked easy enough and like it would make a great buns for some sliders that I was making. (Recipe to come!) So I decided to try it out and they turned out perfect!

And between you, me, and the fence post, I had a complete fail making wheat rolls just hours before I made this recipe so you can imagine my relief when these came out of my oven. It was funny too, because my husband came in to find these beauties while my disaster rolls were already at their fate in the trash can. I almost took a picture of them to show you. But I didn’t want you to be biased towards these, so I decided not to. 😉

If you’re looking for a wheat dinner roll recipe for sliders like I used them, or simply to complement your meal you should try this one!

Recipe courtesy of Salad in a Jar.

Perfect Wheat Dinner Rolls

Perfect Wheat Dinner Rolls

Warm and delicious whole wheat dinner rolls make a great addition to any meal!

Ingredients

  • 3/4 cup warm water
  • 1 egg
  • 1 teaspoon salt
  • 3 tablespoons honey
  • 3 tablespoons oil
  • 1 1/2 cup all purpose, unbleached flour
  • 1 1/2 cup whole wheat flour
  • 1 tablespoon vital wheat gluten (optional)
  • 2 1/4 teaspoons yeast

Method

  1. Preheat oven to 350 degrees.
  2. Add all ingredients (in order listed) to a stand mixer with a dough hook or to a bread machine.
  3. When dough cycle is complete or the dough is completely combined in your stand mixer, remove and shape into balls. For dinner rolls, place 2-3 dough balls into the wells of a muffin tin. For slider rolls, fill either 2 8-inch cake pans evenly OR place 1 dough ball into the well of a muffin tin.
  4. Cover pans with a damp towel and place in a warm place to rise for around 30 minutes.
  5. Bake for 10-12 minutes. Brush the tops with butter when you remove from the oven if desired.

Notes

Salad in a Jar describes using a bread machine to mix the dough for use. I don't have one so I opted for using my stand mixer and dough hook. It worked a lot better than I expected for mixing the dough. Just make sure that if you use your stand mixer to give it ample time to combine all the ingredients well.

Using a muffin tin will create the affect of a muffin roll so if you want your sliders to look less like muffins, the cake pan would be the way to go.

http://www.pennywisecook.com/perfect-wheat-dinner-rolls/


Like this post? SHARE it!

Related Posts Plugin for WordPress, Blogger...

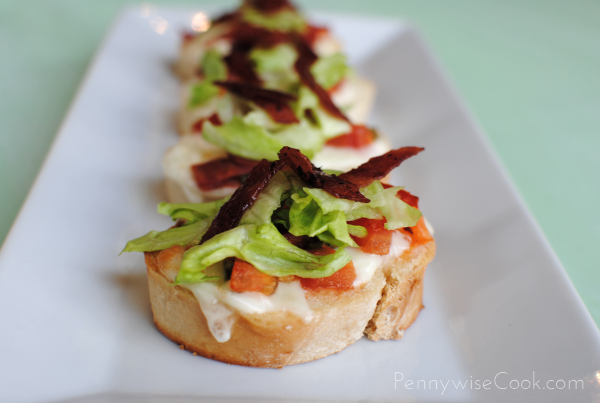
BLT Bruschetta

Tomatoes, bah. I’m really a self-proclaimed tomato hater. I’ll eat them in sauces, soups and chilis, even diced on a taco, but you will never catch me biting into one for fun. I know several folks who just love fresh tomatoes from the vine sliced and drizzled with ranch.

Not me.

Let’s just say they have to be accompanied by some other flavor to be in my presence.

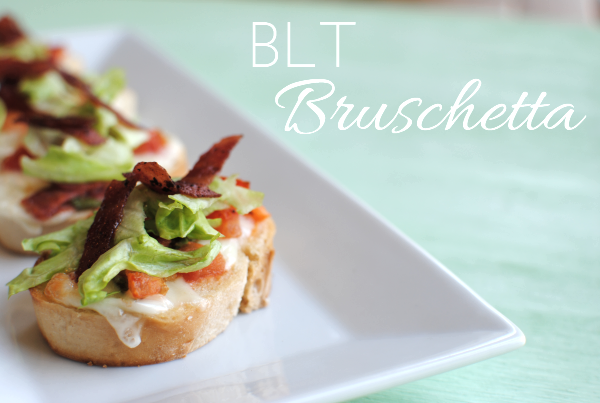
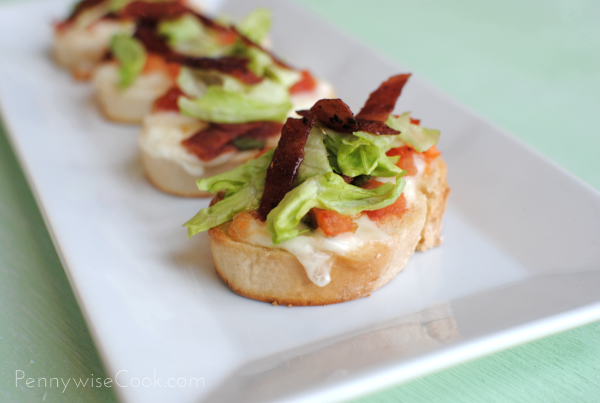
I was at a baby shower for a dear friend recently and there were these incredible appetizers there that were similar to bruschetta. Just french bread with mozzarella cheese and a slice of tomato on top and seasoned well. Who knew that something so simple could be so yummy? They were gone in a flash and everyone kept talking about them.

And of course my mind was just racing with possibilities to make this even yummier than it was.

I decided that they needed bacon. Come on, everything is better with bacon. And what comes to mind when I think about bacon? BLTs. Oh yeah.

Checking out the “about to go bad” section at Kroger, I snagged a loaf of french bread for $.99 to make my creation. I had some lettuce already in the fridge and grabbed a $1.29 package of turkey bacon (you know me!) and a block of mozzarella cheese ($1.67) and I was set.

So light and crisp, a BLT just reminds me of summer. These little beauties would make the perfect appetizer for a summer get together or party. And even your self-proclaimed tomato hater kiddos might like them! My Addie AND my husband both spend oodles of time working around tomatoes in most dishes and BOTH of them enjoyed these.

BLT Bruschetta

BLT Bruschetta

A twist on everyday bruschetta, bacon gives new life to this tasty appetizer.

Ingredients

  • 1 Loaf French Bread, cut into pieces
  • 2 Ripe Tomatoes, Diced
  • 1 Tbsp Fresh Basil, Chopped
  • 10 Pieces Bacon, Chopped cooked and crispy
  • 8 oz Block Mozzarella Cheese, Sliced into Small Pieces
  • 1/2 Cup Lettuce, Shredded or Chopped
  • 1 Tbsp Olive oil
  • 1/2 Tsp Salt
  • Pinch Pepper

Method

  1. Preheat oven to 450 degrees.
  2. Mix tomatoes with olive oil, basil, salt, pepper, and 2/3 of the bacon pieces.
  3. Place a slice of cheese on each slice of bread.
  4. Top with equal amounts of the tomato mixture.
  5. Bake for about 5 minutes until cheese is melted and bread begins to toast.
  6. Top each slice with a bit of lettuce and a few extra pieces of bacon.
  7. Drizzle with more olive oil if desired.
http://www.pennywisecook.com/blt-bruschetta/


Like this post? SHARE it!

Related Posts Plugin for WordPress, Blogger...

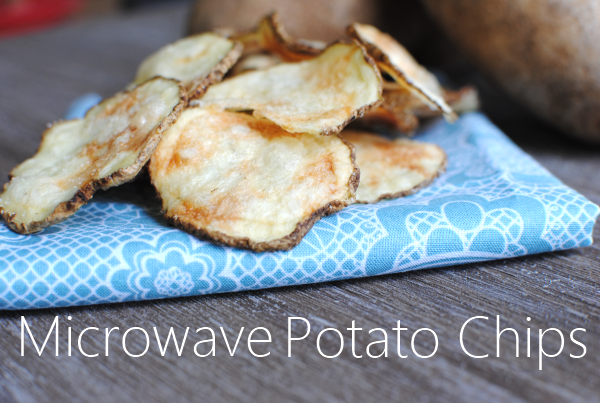
Easy Microwave Potato Chips

You are just going to have to excuse me and my love for potatoes these last couple of days. I’ve always had a thing for them. When I was pregnant with both my girls, I craved them. Give them to me in any shape form or fashion and I’m in heaven. I take that back…

I’ve never like Potatoes Au Gratin. Weird huh? I remember my mom making me eat them when I was little. To this day I can’t make myself eat them.

One of the ways that potatoes can be enjoyed is also possibly one of the worst health-wise. Potato chips. Once you pop, you can’t stop! Isn’t that the saying? It’s so true. The only way that I could eat just one chip is if it was the very last one in the bag. And if that was the case, I would have to yell at somebody for eating all the chips.

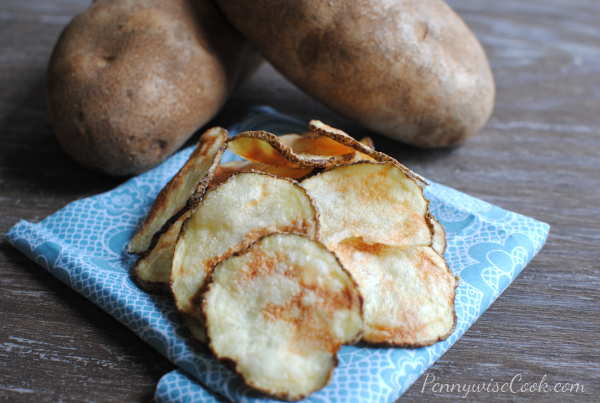
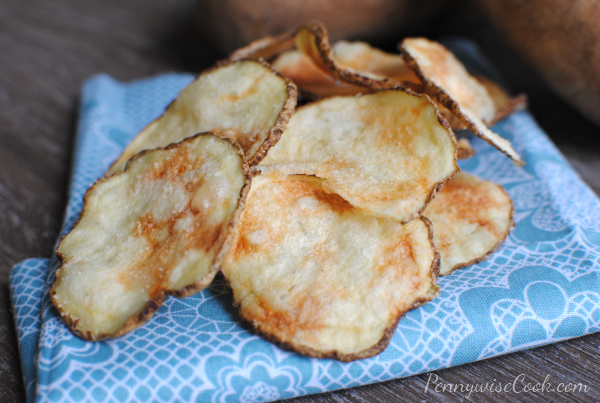
I recently discovered that you can use up potatoes by microwaving them into potato chips. How cool and incredibly simple is that?

You know how sometimes you buy potatoes to make mashed potatoes or something else and you have one or two random potatoes left. What do you do with those? Now that you’re hearing about these microwavable potato chips, this may just be your new way to use them up. It’s definitely mine.

In a matter of minutes and without frying and making them super unhealthy, you can create crispy potato chips in your own microwave. It’s a miracle I tell you.

Just the other day we were going on a picnic and I made a bunch of these up to throw in our lunches. They were so good!

Recipe adapted from Food Gal.

Easy Microwave Potato Chips

Easy Microwave Potato Chips

Create crispy, healthier potato chips in your microwave!

Ingredients

  • 2 Large Russet Potatoes (peeled if preferred)
  • Extra Virgin Olive OIl- Around 2 tbsp
  • Pinch Salt

Method

  1. Slice potatoes to about 1/8" thickness.
  2. Toss potato slices with extra virgin olive oil and salt.
  3. Spray a microwavable plate with cooking spray and place a single layer of potatoes on plate. (you may have to do more than one batch depending on the size of your plate)
  4. Microwave around 2 minutes until potatoes just start to brown. Remove, flip over and microwave another 2 minutes. (This time will really vary depending on your microwave and how thick your potatoes are)
  5. Remove slices and place on another plate to cool.
  6. Repeat with more batches if necessary.

Notes

You can use any type of potato that you prefer. Most will work just fine. Red and Yukon Gold might take a lot less time to cook however, because they are more tender. Keep that in mind.

You can also peel the potatoes if you don't like having the skin on your chips.

Once you do a batch or so, you'll get the hang of the timing for your microwave. Be sure to watch them for scorching, especially if your slices are very thin.

You can use a food processor with slicing attachment if you don't have a mandolin slicer.

http://www.pennywisecook.com/easy-microwave-potato-chips-2/


Like this post? SHARE it!

Related Posts Plugin for WordPress, Blogger...

Crockpot Baked Potatoes

If I had a dime for every time that I’ve said Why didn’t I think of that, I would probably be rich. Do you ever have those duh moments when something so simple jumps right out at you that could’ve made your life easier years ago? Oh yeah, I have those all the time. You see my brain is a little foggy after birthing my 2 children. It’s permanent and I don’t expect it to go away anytime soon. Or at least that’s what I like to blame it on anyways.

I love me a big ole baked potato sometimes. I like to fill them with whatever I have in the fridge. Whether it’s lunch meat, herbs, or just plain old butter I just love baked potatoes. They have a place here called McAllister’s that serves the most gigantic potatoes. Those are my kinda potatoes.

Aldi had a 10 lb bag of russet potatoes on sale for only $.99 the other day. There were some that were huge so I thought what better to do with those than make baked potatoes. Then I thought about the hard labor of turning on the oven and waiting and waiting for the potatoes to cook. I did not look forward to that. So I got this bright idea to slow cook them in the crockpot.

I know. It’s genius really.

I may be the last person on earth who figured this out, but I’m quite happy about it to say the least.

If you figured this out a long time ago that’s great, just let me enjoy the moment.

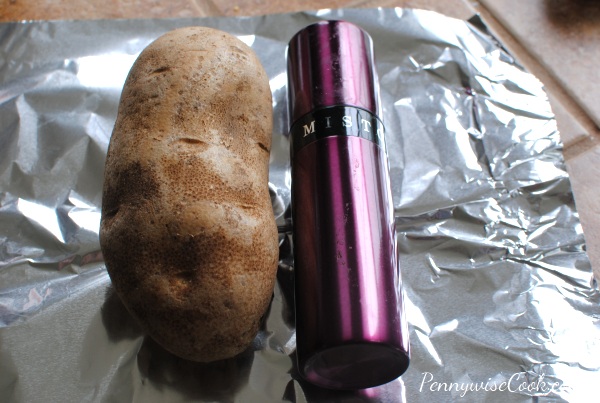
So I set out to try this new (less labor intensive) method of baking potatoes in the crockpot. First, just LOOK at the size of that potato. It is towering over my Misto isn’t it?

(Which by the way, if you don’t have a Misto you should really get one! They are so awesome. If you use olive oil a lot, you may never need cooking spray again. You can find one here at Amazon for around $10.)

Back to the potato. It’s large and in charge and I let my husband eat that one.

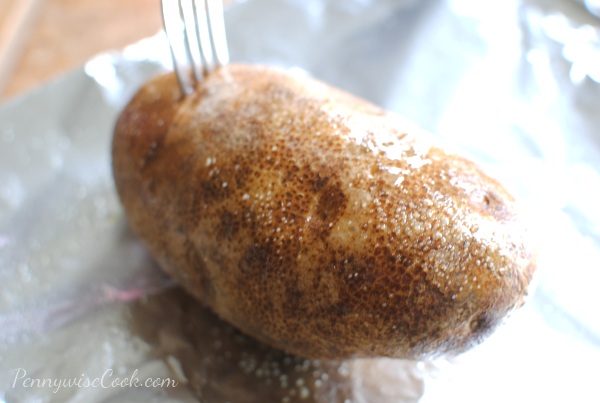
So I just prepared the potatoes much like I would the ones I put in the oven. Washed them, slathered them with olive oil, salted them….

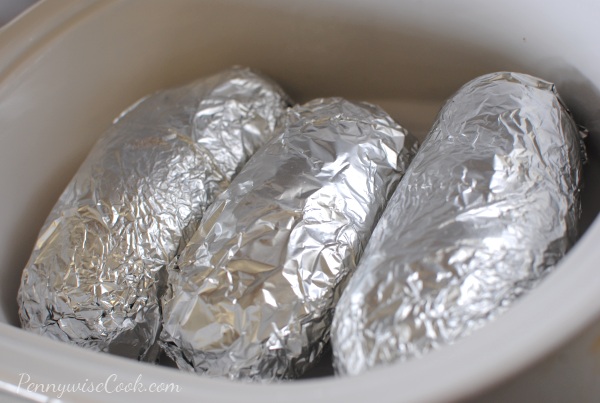
….then poked them just like they were my facebook friend. (wow, that was bad) Then of course I rolled them up in foil and placed them in the crockpot.

Look at those cute little potatoes all snug in the crockpot. This was so easy!

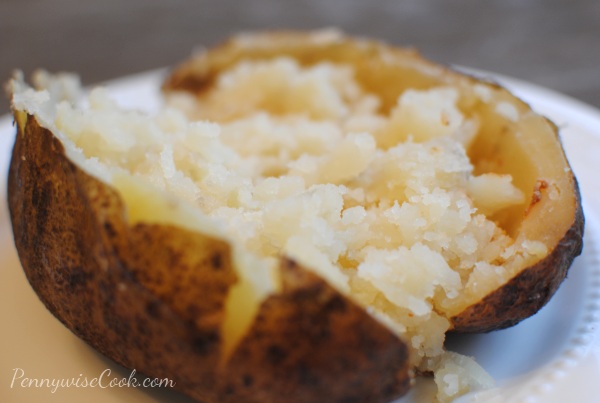
I’m not exactly sure how long that I cooked them because I was off doing more important things like Goodwill shopping or updating my facebook status. But I do think it was around 6 hours or so. This is what they looked like when they came out. PERFECT potatoes. And I didn’t break a sweat or barely lift a finger.

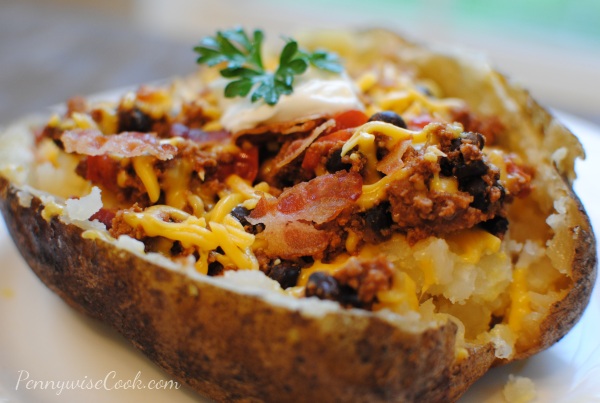
This is a life-changing epiphany in my household. My daughter even asked why we were having dinner so early that night. I felt like super mom. I did make up a quick little chili to put on top of these and broke up some microwaved bacon to go on top.

And I also placed a chub of ground turkey (in foil too) in the crockpot with the potatoes to see how it would cook with them so I didn’t even have to cook that and it worked! So that night, all I had to do was add a few things to the ground turkey to make the chili. The turkey did drip into the bottom of the crockpot, but since the potatoes were covered it wasn’t a big deal. Not sure if I will always do that.

Crockpot Baked Potatoes

Crockpot Baked Potatoes

You don't even have to turn on your oven for a hearty baked potato. Cook them in your crockpot!

Ingredients

    For the Potatoes
  • Russet Potatoes
  • Olive Oil (or Butter)
  • Salt to Taste
  • Foil for Wrapping
  • For the Chili
  • Not quite a whole lb of ground turkey
  • 1/2 Can of Black Beans
  • 1/2 Can Diced Tomatoes (or 8 oz can tomato sauce)
  • Chili Powder to Taste
  • Bacon Pieces for Topping
  • Shredded Cheddar Cheese for Topping

Method

    To make the Potatoes
  1. Wash the potatoes and rub them down with olive oil or butter. Salt and then poke holes in the top of each potato.
  2. Wrap in foil and place in slow cooker for 6-8 hours on low or 4-6 hours on high.
  3. To make the Chili
  4. Brown the ground turkey in a medium skillet Add in the black beans, tomatoes and chili powder and simmer until warm.
  5. Place on potatoes and top with bacon pieces and shredded cheese.

Notes

I would recommend cooking them on low just to make sure they get cooked really slowly and come out soft and fluffy inside.

Use whatever fillings that you see fit! The sky is the limit.

http://www.pennywisecook.com/crockpot-baked-potatoes/


Like this post? SHARE it!

Related Posts Plugin for WordPress, Blogger...

Roasted Broccoli and Potatoes

Some things are fantastic to buy in bulk. For instance, when there’s a stellar deal on paper towels with coupons I stock up like nobody’s business. Toilet paper also falls into this category. And then there are things like gigantic bags of salad that are on clearance. It’s really cheap but won’t last past tomorrow. You have to know when to stock up, when to freeze, and when to use.

Many times Aldi (my favorite go-to place for produce) has their broccoli, cauliflower, and potatoes on sale for cheap. You never know what to expect. You just check back during the week. The past couple weeks it’s been a 10 lb bag of russet potatoes on sale for $.99. Who in their right mind would pass those up? And since this is one of those things that could go bad in a matter of days, I was thinking of what and how I could use them up.

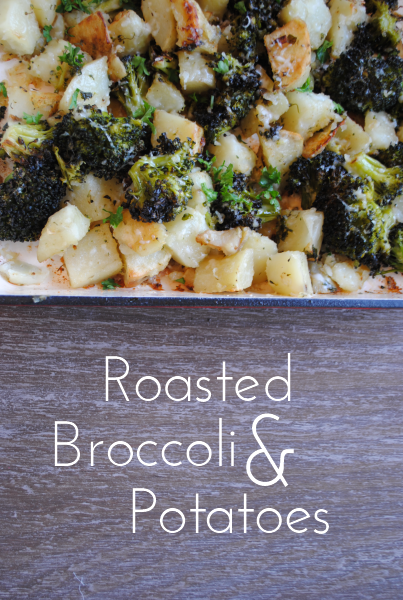
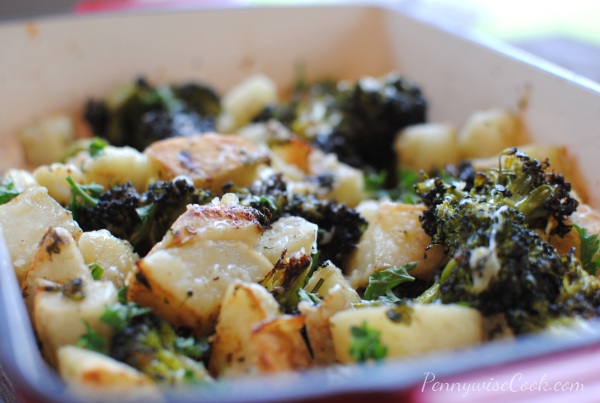
I ended up throwing together these Roasted Broccoli and Potatoes. They go really well together and play nicely with garlic.

This recipe is simple to make and is fairly cheap as well. Plus, it’s a great side dish for having company over.

Roasted Broccoli and Potatoes

Roasted Broccoli and Potatoes

This is a great way to use up russet potatoes and have your green veggies too.

Ingredients

  • 2 Large Russet Potatoes, Peeled and cut into small chunks
  • 2 Large Bunches of Broccoli, cut into bite size pieces
  • 2 Large Garlic Cloves, Chopped
  • 4-5 Tablespoons Fresh Parsley
  • 3-5 Tbsp Grated Parmesan Cheese
  • Generous Abundance of Extra Virgin Olive Oil
  • Garlic Salt

Method

  1. Preheat over to 450 degrees.
  2. Place all ingredients except for cheese and olive oil into casserole dish.
  3. Pour in generous amounts of olive oil and toss everything with it.
  4. Bake for 20 minutes. Remove and stir.
  5. Bake for 15 more minutes.
  6. Top with Parmesan cheese and serve!

Notes

Try cutting your potatoes small. They will cook and brown faster.

http://www.pennywisecook.com/roasted-broccoli-and-potatoes/


Like this post? SHARE it!

Related Posts Plugin for WordPress, Blogger...

Bang Bang Cauliflower

I’m the kinda girl who knows what she likes. I take forever to make a decision simply because I want to make the best possible choice. But when I see it, I know it right away.

I get “gut” feelings. You know, the ones that make lean a certain way when there are more than one options available. And most always my gut leads me in the right direction. Thank you guts! That’s something that I never thought I’d be thankful for. Guts. And I never thought I’d be typing how I’m thankful for my guts.

But I totally digress…

So I came across this recipe on Pinterest. I have a major addiction problem with that place. I won’t go into rambling about that, but just know that I am hugely infatuated with being on that site. 🙂

Back to the recipe…Bang Bang Cauliflower thanks to That’s So Michelle. Apparently it’s supposed to taste like Bonefish Grill’s Bang Bang Shrimp. I’ve never eaten that before, but it sounds like it would be tasty. And at the look of this cauliflower, I knew that I had to make some of this up. Not to mention that Aldi had their cauliflower on sale for just $.39 last week! Yes I know! My jaw was on the floor and my booty was a shakin’ walking out with my buggy full of cauliflower. This recipe is the first thing I thought of making when I got home.

Michelle said that every bite that she took made her say “Oh wow, this is sooo good”. I did the exact same thing. Oh yeah, it was that good.

We’re talking BREADED cauliflower tossed in sweet chili sauce and some other incredible ingredients. I just couldn’t get over how good breaded cauliflower was. I mean, whodathunkit? I’m calling Webster’s with that word!

You have to make this. You just have to. If you are a cauliflower fan, it is your duty. Your cauliflower duty.

Bang Bang Cauliflower

Bang Bang Cauliflower

Cauliflower has never been so tasty!

Ingredients

    For the Cauliflower
  • 1/2 cup Panko bread crumbs
  • 2 tablespoons cornstarch
  • 1/2 cup egg whites
  • 1 head cauliflower
  • Salt & pepper
  • 1 tablespoon garlic powder
  • Green onion
  • 1/4 cup coconut oil (I used olive oil)
  • For the Sauce
  • 1/4 cup lite mayo
  • 1/4 cup Franks Red Hot Sweet Chili Sauce or Siracha (add more or less depends on how hot you can handle it)
  • 1 tablespoon rice vinegar
  • 2 tablespoons sugar

Method

  1. Cut up your cauliflower florets. Mix salt, pepper and garlic powder into your Panko breadcrumbs in a shallow dish.
  2. Set separate bowls aside with egg whites and cornstarch. Dip your florets one by one into the cornstarch, and shake off excess. Then dip into egg whites, and then coat with Panko mixture.
  3. Warm up your coconut oil in a large frying pan and place all florets in hot oil. Turn with tongs making sure all sides are browned. Set on top of paper towels to remove excess oil. Top with more salt.
  4. In a small bowl mix all of your sauce ingredients. Coat your breaded and pan fried florets with sauce, top with sprinkles of green onion and serve right away.

Notes

Because I didn't have coconut oil, I just used extra virgin olive oil and it turned out just fine. So don't fret if you don't have that.

Also, the breading ingredients were JUST enough for my cauliflower so beware if you have a large head like I did.

The Sweet Chili Sauce was the perfect spiciness and sweetness.

We had this as a side, but I could totally eat a bowl just for dinner!

http://www.pennywisecook.com/bang-bang-cauliflower/

And I don’t want to beg you, but will you PLEASE leave a comment if you make this (or even if you don’t) and let me know what you think!


Like this post? SHARE it!

Related Posts Plugin for WordPress, Blogger...

Twice-Baked Cauliflower

Where are my Pinterest addicts at? Yeah, you know who you are. Secretly surfing the pins during work or staying up late getting lost in the abyss of crafty delights. I really can’t talk as I am one of them too. Hi my name is Amy and I am addicted to Pinterest. By the way, are you following me on Pinterest? We can feed each others addiction!

My husband’s parents came for a visit last weekend and we had a blast as we always do. They are big into watching carbs and his dad was trying to lose a few pounds so he is watching his intake pretty closely. I hadn’t prepared for it so I quickly set out on a Pinterest mission (insert Mission Impossible theme song here) to find something low-carb but yummy at the same time. I would have made the the Cauliflower Crust Pizza, but they had just made it that week. They tried it out for the first time and loved it! If you haven’t tried it yet, I highly recommend that you do.

I came across this genius recipe over at Kalyn’s Kitchen for Twice-Baked Cauliflower. I was sold without even looking at the ingredients. You can’t get any more low-carb than that.

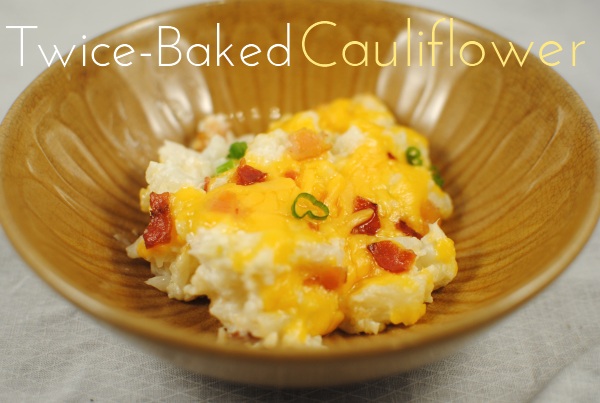
Can I just say that it was A-M-A-Z-I-N-G. All the ingredients that you love in a baked potato including the cheese, sour cream, and bacon all mixed into gooey cauliflower. Honestly, I think you could probably serve this to someone who was unsuspecting and they might never know it’s not potato. The key is to leave the cauliflower a little bit chunky so that it resembles potato chunks.

It was a big hit and everyone loved it. Most everyone had two helpings!

Twice-Baked Cauliflower

Twice-Baked Cauliflower

Who needs a baked potato when you can have twice-baked cauliflower?

Ingredients

  • 1 Large Head Cauliflower
  • 1/2 Block Low Fat Cream Cheese
  • 1/2 c. Low Fat Sour Cream
  • 1/4 c. Green Onions, Chopped
  • 1/4 c. Parmesan Cheese, Grated
  • 6 Slices of Bacon (Or Turkey Bacon), Cooked, crumbled, and Patted dry of fat
  • 1 c. Reduced Fat Cheddar Cheese

Method

  1. Preheat oven to 350 degrees.
  2. Remove stem and core from cauliflower. Cut into small pieces. In a large pot, cook cauliflower over medium heat until just tender. Don't get it overly soft.
  3. Drain and mash with potato masher, leaving some chunks. Mix in the sour cream and cream cheese, green onion, parmesan cheese, and 3/4 of the crumbled bacon.
  4. Spread into a medium casserole dish and sprinkle with cheddar cheese and remaining bacon.
  5. Bake for 30-35 minutes until bubbly.

Notes

I really have nothing to add except that this is easy, cheap and super yummy! I will be making this A LOT from now on. 🙂

Ok, I will add this. Aldi has had their huge heads of cauliflower on sale for $.89 the last 3 weeks. If you have an Aldi, I strongly suggest that you check there first!

http://www.pennywisecook.com/twice-baked-cauliflower/


Like this post? SHARE it!

Related Posts Plugin for WordPress, Blogger...

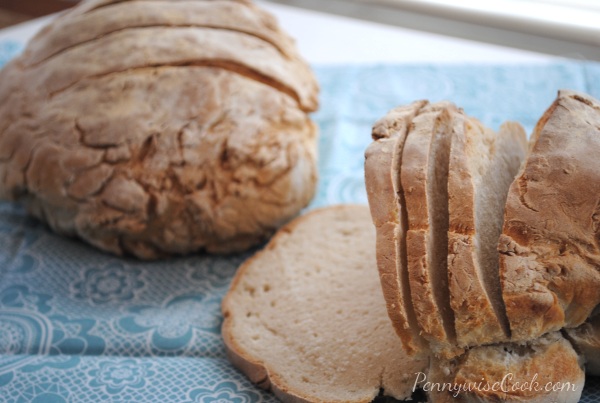
4 Ingredient Artisan Bread

My mom used to have a bread business that she ran out of our home. I remember the smell of fresh bread baking in the oven. It’s the most glorious smell. Not to mention that it tastes amazing too.

I’m not a bread baker, but every now and then I get the itch to make up a loaf. Instead of entertaining the idea of laboring to make it myself, I usually just buy a fresh made loaf at my local grocery store’s bakery counter. Not this time. I became a bread warrior on a random Tuesday afternoon and decided it was time.

This 4 Ingredient Artisan Bread recipe was super easy, especially with my KitchenAid mixer and dough hook. Love that thing! The “labor” wasn’t near as bad as I would have expected with homemade bread. The waiting for the rising was the worst part, but I have kiddos that keep me occupied so I survived the waiting.

This bread made the perfect complement to our warm meal that night. It made two loaves and I shared the other with our neighbor.

Recipe thanks to JoCooks!

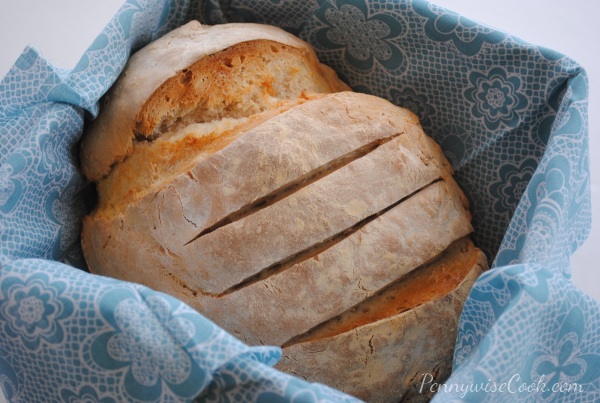
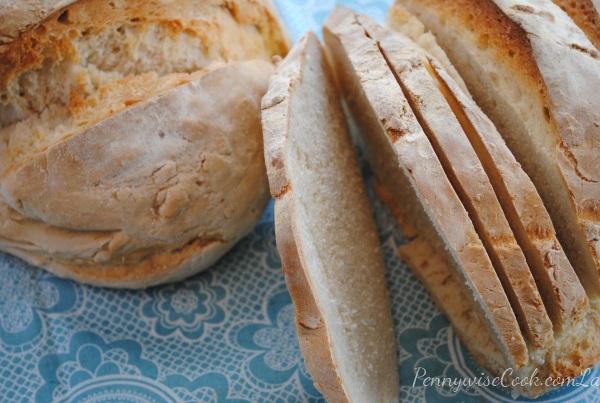
4 Ingredient Artisan Bread

4 Ingredient Artisan Bread

This easy recipe is great for making a nice crusty bread for soup!

Ingredients

  • 3 cups of lukewarm water
  • 1 1/2 tbsp active dry yeast
  • 1 1/2 tbsp salt
  • 6 1/2 cups all purpose flour

Method

  1. In a medium bowl add the warm water, salt and yeast and stir together.
  2. In the bowl of your mixer add all the flour, then pour the yeast mixture over the flour and mix using the dough hook of your mixer, until it’s all well incorporated.
  3. Place the dough in a large plastic container, it needs room to rise, and put the lid on it, but do not close completely, there needs to be one corner left open to let the gases escape. You could also use a large bowl, covered well with plastic wrap and poke a couple small holes in the top using toothpicks.
  4. Let the dough rise for 2 hours.
  5. The dough will be very sticky and elastic. It is recommended to bake this on a stone, however a regular baking sheet will work just fine. Cover the baking sheet, or stone with parchment paper.
  6. Add some flour to your hands, and divide the dough in two pieces. Add more flour to your hands as necessary. Shape the dough into the desired shape for your bread and place it seam down on the baking sheet. Sprinkle some more flour on top of the loaves. Let the loaves rest for another 30 minutes so that they can rise a bit.
  7. Preheat oven to 450 F degrees. Before placing the bread in the oven, add a pan with a cup of water and place it in the bottom rack. Slash the top of your bread, to allow gases to escape.
  8. Bake for 30 to 35 minutes. The water will allow for the bread to form a nice crusty top.
  9. Cool before serving.
http://www.pennywisecook.com/4-ingredient-artisan-bread/

Save on the ingredients in this recipe:

  • $0.40/1 Fleischmann’s Yeast, exp. 4/8/12 (SS 12/04/11)
  • $0.40/1 Fleischmann’s Yeast, exp. 4/15/12 (SS 11/06/11)
  • $1/1 Ultragrain All-Purpose Flour with Whole Grain, exp. 4/30/12 (SS 11/06/11 R)

Like this post? SHARE it!

Related Posts Plugin for WordPress, Blogger...