Archives for July 2012

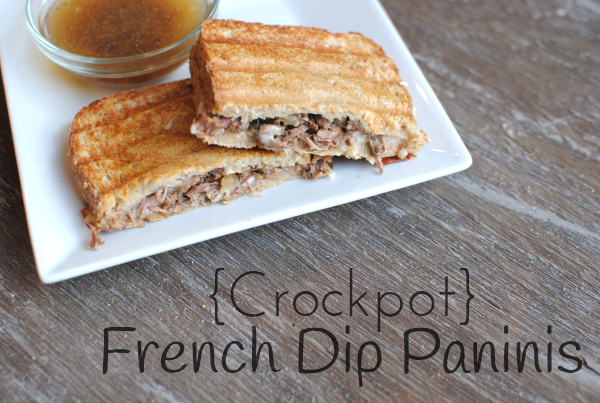
Crockpot French Dip Paninis

I met a sweet girl the other day who was pretty far along in her pregnancy. She already had a little boy and was expecting a brand new little girl soon. We got into talking about cooking (as I cannot help but do) and she described her desire to cook but the lack of time that she had to devote to it. I told her about my love for the crockpot and she made a statement that had my jaw on the floor. She said that she had only ever made one meal in the crockpot.

I know, I know. You can pick your jaw up off the floor now.

It is a little hard to believe, but I think that the norm may be that people think that crockpot means work. When in reality, it’s the opposite. When I’m planning my meals for the week, I plan crockpot meals on those nights that I know will be hectic and too busy for cooking up a meal. If I was smart, I’d make a crockpot meal every night because inevitably most nights end up crazy around here. But the nights that I do make them, it makes life oh so much easier.

Take these super yummy French Dip Paninis for instance. A french dip is definitely a slow cooking process. What makes them so dadgum yummy is that they are tender and juicy so the crockpot is the absolutely perfect way for making the perfect french dip.

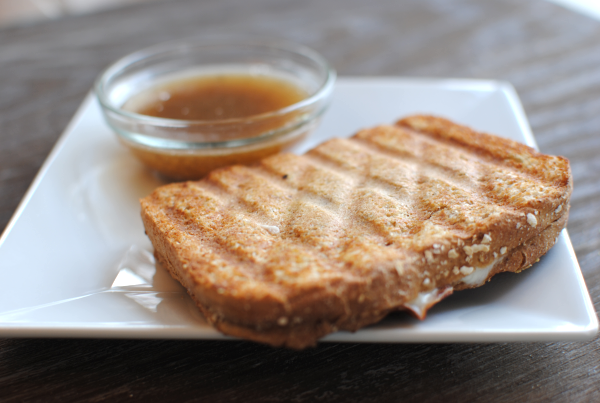
Looking at this panini, you’d never even know that it was packed full of slow cooked, juicy, tender beef and covered in melted provolone cheese…

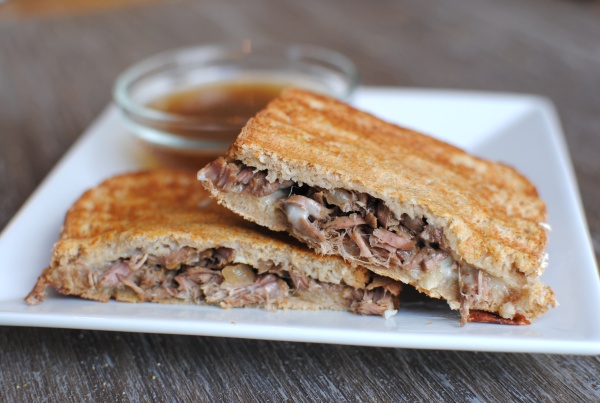
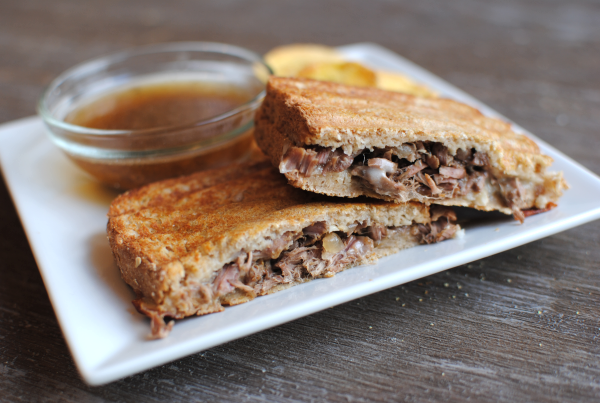
Ah yes, here’s a better view. You can even see a few onions peeking out. I originally planned these to be crockpot subs, but alas the clearance onion buns that I got at Walmart that day were molded by the time I was putting sandwiches together! So I settled on our wheat bread and sprayed it a few times with I Can’t Believe It’s Not Butter. Then I grilled it a few moments on the George Foreman grill.

No need for an expensive panini press, use your George!

And when it comes to meat to make these french dips, use whatever you can find cheap at the store. I used sirloin tip steak this time, but I may use chuck roast next time. I just grab whatever I can find a good deal on. After the slow cooking, it will all pretty much taste the same.

These are a huge hit and a go-to meal for those nights when you don’t want to do any real work in the kitchen.

Crockpot French Dip Paninis
Recipe Type: Main Dish, Crockpot, Lunch
Author: Pennywise Cook
A french dip is as easy as pie when you make them in your crockpot!
Ingredients
  • 1.25- 1.5 lbs Cut of Beef (Your Choice)- Could use Round Steak, Chuck Roast, Sirloin Tip, etc.
  • 2 c. Low-Sodim Beef Broth
  • 1 Medium Onion, Sliced to Thick Rounds
  • 2 Cloves Garlic, Roughly Chopped
  • 2 Tbsp Worcestershire Sauce
  • Salt and Pepper
  • 1/2 Tsp Italian Seasoning
  • 8 Slices Wheat Bread
  • 4 Slices Provolone Cheese
  • Butter Spray
Instructions
  1. Placed onions into the bottom of crockpot. Mix together beef broth, garlic, Worcestershire sauce, salt, pepper, and Italian seasoning.
  2. Place beef onto onions and pour broth mixture over beef.
  3. Let cook on low for 5-6 hours. 30 minutes or so before eating, take out beef and shred and continue cooking.
  4. To make panini, place a scoopful of beef (drained) onto piece of bread. Top with a slice of cheese then second piece of bread. Spray a few times with butter spray on each piece then place on panini press or George grill for a minute or two.
Notes

To be completely honest, I can’t remember if I used 1 or 2 cups of beef broth. I’m pretty sure that I came back and added that second cup because I was concerned that the beef needed more liquid to cook in. You might add 1 cup and see if that is enough and if not add the 2nd cup. Forgive me, forgot to update my recipe as I was going along.

You could also use a can of beef consume in place of the beef broth for a thicker consistency. I plan to try that out very soon. If you do before I do, let me know what you think!


Like this post? SHARE it!

Related Posts Plugin for WordPress, Blogger...

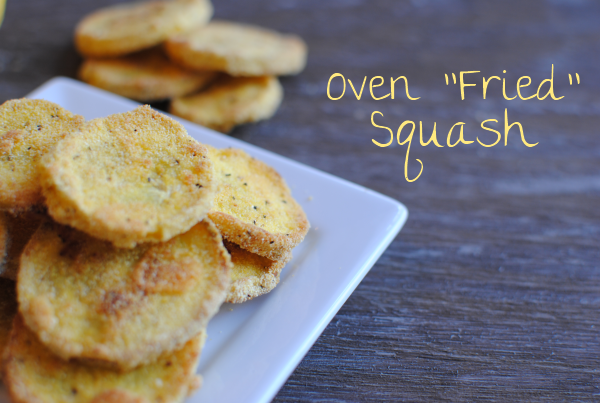
Oven “Fried” Squash And Another Reason I Don’t Like Bees

I absolutely cannot grow a squash to save my life. I started a little garden for herbs and a few veggies earlier this spring and for some reason, mother nature refuses to help me produce even one sign of a squash in my garden. I checked out Google and the only explanation that I can come up with is that we have no bees. Well, at least no bees that want to help me grow some squash. The bees have to transfer pollen to the blossoms while they are open in the mornings in order for the blossoms to produce a squash. Apparently the bees around here don’t like me and don’t want me to have yummy squash this year.

I see them flying around all happy and landing on the weeds, probably pollinating the weeds in place of my squash. Forgive me, I’m a little bee bitter right now…

On a less bee-hater note, Aldi does have great prices on squash and my in-laws have a bountiful garden that we get veggies from. So I don’t have to go without. I love my squash fried, but you know me and my frying. Unlike Nike, I just don’t do it. I usually try to find a way to make things taste fried without the actual frying process. This recipe gives you exactly that!

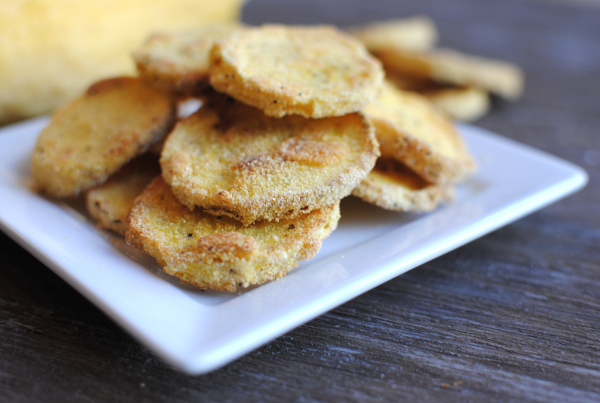
See how crunchy they are? If you bake them too long, they are almost like chips because they are so crunchy. But you won’t have that problem because you’ll bake them just right.

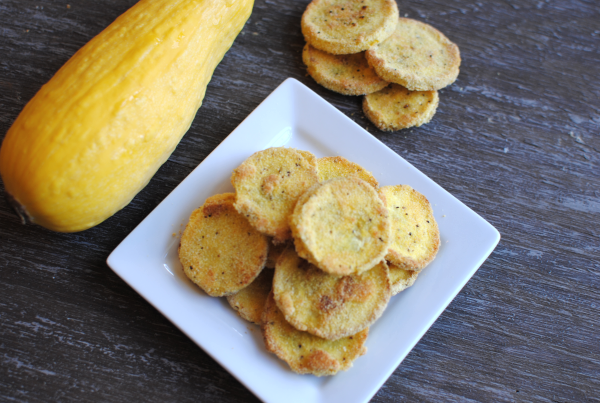
They are oh so yummy. These definitely satisfy that hunger for “fried” squash. I got this recipe from that cookbook that I told you about the other day and come to find out this particular recipe came from a cookbook from 1983! Southern Living’s Cook Light.

Only 64 calories per serving and worth every one.

Oven “Fried” Squash
Recipe Type: Side Dish, Vegetable
Author: MTEMC Company Gifts of Christmas Cookbook,
Crunchy, tasty “fried” squash from the oven.
Ingredients
  • 1/2 c. Cornmeal
  • 1/2 Tsp Salt
  • 1/4 Tsp Pepper
  • 2 Egg Whites
  • 1 Tbsp Water
  • 3 Medium-sized Yellow Squash, cut into 1/4 in. slices
  • Cooking Spray
Instructions
  1. Preheat oven to 450 degrees.
  2. Combine cornmeal, salt, and pepper. Set Aside.
  3. Combine egg whites and water; beat well.
  4. Dip squash into egg and then dredge into cornmeal mixture.
  5. Lightly coat a baking pan with cooking spray. Place squash in a single layer.
  6. Bake for 30- 40 minutes turning once.
Notes

Ok here are my notes on this one:

I would use LESS pepper than this calls for. It was a little spicy with 1/2 teaspoon if you ask me. You might even use a different spice like paprika in it’s place.

I considered my squash to be medium-sized, but I could fit only 2 of them on my pan. You may not really need 3.

I ended up needing more like 1 cup of cornmeal so have more on-hand in case. There was plenty of egg whites, however.

30 minutes was too long. I would say more like 10 minutes, then flip and then another 10 minutes. Or perhaps reduce the temperature.

Enjoy!


Like this post? SHARE it!

Related Posts Plugin for WordPress, Blogger...

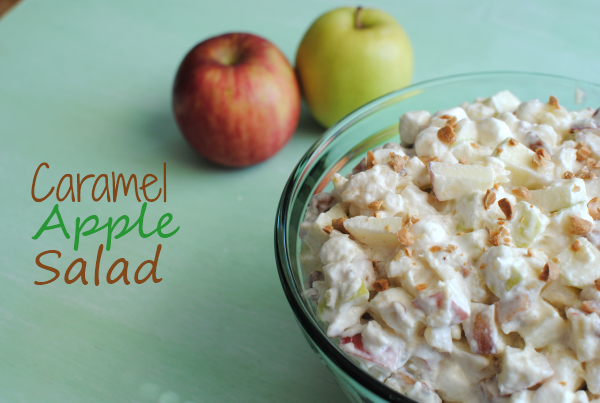
Caramel Apple Salad

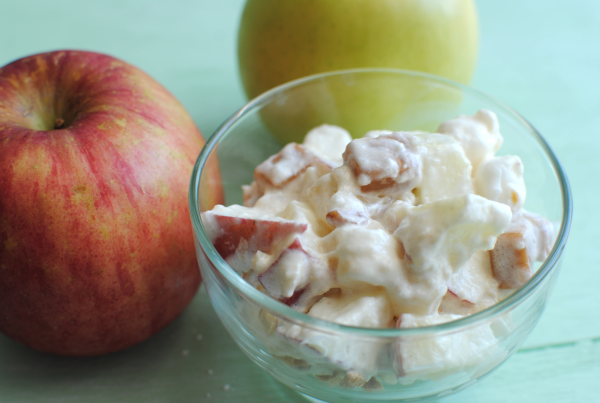
Did you ever eat caramel apples as a kid? Heck when I find them, I like to eat them now! They are kinda healthy aren’t they? Big juicy apples covered in gooey caramel and crunchy nuts. Mainly apples, so I think that’s worthy of calling “healthy”.

And of course, the fact that they are on sticks makes them that much more appealing. It’s amazing what putting something on a stick will do to it’s allure. I watched an entire show dedicated to bacon on a stick the other day. There’s a huge market for that you know.

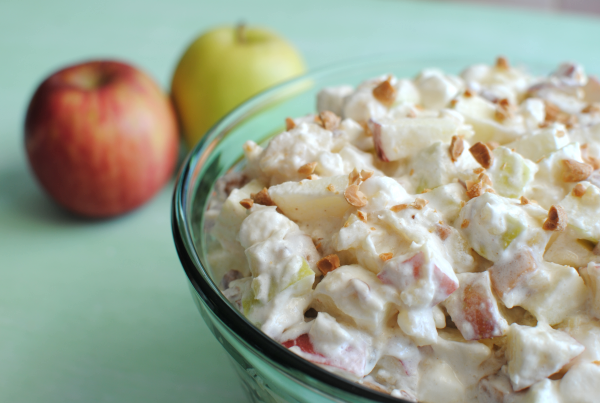
Whether you like your caramel apples on a stick or not, this salad is very similar to that tasty treat. It’s got it all, plus a little extra like marshmallows and crushed pineapple. I will have to admit that when I was making this, I wasn’t sure about adding those things into it. I thought it might take away from the theme. It turned out that those things just enhanced it a bit.

This salad would be perfect for a summer get together. Just don’t set it next to the potato salad. There might be a little confusion…

I made this one morning and by the following day, it was completely gone. Between my little one who loves apples and us big kids who love the caramel and marshmallows, it was the perfect treat on a hot day.

Caramel Apple Salad
Recipe Type: Side dish, Dessert
Author: MTEMC Gifts of Christmas Company Cookbook
Ingredients
  • 1 c. Sugar
  • 2 Eggs
  • 2 Tbsp Flour
  • 1/2 c. Chopped Peanuts
  • 1 (8 oz) Container Cool Whip
  • 1 Can (20 oz) Crushed Pineapple, Drained
  • 2 and 1/2 c. Mini Marshmallows
  • 2 Red Apples, Unpeeled and diced
  • 2 Green Apples, Unpeeled and diced
  • 1 Pkg Caramels, Cut into fourths
Instructions
  1. Mix sugar, eggs, flour, and peanuts into a small saucepan over medium heat. Cook until thick. Let cool and then fold into cool whip. Set aside.
  2. Combine crushed pineapple, marshmallows, apples, and caramels and stir in cool whip mixture.
  3. Serve chilled and store covered in refrigerator.
Notes

You will most likely want to make this close to the time that you intend on serving it. The apples can begin to brown after a couple days.


Like this post? SHARE it!

Related Posts Plugin for WordPress, Blogger...

Bacon Cream Cheese Pinwheels

How was your weekend? Our goal since our yard sale a few weeks ago has been to clean out the garage. Has it happened yet? Nope. I will get my van back in the garage before it’s all said and done! I have to!

Do you park in your garage or am I the only one with junk taking over?

I came across this recipe in a company cookbook that I’ve had for years. If I could link to this book so you could get a copy, I would. It’s a great cookbook. I just love ones like that from folks that you know have amazing recipes.

This week I gave Addie a little break from eating peanut butter and jelly sandwiches by making her up some of these Bacon Cream Cheese Pinwheels! She was less than enthusiastic about eating them when she saw me preparing them.

“Moooooooom, I don’t want onions in mine.” She said. Somehow I knew that was coming the moment that I began to chop. Even still, I had confidence that she was going to like these with onions and all.

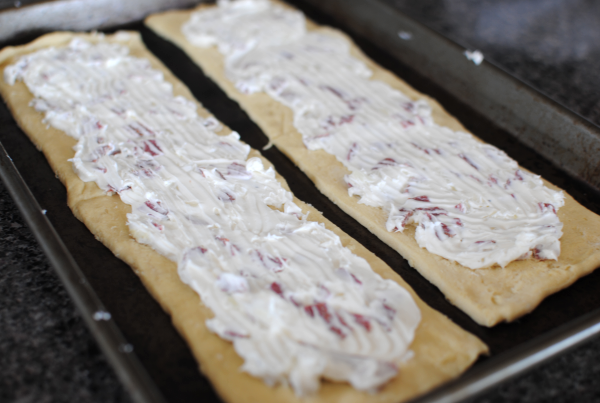
These snacks are so easy to make and have awesome flavor. Bacon, onions, and cream cheese all melt together inside a crescent roll. Hello! You simply mix up a block of cream cheese along with some crumbled bacon (or even bacon bits) and chopped onions and slather it onto some pinched together crescent rolls.

You can almost always find a coupon for Pillsbury Crescent Rolls here. Combine it with a sale and you have a deal!

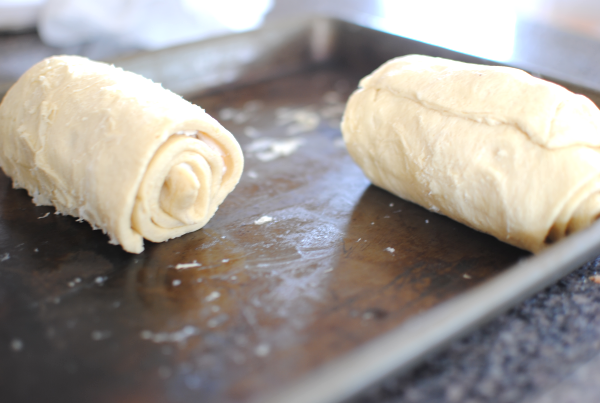
After the slathering process, roooooooooooooll the gooeyness up into 2 little bundles of goodness. Then slice them into separate pinwheels.

Note: I tried baking these before slicing them and trust me, you will want to slice them BEFORE you bake them. They cook much faster and get a better crust.

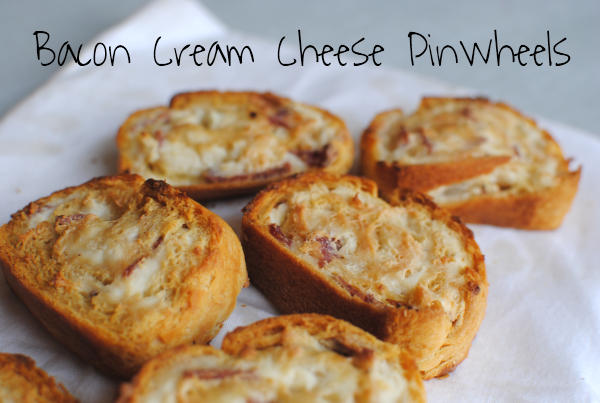
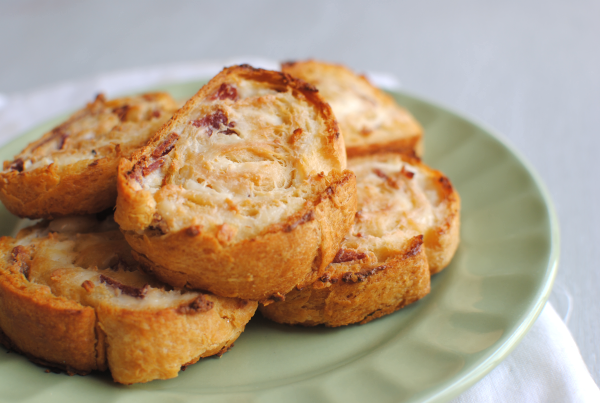
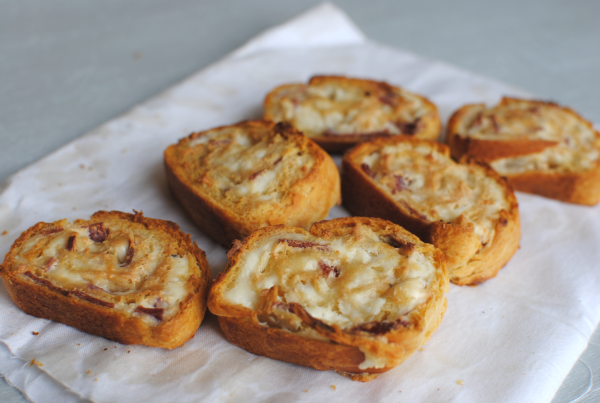
In a matter of minutes you have crusty, cream cheesey pinwheels. These are perfect for a snack, lunch, and even appetizers for a party!

And for the record, Addie LOVED them. Daddy did too. The onions add flavor without being very onion-y.

Bacon Cream Cheese Pinwheels
Recipe Type: Appetizer, Snack
Author: MTEMC Gifts of Christmas Cookbook- Kathie Davies
Spice up your everyday crescent rolls by rolling up bacon and cream cheese inside!
Ingredients
  • 1 Pkge (8 oz) Cream Cheese, Softened
  • 1/4 c. Crumbled Bacon
  • 2 Tbsp Chopped Onions
  • 1/2 Tsp. Black Pepper
  • 1 Can Crescent Rolls
Instructions
  1. Preheat oven to 350 degrees.
  2. Combine cream cheese, bacon, onions and pepper together. Set aside.
  3. Separate crescent rolls into 2 rectangles by pinching the seams together.
  4. Spread mixture onto each rectangle and roll up from the long end.
  5. Bake for 15 minutes or until golden brown.

Like this post? SHARE it!

Related Posts Plugin for WordPress, Blogger...

How to Get Rid of Gnats and Fruit Flies

I can probably speak for all of us when I say that bugs are CRAZY this year! They are everywhere and taking over the world! Ok so maybe not taking over the world, but they are really bad this year. We had such a mild winter (at least around here) that the bugs never really got a chance to get hibernated so they came back out with a bang.

I’m a door watcher these days. If you come to my house, be prepared to always shut the door behind you. If it doesn’t get closed I will not be a happy camper because Bobby bug and his momma probably just brought their cousins with them to secure a new place in our house. My husband is worse than me. He goes on bug killing rampages with his fly swatter and won’t stop til he gets them all. Sometimes, depending on his determination that day, it will only take a few minutes and other times it takes an hour.

We got those window clings that actually do a great job of getting a lot of fruit flies. But for some reason this year they are fixated on our ceiling fan cords and the middle of the room. I found this idea on Pinterest last weekend at Passionate Homemaking and thought I’d try it out. It looked as though it would work, but seemed too easy. I thought I’d give it a try anyways.

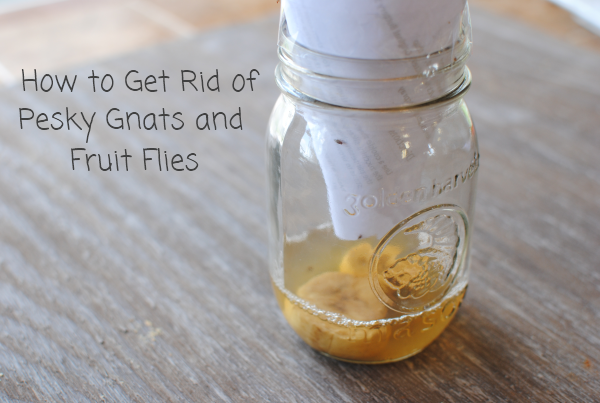
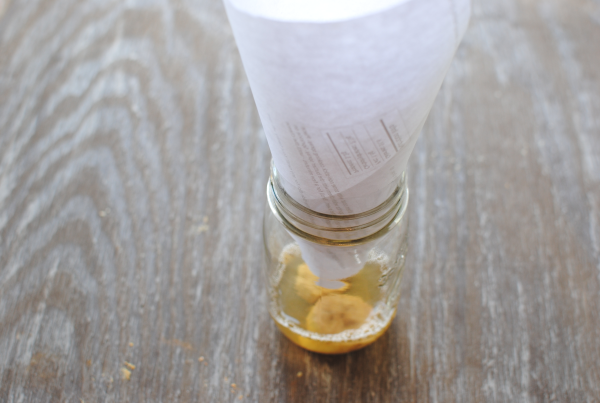
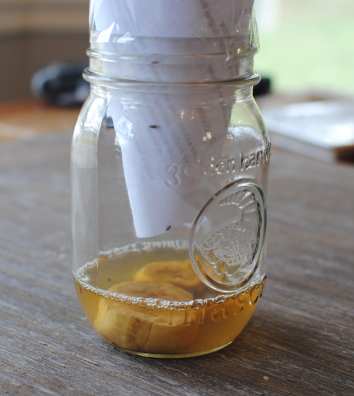
This is the miracle contraption.

Don’t underestimate the power of the miracle this jar will perform.

1 Jar (or something like it that you have on hand)
1 Piece of Paper
Scotch Tape
Banana Slices (or something else nasty that bugs like)
1/2 inch – 1 inch Apple Cider Vinegar
2 Drops Dishwashing Liquid

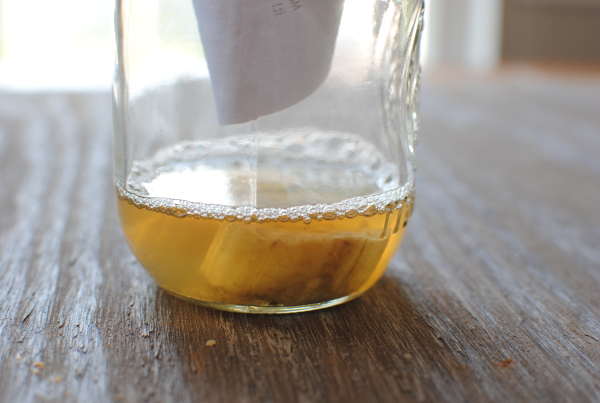
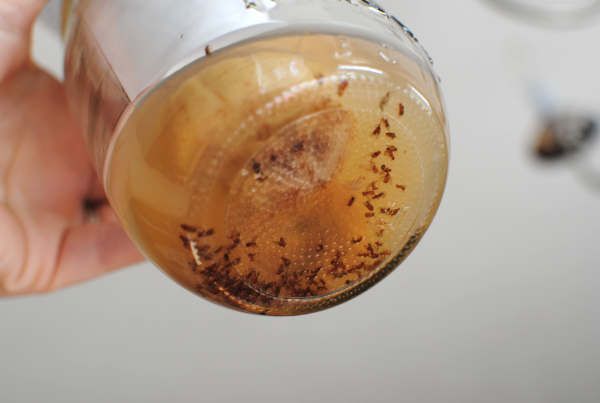
The idea is that the flies will go into the paper funnel attracted to the vinegar and bananas and then not be able to get back out and eventually fall to their deaths in the slimy detergent-y liquid below. It only took a few moments for these little guys to fall into my evil trap. There are more on the other side. They kept moving every time I’d move the jar around!

It took a while for them to give up. But then by the next morning…

Ew! Yeah, not the most appealing view but satisfying all the same. Mission accomplished.

Let me know if you try this and have the same success!


Like this post? SHARE it!

Related Posts Plugin for WordPress, Blogger...

Happy Birthday to You! Freebies for Signing Up

I don’t need much of a reminder that my birthday is next week because all of my email clubs have definitely got me covered in that department! If you’ve signed up for your favorite retailer’s and restaurant’s eclubs, most will start sending you freebies about a week before your birthday.

I woke up to a slew of them on Wednesday and seeing as how you are my frugal friends, I thought I’d share them with you!

A few tips for signing up and redeeming birthday offers:

  • If you want to avoid getting spam mail, use a junk email address to sign up with. However, when it’s close to your birthday be sure to check it for your freebie!
  • All of these sites are currently offering birthday offers.
  • You must provide your email address to receive the offers.
  • The offers have specific time periods and expiration dates. Some are ONLY available for use on your birthday and others are good for the entire week.
  • You will most likely need an id with you to prove who you are and your birth date.
  • These are only a few, there are many more not mentioned here. It’s always a good idea to sign up for any eclubs that you may like offers from.

Arby’s– FREE 12 oz Shake with any purchase. Sign up here.

Chili’s– FREE Brownie Sundae with any entree purchase. Sign up here.

Denny’s– FREE Grand Slam. Sign up here.

Driscoll’s Berries– Sweepstakes entry and coupon for $.50 off Driscoll’s Berry purchase. Sign up here.

Great American Cookies– FREE Cookie Cake Slice with regular soda purchase. Sign up here.

IHOP– FREE Rooty Tooty Fresh and Fruity. Sign up here.

Krispy Kreme– FREE doughnut AND small coffee or fountain drink. Sign up here.

On the Border– FREE Brownie Sundae or Queso. Sign up here.

Perkins– FREE Magnificent Seven. Sign up here.

Pizza Hut– FREE Breadsticks or Cinnamon Sticks with your online order. Sign up here.

Ruby Tuesday– FREE handcrafted burger with sign up of So Connected. Sign up here.

Rue 21– Coupon for $10 off $20 purchase. Sign up here.

TCBY– Freebie on your birthday. Sign up here.

Looks like I will be very busy and full on my birthday this year!

Question of the day: What month is your birthday in?


Like this post? SHARE it!

Related Posts Plugin for WordPress, Blogger...

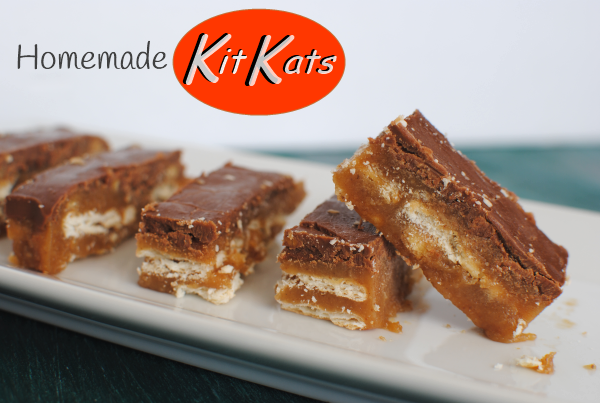
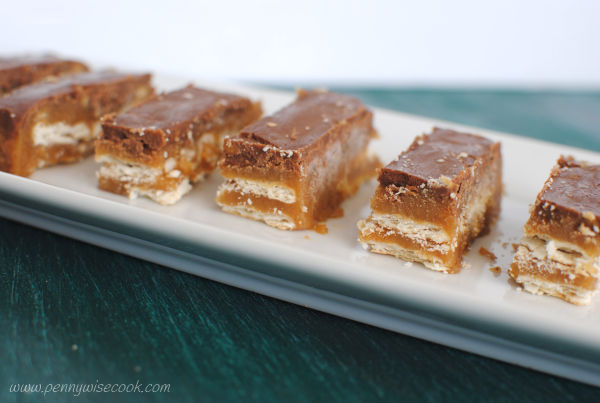
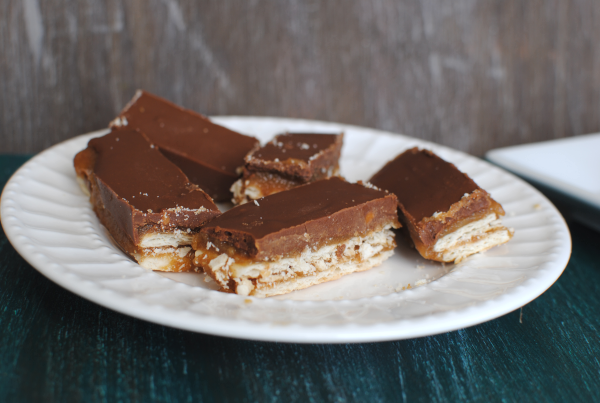
Homemade Kit Kat Bars

Warning: the following recipe could be detrimental to your diet.

Visiting with my husband’s parents every now and then, there’s a certain sweet treat that often pops up. His aunt Millie makes these treats and I can remember sneaking into the refrigerator multiple times to grab a bite of these ooey gooey and addicting morsels.

Here’s a FAQ to prepare you for what is to come if you make these:

Q- Are these good for a diet?
A- Absolutely not.

Q- Can you eat just one of them at a time?
A- Absolutely not.

Q- Will these last long in my house?
A- Absolutely not.

Q- What’s the best occasion to make them?
A- When you will be taking them far, far away from your house.

I hope that this information will be of some help when it comes time to make these Homemade Kit Kat bars. You are going to need to be armed with willpower and a big glass of milk when you do.

I’m not really sure why I was thinking of these the other day, but I asked Millie for the recipe so that I could make some up. I decided to make them for the 4th of July get together in hopes of getting other people to eat them instead of me. No luck, I couldn’t keep my hands off of them. They are SO good.

And I had no idea how yummy the filling was when it was warm until I had it bubbling on my stove. I kept taking the crackers and dipping them directly into the filling. Hubby wasn’t too excited when he went to do the same and I had basically licked the pot clean.

What can I say? It’s the least I deserve when slaving over a warm stove making Kit Kats, right?

You have free reign to create these bars as little or as BIG as you please. Be cautious and enjoy!

Homemade Kit Kat Bars
Recipe Type: Dessert, Snack
Author: Hubby’s Aunt Millie
Create yummy and addicting Kit Kat bars at home!
Ingredients
  • Club Crackers (Less than a box, About 75 Crackers)
  • 1 C. Butter
  • 2 C. Graham Cracker Crumbs
  • 1 C. Firmly Packed Brown Sugar
  • 1/2 C. Whole Milk
  • 1/3 C. Sugar
  • 2/3 C. Creamy Peanut Butter
  • 1/2 C. Semisweet Chocolate Chips
  • 1/2 C. Butterscotch Chips
Instructions
  1. Line an ungreased 9×13 pan with wax paper. Lay a flat layer of Club Crackers along the bottom cutting them to fit if necessary. Set aside.
  2. In a large saucepan, melt butter. Add in the cracker crumbs, brown sugar, milk & sugar. Bring to boil and cook for 5 minutes stirring constantly. Remove from heat.
  3. Pour half butter mixture evenly over crackers. Place another single layer of crackers flat over butter mixture, cutting to fit if necessary. Pour the remaining butter mixture evenly over crackers.
  4. In a small saucepan, combine peanut butter, chocolate chips and butterscotch chips. Melt over medium-low heat, stirring constantly. Spread evenly over top of crackers.
  5. Cover and chill for at least an hour. Cut into bars.
Notes

To make these a bit healthier, I used reduced-fat club crackers, light butter, and part splenda in place of the sugar.

To speed up the chill time, you can also place them in the freezer instead. I prefer to keep them there so they stay nice and hard.


Like this post? SHARE it!

Related Posts Plugin for WordPress, Blogger...

Peanut Butter and Jelly Rolls

As I sit here and listen to the sirens heading all over the city, I can’t help but be thankful that the 4th is over. No rain for what seems like forever and fires popping up everywhere. Fireworks are the last thing that we need right now for sure. Our city did a big display which was really great this year. I’m fortunate to have a front row seat from our driveway. It was a great show! I hope that you’ve had a fantastic 4th.

There are times when I balance a diaper bag, a 13 month old, a 5 year old, and a buggy all at the same time. I can cook dinner and make a sippie cup while tying a shoe, simultaneously. You may know exactly what I’m talking about if you’re a supermom like I am. Go ahead, accept that title and wear it proud.

Another way to confirm your supermom status is to make some of these Peanut Butter and Jelly Rolls. I know the name is kinda lame. I couldn’t think of much more creative to be honest. It’s a crescent roll filled with peanut butter and jelly. How creative can you really get with that?

While these may seem extremely simple, which they are, they are also extremely incredible to kids. It’s like 2 of the best things on earth coming together to make the perfect snack. Warm and toasty crescent rolls filled with ooey gooey peanut butter and jelly. I like to call this one of those “duh” things. Like duh, why didn’t I think of that!

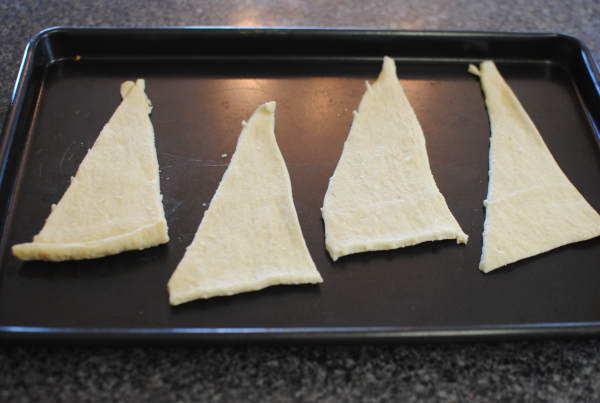
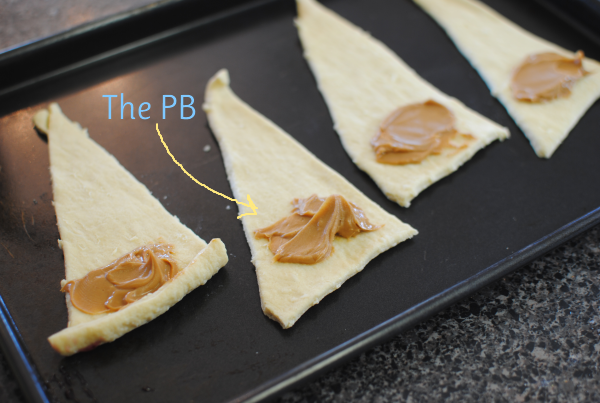
Start off with your cute little crescent roll triangles like so.

Drop a teaspoon full of peanut butter onto each triangle.

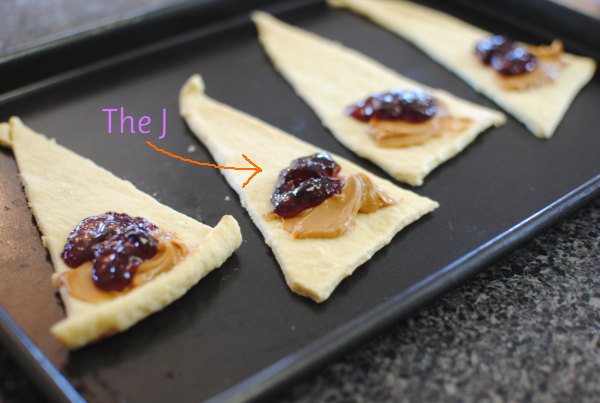
Then drop a teaspoonful of jelly (your favorite kind!) onto the peanut butter.

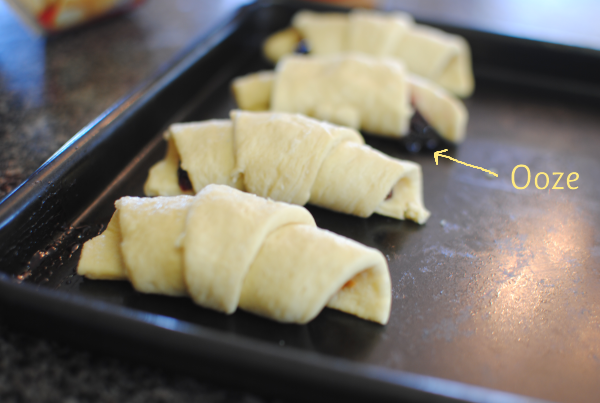
Then you just roooooooooll the suckers up going from the large end to the small end. Place the point side down. You might end up with some ooze, but that’s alright. A little mess never hurt anyone.

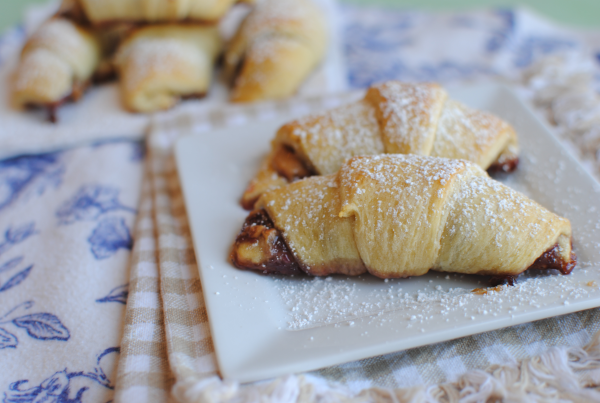
Dust your rolls with a little powdered sugar and serve! These also freeze well too.

I love when they have a sale on Pillsbury Crescent Rolls so I can stock up for snacks like these. You can usually find some good coupons for Pillsbury Crescent Rolls here.

Peanut Butter and Jelly Rolls
Recipe Type: Snack
Author: Pennywise Cook
A simple yet tasty treat with peanut butter and jelly. Your child will love it!
Ingredients
  • 1 Package Crescent Rolls (8 ct)
  • 8 Tsp Peanut Butter
  • 8 Tsp Jelly (Your favorite Flavor)
  • Powdered Sugar for Dusting
Instructions
  1. Preheat oven to degree listed on crescent roll package.
  2. Roll out dough into 8 triangles. Place teaspoon each of peanut butter and jelly on the big part of each triangle.
  3. Roll starting with the bigger end towards the smaller.
  4. Bake 5-8 minutes or until the tops begin to brown. Let cool.
  5. Dust with powdered sugar if preferred.

Like this post? SHARE it!

Related Posts Plugin for WordPress, Blogger...

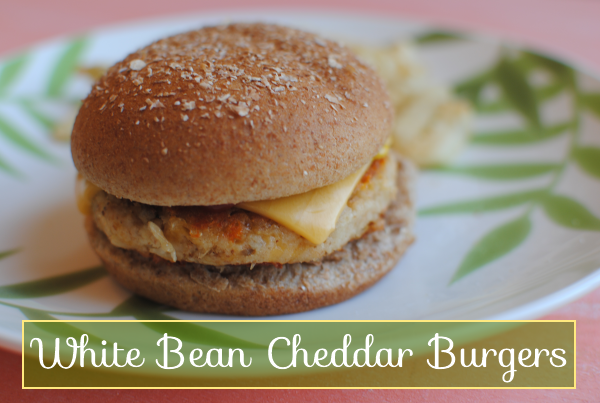
White Bean Cheddar Burgers

First of all, Happy 4th of July! I love summer and the 4th of July always tells me it’s definitely summer! Well that and the ridiculous sweat provoking heat. Either way, today is a great day to celebrate our independence and enjoy our freedom. If you got the day off, enjoy your time! And if you didn’t well shame on your boss. 😉

What better thing to cook today than a burger, right?

I tell you, this cooking stuff has its highs and lows. I get a lot of ideas all the time and it’s like the gears in my brain start turning trying to think of ways to make something new or different. Just the other night I made something that was not very good. The idea of it was brilliant, but the execution was not so much. Hubby said it was good and even took the leftovers for lunch the next day, even when I insisted on chunking them. But He was just being sweet. I’m sure of it. 🙂

While undoubtedly, I have some cooking failures lows, I also have some things that end up really great! Today’s recipe is one of them.

You may never think about a black bean burger again. This my friends is my absolute favorite new burger. I saw mention of the words “white” bean burger the other day in passing. Without even looking at the recipe, I knew that I could create one similar to my black bean burger but creamier, as white beans tend to be. Normally I kinda jot down what I might put in the recipe, but this time I decided to wait until it was time to start making them to jot down the ingredients. You know, a little bit of this and a little bit of that.

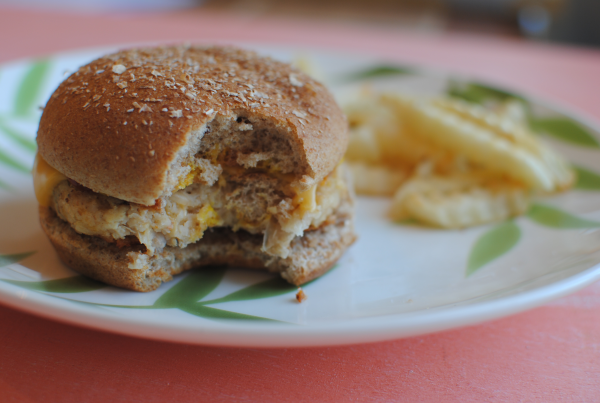
What my brain (and food processor) produced was yummy y’all! I’m so excited about these burgers! Not only are they made with the creamiest beans, they are loaded with cheese and even have an added bonus- mushrooms! If you’re not a mushroom person, please don’t write these burgers off just yet. I’m not a huge mushroom fan either. You cannot even tell that they are there. It’s a great way to get the kids to eat them without suspecting a thing.

White Bean Cheddar Burgers
Recipe Type: Main Dish, Burger
Author: Pennywise Cook
Take a break from the ordinary and enjoy a meaty white bean and cheddar burger!
Ingredients
  • 1 (19 oz) Can Cannelini Beans, Rinsed and Drained
  • 1/4 c. Mushrooms, chopped
  • 1/4 c. Bread Crumbs
  • 1 Egg White
  • 2 Tbsp Olive Oil
  • 1/2 c. Shredded Cheddar Cheese
  • 1 Tsp Minced Garlic
  • 1/4 Tsp Salt
  • Dash of Pepper
  • Dash of Onion Powder
Instructions
  1. Place all ingredients in a food processor and pulse until combined well.
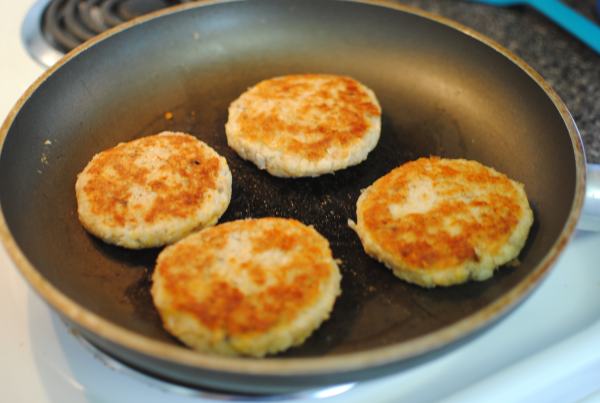
  2. Heat olive oil in a skillet over medium high heat. Form “meat” into 4 patties and place into skillet.
  3. Cook for about 4-7 minutes on each side until browned.
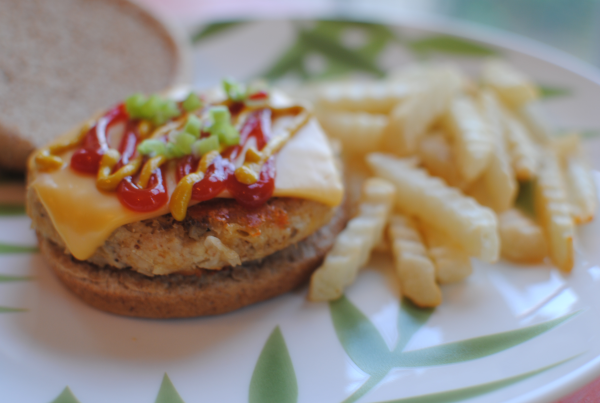
  4. Serve with your favorite toppings!
Notes

I put green onions on top of my burger and it went really well. If you like green onions, it would be a fantastic addition to add 2 tbsp chopped green onion to your burger “meat”!

I used cannelini beans, but you could also use any other white bean such as great northern beans or even pinto beans.

I used jarred mushroom pieces or you could use canned.

If you are concerned about what a “dash” is, then just use about 1/8 tsp.


Like this post? SHARE it!

Related Posts Plugin for WordPress, Blogger...

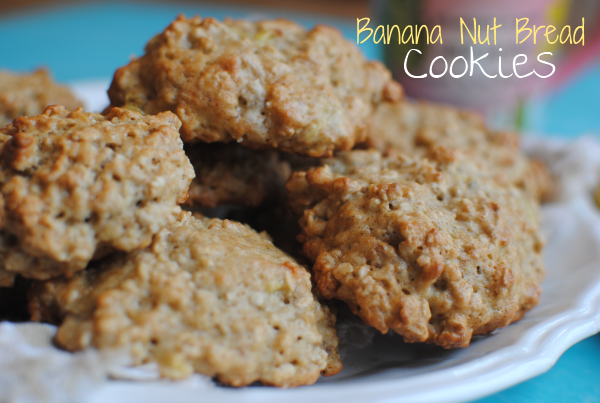
Banana Nut Bread Cookies

So I completely understand if you look at the title of this recipe and think, what in the world? How can a recipe be both bread and cookies at the same time? Well it’s simple really. You take the best flavors and tastes from a popular bread and bake it into a cookie leaving the cookie every so slightly bread-ish, but in bite-size form. It’s a tremendous feat. Creating the impossible.

You can be a kitchen super-hero just by making these cookies!

No really, your kids will love them. And hubby too. Mine won’t get out of the kitchen eating them. But I’m not going to scold him for it because I can’t get away from them either. I think I’ve already eaten about 6 myself.

I got this recipe from this eCookbook at Amazon called Keep the Cookie Jar Full, but I made some changes to it to accommodate what I had on hand. These turned out fantastic!

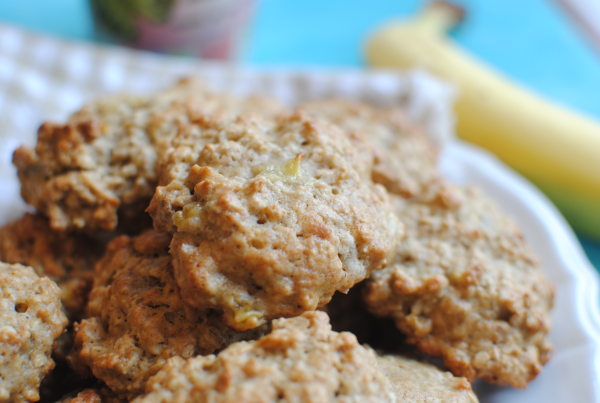
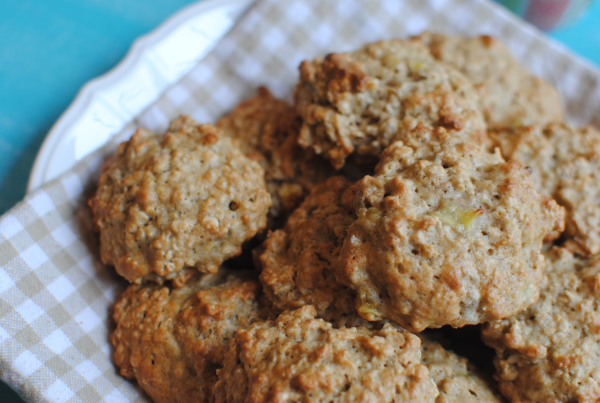
Just the right mixture of bananas, oats, and walnuts make these ultra soft and mimic the flavors of banana nut bread perfectly. Great idea for bringing along to a get together!

I can’t believe that tomorrow is July 4th already. I feel like I’m still waiting on Easter or something. Sheesh I’m behind! I’m just praying that all of these fireworks don’t set off fires all over town. Scary stuff with how dry it’s been.

I digress….

Try these cookies! You won’t be sorry.

Banana Nut Bread Cookies
Recipe Type: Dessert, Cookies
Author: Homemade Cookie Recipes eCookbook on Amazon
As tasty as a fresh loaf of banana nut bread, these cookies are the perfect alternative.
Ingredients
  • 1 and 1/2 c. All-Purpose Flour
  • 1/2 Tsp Baking Soda
  • 1 c. Sugar
  • 1/8 Tsp Nutmeg
  • 1/2 Tsp Cinnamon
  • 3/4 c. Butter
  • 1 Egg, Beaten
  • 1 Tsp Salt
  • 2 Very Ripe Bananas, Mashed
  • 1 and 3/4 c. Oats
  • 1/2 c. Chopped Walnuts
Instructions
  1. Preheat the oven to 400 degrees.
  2. In a large bowl, sift together the flour, baking soda, sugar, nutmeg, salt, and cinnamon. Add in the butter and combine until most of the lumps are gone.
  3. Add the egg and bananas and combine well. Fold in the oats and walnuts and mix well.
  4. Drop dough by the teaspoonful on an ungreased cookie sheet. About 2 inches apart.
  5. Bake for 10-12 minutes or until the edges start to brown.
  6. When done, immediately remove from pan and place on wire rack to cool.

Like this post? SHARE it!

Related Posts Plugin for WordPress, Blogger...