Archives for July 2012

Hair Cuts, Ear Infections, and Squash

Yes, I’m still around. Is my sanity? No, but I’m making it.

My husband left for a business trip just as a double ear infection set in on my little one. Not sure why this particular one has decided to be the worst, but I think we might be over the worst of it. My children always tend to run really high fevers no matter what they have so I immediately jump to high alert trying to figure out what it is. It usually ends in a doctor visit and the impending It’s a virus and it’ll have to run it’s course from the doc. Or it ends in antibiotics and horrible diaper rash from the other impending situation….diarrhea. Oh the joys of motherhood, right?

On a less runny note….

I

HAVE

SQUASH!

Forgive my excitement, but one of my tomato plants died and I should’ve had a funeral for it. Instead, the result was a tiny tomato that was so small that my mom thought I was growing grape tomatoes. When “harvesting” my one little tomato, I asked my oldest to carefully take it inside. She proceeded to throw it in the air and exclaim that “she can play ball with it!” My heart sunk and then I calmly removed my poor little tomato from her fingers and took it inside. You’ll be glad to know that it survived the game of catch and that it’s sitting on my kitchen counter.

I can’t even eat it. It’s too special.

Sooooooooo, long story short. I have actual squash growing now! I have a few of them, actually. Isn’t it cute? I’m so proud. You may remember that I hated on bees because of their lack of help in my squash growing processes. I think they must have read that post and sent out their queen bee to do some quality control on my garden. I can’t wait to make up some of that yummy oven “fried” squash from my own garden!

Hair cut…yes I got one. It’s very, very, very, very, very (plus about a million more verys) short. Probably the shortest that I’ve ever gotten it cut. Probably not even as short as you would think, but short to me anyways. I also got highlights because it came with my Plum District package. It was a fantastic deal. $52 for shampoo, conditioning treatment, cut, and partial highlight. I had Plum Dollars so I actually didn’t have to pay anything at all. Which made it ok that I’ve already dyed it back to brown.

Yes, I couldn’t stand the highlights. I’m ridiculous and wishy washy I know. But it was free and the highlights washed me out.

So there’s an update on my life. I hope that all of that didn’t bore you…

I’m very random aren’t I? How is your week going? SHARE with ME! 🙂


Like this post? SHARE it!

Related Posts Plugin for WordPress, Blogger...

A Day of Random Acts of Kindness

This year on my birthday, I really wanted to do something completely different. Most of the time we’ll just go out to eat and maybe have some cake. This year I really wanted to do something extra special. Not for me, but for others. We often spend our birthdays centered around ourselves and there’s nothing wrong with that. But what if we could spread the love by blessing others, too? That’s exactly what I set out to do!

For months I was telling my husband that I wanted to spend the day just gallivanting around town doing what I could to make someone smile or simply make their day. So I did some research into ideas and came up with some of my own. My husband even took the day off work and we got a babysitter for my little one. My oldest got to come with us and that was such a great experience for her to witness compassion, giving, and simple kindness.

This is one of my favorite Bible verses…

But the fruit of the Spirit is love, joy, peace, patience, kindness, goodness, faith,gentleness, self-control. Against such things there is no law.

– Galatians 5:22-23

We spent about 4 hours just having a blast doing small things to brighten others days. I took a few pictures to document it and thought I’d share them with you. I tell you, I think that everyone should spend their birthday doing this. It brought us all so much joy and that joy just emanated to those that we blessed.

It’s funny to me how most people thought it was odd. Being given something for nothing. It’s sad that these days there is always a catch to things. I know even I always want to know what you’re selling me if you have me something free.

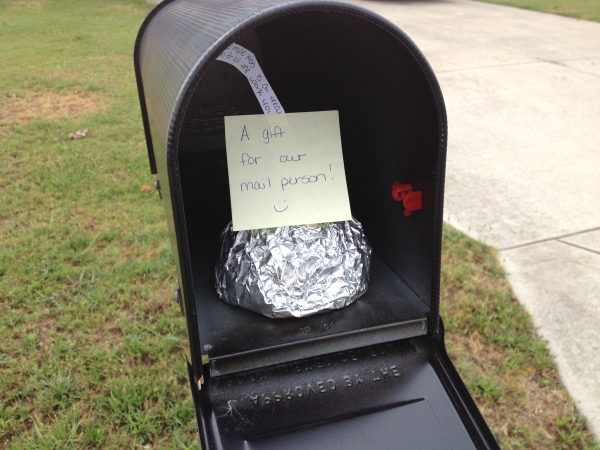
1) The first thing that we did was leave a special treat in our mailbox for the mail lady. She left us a note the next day that said it had made her day. Mission accomplished on our very first random act of kindness!

2) Then it was off to leave our little one with a special friend who we felt led to bless for no reason at all. 🙂

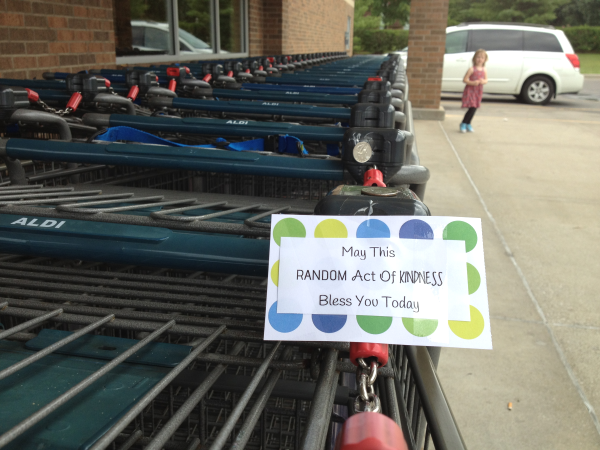
3) We taped quarters to random buggies (yes buggies. That’s what we call them here in the south y’all!) at Aldi. Some folks don’t realize that you have to have a quarter to get a buggy. It’s their very own cart system that is actually quite brilliant because I don’t know anyone who won’t want to return their buggy to get their quarter back! I think that next time I’ll do something with bags. People also don’t realize that you need bags because they don’t provide them free AND that you have to bag your own groceries. All part of the reason they are so cheap. I love Aldi!

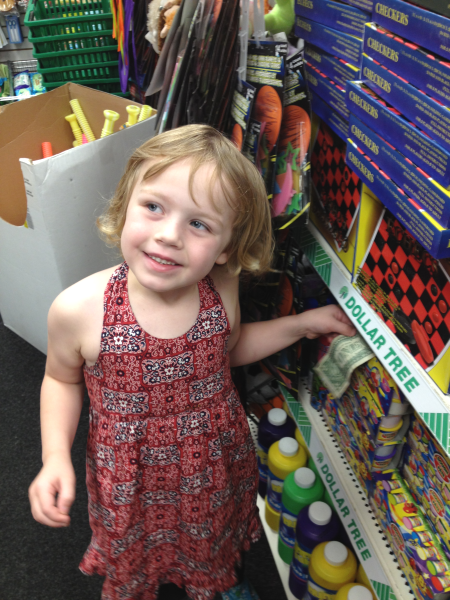
Addie leaving a dollar on the toy aisle for one lucky kiddo!

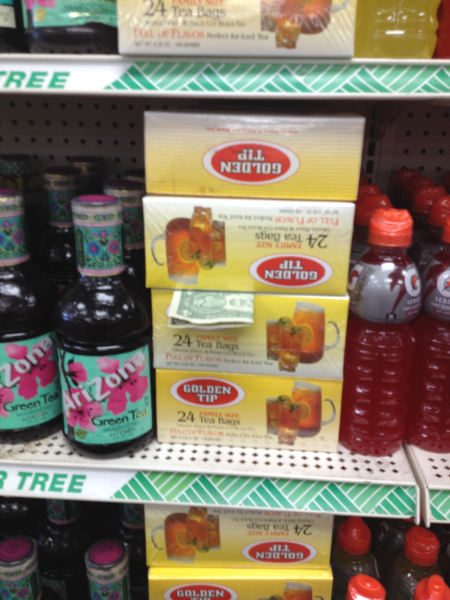
4) We stopped at a couple of different Dollar Trees along the way and left a few $1 bills on a few of the aisles. Honestly this was a funny experience. I felt like a thief because I didn’t want anyone to see us. There were people who kept coming up and down the aisles. I know they had to think we were being silly. I wish I could’ve seen the faces of the people who found those dollars!

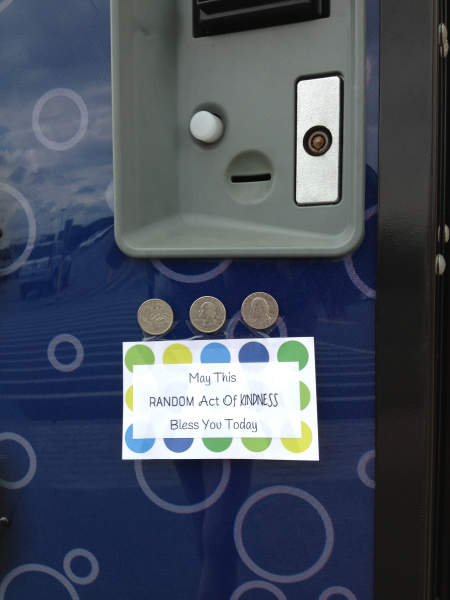
5) At a couple of the local grocery stores, we stopped and taped some quarters to the coke machines so someone could enjoy a refreshing drink on that hot day. They are so expensive these days!

6) We were getting hungry by this time, so we stopped at my favorite place, Arby’s! We purposely went through the drive-thru so we could anonymously pay for the people behind us. While we were waiting for our food we decided to pay for both of the cars behind us, as there were only 2 cars behind us. We gave the cashier a couple of those Random Acts of Kindness notes to hand to them when they came through. She smiled and said “That is so sweet!”.

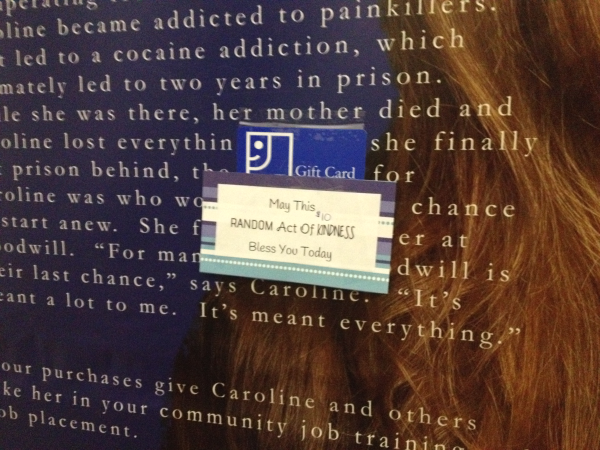
7) After lunch, we dropped into a couple of different Goodwill stores and left $10 gift cards taped to the back of the dressing room doors. Can you imagine trying on clothes and looking up to find a gift card? Score!

We also handed 2 random people cards just to see their reaction. Both of them gave us really funny looks but smiled and said thank you. I’m sure they were lost in a sense of What’s the catch?

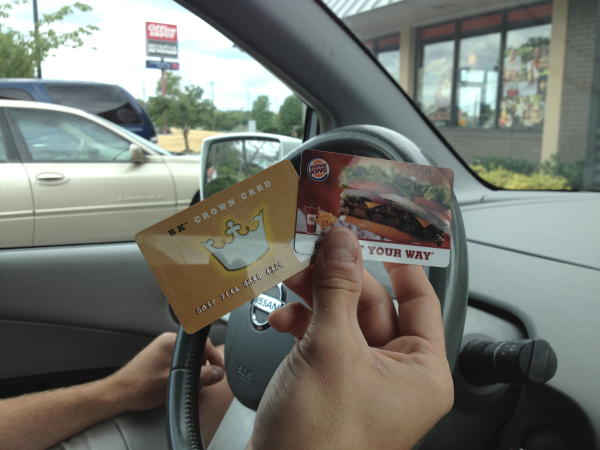
8) There are always homeless folks who stand around on the corner near the interstate. There is a Burger King close by so we stopped and grabbed a couple gift cards for the 2 men on different corners holding signs.

9) We are regulars at our local YMCA. We’ve been going there for years and the staff is so great to my girls. They love going to Y-Play so we took them some cookies to say thank you. I took them some of my White Chocolate Chip Cookies and I got rave reviews!

10) We took some of those cookies to our local fire department. I think they were shocked by our gift, but very thankful. A wanted her picture by the fire truck and that might just have been the highlight of her day.

11) We left a special gift for a friend.

12) We sent 2 of our relatives thank you and gift cards for things they’ve done for us.

13) We donated to the Operation Homefront School Supply Drive.

It was so much fun. I smiled the entire day and even cried a few times…


Like this post? SHARE it!

Related Posts Plugin for WordPress, Blogger...

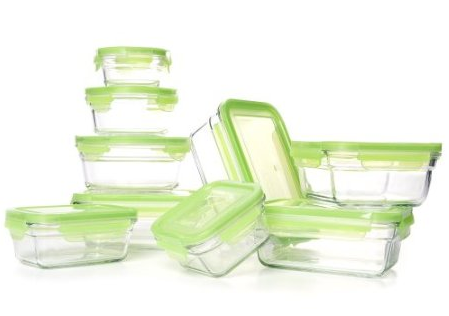
18-Piece Glasslock Snapware Tempered Food Storage Set $19.99

I don’t like to share too many deals over here on Pennywise Cook, but if I find one related to our love of cooking I will! Like this deal of the day at Amazon today.

This 18-Piece Glasslock Snapware Tempered Glass Food Storage Set is 50% off for only $19.99 today only. (FREE shipping too) I really like storing my food in glass rather than plastic but it’s always so much more expensive. And this set appears to be cookware also!

The description says you can use it in the oven, microwave, freezer, and dishwasher! That is my kinda food storage set y’all. Just don’t put the lids in the oven please.

Anywho, hope this helps somebody in need of a new set. It’s a good price considering it’s normally $39.99.


Like this post? SHARE it!

Related Posts Plugin for WordPress, Blogger...

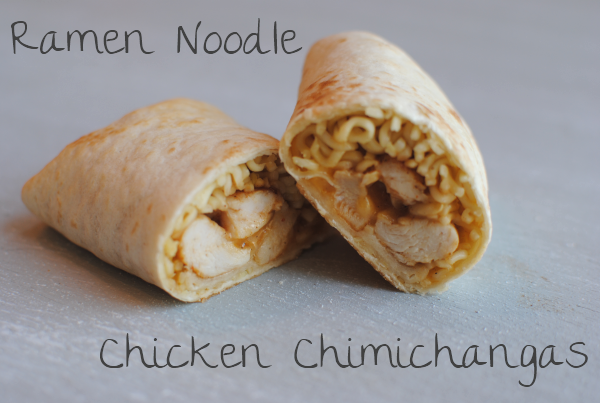
Ramen Noodle Chicken Chimichangas

Ramen Noodle Chicken Chimichangas 9 Ramen Noodle Chicken Chimichangas

We’re going to go low budget today. We’re talking way low budget. Like Ramen Noodle budget low. You know what I’m talking about…the magical noodles that come in handy when money is tight or you just don’t want to cook. I got this idea from my step brother who was low on ingredients for a chimichanga and came up with this concoction. He shared one with me and I was pleasantly surprised at how yummy they were.

I have to admit that the thought of Ramen noodles in a chimichanga didn’t exactly sound that amazing to me. But once I tried, I was actually excited to make my own. Even if you’re not too keen on putting Ramen noodles in your chimichanga, you can at least see below from instructions on how to fold a chimichanga. But I think you’ll want to give these a chance y’all. They are surely worth it!

Price breakdown:

4 Flour Tortillas $.40
4 Fresh Chicken Tenders $.80
1 Package Chicken Ramen Noodles $.18
2 Cups Shredded Cheese $1.79
Total= $.79 per chimichanga

Ramen Noodle Chicken Chimichangas 1 Ramen Noodle Chicken Chimichangas

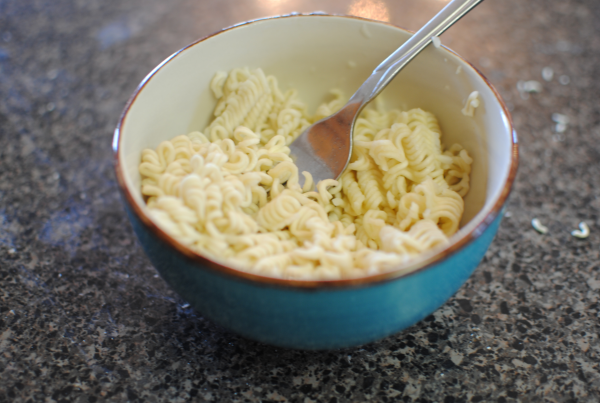
It all starts with those college-esq Ramen noodles. Which by the way, are quite tasty! I haven’t made them in so long and when these came out of my microwave, I seriously had to stop myself from eating them all. Cook them up according to the package including the seasoning. Easy and cheap way to get that great flavor inside the chimi.

Ramen Noodle Chicken Chimichangas 2 Ramen Noodle Chicken Chimichangas

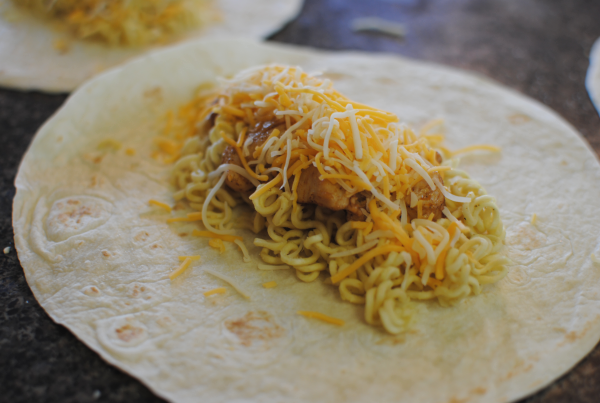
On each tortilla, you place some of those Ramen noodles along with some seasoned grilled chicken and shredded cheese. YUM!

Then it’s time to roooooooooll them up for baking.

Ramen Noodle Chicken Chimichangas 3 Ramen Noodle Chicken Chimichangas

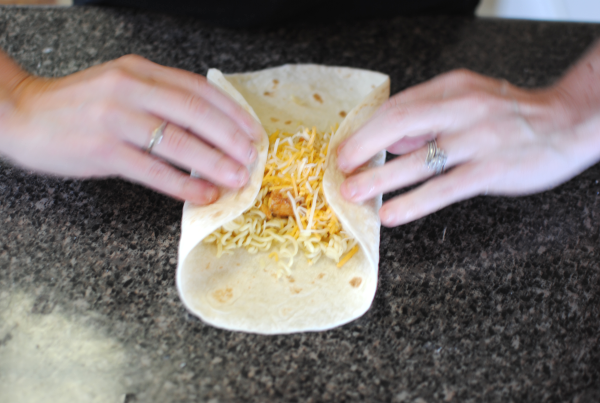
Lay your tortilla flat. Fold the sides in towards the middle.

Ramen Noodle Chicken Chimichangas 4 Ramen Noodle Chicken Chimichangas

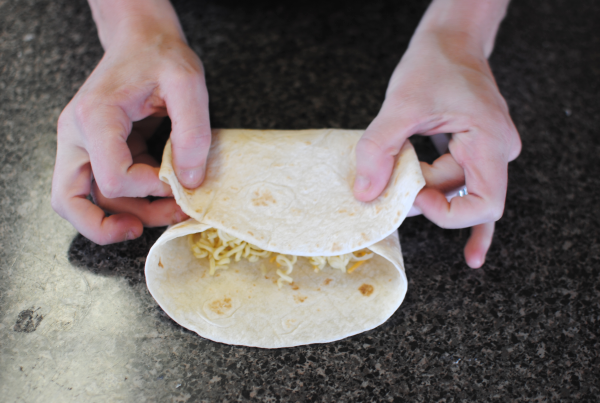
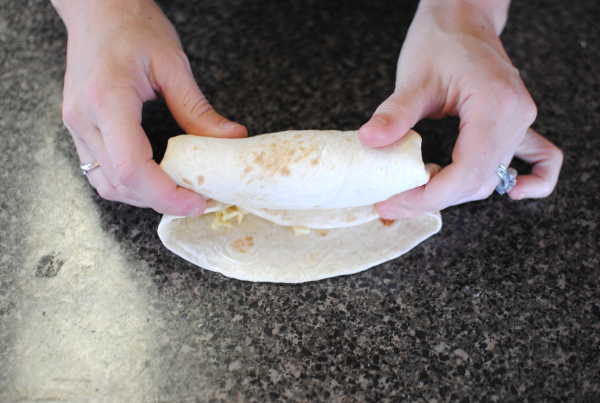
Then fold the bottom towards the top, but only halfway. Fold the edge towards the inside and begin to roll.

Ramen Noodle Chicken Chimichangas 5 Ramen Noodle Chicken Chimichangas

…like so.

Ramen Noodle Chicken Chimichangas 6 Ramen Noodle Chicken Chimichangas

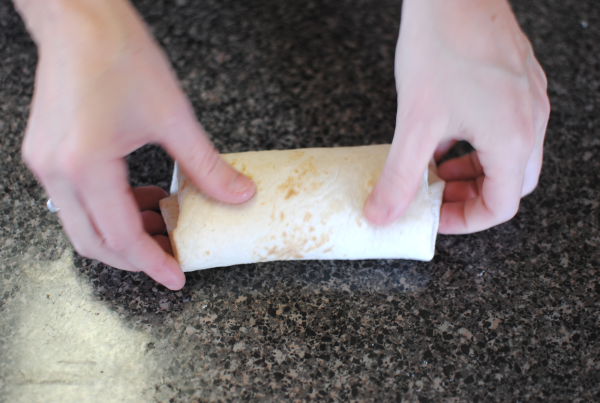
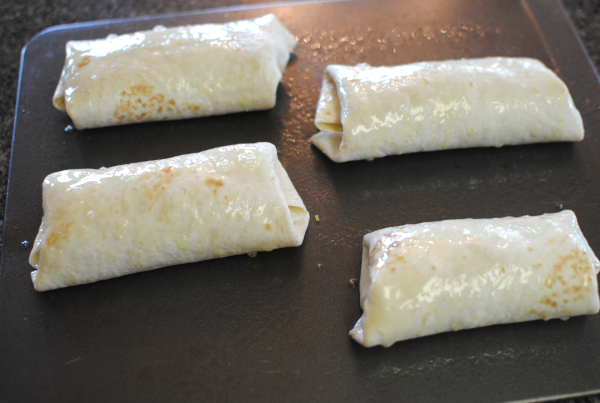
Once you get the rolling down, it will look like this. Place them seam side down on your baking sheet.

Ramen Noodle Chicken Chimichangas 7 Ramen Noodle Chicken Chimichangas

Spray them with a little cooking spray to help them brown and get a little crunchy.

Ramen Noodle Chicken Chimichangas 8 Ramen Noodle Chicken Chimichangas

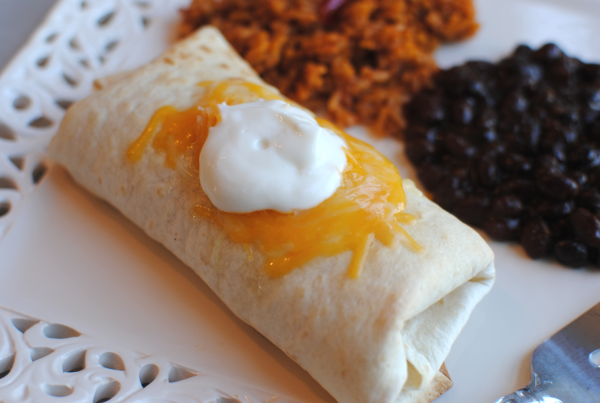
Serve with your favorite fix-in’s like more cheese or sour cream on top and viola. So easy, cheap, and great for freezing too!

Ramen Noodle Chicken Chimichangas
Recipe Type: Main Dish
Author: Pennywise Cook
Serves: 4
Using a low budget ingredient, Ramen noodles make a great addition to chicken chimichangas!
Ingredients
  • 4 Flour Tortillas
  • 4 Fresh Chicken Tenders, Cut into Bite-Size Pieces
  • 1 Pkg Chicken Flavored Ramen Noodles
  • 1 Tbsp Olive Oil
  • 1 Tsp Minced Garlic
  • 1/2 Tbsp Chili Powder
  • 8 Tbsp Shredded Cheddar Cheese
  • Cooking Oil
Instructions
  1. Preheat oven to 350 degrees.
  2. Cook Ramen Noodles according to the package directions. Drain all liquid from the noodles and set aside.
  3. Meanwhile, in a skillet heated to medium-high cook chicken in olive oil along with the minced garlic and chili powder until no longer pink.
  4. On each tortilla place 1/4 of the Ramen noodles, 1/4 of the to chicken, and 2 tbsp shredded cheese.
  5. Roll up into chimichangas and place seam side down on a greased baking sheet.
  6. Spray tops with cooking spray and bake for 10-15 minutes until browned and crunchy.
Notes

If you like spicy things, you can use jalapeno cheese like my step brother to add a little kick!


Like this post? SHARE it!

Related Posts Plugin for WordPress, Blogger...

The Best White Chocolate Chip Cookies

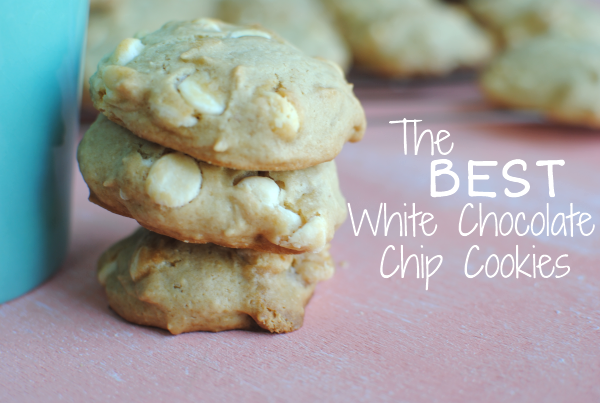
It takes a lot to make a cookie worth the title The BEST White Chocolate Chip Cookies. Believe me, I’ve tried my share of them. I can’t tell you that these are the best in the world, but I can tell you that they are the best that I’ve made and I’ve been working on my recipe for a little while now. I am head over heels in love with white chocolate, but it doesn’t love me back. I cannot cook with it for anything so the fact that I was able to accomplish these cookies is a feat in itself. Therefore, they have been dubbed The BEST White Chocolate Chip Cookies.

…and because they also happen to be absolutely fabulous as well.

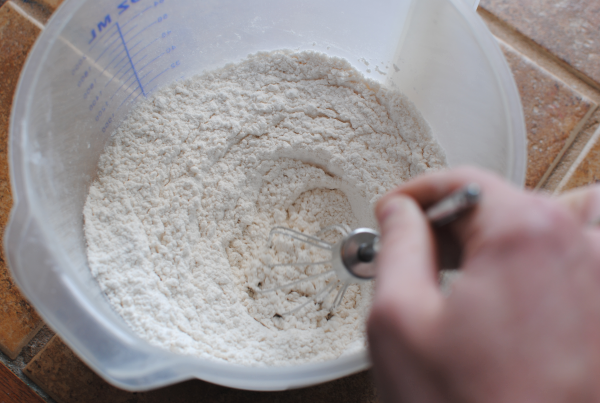
It starts with what you would expect from a cookie recipe, flour. Sift it together with some baking soda and a little salt. It would be good to use a sifter, but seeing as how mine is a piece of crap and the top won’t release itself from the bottom, I opted to use a wisk in a bowl.

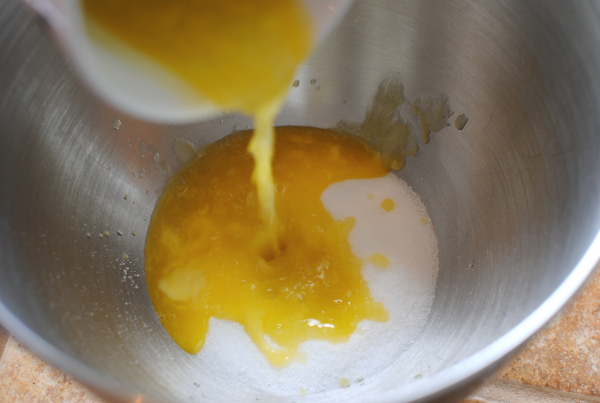
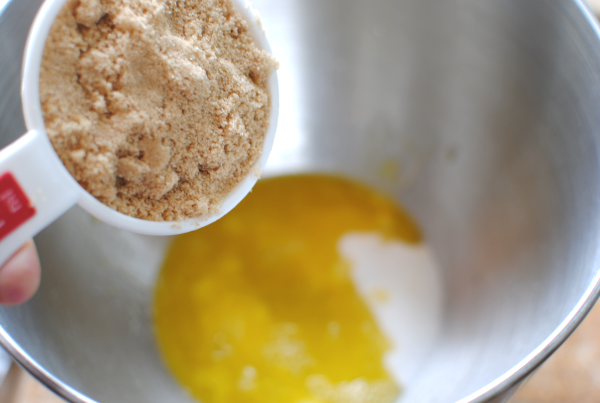
Here comes the yumminess. In your mixing bowl you’re going to add 2 different kinds of sugar (brown and white) along with some melted butter. I always use the Blue Bonnet Light because it makes me feel less guilty for using butter. Hey, whatever it takes right?

Oh look, there’s the brown sugar!

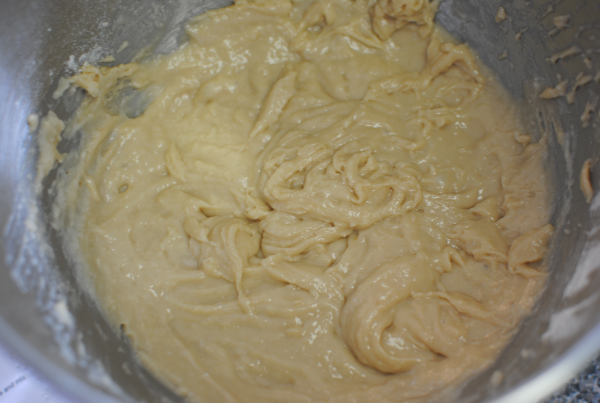
We’re going to fast forward just a bit. After you’ve mixed the sugars and the butter with the flour mixture, some eggs, and a secret ingredient- applesauce, this is what it will look like. It’s quite runny for cookie dough, but understand that this is normal. It’s going to be soft and cakey and that’s why.

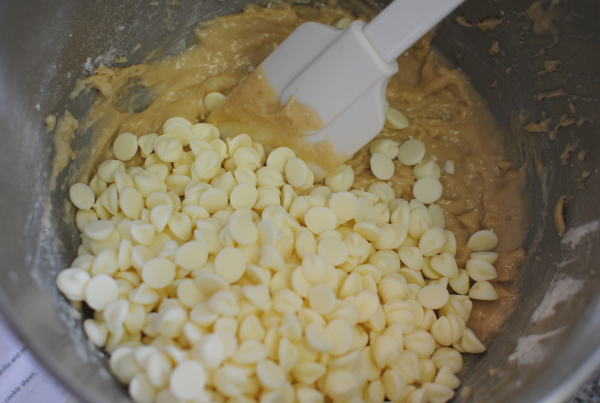
Then comes the star of our dough, the white chocolate baby! At this point, it takes everything I have not to just grab a spoon and inhale all of those white chocolate chips.

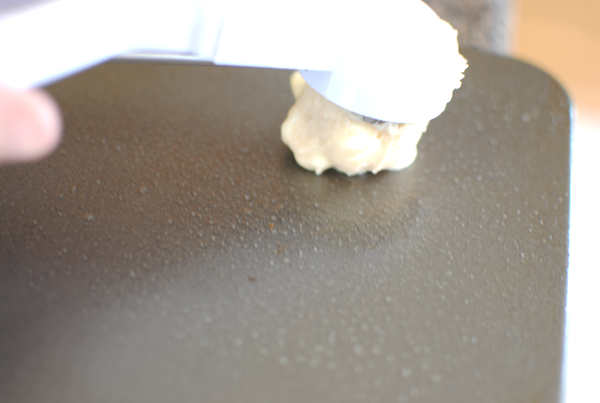
Then, I use my little cookie dough scooper to make perfect little dough balls on the baking sheet.

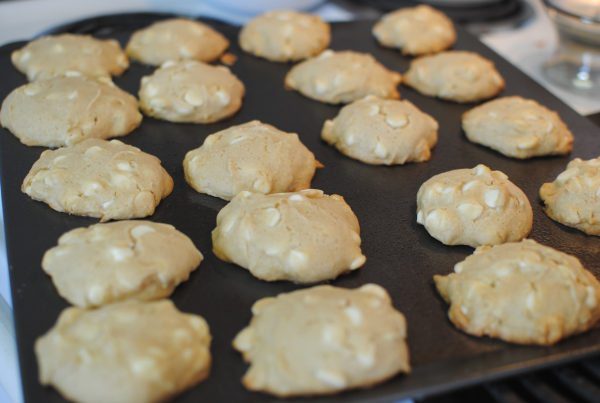
Within about 13 minutes, they will have made your home smell heavenly and your tummy rumble for their white chocolatey goodness. Always best when eaten a little warm, of course.

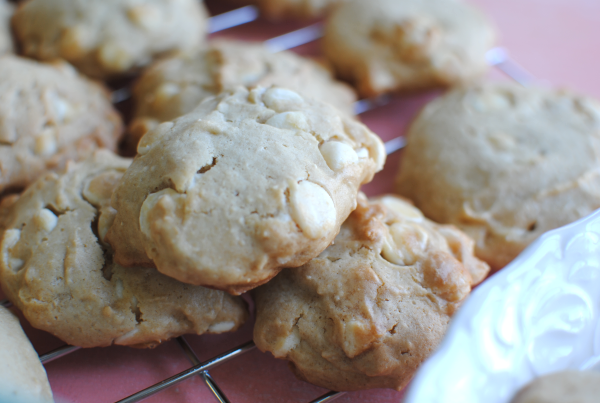
Tah dah! Enjoy 🙂

The Best White Chocolate Chip Cookies
Recipe Type: Dessert, Cookies
Author: Pennywise Cook
Yep. These are the BEST White Chocolate Cookies.
Ingredients
  • 2 c. All-Purpose Flour
  • 1/2 Tsp Baking Soda
  • 1/2 Tsp Salt
  • 6 Tbsp Butter, Melted
  • 1/2 c. Packed Brown Sugar
  • 1/2 c. Sugar
  • 1/2 Tbsp Vanilla Extract
  • 1/3 c. Applesauce
  • 2 Egg Whites
  • 2 c. White Chocolate Chips (1 bag)
Instructions
  1. Preheat your oven to 325 degrees. Grease your cookie sheets.
  2. Sift the flour, baking soda, and salt together and set aside.
  3. In a mixing bowl, cream the sugars and butter together. Add in the egg whites, vanilla, and applesauce and combine well.
  4. Add the sifted flour mixture slowly to the sugar mixture until just combined.
  5. With a spoon, stir in the white chocolate chips.
  6. Drop 1/8 cup or so of the dough around 2 inches apart on baking sheet.
  7. Bake for about 13 minutes or until they have begun to brown around the edges.
  8. Cool on wire rack.
Notes

The timing for these has been 13 minutes for me each and every time. Your oven may be different so I would watch to see how done they are around 12 minutes and add more time if needed.

The last time I made these, I counted them and was going to make a point to know how many servings this recipe makes. Of course my crazy brain forgot to write it down and now I have no idea. It’s a lot though! Maybe 2 dozen or so.


Like this post? SHARE it!

Related Posts Plugin for WordPress, Blogger...

3-Ingredient Reese’s Truffles

It was a really great weekend around here. I actually got a girl’s night out with some friends and we had a blast. Isn’t it funny how silly us moms can act when you put a few of us in a room together without our children? We need that time every now and then to just be silly.

I was on a mission to create a Reese’s Truffle over the weekend as well and after a failure, I finally got it right. That’s usually how my creations usually work. I have to fail a few times before I get it right. But that’s what we call trial and error. But let me just tell you, these truffles are no error. They are so yummy! And they are so incredibly easy, it’s insane.

I think one of my favorite things about them is that you can get all the ingredients that you need anywhere, including a convenience store! You know sometimes, it’s just not possible to make it to the grocery store. Whether it’s because you’re on vacation and have no idea where a grocery store is or because you don’t want to fight the crowd, a convenience store is always around the corner and you can get all of the ingredients in this particular recipe from one!

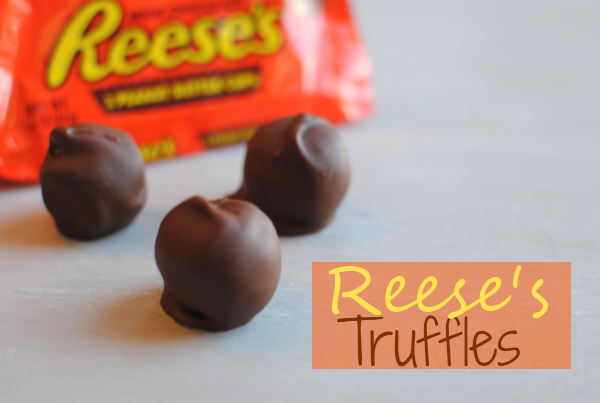
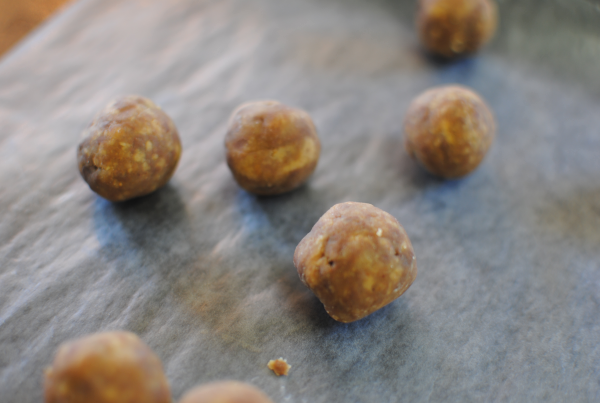
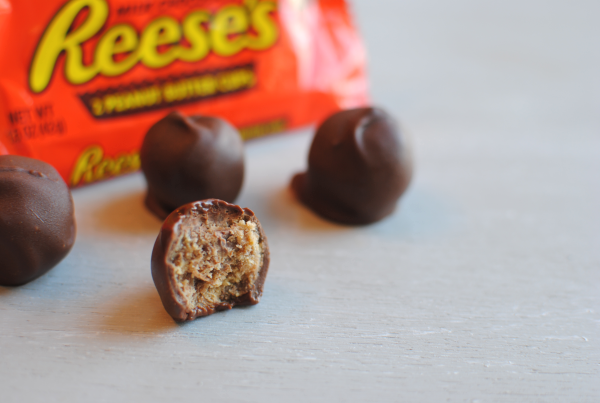
You start out by taking 6 packs of 2 Reese’s cups and 3 slices of pound cake and putting them through the food processor (or blender). It makes a crumby mixture that is really soft and easily formed into a ball. Make them as big or as little as you want.

Although trust me, you’ll want them smaller so you can eat more…

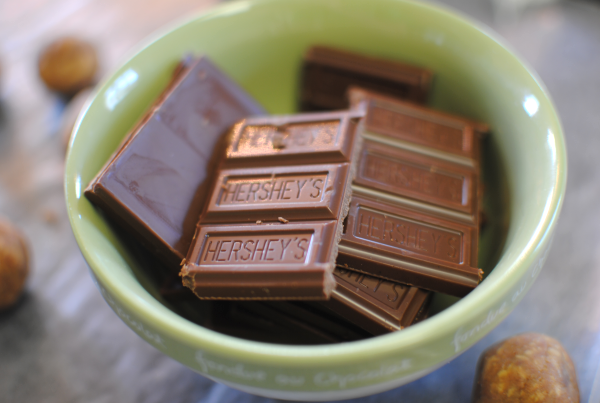
Pop your little balls into the freezer for a little bit. Around 15 minutes or so to get them good and firm so you can dip them in the Hershey goodness.

This is the Hershey goodness. Try to refrain from reaching through the picture to eat one. This is just a picture, I promise.

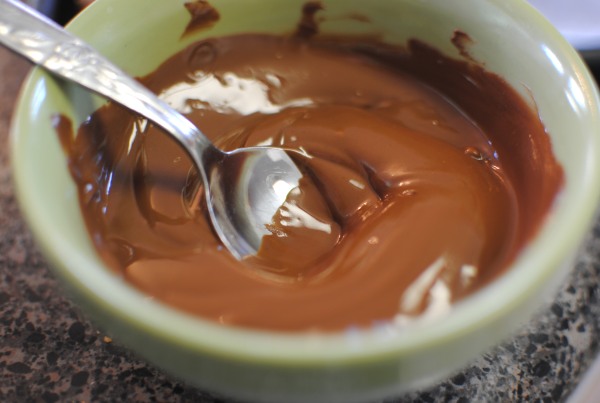
Melt it in the microwave for a bit to get it so nice and gooey. Then it’s time to get your peanut buttery balls out of the freezer for their chocolate bath.

I would never object to a chocolate bath, would you?

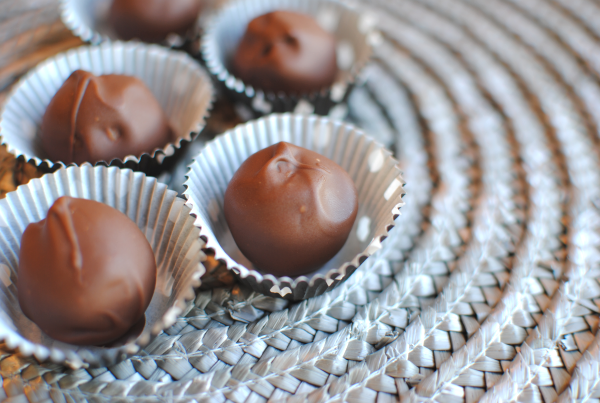
When you’re done dipping them, put them back in the freezer for another little bit to help the chocolate firm a bit quicker and then you can put them in a tupperware or in cute little mini cupcake wrappers like these for serving.

This is what the inside looks like. Once again, this is just a picture. I hate to make you sad, but this truffle ended up in my belly. It was really good. 🙂

Here’s the recipe so you can make your own!

3-Ingredient Reese’s Truffles
Recipe Type: Dessert, Snack
Author: Pennywise Cook
3 Ingredients come together to create a peanut buttery truffle made of Reese’s cups.
Ingredients
  • 3 Packs of Reese’s Peanut Butter Cups (6 total)
  • 3 Standard Size Hershey Bars
  • 3 Slices of Regular Flavor Pound Cake
Instructions
  1. In a food processor, combine and process the pound cake and Reese’s cups until crumby.
  2. Shape into 1-inch balls. Place on a pan and freeze for around 15 minutes.
  3. Meanwhile place Hershey bars in a small bowl and microwave for 30 seconds on 50% power. Continue microwaving in 10 seconds increments until completely melted, stirring after each time.
  4. Remove balls from freezer and dip each into the chocolate. Place on dish covered in wax paper and place back into freezer for around 15 minutes to firm.
  5. Serve and try not to consume them all yourself!
Notes

You could also make these with chocolate pound cake and that would be very delicious as well!


This experience has been part of a study with Murphy USA and The Smarter Driver. See more Convenience Store Cuisine at The Smarter Driver or at Murphy USA on Pinterest. All opinions expressed are 100% my own.


Like this post? SHARE it!

Related Posts Plugin for WordPress, Blogger...

iPhone Diaries: Seeking Date Night Ideas!

It’s another iPhone Diary today and this time I’m looking for date night ideas…


Like this post? SHARE it!

Related Posts Plugin for WordPress, Blogger...

Pizza Quesadillas

Every now and then to change lunch up just a bit, I make what my little girl what she likes to call “pizza tacos”. I use a tortilla and spoon on some pizza sauce (or sometimes just tomato sauce) along with some pepperoni and mozzarella cheese. I roll them up and microwave them for a few seconds to help the cheese melt. It makes a really tasty lunch. After making one for her the other day I got to thinking about how the same might taste good in a quesadilla.

The idea eventually made its way to my menu plan and I was excited about that night. It was another one of those dinners that I knew everyone would love.

One of the best things about making these quesadillas is that you can customize them to the eater’s liking. For instance, I like my pizzas with everything on them. Well, minus any small fish or fungi. My daughter and husband? Not so much. Strictly cheese and pepperoni. But I did add some meat to the mix for substance since this is for dinner after all.

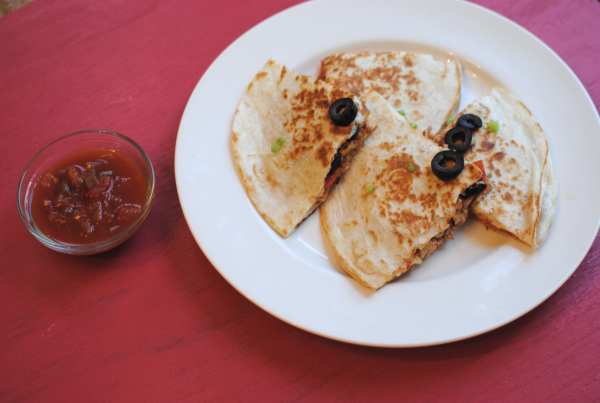
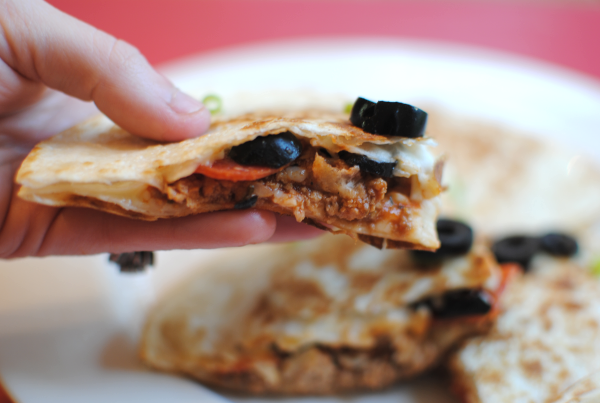
These were a major hit with the fam. I even told my hubby that I have to hand it to myself, they are pretty good. I dunked mine in salsa although some might find that a little weird. Pizza and salsa don’t exactly go together, but they tasted fine to me. You could dip them in more pizza sauce. I’m sure that would be tasty.

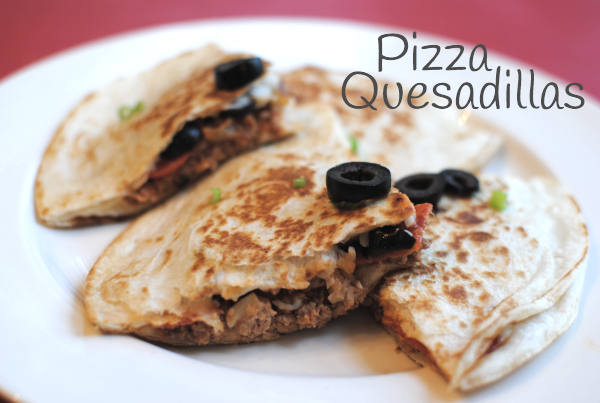
Oh yeah. That’s obviously a picture of my quesadilla with olives and all. Feel free to leave those off if you must.

Here’s the recipe.

Pizza Quesadillas
Recipe Type: Main Dish
Author: Pennywise Cook
Serves: 4
Make this every day Mexican dish and make it Italian. These Pizza Quesadillas are extra tasty!
Ingredients
  • 1 lb Ground Turkey
  • 1 Tsp Minced Garlic
  • 1 Tsp Onion Flakes
  • 1 Tsp Dried Oregano
  • 1/2 Tsp Dried Basil
  • 1 Cup Pasta Sauce
  • Sliced Olives
  • Pepperoni
  • 2-3 c. Shredded Mozzarella Cheese
  • 8 Medium tortillas
  • Cooking Spray
Instructions
  1. Brown ground turkey with garlic, onion flakes, oregano, and basil. Add pasta sauce and cook for about 5 minutes.
  2. Heat a skillet to medium high heat. Spray with cooking spray. On a tortilla place about 1/3 c. shredded cheese, then some of the meat mixture, then top with optional olives and pepperoni. End with cheese and top with second tortilla. Place into heated skillet for about 2-3 minutes.
  3. Spray top tortilla with cooking spray then flip the entire quesadilla with spatula.
  4. Repeat for next 3 quesadillas.
Notes

This makes about 4 quesadillas that make 4 squares each. They are surprisingly filling too!


Like this post? SHARE it!

Related Posts Plugin for WordPress, Blogger...

DIY Wooden Eat Sign

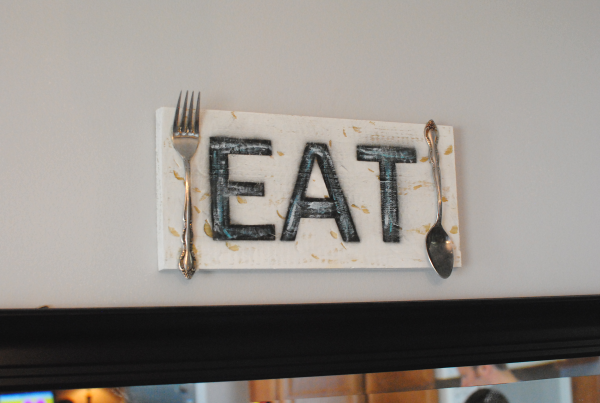
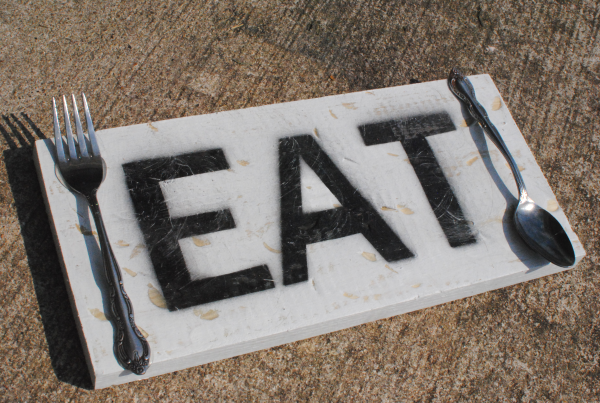
You may have seen the cute little Eat signs that have been popping up all over the net. They make the perfect wall decoration for a kitchen. I’ve never once attempted to make a wall sign before, but we had some leftover wood from another project so I decided I’d give it a shot. I first came across the idea over at Crafts by Amanda. And apparently I’m late on the Eat sign bandwagon because she originally posted that back in November of 2012!

If you’re considering something like this cute sign for your kitchen, here’s how I made mine. Super easy and only cost me the price of the fork and spoon (which was literally a few cents). I picked them up at Goodwill where they were 10 for $.99.

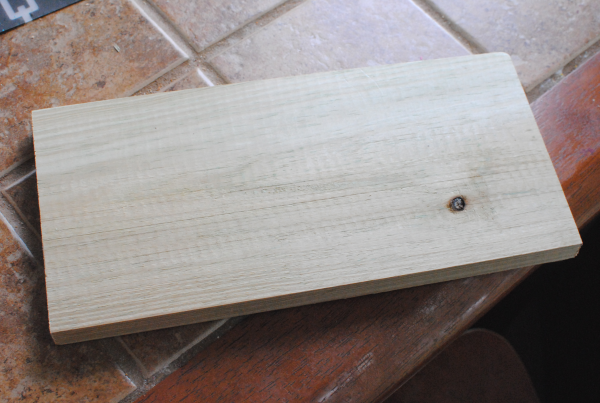
I started with this plain jane, foot-long piece of wood. It doesn’t really matter what size, it’s whatever you have on-hand or find cheap.

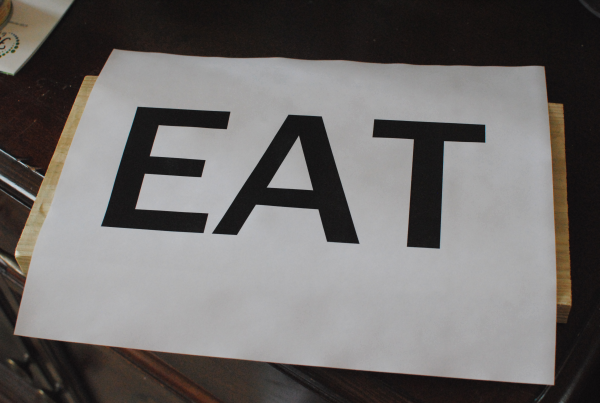
Using my computer and printer, I made the word eat with a pretty standard font. You’ll have to forgive me, I forgot exactly which one this is. I fit it to my board making sure it would fit just right.

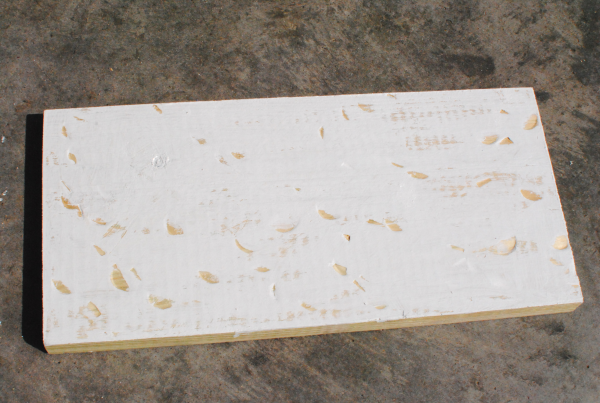
I then painted it with some white-ish paint that I had already. I let it dry and then came the fun part…

I took a hammer and sander to it. Just to give it a little distressing. I wasn’t too worried about making it perfect.

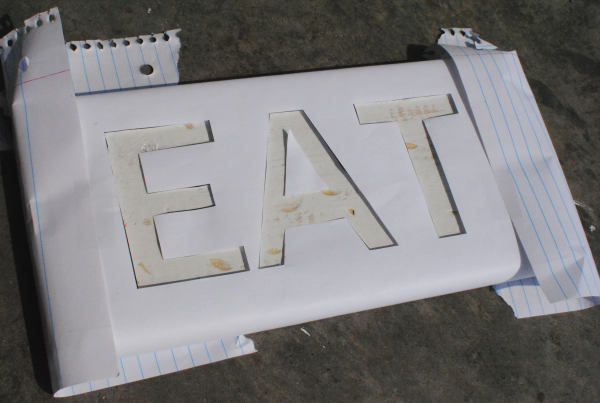
I cut out my letters and then taped them to the board on the back. Once again, I wasn’t too worried about it looking perfect. Do you like my notebook paper job? It’s a hot mess!

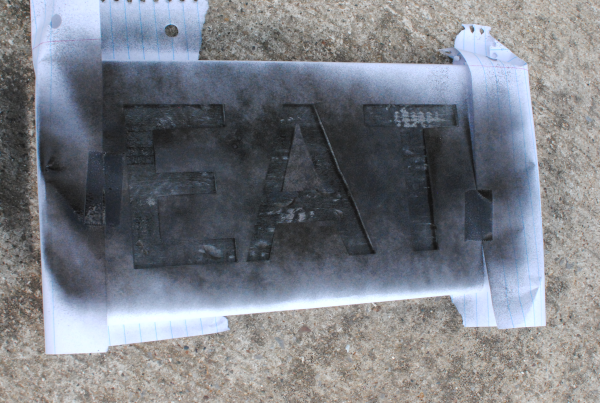
I spray painted the cut out letters and once again, perfection was not the object. It can look darker in some areas and lighter in others.

I used a very small brush to paint in a few more colors onto the word eat. I also sanded the letters just a bit.

I then used some general glue (I can’t remember what it’s called) to glue the silverware to the sign. I really loved the idea of Amanda’s to put silverware on there. It really gives the sign some demention I think.

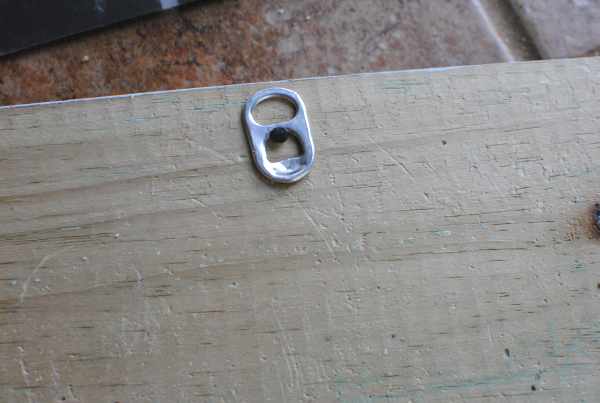
And check this out, I used a soda tab to hang it! It was light enough that I didn’t really need anything too involved to hang it.


Like this post? SHARE it!

Related Posts Plugin for WordPress, Blogger...

Friday’s Frugal Finds 7/20

I hope that you’re enjoying my little Friday’s Frugal Finds round up each week. Are there any specific things that you’d like me to highlight for you?

Restaurant Coupons

Amazon Finds

Freebies

  • Curves– FREE One Week Pass
  • American FamilyGrilling Recipe eBook
  • Cardstore– FREE greeting card with the coupon code CAJ2719 when you go here. Valid through 7/22 or the 1st 25,000.
  • Jelly Beanz Kids Multivitamins Sample here.

Fabulous Coupons (These are just a few of my faves)

Smartsource (here):

  • $1/1 Barilla Mmicrowaveable Meals
  • $1/2 Alexa Frozen Items

Coupons.com (here):

  • $.50/1 French’s Fried Onions (will be great at a store that doubles!)
  • $.50/2 TWO (2) Campbell’s® SpaghettiOs® canned pasta
  • $1/1 Tic Tac 100 ct

Redplum (here):

  • $.55/1 Black Flag Product (will makes some things close to FREE)

Coupon Network (here):

  • $1.10/2 Hot Pockets Snackers (+ $.40 more off with video!)
  • $1/1 Post Shredded Wheat Cereal
  • $1.10/2 Skinny Cow Shake-Stirs

Target Daily Deal (here):

Buy One, Get One FREE Maxidresses
$24.99 for TWO of them shipped


Like this post? SHARE it!

Related Posts Plugin for WordPress, Blogger...