Perfect Wheat Dinner Rolls

I can’t think of anything better than a soft, warm dinner roll with melted butter slathered onto it to eat with my dinner. I’m a big fan of Sister Schuberts yeast rolls, but they aren’t so great for my hips so I avoid them at all costs. I can remember there was a point at which we had those with almost every meal at our house. We love them that much. Now I like to make sure we don’t double dose on carbs so I watch how many I include in our meals.

But rolls simply call my name sometimes. They taunt me with their bready and golden pillows of perfection. I smell their sweet, comforting scent that’s fill up the kitchen and feel compelled to grab the butter.

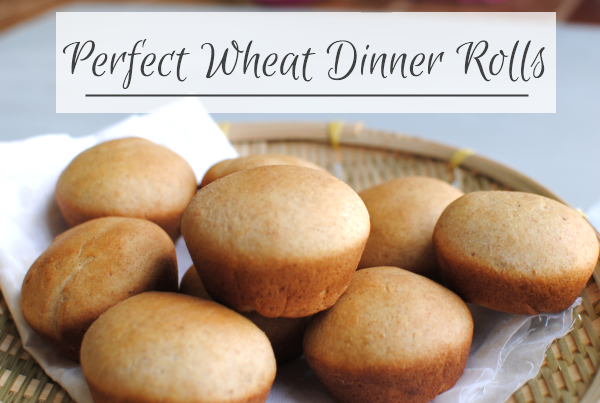
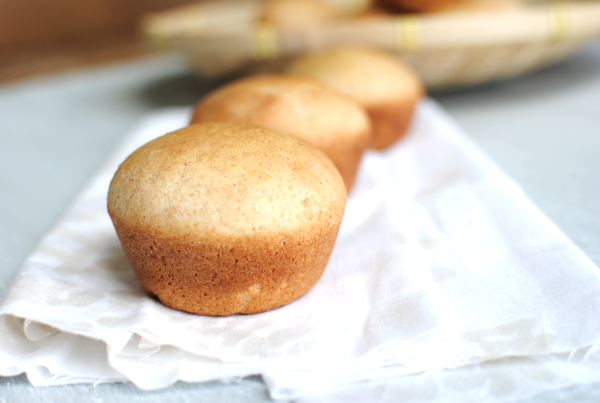
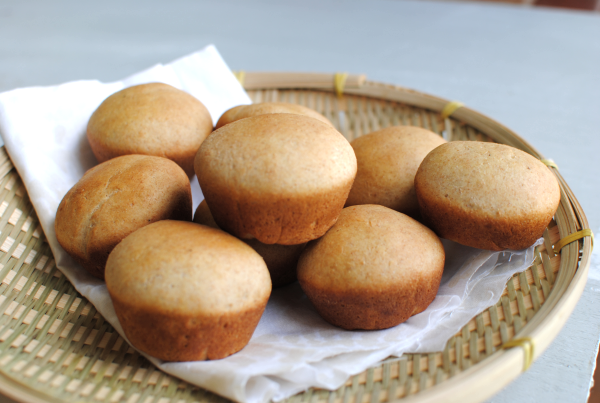
They remind me of potato chips in a way. There’s almost no way that I can eat just one. That’s why I at least try to make them a little more nutritious by making them wheat. I came across this Whole Wheat Rolls recipe at Salad in a Jar that looked easy enough and like it would make a great buns for some sliders that I was making. (Recipe to come!) So I decided to try it out and they turned out perfect!

And between you, me, and the fence post, I had a complete fail making wheat rolls just hours before I made this recipe so you can imagine my relief when these came out of my oven. It was funny too, because my husband came in to find these beauties while my disaster rolls were already at their fate in the trash can. I almost took a picture of them to show you. But I didn’t want you to be biased towards these, so I decided not to. ๐Ÿ˜‰

If you’re looking for a wheat dinner roll recipe for sliders like I used them, or simply to complement your meal you should try this one!

Recipe courtesy of Salad in a Jar.
Perfect Wheat Dinner Rolls

Perfect Wheat Dinner Rolls

Warm and delicious whole wheat dinner rolls make a great addition to any meal!

Ingredients

  • 3/4 cup warm water
  • 1 egg
  • 1 teaspoon salt
  • 3 tablespoons honey
  • 3 tablespoons oil
  • 1 1/2 cup all purpose, unbleached flour
  • 1 1/2 cup whole wheat flour
  • 1 tablespoon vital wheat gluten (optional)
  • 2 1/4 teaspoons yeast

Method

  1. Preheat oven to 350 degrees.
  2. Add all ingredients (in order listed) to a stand mixer with a dough hook or to a bread machine.
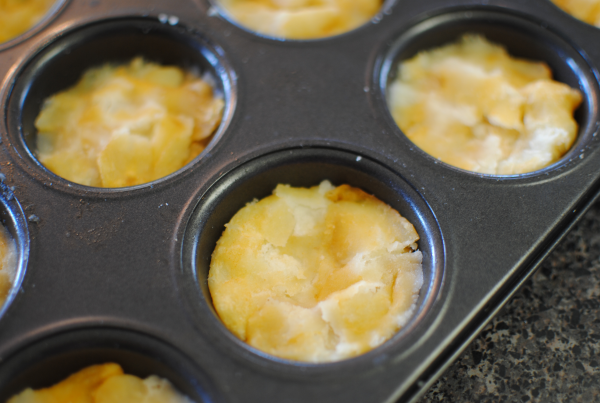
  3. When dough cycle is complete or the dough is completely combined in your stand mixer, remove and shape into balls. For dinner rolls, place 2-3 dough balls into the wells of a muffin tin. For slider rolls, fill either 2 8-inch cake pans evenly OR place 1 dough ball into the well of a muffin tin.
  4. Cover pans with a damp towel and place in a warm place to rise for around 30 minutes.
  5. Bake for 10-12 minutes. Brush the tops with butter when you remove from the oven if desired.

Notes

Salad in a Jar describes using a bread machine to mix the dough for use. I don't have one so I opted for using my stand mixer and dough hook. It worked a lot better than I expected for mixing the dough. Just make sure that if you use your stand mixer to give it ample time to combine all the ingredients well.

Using a muffin tin will create the affect of a muffin roll so if you want your sliders to look less like muffins, the cake pan would be the way to go.

http://www.pennywisecook.com/perfect-wheat-dinner-rolls/


Like this post? SHARE it!

Related Posts Plugin for WordPress, Blogger...

Homemade Chocolate Pudding

Marshmallows, pie crusts, ice cream, loaves of bread, even cookies. All of these things are foods that we tend to buy from the store for convenience. Isn’t it funny how we can get so used to that processed, store-bought taste that we aren’t even familiar with the homemade version anymore?

I’m not complaining about store-bought food. I buy those things just as much as the next person, but with my love of creating and cooking, I can’t help but want to make those things myself from time to time. And usually, the difference in the processed and the homemade are similar yet very different.

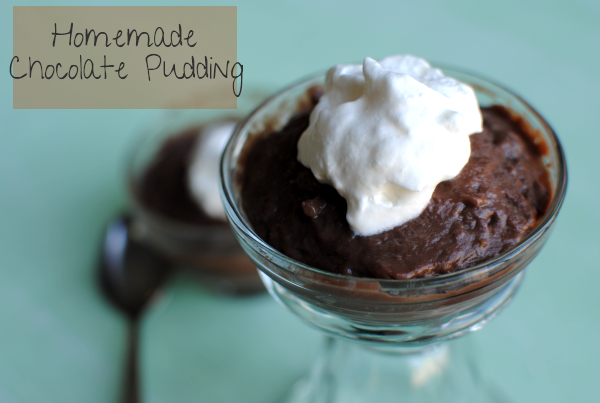
Let’s take this homemade chocolate pudding for instance. Until last week, I had NEVER made homemade chocolate pudding before. Why? Because the purchasing of the Snak Packs are just easier.

Or so I thought.

I’m beginning to question every Snak Pack purchase that I’ve ever made. Why chocolate pudding is made of things that I have in my very kitchen every day! And there are no extra preservatives or triglceridontknows in it.

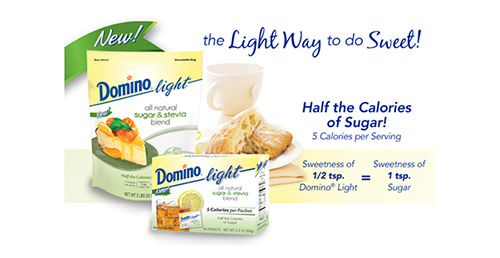
You know me and my healthy makeovers on food. Have you heard of Domino Light? I’ve seen tons of coupons for it, so I was excited to try it out with this pudding. Basically, Domino Light is made from pure cane sugar and the tropical stevia plant. Which means that it’s ALL NATURAL with no added artificial ingredients.

What could possibly make this sweetener better? Oh nothing big, but that it contains HALF the calories of sugar. Plus, you only need a 1/2 teaspoon of Domino Light to be equivalent to 1 teaspoon of sugar which means that your dollar will go further. That means saving money and saving money makes momma happy! It comes in 2lb bags (which is equivalent to a 4lb bag of sugar!) and individual packets too.

You can like Domino Sugar on facebook to get a $1 off Domino Light Coupon! This is a great way to try it out for yourself. There is a Twitter party coming up with C&H/Domino Sugar that you won’t want to miss. You can RSVP to the party HERE as it takes place on August 8th from 5-7pm PST. There will be $500 worth of prizes and gift cards given away.

With every intention of making this chocolate pudding for Addie and Britton, I found myself eating most of it. I shared a teensie tiny bit with my husband too. He had to try it out too you know.

I’m new to stevia so I wasn’t sure what to expect, but the Domino Light was wonderful in this recipe. I’ve used it in every sweet dish over the last 2 weeks and I love it. One thing that I really want to point out about it, is that it’s very similar to sugar. The consistency I mean. You know how some sweeteners are very light and fluffy and don’t really take on the same feel as sugar? This is almost exactly the same texture as sugar itself.

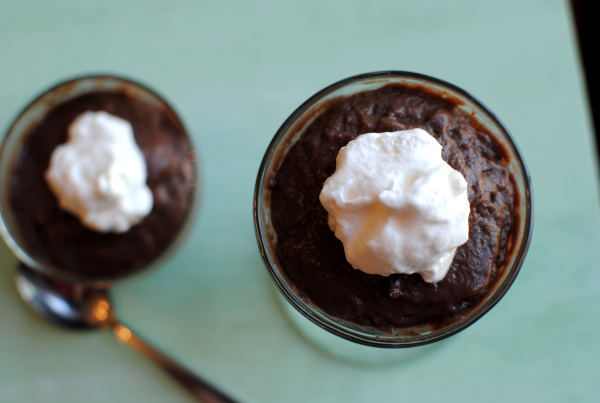
If you’ve never made homemade chocolate pudding before, I urge you to try it out. Place it in small containers and treat it just like a Snak Pack.

Recipe courtesy of Domino Light.

Homemade Chocolate Pudding

Homemade Chocolate Pudding

Only 5 ingredients that you probably have in your kitchen right now can make you homemade chocolate pudding!

Ingredients

  • 1/4 c. + 1 Tbsp Domino Light
  • 1/4 c. unsweetened cocoa powder
  • 1/4 c. cornstarch
  • 2 c. milk
  • 1 tsp vanilla extract

Method

  1. In a small saucepan, whisk together all dry ingredients.
  2. Whisk in the milk 1/2 c. at a time until combined. Place over medium heat and continue to whisk until the pudding thickens and begins to bubble.
  3. Remove from heat and whisk in the vanilla. Pour into a medium bowl or individual serving bowls.
  4. Place plastic wrap on the surface to prevent a skin from forming. Chill for at least 2 hours.

Notes

My pudding didn't thicken at all until it started to boil. So don't fret if it takes a minute for it to begin thickening. Just be sure to keep whisking to avoid having lumps.

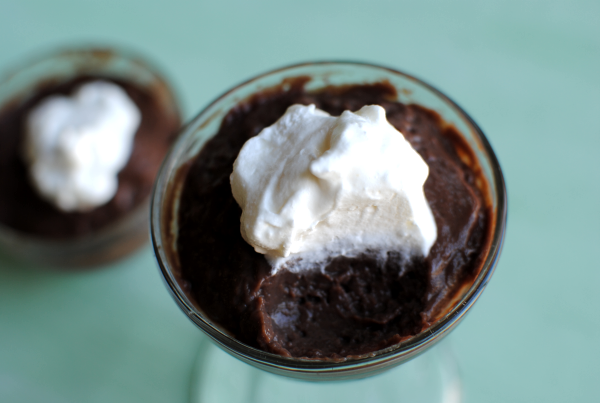
This is fantastic with a little whipped cream on top!

http://www.pennywisecook.com/homemade-chocolate-pudding/

This is a sponsored post written by me on behalf of Domino Sugar. All opinions expressed are 100% my own.


Like this post? SHARE it!

Related Posts Plugin for WordPress, Blogger...

Chili Cheese Fry Cupcakes

I think it’s about time that I shared a bad recipe with you. No, not bad as in it tastes like crap, but bad as in naughty. Oh yeah, you know what I’m talking about.

Try chili CHEESE fries. I’m feeling naughty just typing those words. Every now and then I like to take a break from my vegetable eating, low fat loving, and calorie watching to just make something so incredibly yummy that my toes curl. These Chili Cheese Fry Cupcakes come pretty darn close.

As you’d expect, I used ground turkey which makes me feel just a taddy bit better about them. I also used part skim low-moisture cheese which is also a little better. Besides that, all bets were off.

I started off by microwaving some store-bought steak fries until they were soft. Next time I will be making the fries from scratch in order for them to be softer. These ended up a bit crunchier than I would have preferred, but they were smothered in chili and cheese so I can’t complain too much.

Once the fries are softened, you squish them into muffin tin wells to make the base of your “cupcake”. Believe it or not, but your muffin tin will take an entire bag of steak fries. Then it’s a matter of baking them a bit and letting them cool a minute before topping them with your fantastically easy homemade chili and melty cheese.

The result is nothing short of amazing. You have fries, chili, and cheese all in your hand. The only thing that could make this better would be….well,…….sour cream. (Which I unfortunately did not have otherwise I would have put a dollop on these)

I got the idea for these gems over at 1 Fine Cookie. I made the chili part up myself in an attempt to make it fast and wow did it come out well!

Chili Cheese Fry Cupcakes

Chili Cheese Fry Cupcakes

These cupcakes are anything but dainty. Chili, cheese, and fries come together to create the ultimate savory cupcake.

Ingredients

  • 1 Package Frozen Steak Fries (or create your own fries)
  • 1 Pound Ground Turkey
  • 1 Can Ranch Style Beans
  • 1 medium Onion, Chopped
  • 1 Can Rotel
  • 1 Tsp Chili Powder
  • 1 Tsp Garlic, Minced
  • Salt and Pepper to Taste
  • 2 Cups Shredded Cheddar Cheese

Method

  1. Preheat oven to 375 degrees.
  2. On a large microwavable plate, microwave steak fries for about 4 minutes or until soft. (You may have to do this in batches) Let cool.
  3. Squish and flatten equals amounts of fries into the muffin tin wells.
  4. Bake fries for about 25- 30 minutes. Do not overbake or else they will be hard as a rock.
  5. Meanwhile, brown ground beef with onion and garlic.
  6. Add in beans, rotel, chili powder, and salt and pepper to taste.
  7. Once potatoes are done, removed from muffin tin and allow to cool.
  8. Place a spoonful of chili on each of the fries. Next top with equal amounts shredded cheese.
  9. If desired, place cupcakes in the oven to allow the cheese to melt for a moment or two.
  10. Serve with sour cream and green onions if preferred!

Notes

If you do plan to make your own potato fries (I will do this next time!), parboil your fries a bit before placing them in the oven to crispy a little. Then squish them into the muffin tins before baking them one last time.

http://www.pennywisecook.com/chili-cheese-fry-cupcakes/


Like this post? SHARE it!

Related Posts Plugin for WordPress, Blogger...

Freezer Peanut Butter and Jelly Sandwiches

School is either out or almost out in most places. Just because school is out doesn’t mean that you can quit making lunches. The familiar I’m huuuuuuuuuuuungry will haunt you if you do! Well come to think of it, that will haunt you even if you do make lunches. Whether you work or you don’t, it’s always a good idea to make life easier by taking a few shortcuts.

I had my precious Britton about this time last year. 1 year on Friday to be exact. In preparation for my hands being tied up breastfeeding or changing diapers, I knew that I had to take a few shortcuts in order to keep myself sane. So I decided to make up a bunch of PB & J sandwiches and freeze them for a quick lunch for Addie. This shortcut basically was a Godsend during the first 2 months. I was struggling with breastfeeding and getting used to those sleepless nights again so every little bit helped.

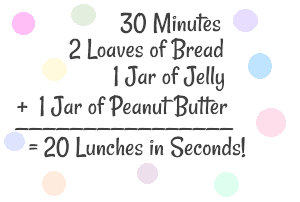
I’ve done some “mom math” for you to approximate the handiness of this shortcut.

It’s quite simple really. Everyone knows how to make a PB&J. Make a bunch at once and you’re set for practically a month! This math only calculates for using 2 loaves of bread, but technically I think you could get 3 out of it. I had quite a bit of peanut butter and jelly left over after using up the bread loaves.

This is really the only word to describe how freezing PB&Js can make your life. I couldn’t help myself from making a word with my sandwiches. Humor me please.

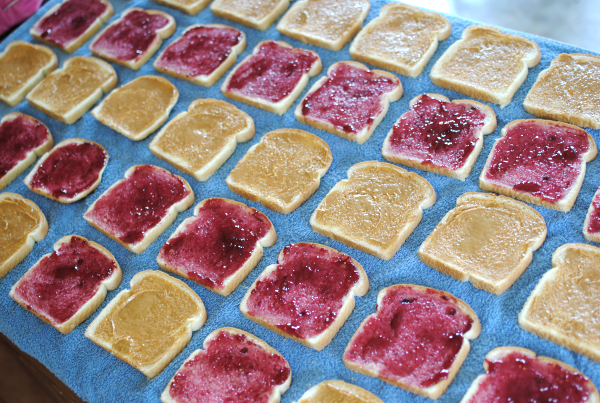
I don’t think that I’ve ever been so excited about a counter full of bread slices in my life. They represent time to me. Time that I can be washing dishes. Time that I can be eating my own lunch. Time that I could be sitting for a split second. You know, the important things.

Here are some questions that you might have about freezing PB&J Sandwiches:

Do you make them any special way for freezing?
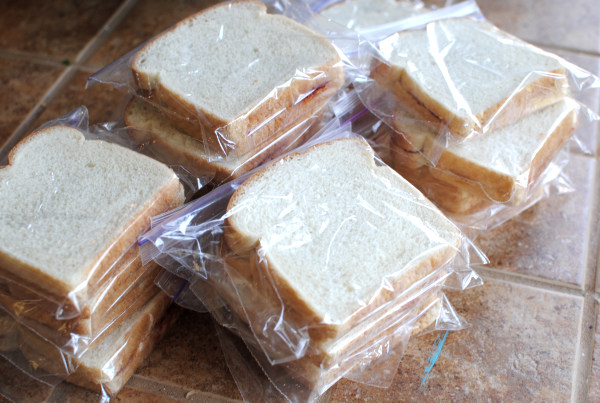
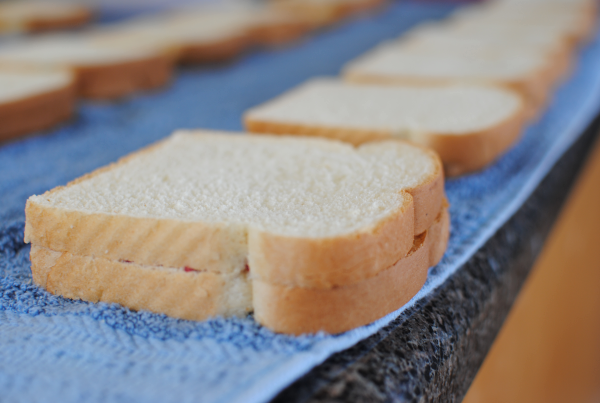
Nope! Make them like you would regularly enjoy your PB&Js and pop them into a ziploc freezer bag.

Do they become soggy when you heat them up in the microwave?
This depends. If you overheat them, the jelly side does tend to become soggy so it’s imperative that you don’t overheat them.

How long do you reheat them in the microwave?
Depending on your microwave, this would be around 12 seconds. It’s better to have them a tad cold than overheated and soggy.

What if I am placing the frozen PB&J into a lunchbox for later that day?
The sandwich will simply thaw out on it’s own and most likely be just right at lunchtime!

I’m actually on a freezer cooking journey right now. Not necessarily for dinners, but for breakfasts and lunches. There is just not enough time in the day to create elaborate dishes for those meals so why waste your day doing so? Take shortcuts to make your life easier during the day and then create something amazing for dinner instead.

Can’t wait to share with you some other meals that I’ve stocked my freezer with! But this one just might change your life.


Like this post? SHARE it!

Related Posts Plugin for WordPress, Blogger...

Easy Sausage and Cheese Biscuits

It was a busy weekend here. Hence the lack of the DIY and kitchen tip for you. I had the most amazing craft to share with you, but I have been so exhausted that every free moment has been used just plain sitting. You know how those weekends go. Today’s recipe is one that can practically save breakfast on days just as I described.

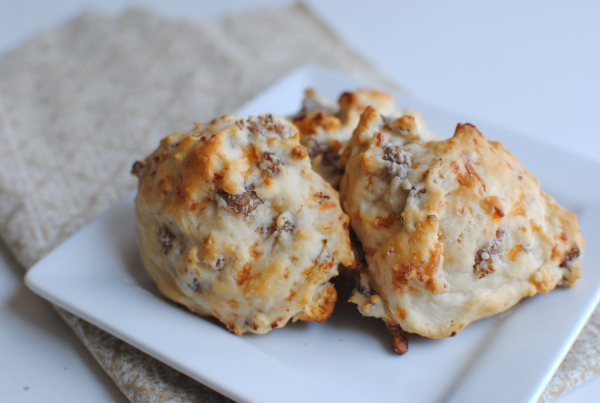
While it’s fairly simple to prepare a bowl of Froot Loops in the morning, it’s not always filling. The sugary cereal usually makes my oldest hungry within about 20 minutes. Looking for some freezer breakfast ideas the other night I ended up settling on a biscuit idea that I was sure would satisfy and kick start the mornings will something yummy.

Biscuits packed with meaty sausage and cheese.

I could’ve gone to my mom and gotten a family recipe for special biscuits. I could’ve gone to Google for a tasty biscuit recipe that was effortless. But to be honest with you, I ended up using the recipe for drop biscuits on the back of my off-brand Bisquik box and just adding what I wanted to it!

They turned out absolutely perfect. So simple, yet so tasty. My favorite kind of recipes!

These make the perfect freezer breakfast on the go! Or just on a lazy morning when you don’t feel like making anything. That just so happens to be most mornings around here. Especially lately because Britton has decided that she is an early bird. I’m not yet used to such early mornings just yet, but it’s good to know that I have something like these biscuits to just pop in the microwave for a quick bite for breakfast.

Easy Sausage and Cheese Biscuits

Easy Sausage and Cheese Biscuits

Adding hearty ingredients like sausage and cheese to an everyday biscuit make a great kick start to your morning!

Ingredients

  • 2 1/4 c. Bisquik Baking Mix
  • 2/3 c. Milk
  • 1 lb Turkey Breakfast Sausage
  • 3/4 c. Shredded Cheddar Cheese
  • 1 1/2 tsp garlic, minced

Method

  1. Preheat oven to 450 degrees.
  2. Mix all ingredients in a medium bowl until combined.
  3. Drop dough by the teaspoonful onto a lightly-greased baking sheet.
  4. Bake for 8-10 minutes or until golden brown.

Notes

To freeze, let cool completely then place in a ziploc or freezer bag. To thaw, pop in the microwave for around 5 seconds.

http://www.pennywisecook.com/easy-sausage-and-cheese-biscuits/


Like this post? SHARE it!

Related Posts Plugin for WordPress, Blogger...

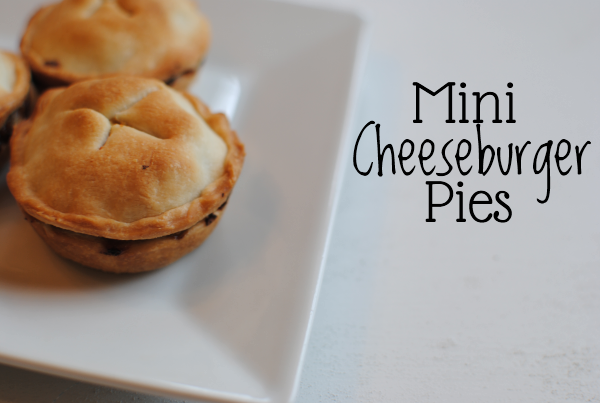
Mini Cheeseburger Pies

When my husband and I were dating like a million years ago (or so it feels), we actually went on dates to McDonald’s. Not only were both incredibly cheap tightwads, but my husband had a crazy obsession with none other than…..dom dom dom, McDonald’s! Yes, he was (and still is) a cheeseburger fanatic. I even had a cheeseburger birthday cake made a couple years ago. Needless to say that he is all-American and loves his American food.

He’s not always easy to please, but as long as he gets his cheeseburger every now and then he’s good! In honor of him, I made up these amazing Mini Cheeseburger Pies that honestly was a little unplanned. It was one of those days when I was feeling experimental and I was on a path to one idea and ended up with another. I’m glad that this is where I ended up! These were sooooo good.

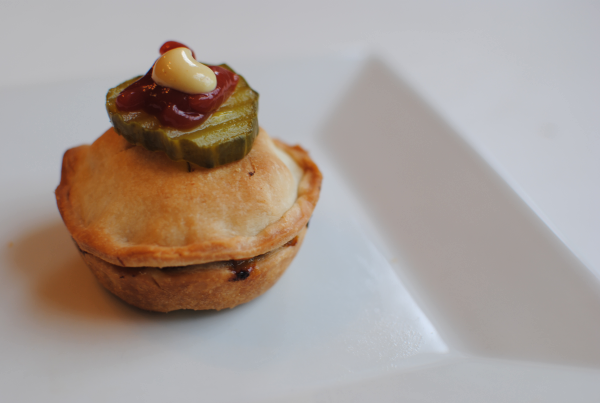
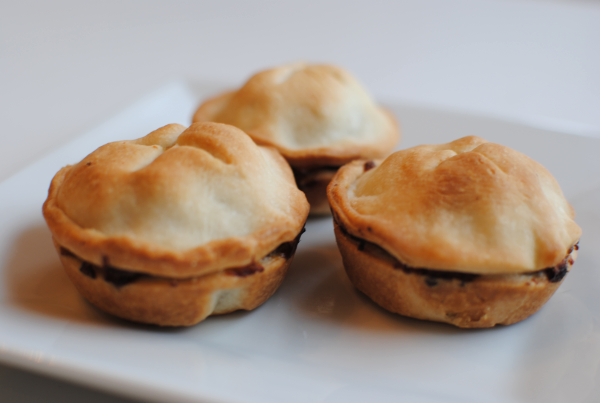
Using store bought pie crusts that I got 2 for $1.99 at Aldi, I filled them with a cheeseburger filling and topped them with whatever each family member wanted. My daughter Addie has just realized that she likes pickles. (I know right? Where has she been?! Pickles are yummy.) So she got those on her’s.

See? How adorable. What a great idea for a party. These aren’t too small but they also aren’t huge either so they could be used an appetizer also.

They are so simple too. I have a good feeling these would also freeze well.

Mini Cheeseburger Pies

Mini Cheeseburger Pies

This miniature version of cheeseburger pie is a perfect appetizer or party food!

Ingredients

  • 1 lb Ground Beef
  • 2 Premade Pie Crusts (or homemade if you prefer)
  • 1 Medium Onion, Chopped
  • 2 Tbsp Worcestershire Sauce
  • 1 Tbsp Ketchup
  • 1 Tbsp Djon or Yellow Mustard (whichever you prefer)
  • 2 Tsp Garlic, Minced
  • 4 oz Velveeta Cheese
  • Salt and Pepper
  • Bacon Pieces (Optional)

Method

  1. Preheat over to 450 degrees.
  2. In a large skillet over medium-high heat, brown mean with onion and garlic. Drain.
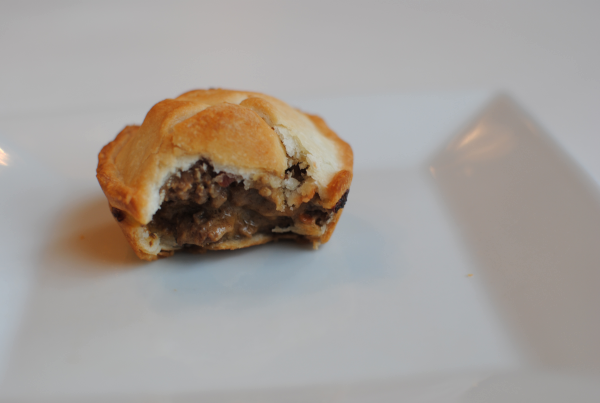
  3. Add worcestershire sauce, ketchup, mustard, and Velveeta. Stir until combined.
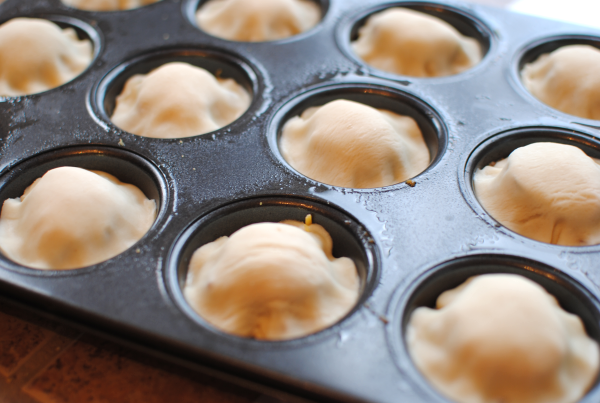
  4. Meanwhile, using a glass or biscuit cutter, cut 2 and 3/4 inch circles out of pie crusts. Place circles into a greased muffin tin using the leftover scraps to piece together more.
  5. Fill each crust with equal amounts of meat filling. Add bacon pieces last if desired.
  6. Place a second pie crust circle on top of each pie and press down around the edges to help it seal.
  7. Cut a T slit in the tops to prevent them from bubbling up.
  8. Bake for 12 minutes or until golden brown.
  9. Serve with your favorite cheeseburger condiments!
http://www.pennywisecook.com/mini-cheeseburger-pies/


Like this post? SHARE it!

Related Posts Plugin for WordPress, Blogger...

Sugar Cookie Ice Cream Bowls

I was busy making up cookies for Addie’s 5th birthday last week. Which by the way, I am still in shock that I have a 5 year-old. Doesn’t seem possible that she is already that big. I’m going to try to get over it and not have a mini meltdown. Instead, I’ll just eat a SUGAR COOKIE BOWL full of ice cream! I got the idea from this picture. Pretty self explanatory.

Yeah, it’s quite an epiphany. Eating ice cream out of a cookie? I’m totally down with that. I think the only thing better than that would be eating ice cream out of a brownie. Hmmm, I’m getting ideas….

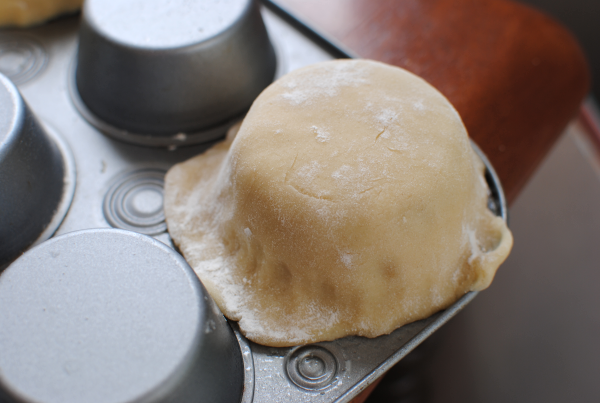
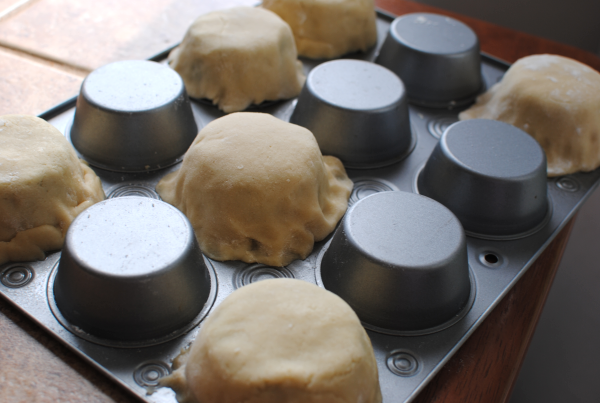
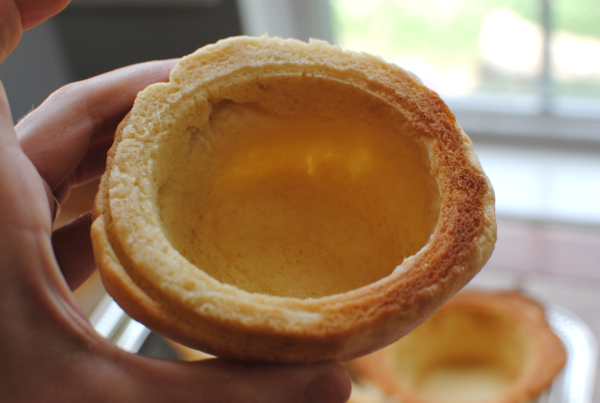
It’s best to have a good batch of sugar cookie dough to use. I found the BEST recipe last week and it worked like a charm. You simply lay the dough over the muffin tin cups and bake as usual.

You can also cut the dough using the top of a glass to get a perfect circle. Or you can just wing it like I did. I even had to patch a few up. It didn’t matter though because they still baked up fine.

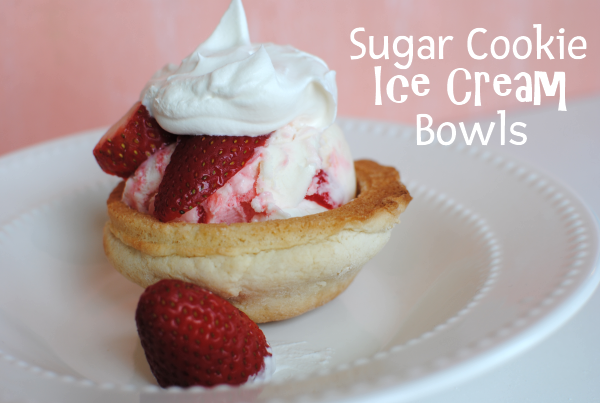
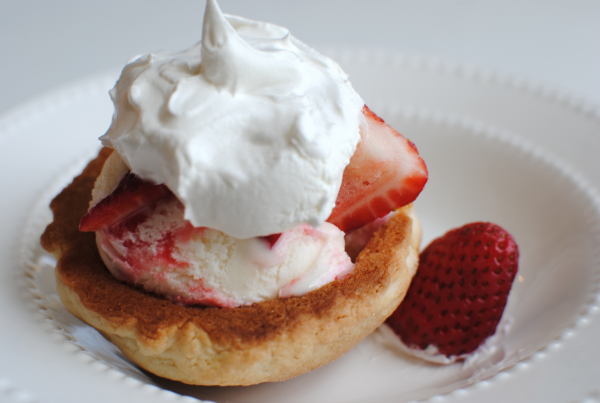
Tah dah! Oh yeah, it’s a bowl that’s a sugar cookie. Incredible isn’t it? This is where you place your ice cream…

Or even fruit if you’re being good….

Sugar Cookie recipe courtesy of Spark People.

Sugar Cookie Ice Cream Bowls

Sugar Cookie Ice Cream Bowls

Eat your ice cream out of a sugar cookie!

Ingredients

  • 1 1/2 cups - granulated sugar
  • 2/3 cup - butter (or shortening - half of each is recommended)
  • 2 whole eggs
  • 2 Tbsp - 2% milk
  • 1 tsp. - vanilla extract
  • 3 1/4 cups - white flour
  • 2 1/2 tsp - baking powder
  • 1/2 tsp - salt

Method

  1. Cream butter and sugar together in a large bowl. Add eggs, extract, and milk and mix well.
  2. Mix dry ingredients with a wire wisk in a medium bowl. Add dry ingredients to wet ingredients in large bowl. Mix until combined well.
  3. With hands, shape dough into a ball. Wrap with plastic wrap and refrigerate for 2-3 hours.
  4. Meanwhile, preheat oven to 400 degrees F.
  5. Lightly grease muffin tins. Roll half or 1/3 of the dough at a time on a floured surface. Keep the rest in the fridge.
  6. Roll dough to 1/8-1/4 inch thick.
  7. Flour a glass or cup and cut shapes. Re-roll trimmings and reshape. Place over muffin tin wells making sure to cover the whole thing with no holes.
  8. Bake for 8 min or until light brown.

Notes

You are free to use whatever sugar cookies your prefer, even store bought. I just found this recipe to be really great to molding and rolling.

It's not a bad idea to make your dough the night before and roll it out in the morning. The colder it is, the easier it is to work with.

This works with chocolate chip cookie dough too!

This recipe makes a LOT of dough (like 72 cookies depending on your size) so if you only plan on making a few, half this recipe.

http://www.pennywisecook.com/sugar-cookie-ice-cream-bowls/


Like this post? SHARE it!

Related Posts Plugin for WordPress, Blogger...

Cinnamon Sugar Roasted Chickpeas

My sister has been making fun of me lately. This isn’t really anything new because she has always done this. We’re 4 years apart so it’s what you would expect. Back in the day she would make fun of me for the way I walked or the way I’d say something. You know, silly, ridiculous picking-on-your-sister kinda stuff. Now that we’re older, I’m used to it. It came with the territory of being the family baby.

Nowadays it’s things like her latest picking about my use of chickpeas in recipes. She thinks I’m silly for using them in so many dishes and in things that you wouldn’t normally expect to find them in. It’s alright, she can just pick away because I love my chickpeas! And for the record, I love my sister too.Very much so. It’s her birthday today so I want to wish her a happy one! I might just buy her a can of chickpeas! ๐Ÿ˜‰


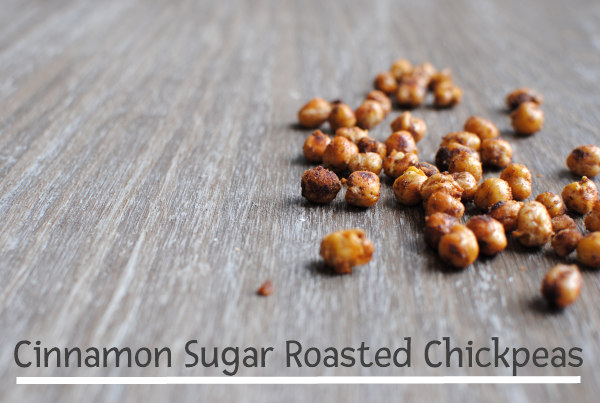
Yes, I admit it. I am a fan of chickpeas, otherwise known as garbanzo beans. I like them right out of the can on salads, mixed into cookies or cakes, and my newest favorite- roasted in the oven for a snack! The best part of roasting them is that they can go savory or sweet. I have a sweet tooth the size of Texas so I usually go that route.

I came across a recipe for Sweet and Salty Roasted Chickpeas over at The Cupcake Project and HAD to make them! I made a few slight changes and they were incredible. These are so incredibly cheap and easy to make and it’s awesome that these make for such a healthy snack too.

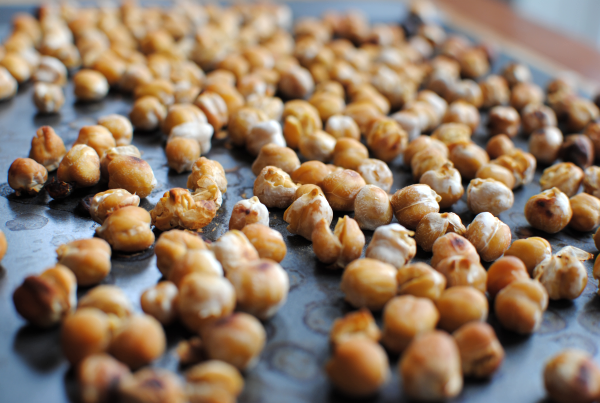
The first step is the easiest. Bake them for 30 minutes without doing a thing. Of course you’ll want to bake them on parchment paper or a nonstick baking mat. It’s only after they cook that you add the yumminess.

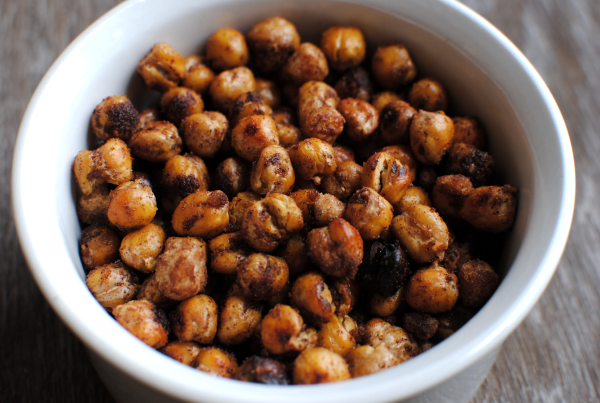
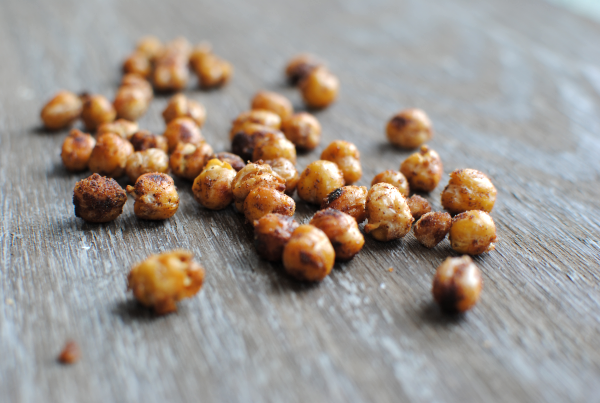
Then you transfer them to a bowl to mix in the olive oil, cinnamon and brown sugar. The next step isn’t as simple. Trying to not eat the entire batch is the hardest step of all.

I failed at this step.

I ate every single last chickpea.

Recipe adapted from The Cupcake Project.

Cinnamon Sugar Roasted Chickpeas

Cinnamon Sugar Roasted Chickpeas

Cheap, easy and incredibly delicious, chickpeas make an awesome roasted snack!

Ingredients

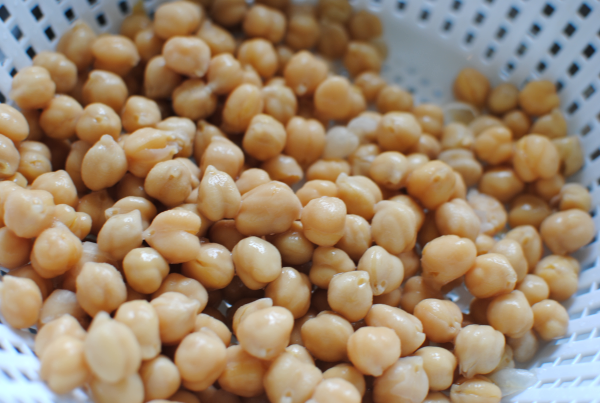
  • 1 Can 14 or 15 oz Chickpeas (Garbanzo Beans), Drained and Rinsed
  • 2 Tsp Olive Oil
  • 1 Tsp Cinnamon
  • 2 Tsp Brown Sugar

Method

  1. Preheat oven to 450 degrees.
  2. Place chickpeas on parchment paper or nonstick baking mat and bake for 30 minutes.
  3. Transfer chickpeas to bowl and mix in the olive oil, cinnamon, and brown sugar until coated.
  4. Serve or store in an air-tight container.

Notes

IF (that is a big if) your chickpeas are still around the next day, they probably won't taste as good. They are best eaten right away or within a few hours, just FYI.

http://www.pennywisecook.com/cinnamon-sugar-roasted-chickpeas/

P.S.- A very BIG Happy Birthday to my sister! I love you!


Like this post? SHARE it!

Related Posts Plugin for WordPress, Blogger...

Strawberry Banana Smoothie Pops

Sometimes I wish that I had a dime for every time that my daughter came to me during the day saying “I’m huuuuuuuungry”. You don’t even have to have kids to know exactly what that statement sounds like. I can remember saying that to my mom when I was young. Even after my daughter has just eaten a complete meal, not 10 minutes later I hear those words come out of her mouth. So around here it’s imperative that we have healthy snacks available for these moments of huuuuuunger.

Some of the snacks of choice that I like to have on-hand are string cheese, peanut butter crackers, and fruit snacks. But we’re almost to summer and it’s time to cool off with some refreshing snacks on a hot day. My favorite store for produce, Aldi of course, had a great price on strawberries the other day and I stocked up! They also almost always have the best price on bananas in town. To me, nothing brings those two fruits together better than a smoothie! But if you don’t want to have to create a smoothie every time you would like one, the pops might just satisfy your strawberry banana smoothie craving!

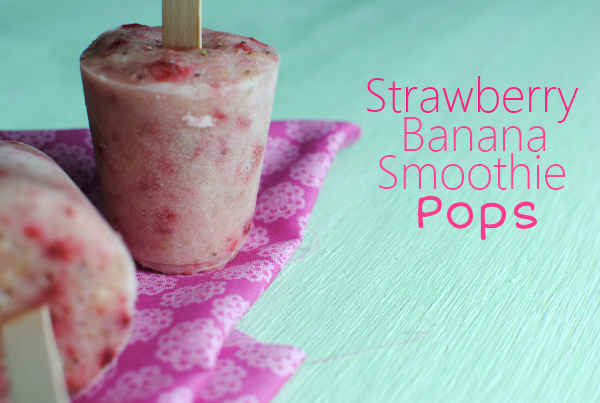
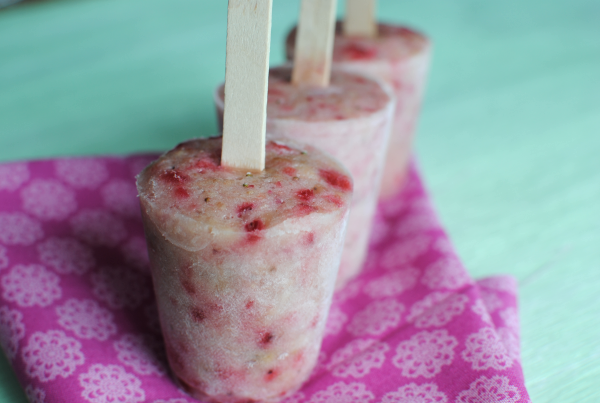
I mixed a couple of bananas and several strawberries together with a little plain yogurt and a pinch of splenda and threw it all in several dixie cups. I popped popsicle sticks into each one and froze them to create these yummy smoothie pops.

It’s a snack that’s not only healthy but really satisfying and refreshing at the same time. And I love that making them in these cups make them fairly big. Maybe more than you would get from a store bought pop and way cheaper for sure!

Strawberry Banana Smoothie Pops

Strawberry Banana Smoothie Pops

A natural and refreshing popsicle made from fresh strawberries and bananas.

Ingredients

  • 2 Large Bananas
  • 10 Medium-Large Strawberries, Cored
  • 1/4 Cup Plain Nonfat Yogurt
  • 1 Tsp Sugar Substitute (optional)
  • 8 Small Dixie Cups

Method

  1. Place all ingredients in a food processor or blender and mix until smooth.
  2. Pour into cups and freeze until solid (around 2-3 hours).

Notes

You don't have to use "Dixie" cups. Use whatever cups you might have. We used plastic bathroom cups. Depending on the size, you may have more or less popsicles.

The sugar substitute addition is not completely necessary. The strawberries and bananas give it plenty of natural sweetness, I just like mine extra sweet!

http://www.pennywisecook.com/strawberry-banana-smoothie-pops/


Like this post? SHARE it!

Related Posts Plugin for WordPress, Blogger...

Low Calorie Berry Wontons

I went through a phase a couple months ago where all I wanted to do was make meals out of wonton wrappers. If you’re not familiar with them yet, they are found in the refrigerated section usually near the tofu and guacamole. I used to pass them at the grocery store all the time thinking who in their right mind has enough time to wrap up their own wontons or eggrolls? That was until I came across the recipe for Lasagna Cupcakes. Little did I know that those little wonton wrappers are fairly inexpensive and are (best of all) low in calories!

Using them to wrap things in and then bake can really satisfy the craving for that crispy crunch without adding all the fat of frying. And did you know they are incredibly versatile too? They can go either way…savory or sweet!

You can have 8 wonton wrappers for just 160 calories.

The other day I got a sweet tooth. Yes I know this is nothing new, but it’s how the story started so keep listening. So I got this sweet tooth and was also feeling a bit innovative. Ideas like that can either end really well or very badly. I was willing to take my chances.

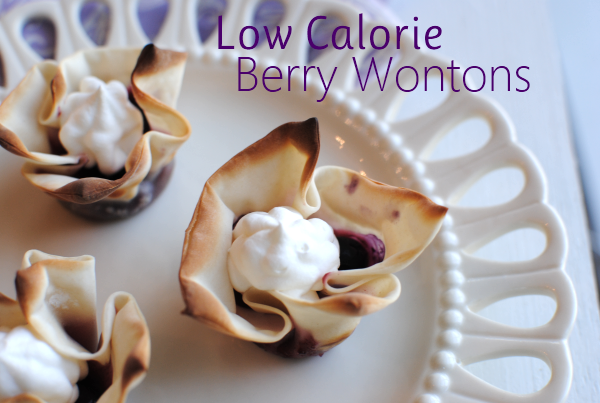
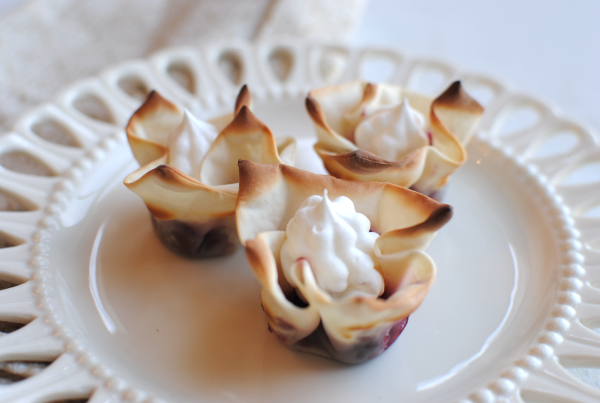
I had a jar of sugar-free raspberry jam in the pantry and these wonton wrappers in the fridge. I wasn’t exactly sure how I was going to use them together so I just kinda winged it really. I placed a wonton wrapper in each well of a mini muffin pan letting them curl where they wanted to. Then I dropped 1 tsp of my sugar-free raspberry jam in each wrapper. I baked them for a few minutes and took them out of the oven.

Berry Wontons! I felt like they needed the whipped cream for a finishing touch. These look like expensive hors d’ล“uvre that you would expect to see at a fancy party. So incredibly simple and yet fancy. That combination is my favorite.

And the best part? 1 of these Berry Wontons only has 30 calories!

Minus the whipped cream. Depending on your kind it will add a few calories, but not too much.

You can use whatever jam or jelly that you have on-hand. I just went the sugar-free way to reduce the calories. Any flavor would be so tasty!

Low Calorie Berry Wontons

Low Calorie Berry Wontons

Only 2 ingredients create a charming and tasty yet low-calorie snack!

Ingredients

  • 24 Wonton Wrappers
  • 24 Tsp Sugar-Free Jam or Jelly
  • Whipped Cream for topping, Optional

Method

  1. Preheat over to 375.
  2. Place a wonton wrapper into each well of your 24 cup mini muffin pan. Let them curl up if needed.
  3. Place a teaspoon of jam or jelly in each wrapper.
  4. Bake for 4-5 or until edges just begin to brown. Let cool.
  5. Top with optional tsp of whipped cream and serve!

Notes

I also added a couple of fresh blueberries to a few of these. Adding fresh fruit if you have any on hand would make a great addition.

http://www.pennywisecook.com/low-calorie-berry-wontons/


Like this post? SHARE it!

Related Posts Plugin for WordPress, Blogger...