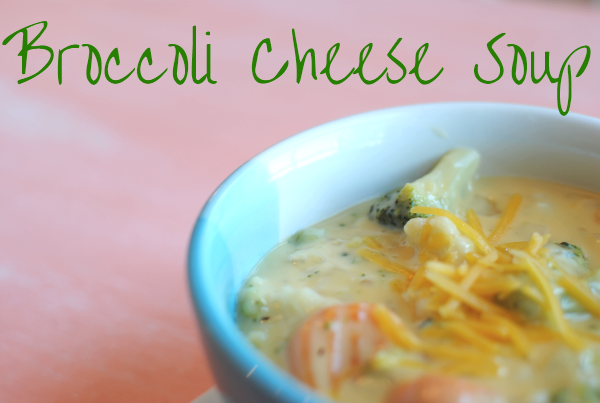
Broccoli Cheese Soup

How was your 3-day weekend? Get a little R&R in? I was kinda forced into some R&R this weekend when a very random illness struck. It wasn’t something that had been going around as far as I know, but thankfully it’s going away fairly quickly. We didn’t have big plans for the holiday so it was nice to have some time to just be lazy.

One of my favorite comfort foods is broccoli cheese soup. There is just nothing like the thick, cheesy, stick-to-your-ribs soup. Especially when it starts to get cold outside. But honestly, I could care less what time of year it is. I’ll eat it any day!

There are some really great recipes out there for this kinda soup. Just about anywhere you look, somebody has their own version. But they all come down to the same ingredients: broccoli and cheese! Most of which contain Velveeta. There’s nothing wrong with that, but sometimes I do like to skip the processed blocks of cheese and use the good stuff. So I adapted my potato soup recipe to include a little more cheese and swapped out the potatoes to create this yummy version of broccoli cheese soup!

I also added barley for added fiber!

This has got to be one of the easiest soups out there to make. It tastes like it’s slow-cooked but only takes minutes. My absolute favorite kind of recipes.

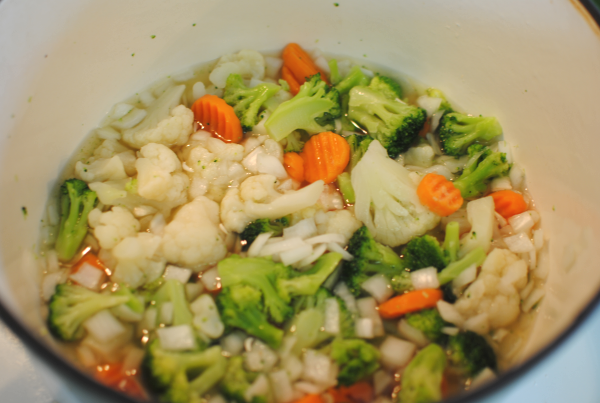
You start with a 16 oz package of frozen broccoli and carrots, broccoli and cauliflower, or broccoli and both! Whatever you can find at the store for cheap. Throw that into a pot along with a chopped onion, your barley, and can of chicken broth. The veggies just simmer away. Believe it or not, but this is the most time-consuming part of the entire process! (Besides chopping the onion, of course)

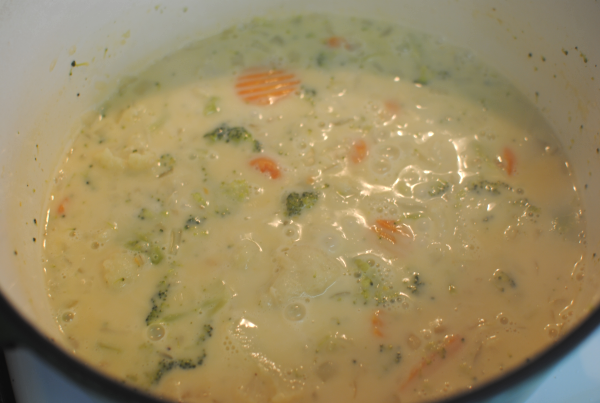
Whisk together cornstarch and part of a can of evaporated milk to begin your thickening agent and add that in.

We’re starting to get creamy y’all.

Pour in the rest of your milk and then it’s time to get cheesy.

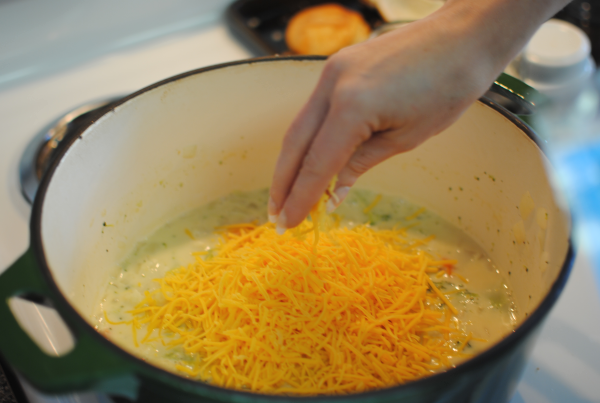
Oh yeah. Cheeeeeeeeese always makes things better.

That’s 2 cups right there. Let that melt and you’re ready to serve! This goes really great in a bread bowl or along with some yummy rolls.

I’m not sure why it makes me happy to know that there’s no Velveeta in it, but it does! Somehow it just feels healthier.

I’m sure there’s a recipe that you love or that you’ve heard of. I urge you to give this one a try next time you’re in the mood for a warm, broccoli cheese soup.

Broccoli Cheese Soup
Recipe Type: Main Dish, Soup
Author: Pennywise Cook
It is possible to make broccoli cheese soup without Velveeta! Try this recipe for a tasty alternative!
Ingredients
  • 16 oz Package Frozen Broccoli (or variation of broccoli and cauliflower or carrots)
  • 1 Medium onion, chopped
  • 1 can Reduced-sodium, fat-free chicken broth
  • 1/4 c. Barley (Kroger has this for around $1)
  • Dash pepper
  • 3 tbsp cornstarch
  • 1 can fat-free evaporated milk, divided
  • 2 c. reduced-fat shredded cheddar cheese
Instructions
  1. In a large pot, combine frozen veggies, onion, chicken broth, barley, and pepper. Bring to boil, then simmer for about 20 minutes.
  2. Combine 3 tbsp cornstarch with 1/4 c. evaporated milk. Pour into veggie mixture and stir well. Pour in the rest of the evaporated milk. Bring to a boil and let cook for about 2 minutes.
  3. Remove from heat. Stir in cheese and serve!
Notes

Makes a great meal for having a vegetarian friend over!


Like this post? SHARE it!

Related Posts Plugin for WordPress, Blogger...

Southwestern Black Bean Omelet

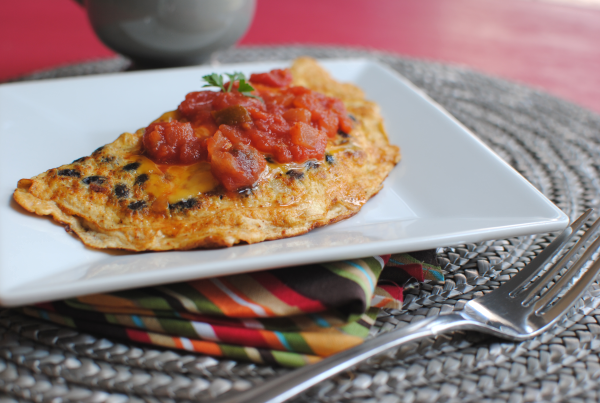
My mission lately is to make sure that I eat all 3 meals. I have a tendency to get busy with the girls, cleaning the house, or perhaps blogging my favorite recipes with you and just completely lose track of time and meals. That’s coming to an end because I’m on a mission to find filling, yet easy breakfasts and lunches. I’ve been making one that I wanted to share since I find it really tasty.

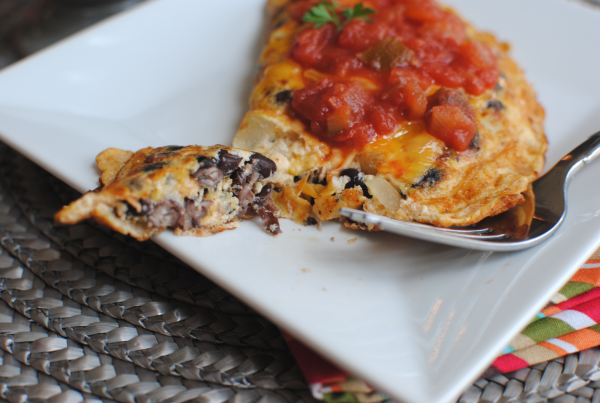
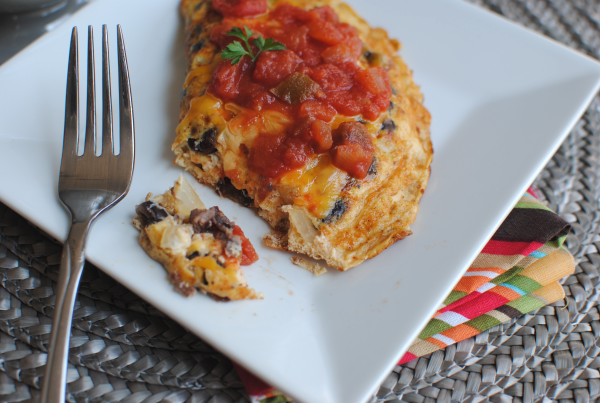
This Southwestern Black Bean Omelet is filling and tasty, but also low in calories. I figured it up and there are just 160 calories in this entire omelet! That even includes the cheese, which is where almost half of the calories come from. You could easily knock off even more calories by using reduced-fat cheese.

My favorite thing about this omelet is that it’s super fast to make. It takes no time at all to whip up but leaves you feeling satisfied. With the protein from the egg beaters and the fiber and antioxidants from the black beans, it’s also very healthy.

I find myself eating this for lunch more than I do for breakfast! If you’re looking to change up your everyday lunch or breakfast, you might try this out.

Check out the recipe below and enjoy!

Southwestern Black Bean Omelet
Recipe Type: Breakfast, Lunch
Author: Pennywise Cook
This black bean omelet is not only filling and tasty, but it’s healthy too!
Ingredients
  • 1/3 c. Egg Substitute
  • 2 Tbsp Chopped Onion
  • 1/4 c. Black Beans
  • 1/8 Tsp Chili Powder
  • 2 Tbsp Shredded Cheddar Cheese, Divided
  • 1 Tbsp Salsa
  • Salt & Pepper to Taste
  • Cooking Spray
Instructions
  1. Heat a skillet over medium-low heat. Combine the egg, onion, black beans, salt & pepper, and chili powder in a bowl. Spray skillet with cooking spray then pour in the egg mixture. Immediately sprinkle with 1 tbsp shredded cheese. Let cook for 4-5 minute until the edges start to firm.
  2. Flip and the omelet in half and top other tbsp of cheese. Cook for about another 2 minutes until cheese is melted. Remove from skillet, top with salsa and serve!
Notes

Save the rest of your canned black beans and leftover onion for another day to make another omelet!


Like this post? SHARE it!

Related Posts Plugin for WordPress, Blogger...

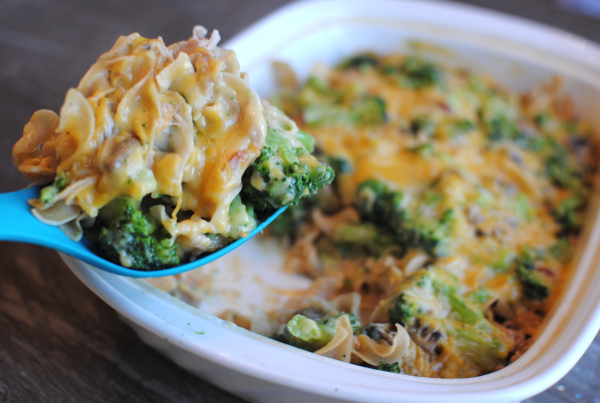
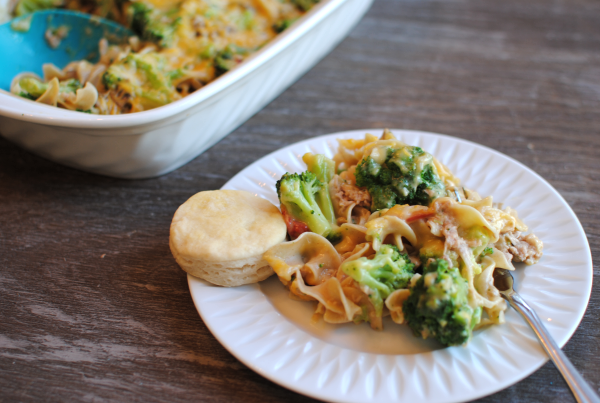
Cheesy Broccoli Tuna Casserole

Today I’m going to address a meaty ingredient that folks often overlook when it comes to making meals.

Canned tuna.

No, it’s not glamorous. Quite the contrary, the very thought of it is not appealing at all to me. When I pop open a can, I feel like I’m about to feed a cat, not make dinner. But undeniably, it’s a cheap meat. I don’t really mind the taste, as long as it’s covered with cheese or mayonnaise or mustard. I even love a good old-fashion tuna sandwich every now and then. Will my husband eat one? No. Will my kiddo eat one? No.

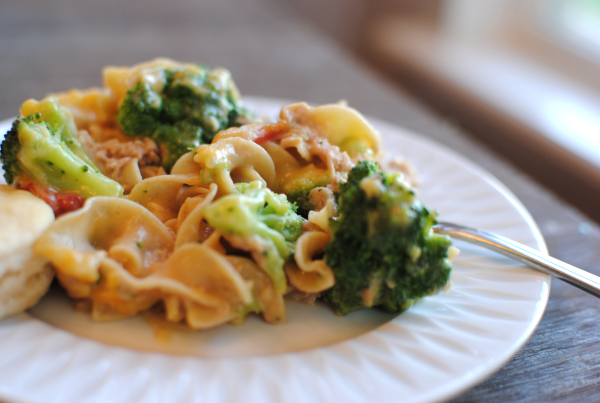
Enter Cheesy Broccoli Tuna Casserole. I adapted this recipe a little from this cookbook.

I’ll go ahead and warn you though, if you have tuna haters who can’t stand tuna, this probably won’t change their tune. It’s not one of those kinda casseroles. But it is quite tasty and a great way to save a little money using affordable pasta, meat, and veggies.

One of my favorite things about this dish is that you can microwave it instead of firing up the oven. That’s always a plus to me.

It’s funny, my daughter was eating it and she couldn’t quite put her finger on what was in it. She was blind-sided by the yummy cheese and broccoli (this is what makes this one so sneaky!) and didn’t realize that there was tuna inside. She then said “Ew, fish!” and gave me the oh-so-famous “I don’t like it.”. I told her to just pick out what she didn’t like. She once again stated that she didn’t like the tuna part.

Later on, washing the dishes I found nothing but pieces of mushroom on her plate. She didn’t even know that she was actually eating the tuna and not eating the mushrooms. So the moral of this story is that from now on, I’ll make this dish without mushrooms.

And p.s.- be prepared to have your entire kitchen smell like tuna. If you figure out a way to avoid that, please let me know!

Cheesy Broccoli Tuna Casserole
Recipe Type: Main Dish
Author: Adapted from 366 Low-Fat Brand-Name Recipes in Minutes Cookbook
Affordable canned tuna makes up a very simple yet tasty supper!
Ingredients
  • 10- 12 oz Wide Egg Noodles
  • 10.75 oz Can of Cheddar Cheese Soup
  • 5 oz Evaporated Milk
  • 1 tsp Onion Flakes
  • 2 Cans Tuna packed in water, drained
  • 4 oz Mushroom Pieces, Drained (optional)
  • 16 oz Frozen Broccoli, Thawed (I used steamfresh)
Instructions
  1. Preheat oven to 350 degrees. In a large pot, boil noodles according to package directions. Drain and set aside.
  2. In a small bowl, combine cheddar cheese soup and evaporated milk. Add onion flakes and mushrooms.
  3. Layer 1/2 the noodles in the bottom of a 9×13 baking dish. Crumble 1 can of tuna over the top of the noodles. Add 1/2 of the broccoli and then pour 1 cup of the sauce on top of that. Repeat layers ending with the rest of the sauce.
  4. Top with a sprinkle of shredded cheese if desired.
  5. Bake for 20 minutes.
  6. Microwave version- assemble as above. Then microwave on high for 8 minutes. Then reduce power to 50% and microwave another 5 minutes.

Like this post? SHARE it!

Related Posts Plugin for WordPress, Blogger...

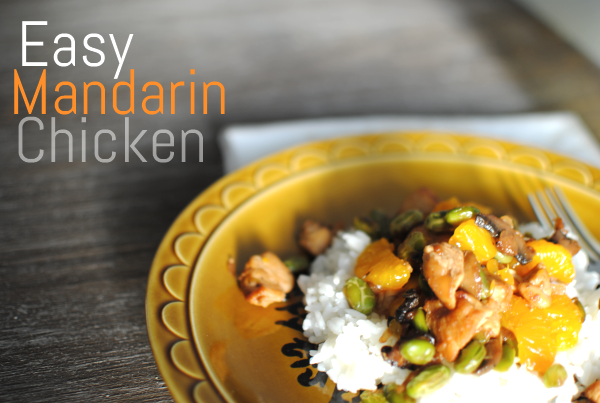
Easy Mandarin Chicken

My girls have recently discovered mandarin oranges. Ever since I was a kid, I’ve always loved fruit in any form. Even canned fruit strikes my fancy every now and then. I picked up a few cans of mandarin oranges the other day to see if my girls would enjoy it as much as I used to. I think ended up rekindling my love for the fruit myself. And as expected, they absolutely loved them. I really need to find myself a good sale to stock up on them.

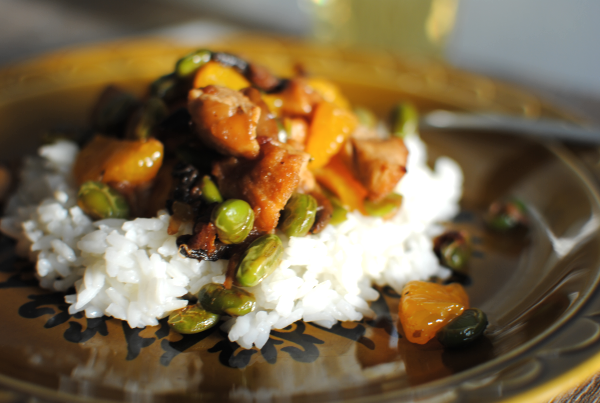
In keeping with their latest obsession, I decided to make something that showcased two things that I know they’ll both like. Chicken and the new-found love, mandarin oranges.

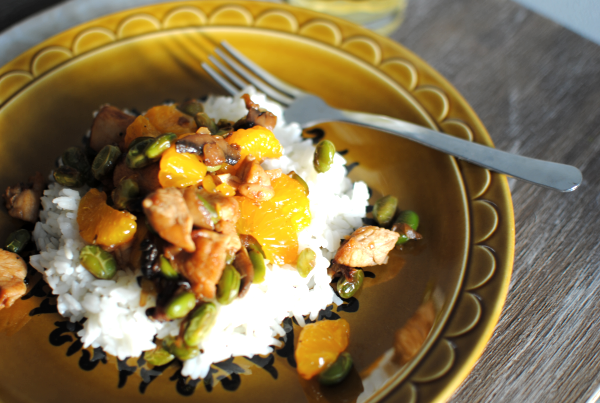
To my utmost surprise, my ENTIRE family (including my incredibly picky husband and 5-year old) loved this meal! The 1-year old even cleaned her plate.  I cleaned mine and an entire 2nd plate as well. Hubby was really concerned about the sweet oranges being used with savory chicken, but when he was done he told me that he thought it worked really well together. SCORE!

I used edemame to kick up the nutrition and hid mushrooms with the onions. The mushrooms were quite stealth and the kiddos loved the edemame! In fact, Addie asked me at one point what kinda beans they were. I told her edemame and she replied “I really like edemame!”.

Those are words that I never expected to come out of my 5-year old’s mouth…

By the time dinner was over, I was floored. This was a meal that the whole family loved and it was actually healthy and good for them. That only happens in my dreams and on commercials doesn’t it?

Recipe adapted from 366 Low-Fat Brand-Name Recipes in Minutes Cookbook.

Easy Mandarin Chicken
Recipe Type: Main Dish
In just minutes, you’ll have a mouth-watering Asian meal with little effort!
Ingredients
  • 1 11 oz Can Mandarin Oranges
  • 2 & 1/2 tbsp Soy Sauce
  • 2 Boneless, Skinless Chicken Breasts, Cut into Bite-size Pieces
  • 1 Tbsp Canola Oil
  • 1/4 Tsp Garlic Powder
  • 1 Cup Chopped Onion
  • 1 & 1/2 c. Frozen Edemame
  • 8 Baby Bella Mushrooms, Sliced
Instructions
  1. Drain oranges, reserving 3 tbsp of the liquid. Mix together the reserved liquid with the soy sauce and set aside.
  2. Heat oil in a large skillet and cook chicken in the oil over medium-high heat until chicken is no longer pink. Remove chicken from skillet. Add in the onions, edemame and mushrooms. Cook until onions are tender.
  3. Add the chicken back in along with the soy sauce mixture. Cook and stir to heat all of it through.
  4. Gently stir in the mandarin oranges right before serving.
  5. Goes well over rice!
Notes

If your group is not a fan of edemame, you can always use frozen snap peas in their place.

Teriyaki sauce can also be substituted in soy sauce’s place.

The addition of a couple drop of sesame oil would also make a nice addition.

Be prepared for a quick meal! This one takes no time at all to whip up!


Like this post? SHARE it!

Related Posts Plugin for WordPress, Blogger...

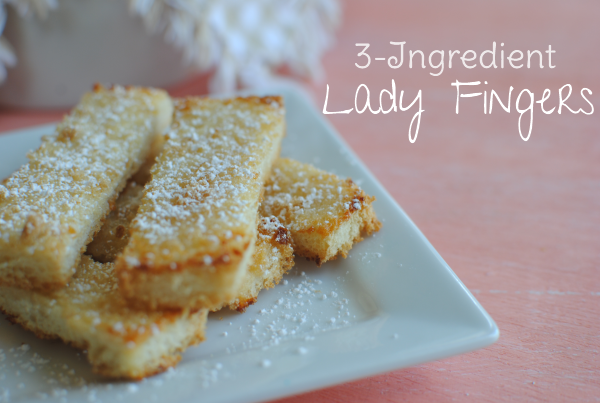
3-Ingredient Lady Fingers

Y’all know I’m a big fan of my sweets. Did you see yesterday’s recipe? I especially love recipes that don’t include many ingredients. In most cases that means that it will cost less to make and it will take less time. Cheaper and I can eat it sooner? My kinda recipe.

I can’t take credit for these sweeties today. I found this one inside the Fite for Your Life II cookbook by Janis Forbes Fite, RN. It’s a really good cookbook for low-fat and simple recipes. And she’s from my home town!

These are SO simple and perfect for a brunch, baby shower, or tea. Very light and airy and made out of things you probably have on-hand. It starts with day old white bread. Now I’m not going to lie. My bread wasn’t old. In fact, I bought it the day that I made these. So I just popped them into the toaster for a taddy bit to get them a little “stale”. Worked like a charm, but had me considering the need for a 4-piece toaster. It took a while to toast up all that bread.

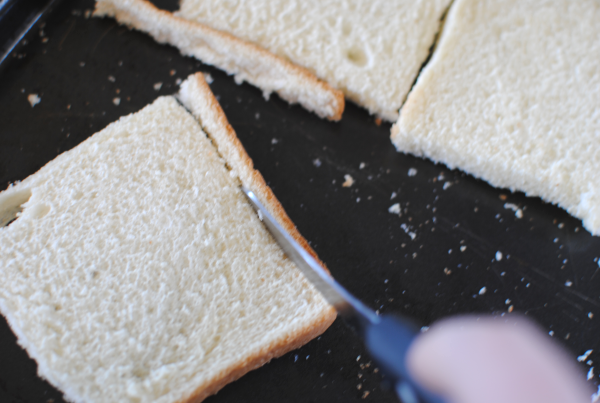
So, start by cutting the crust off every piece. This will leave you with a lot of leftover crusts. You can simply eat them as you cut them off as I did. Or consider some of the options below:

  • Pop them into the food processor to make your own bread crumbs.
  • Dip them in melted butter and sprinkle with cinnamon and brown sugar, then bake at 350 degrees for 20 minutes or so. Tasty sweet treat!
  • Use them to make stuffing (or dressing as we call it in the south)
  • Use them to make bread pudding.
  • Freeze for later to make any of the above!

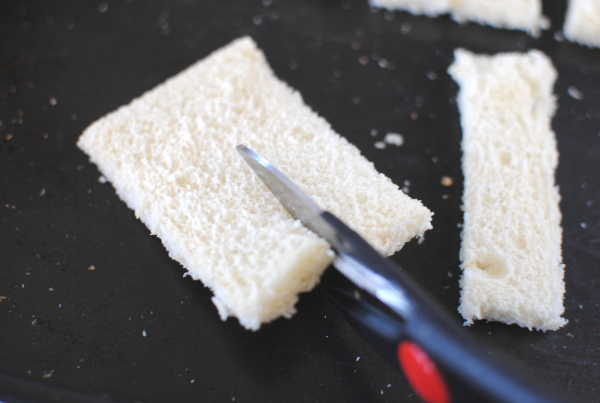
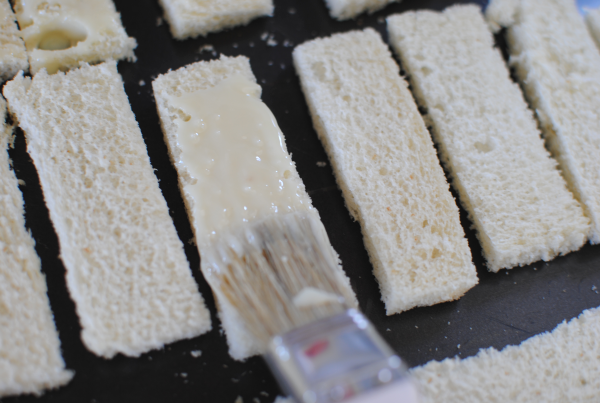
Cut each piece into 3 “fingers”. I used my kitchen shears and that worked really well to get straight pieces. Nobody wants a crooked finger! 😉

Enter, sweetened condensed milk. The fat-free kind that is. Using a pastry brush or whatever kinda brush you’d like, spread a generous amount onto each piece. This is what gives it that yummy sweetness.

Sprinkle on some brown sugah too…

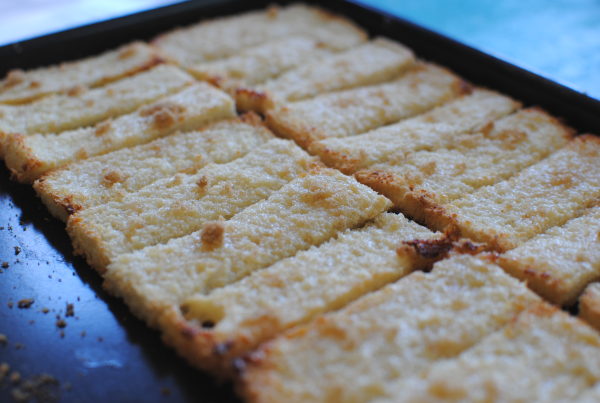
Oh yeah. Pop those loves into the oven and let them get all brown and crusty.

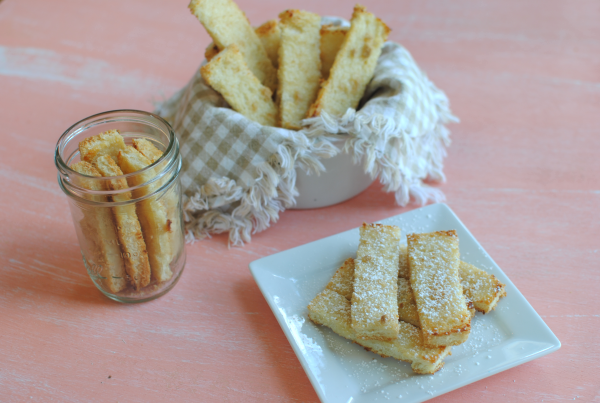
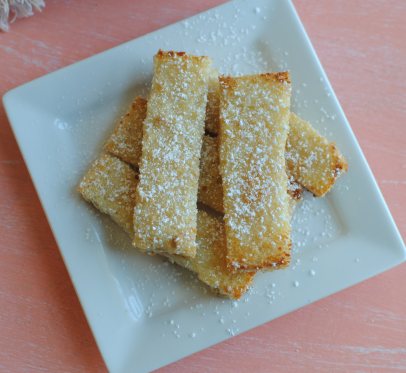
And if you’re like me, you’ll sprinkle on a little powdered sugar just because. They are so good! Maybe not exactly like other Lady Fingers that you’ve had. But hey, with plain old (literally) white bread and a couple other simple ingredients, you just can’t beat it.

3-Ingredient Lady Fingers
Recipe Type: Dessert, Snack
Author: Fite for Your Life II Cookbook- Janis Forbes Fite, RN
Using day old white bread, sweetened condensed milk, and brown sugar you can create Lady Fingers in no time flat.
Ingredients
  • Day Old White Bread
  • Sweetened Condensed Milk (Fat-Free)
  • Brown Sugar
Instructions
  1. Preheat oven to 350 degrees. Trim the crust off bread. Cut each piece into 3 fingers.
  2. Brush each generously with sweetened condensed milk. Sprinkle each with brown sugar.
  3. Bake for 10 minutes or so until golden and bubbly.
Notes

The reason there are no specifics amounts listed on this recipe is because it is completely up to you how many you make. I didn’t use an entire loaf of bread or an entire can of sweetened condensed milk. 1 can will go a very long way. You can probably make 50- 100 with 1 can.

Store in an air-tight container or bag.


Like this post? SHARE it!

Related Posts Plugin for WordPress, Blogger...

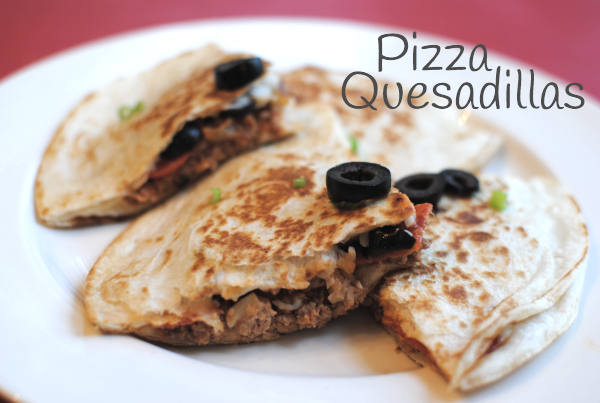
Pizza Quesadillas

Every now and then to change lunch up just a bit, I make what my little girl what she likes to call “pizza tacos”. I use a tortilla and spoon on some pizza sauce (or sometimes just tomato sauce) along with some pepperoni and mozzarella cheese. I roll them up and microwave them for a few seconds to help the cheese melt. It makes a really tasty lunch. After making one for her the other day I got to thinking about how the same might taste good in a quesadilla.

The idea eventually made its way to my menu plan and I was excited about that night. It was another one of those dinners that I knew everyone would love.

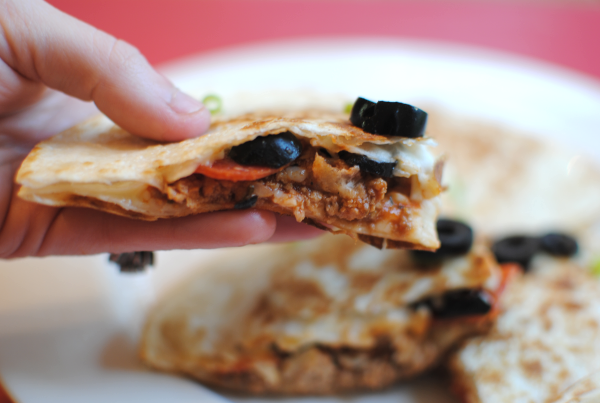
One of the best things about making these quesadillas is that you can customize them to the eater’s liking. For instance, I like my pizzas with everything on them. Well, minus any small fish or fungi. My daughter and husband? Not so much. Strictly cheese and pepperoni. But I did add some meat to the mix for substance since this is for dinner after all.

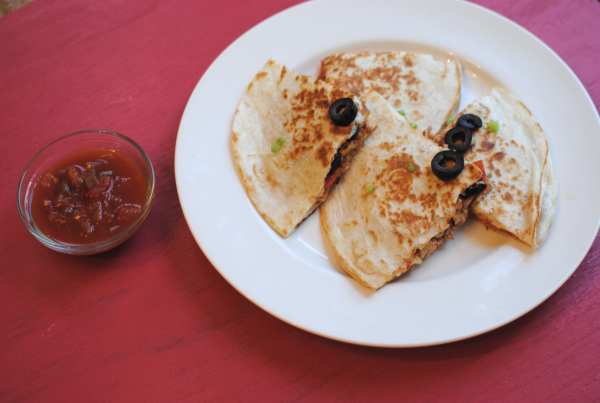
These were a major hit with the fam. I even told my hubby that I have to hand it to myself, they are pretty good. I dunked mine in salsa although some might find that a little weird. Pizza and salsa don’t exactly go together, but they tasted fine to me. You could dip them in more pizza sauce. I’m sure that would be tasty.

Oh yeah. That’s obviously a picture of my quesadilla with olives and all. Feel free to leave those off if you must.

Here’s the recipe.

Pizza Quesadillas
Recipe Type: Main Dish
Author: Pennywise Cook
Serves: 4
Make this every day Mexican dish and make it Italian. These Pizza Quesadillas are extra tasty!
Ingredients
  • 1 lb Ground Turkey
  • 1 Tsp Minced Garlic
  • 1 Tsp Onion Flakes
  • 1 Tsp Dried Oregano
  • 1/2 Tsp Dried Basil
  • 1 Cup Pasta Sauce
  • Sliced Olives
  • Pepperoni
  • 2-3 c. Shredded Mozzarella Cheese
  • 8 Medium tortillas
  • Cooking Spray
Instructions
  1. Brown ground turkey with garlic, onion flakes, oregano, and basil. Add pasta sauce and cook for about 5 minutes.
  2. Heat a skillet to medium high heat. Spray with cooking spray. On a tortilla place about 1/3 c. shredded cheese, then some of the meat mixture, then top with optional olives and pepperoni. End with cheese and top with second tortilla. Place into heated skillet for about 2-3 minutes.
  3. Spray top tortilla with cooking spray then flip the entire quesadilla with spatula.
  4. Repeat for next 3 quesadillas.
Notes

This makes about 4 quesadillas that make 4 squares each. They are surprisingly filling too!


Like this post? SHARE it!

Related Posts Plugin for WordPress, Blogger...

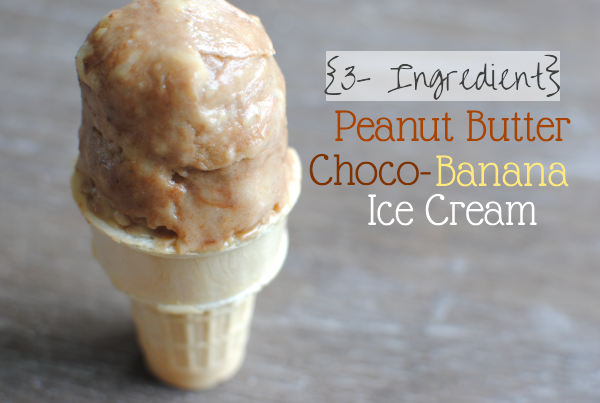
Peanut Butter Choco-Banana Ice Cream

I am an absolute ice cream fanatic. There, I said it. It’s in my top favorite sweets out there. I have issues practicing portion control when a tub is placed in front of me. So as you can imagine, I try not to get into that position very often.

A while back, I shared a recipe for 1-Ingredient Banana Ice Cream over at Saving with Amy. For ice cream lovers like myself, this is quite a discovery that makes eating ice cream a little less guilt-stricken. You see, all it takes to make a batch of creamy and smooth no-add sugar banana ice cream is to freeze a few sliced bananas and then pop them into a food processor!  I know, right?

I can just feel you saying SHUT UP!


But around here, where there’s banana you’ll almost always find peanut butter. They go together like milk and cookies or Lucy and Ethel……..

….or perhaps me and ice cream.

I have a history of pairing peanut butter and banana together.

Exhibit A:

If you’re a fan of the duo, those are some recipes you could try.

Not only did I add in some peanut butter, I also added in another fave of mine…chocolate! There is nothing better than the combination of those three in harmony taking a dip in my ice cream cone. So soft and creamy.

That’s the stuff! And I just love that this is available whenever I’m ready. The bananas can be frozen for weeks or sometimes even months in the freezer and then popped out to be made into ice cream when you have a craving. And of course, you probably have a little powdered cocoa in the pantry along with some peanut butter.

3- Ingredient Peanut Butter Choco-Banana Ice Cream
Recipe Type: Dessert, Ice Cream
Author: Pennywise Cook
The base of this natural ice cream is simply frozen bananas. Add in some yummy touches like peanut butter and cocoa for an extra treat!
Ingredients
  • 2 Cups Frozen Banana Slices
  • 1 Heaping Tbsp Peanut Butter (creamy)
  • 2 Tsp Cocoa Powder
Instructions
  1. Place the bananas in a food processor and pulse until the bananas start to break up. Add in the peanut butter and cocoa.
  2. Process until small beads are created then scoop into bowl and ice cream and serve!
Notes

I must admit that these are complete estimates for the peanut butter and cocoa. I did not measure exactly but I don’t see how you could really mess this one up. 🙂


Like this post? SHARE it!

Related Posts Plugin for WordPress, Blogger...

Marshmallow Glazed Oatmeal Muffins

It’s Friday the 13th! Who is up for a Jason marathon? Not me, but the thought sounded fun anyways. 🙂

I always have good intentions, don’t you? It’s funny how things can sometimes work out completely different than you really intend them to. For instance, some days I plan my entire day around cleaning the house. The perfect example of a good intention. And then some unforeseen, crazy, busyness takes over and the dishes pile up while the laundry remains unfolded. But I take comfort in knowing that I really did plan on making my house spotless…. That is, until I can’t see my floor because it’s covered in toys.

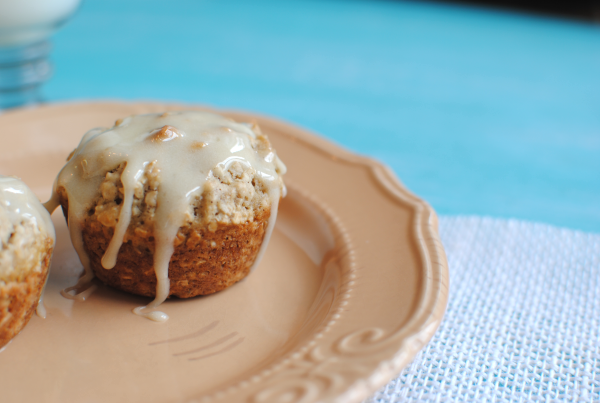
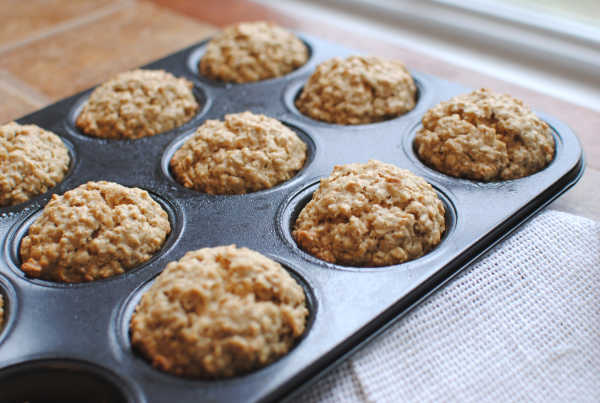
My first intention for this recipe today was to make homemade oatmeal cream pies. And then my second intention was to make oatmeal cream pie cupcakes. They eventually turned into more of a muffin and instead of the everyday marshmallow cream filling, I decided to glaze them. Though they ended up completely different than what I had intended, I must say that they are fabulous just the same!

It might just be impossible to dislike oatmeal muffins. Even those who don’t like oatmeal usually like oatmeal muffins. And if they don’t then they are really missing out my friends. They are dense (the muffins, not the people who dislike them) and yet still so cakey and muffiny. You like those words there don’t you?

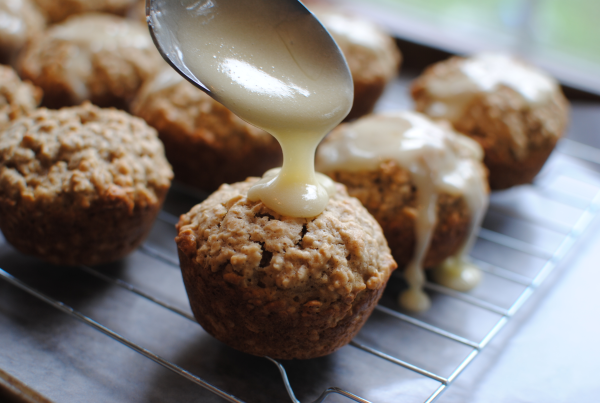
Believe it or not, these are actually not that bad calorie-wise. I did what I could to create them with low calorie ingredients, including the glaze. So you won’t have to feel too bad for inhaling a few. The glaze firms up a bit and starts to get back to it’s marshmallow form after they have sat for a bit. My Addie kept laughing because she would get a marshmallow mustache after taking bites.

Just perfect for breakfast or perhaps a brunch, they do have a certain oatmeal cream pie-esqe taste to them. They definitely satisfy my sweet tooth and yet are so filling that I don’t need anything else for breakfast. Except for MILK. You will need milk for sure.

So how do you think my intentions turned out?

Question of the day: Can you count how many times I used any variation of the word intention in this post?

Marshmallow Glazed Oatmeal Muffins
Recipe Type: Breakfast
Author: Pennywise Cook
Prep time: 10 mins
Cook time: 13 mins
Total time: 23 mins
Serves: 11
This muffin recipe intended to mimic oatmeal cream pies takes the famous snack to a whole new level.
Ingredients
  • For the Oatmeal Muffins
  • 6 tbsp butter (I use Blue Bonnet Light)
  • 1/4 c. Unsweetened Applesauce
  • 1/2 c. Brown Sugar
  • 1/2 c. Granulated Sugar
  • 3 Egg Whites
  • 1 Tsp Vanilla
  • 1 and 1/2 c. all-purpose flour
  • 1 Tsp Baking Soda
  • 1/2 Tsp Cinnamon
  • 1/2 Tsp Salt
  • 2 Cups Oats (Quick Cooking)
  • For the Marshmallow Glaze
  • 2 c. Marshmallows (big or little)
  • 2 Tbsp Skim Milk
  • 2 Tbsp butter
  • 1/4 c. Powdered Sugar
Instructions
  1. Preheat oven to 350 degrees. Cream together butter, sugars, and applesauce. Add in egg whites and vanilla.
  2. Sift flour, baking soda, cinnamon and salt together. Slowly add to sugar mixture and beat until combined.
  3. Stir in the oats. Using an ice cream scoop, scoop equal amounts into greased muffin tin.
  4. Bake 13 minutes or until golden brown.
  5. Meanwhile, in a saucepan place the butter, skim milk and marshmallows and cook over medium heat stirring constantly. Once the marshmallows are completely melted and smooth, stir in the powdered sugar.
  6. Remove muffins from oven and place on cooling rack with wax paper underneath. Carefully glaze each muffin and allow to cool.
Notes

This recipe will make about 11 muffins, maybe 12 if you make your batter go further.


Like this post? SHARE it!

Related Posts Plugin for WordPress, Blogger...

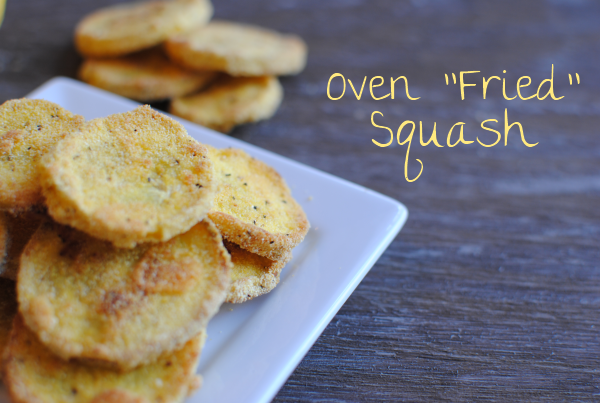
Oven “Fried” Squash And Another Reason I Don’t Like Bees

I absolutely cannot grow a squash to save my life. I started a little garden for herbs and a few veggies earlier this spring and for some reason, mother nature refuses to help me produce even one sign of a squash in my garden. I checked out Google and the only explanation that I can come up with is that we have no bees. Well, at least no bees that want to help me grow some squash. The bees have to transfer pollen to the blossoms while they are open in the mornings in order for the blossoms to produce a squash. Apparently the bees around here don’t like me and don’t want me to have yummy squash this year.

I see them flying around all happy and landing on the weeds, probably pollinating the weeds in place of my squash. Forgive me, I’m a little bee bitter right now…

On a less bee-hater note, Aldi does have great prices on squash and my in-laws have a bountiful garden that we get veggies from. So I don’t have to go without. I love my squash fried, but you know me and my frying. Unlike Nike, I just don’t do it. I usually try to find a way to make things taste fried without the actual frying process. This recipe gives you exactly that!

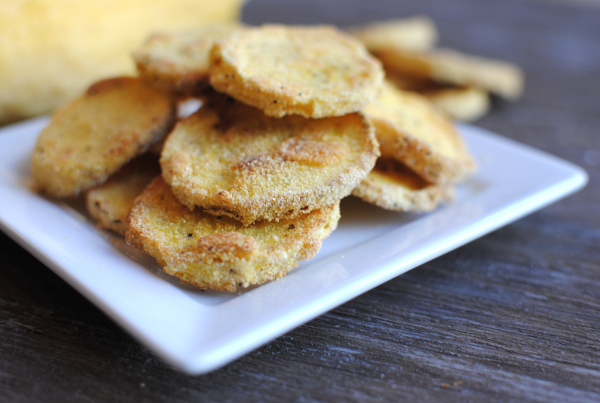
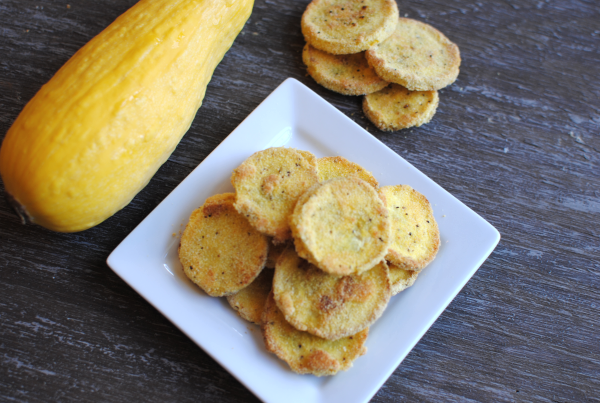
See how crunchy they are? If you bake them too long, they are almost like chips because they are so crunchy. But you won’t have that problem because you’ll bake them just right.

They are oh so yummy. These definitely satisfy that hunger for “fried” squash. I got this recipe from that cookbook that I told you about the other day and come to find out this particular recipe came from a cookbook from 1983! Southern Living’s Cook Light.

Only 64 calories per serving and worth every one.

Oven “Fried” Squash
Recipe Type: Side Dish, Vegetable
Author: MTEMC Company Gifts of Christmas Cookbook,
Crunchy, tasty “fried” squash from the oven.
Ingredients
  • 1/2 c. Cornmeal
  • 1/2 Tsp Salt
  • 1/4 Tsp Pepper
  • 2 Egg Whites
  • 1 Tbsp Water
  • 3 Medium-sized Yellow Squash, cut into 1/4 in. slices
  • Cooking Spray
Instructions
  1. Preheat oven to 450 degrees.
  2. Combine cornmeal, salt, and pepper. Set Aside.
  3. Combine egg whites and water; beat well.
  4. Dip squash into egg and then dredge into cornmeal mixture.
  5. Lightly coat a baking pan with cooking spray. Place squash in a single layer.
  6. Bake for 30- 40 minutes turning once.
Notes

Ok here are my notes on this one:

I would use LESS pepper than this calls for. It was a little spicy with 1/2 teaspoon if you ask me. You might even use a different spice like paprika in it’s place.

I considered my squash to be medium-sized, but I could fit only 2 of them on my pan. You may not really need 3.

I ended up needing more like 1 cup of cornmeal so have more on-hand in case. There was plenty of egg whites, however.

30 minutes was too long. I would say more like 10 minutes, then flip and then another 10 minutes. Or perhaps reduce the temperature.

Enjoy!


Like this post? SHARE it!

Related Posts Plugin for WordPress, Blogger...

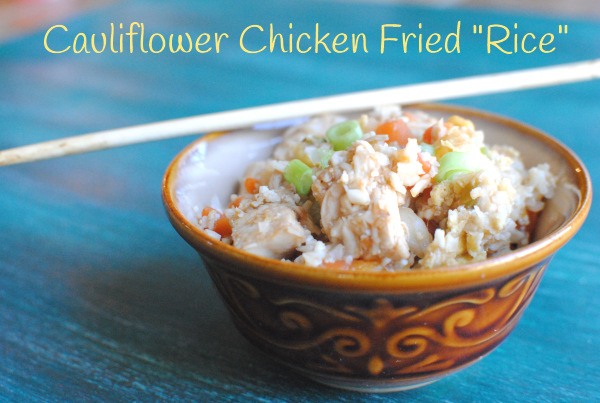
Cauliflower Chicken Fried “Rice”

We have this little Chinese buffet right around the corner from where I live that is all you can eat for $5.98. We’re talking lo mein, shrimp, wontons, those amazing Chinese donuts, and we mustn’t forget- chicken fried rice. That’s why I love those buffets, on occasion of course. Where else can you stuff your face until it’s time to unbutton your pants for just $5.98?

Or take it from me, just wear elastic pants next time…

Since I don’t go into the gut-busting buffets too often, I sometimes just make my favorite Chinese dishes at home. One of the easiest is chicken fried rice. I mean come on, it’s the perfect way to use up leftover rice and chicken. It makes one of those double duty meals that starts as one thing and turns into another. That’s a smart or shall I say, pennywise move.

Cauliflower is one of my favorite vegetables. Not only for it’s affordability, but for it’s taste and ability to pretty much adapt itself to any dish. Take for instance the Doughless Pizza Crust. Whodathunk that you could turn cauliflower into pizza and make it taste good?

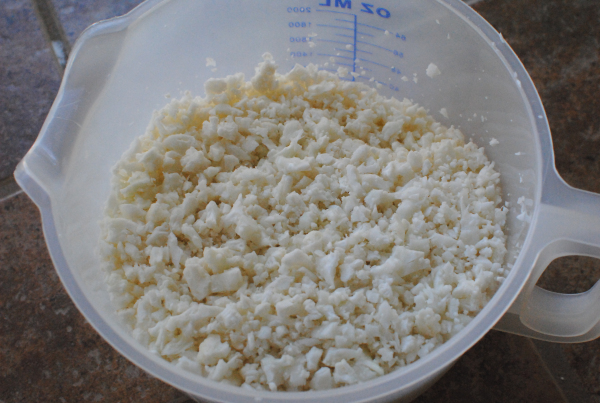
When you make up the “riced” cauliflower for the pizza crust, this is what it looks like. It’s basically very finely ground. It reminded me of rice. Hey! I wonder if that’s where the term “riced” came from? Ah yes, we are learning together here folks!

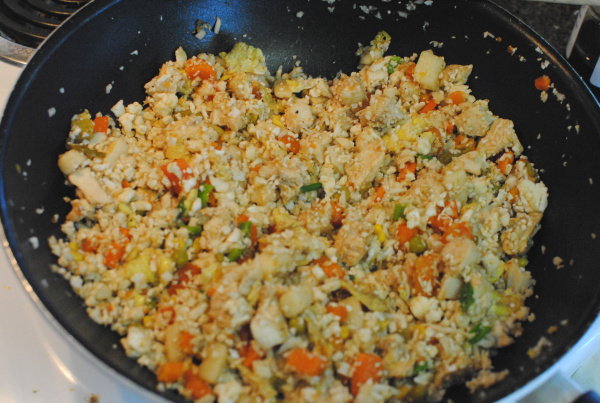
This brought me to  thinking about fried rice and how you could easily just throw some grilled chicken into the cauliflower and add some seasonings and such to make a mock chicken fried rice.

Voila! It totally worked! I did not even COOK the cauliflower before putting it in. I had originally planned to microwave it like you do with the pizza crust, but I got to thinking that might make the cauliflower too soft. I then decided to place it in the fridge for a little while to get it cold. I made the rest of the veggies and chicken and then added the cauliflower very last.

I tend to think in terms of calories. Weighing out the calories for the difference in rice and cauliflower, you’ll save about 168 calories per cup using cauliflower. And if you’re a carb person, the difference is a whopping 39 carbs less in a cup of cauliflower! So needless to say, it’s a healthier choice.

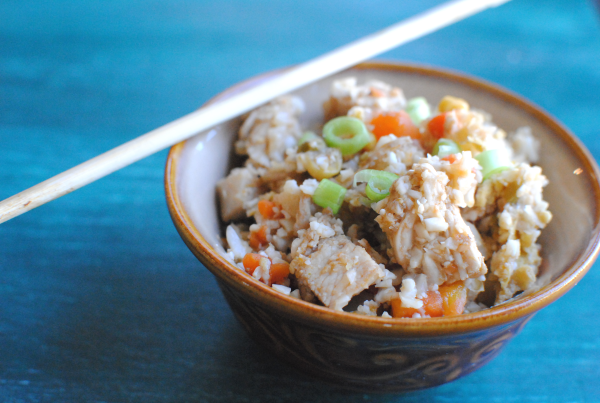
Don’t expect it to taste exactly like rice. That would require a magic wand, but this does come close if you ask me. Definitely as satisfying and scrumptious.

If you try this, PLEASE tell me what you think! I’d love to hear your thoughts as I just whipped this together the other night.

Cauliflower Chicken Fried “Rice”
Recipe Type: Main Dish, Side Dish
Author: Pennywise Cook
A healthier alternative to starchy rice, try this cauliflower chicken fried “rice” instead! You won’t miss the rice!
Ingredients
  • 3 Cups, Riced Cauliflower
  • 1 Large Boneless, Skinless Chicken Breast cut into bite-size pieces
  • 1 Tsp Olive Oil
  • 1 Can Mixed Vegetables (or Frozen and thawed), drained
  • 1 Egg, Beaten
  • 1/2 Tsp Minced Garlic
  • Pepper
  • 2 Tbsp Soy Sauce
  • 1/2 Tbsp Teriyaki Sauce
  • 1/2 Tsp Sesame Oil
  • 2 Green Onions, Chopped
Instructions
  1. “Rice” your cauliflower by placing in the food processor or blender and making it finely ground. Place in the refrigerator until ready to use.
  2. In the oil, pan sear the chicken breast along with the garlic. Add pepper. Push to one side of skillet and cook the egg.
  3. Add in the cauliflower, veggies, soy sauce, teriyaki, and sesame oil. Cook over medium heat until heated through.
  4. Top with green onions and serve!
Notes

I used canned veggies and it turned out ok. Frozen would be even better since they have more variations on the veggie combinations.

The colder that your cauliflower is, the better.

This would also be great even without the chicken!


Like this post? SHARE it!

Related Posts Plugin for WordPress, Blogger...