Stuffed Pizza Cupcakes

I’ve finally started Christmas shopping. Last year I had most of it done by the very first week in December. Yeah, I was a little nuts wasn’t I? Nuts or extremely genius I’d say. This year, I’m probably going to do a lot of my shopping online. Since I’ve stopped blogging at Saving with Amy, I’m very much less in-tune with the current deals and steals across the web.

It’s a weird feeling not being on top of the latest deals.

But my sanity is currently intact so I’m not going to complain. It took a long time to make my decision to quit blogging deals and in the end, it was best for me and my family. And now I get to spend my time making yummy food and fun DIY projects to share with you!

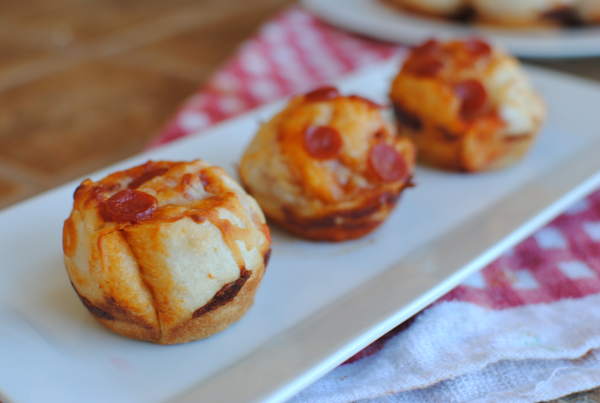
These, my friends, might just be your family’s new favorite snack. When I made these, I had no idea how excited that my family would get about them. They have been requested over and over again. Hubby even wants me to make some for him to take for lunches.

There is nothing better than making something that is requested a second time. Well at least in my book anyways.

I made these earlier in the day and just reheated them for dinner and they were perfect. You could just make them on demand, but I needed the daylight for my pictures. But it goes to show that these are great for making ahead of time for a party or lunches.

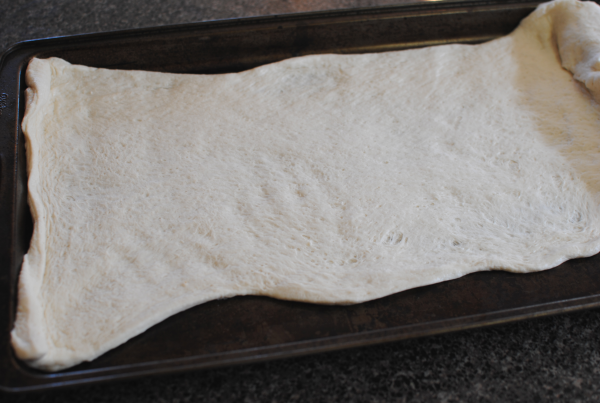
You start by rolling out a store-bought pizza dough. Get it as long and flat as you can. It doesn’t have to be perfect.

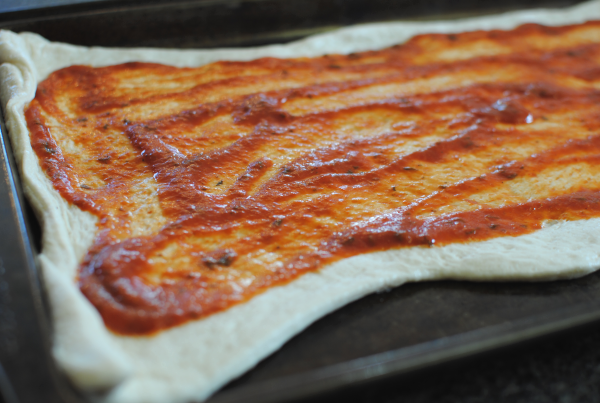
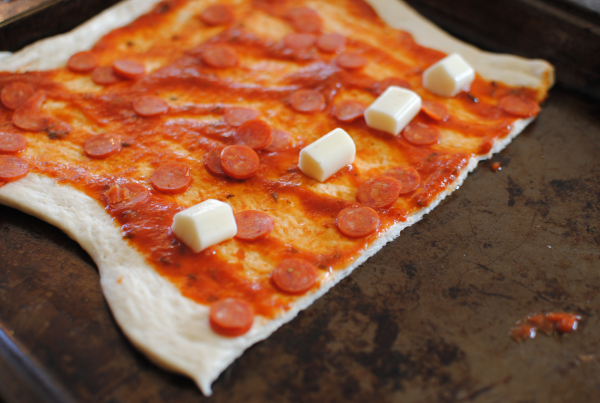
Next, spread about 1/2 a jar of pizza sauce over the entire pizza dough, leaving about an inch around the edges.

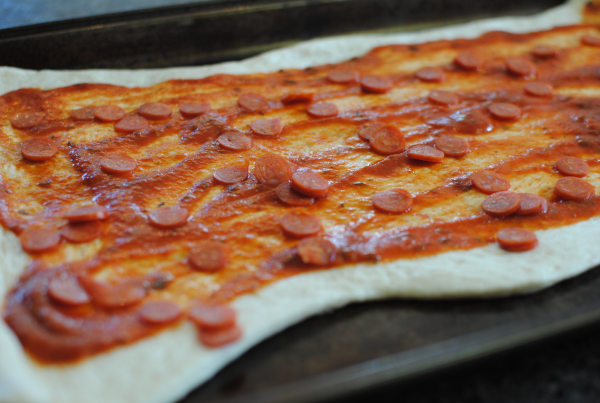
Then sprinkle the entire thing with mini pepperonis. I was going to use the regular size, but when I came across these, I thought they might work better for this. And I was right! So glad that I used the smaller. It made it possible to get a bite of pepperoni in each bite without them trying to separate.

Then cut the dough in half.

Place about 4-5 pieces of cut up string cheese across the dough like this.

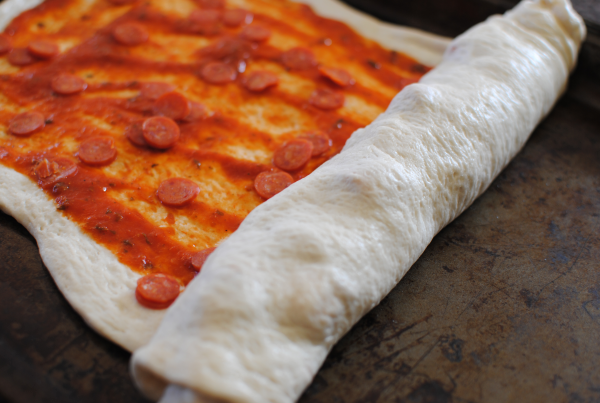
Then proceed to roll the dough up. Once rolled, cut it into 1 inch pieces doing your best to keep all the fillings inside.

Place the rolled up pieces into a greased muffin pan with the swirled part facing up.

You’ll top with a little more mini pepperonis and some shredded cheese before baking. Then bake them up and you’re done!

SO amazingly yummy! Everyone will be bound to love these. Come on, pizza dough filled with sauce, pepperoni, and cheese? I think so!

Stuffed Pizza Cupcakes
Recipe Type: Main Dish, Snack
Author: Pennywise Cook
5 simple ingredients lead to the tastiest of all cupcakes. STUFFED Pizza Cupcakes!
Ingredients
  • 1 pkg Store-Bought Pizza Dough
  • 1/2 Jar Pizza Sauce
  • 1 c. Mini Pepperonis, Divided
  • 1/2 c. Shredded Mozzarella Cheese
  • 6 Mozzarella String Cheese, cut into 1 inch pieces
Instructions
  1. Preheat oven according to pizza dough’s directions.
  2. Begin by rolling out the pizza dough flat. Spread the pizza sauce over the dough, leaving 1 inch around the edges. Sprinkle with 1/2 c. mini pepperonis. Cut the dough in half.
  3. Lay 4-5 pieces of string cheese across the dough, adding more as you roll. Do this with both of the pizza doughs.
  4. Cut into 1 inch pieces and place in a greased muffin pan with the swirled side up.
  5. Bake according to your pizza dough’s directions checking after about 12 minutes. When tops begin to brown, remove from oven.
  6. Use a knife to separate from the pan and cool.

Like this post? SHARE it!

Related Posts Plugin for WordPress, Blogger...

Butterscotch Pretzel Treats

Thanksgiving is in TWO days! This year has just flown by. Have you finished all your big feast shopping? I sure hope so, because the stores are nuts about now. I was in a few stores the other day and just gave up. You know those trips to the store when you have only a couple of items. Then you get in line only to realize that for those 2 items you’ll have to wait in line for 20 minutes. That’s about the time that I start to justify whether or not it’s absolutely necessary that I get those items.

I usually just give up.

I wanted to share with you guys these awesomely yummy treats that I made the other day. When I’m feeling experimental, I pick up things I think might go well together and then kinda throw it together. As you know, sometimes it works well and other times, well, it completely bombs.

I’m human and a novice cook, so what can I say?

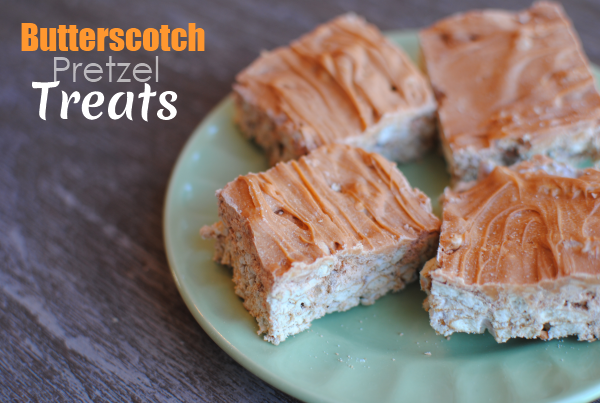
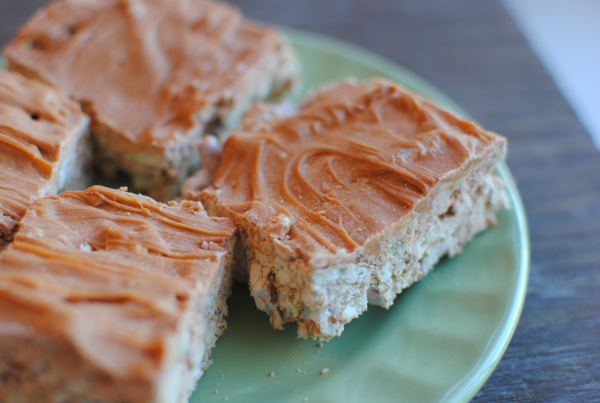
So this is why I was so very happy when these tasty Butterscotch Pretzel Treats turned out so yummy! So easy with just 4 simple ingredients and they take literally minutes to make.

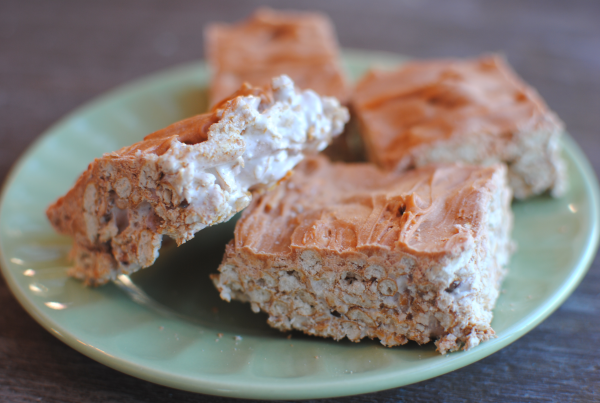
They resemble that of rice krispie treats, but I used pretzels instead of the rice krispies. And oh did that make them yummy. I just love the hint of salty that  you get with these sweet treats.

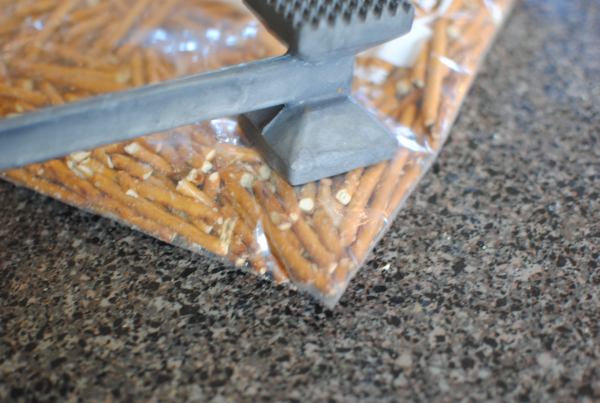
The first thing you want to do is get all of the pretzels out of the bag. The reason that I want to unscore pretzels is because the bag tends to have a ton of salt at the bottom, so don’t just pour the entire bag of pretzels into your ziploc. Use your hand to get them out leaving all the salt at the bottom of the bag.

Use meat mallet or something heavy to break up the pretzels a bit.

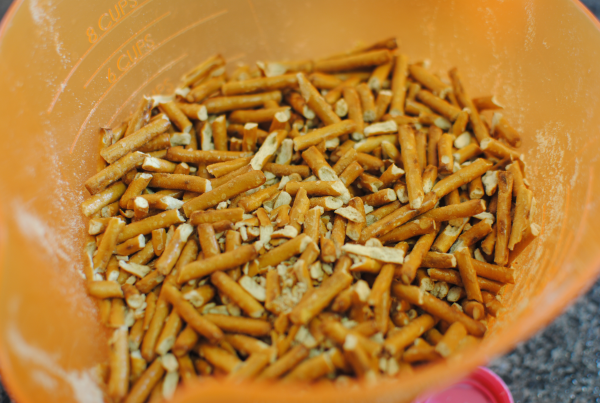
It’s really not essential that you make them super small. Just get them fairly broken and be done. Put them in a bowl.

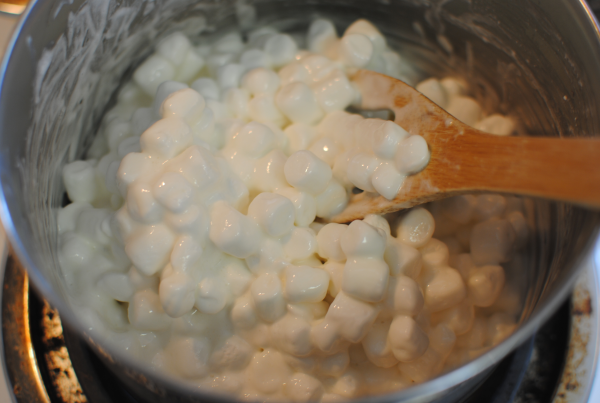
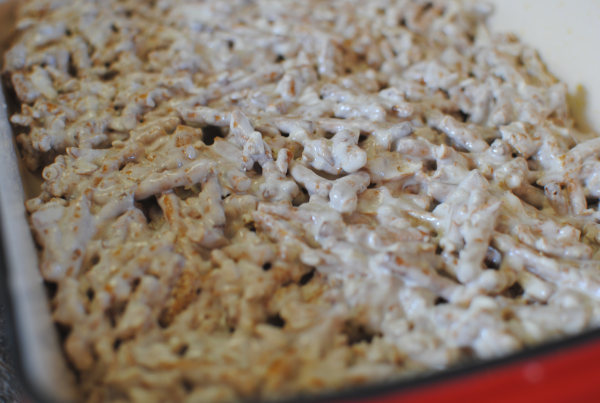
Then it’s time to melt up your marshmallows with a little bit of milk. This may be the longest step in the whole process.

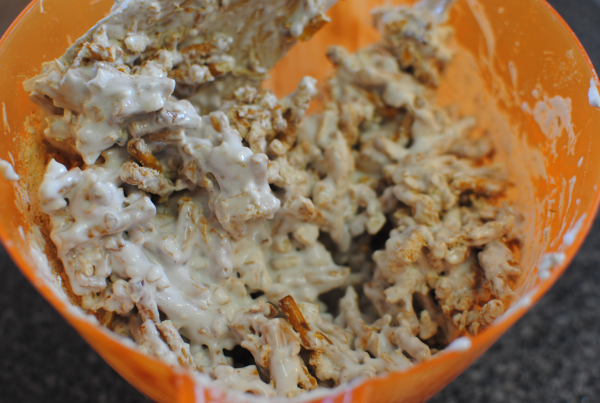
Pour the melted marshmallows in with the pretzels and use your spoon to mix it all up really well. There tends to be pretzel crumbs at the bottom, so make sure to incorporate those too.

Pour it all into a greased 9×13 dish and flatten out. Set that aside while you get the butterscotch going.

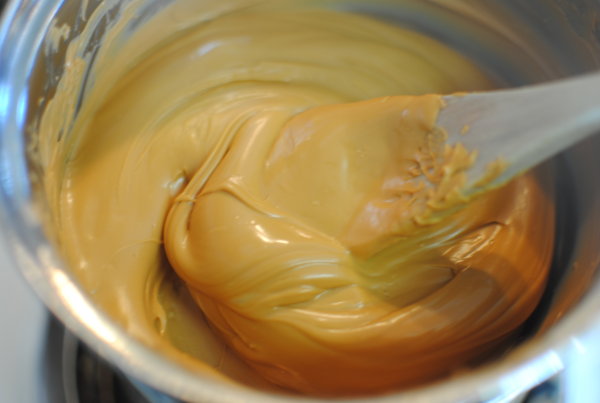
Using your preferred method, melt the butterscotch chips until smooth. Some people feel comfortable using the microwave, but I’m not good at that so I always use a make-shift double boiler for this.

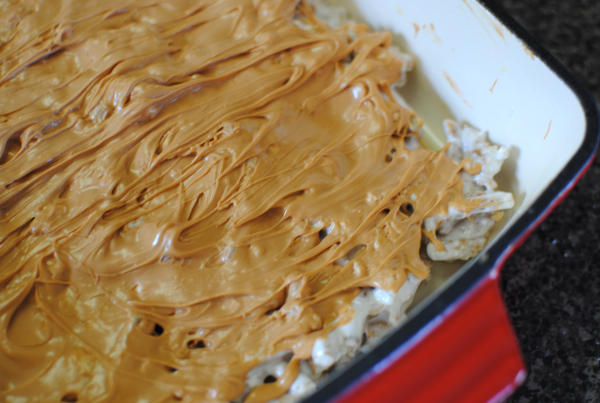
Pour the melted chips over the marshmallowey pretzels and place in the refrigerator to set.

Cut into bars and serve! It’s so easy to make these and they are SO good. A nice little change from your everyday rice krispie treats, don’t ya think?

Butterscotch Pretzel Treats
Recipe Type: Dessert, Snack
Author: Pennywise Cook
With only 4 ingredients, these Butterscotch Pretzel Bars and easy AND incredibly yummy!
Ingredients
  • 1 12 oz Package Butterscotch Chips
  • 1 12 oz Package Pretzel Sticks
  • 1 10 oz Package Mini Marshmallows
  • 2 Tbsp Milk
Instructions
  1. Remove the pretzels from their bag and transfer to a large ziploc bag. Make sure to use your hands to remove them and not pour the entire bag in. This will avoid getting all of the salt into your treats.
  2. Using something heavy, break the pretzels inside the ziploc until fairly small. Pour into a mixing bowl.
  3. Place the milk into a large saucepan. Pour in marshmallows and melt over medium heat until smooth.
  4. Pour the marshmallows into the pretzels and combine well. Making sure to get the pretzel crumbs incorporated well. Pour into a greased 9×13 dish and flatten with the back of a wooden spoon.
  5. Meanwhile, melt bag of butterscotch chips in microwave or over a double boiler until smooth. Pour over pretzel mixture and spread completely over top.
  6. Place in refrigerator to set. Cut into bars and serve!


Like this post? SHARE it!

Related Posts Plugin for WordPress, Blogger...

Ridiculously Easy Brown Bag Popcorn

I wish I had a dime for all of the “duh” moments that I’ve had in my life. I will not go into any specifics with you, but just know that sometimes I’m not the brightest crayon in the box. 🙂

Now that I’ve thoroughly dissed myself, we’ll move on to this awesome new revelation that I’ve made! It’s been a long time, but a friend of mine guest posted on Saving with Amy about how to make your own popcorn. I remember reading it and thinking oh that’s neat and looks really easy. And then I just moved on with my life to never try it out for myself.

Not sure why I didn’t because I am HOOKED on this stuff now!

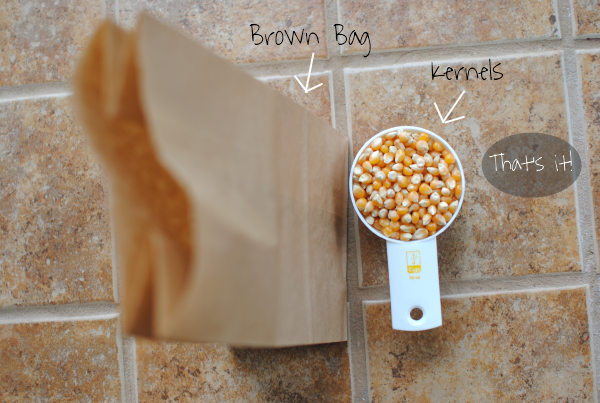
You see, to make about 8 or 9 cups of your very own popcorn, all you need is a brown bag like this one. You can get 50 of them at Dollar Tree for a buck! And you need 1/3 cup of unpopped kernels. You can also get these at Dollar Tree for a buck!

For $2, you’ll have popcorn coming out of your ears…

Have you ever looked inside one of those prepackaged bags of popcorn? There are all sorts of things in there that are pretty much unnecessary. Sure it’s nice to have salt or butter flavor, but with all the added fat too? This easy brown bag method makes it easy to make pure popped corn without adding any extra nonsense. In fact, I actually like it plain just like this. No butter or salt needed!

Just try it once and you’ll be hooked like me. It’s too incredibly simple not to.

Ridiculously Easy Brown Bag Popcorn
Recipe Type: Snack
Author: Pennywise Cook
A brown paper sack and popcorn kernels are all you need to make your very own popcorn!
Ingredients
  • 1 Brown Paper Bag
  • 1/3 c. Unpopped Kernels
Instructions
  1. Pour to kernels into the brown bag. Fold the top down about 2 times.
  2. Place in microwave and heat on full power for 1:45- 2 minutes. This will depend on your microwave, but 2 minutes is about right for mine. Just stop it once there is about 2-3 seconds between kernel pops.

Like this post? SHARE it!

Related Posts Plugin for WordPress, Blogger...

2-Ingredient Oreo Bark

How did your family do with the time change? Everyone enjoy their extra hour of sleep at your place? With 2 girls under 5, there was no extra hour of sleep here. They just don’t cherish that hour like we do. I even had a conversation with my 5 year old the other night about how mommy and daddy like sleep. She just couldn’t grasp why we would enjoy wasting so much time with our eyes closed. That whole conversation was a lost cause. It never really went anywhere and contained no resolution for her.

Sometimes it’s better to just not try and explain things to a 5 year old, huh?

Last week, I had a hankering for something Oreo. I can’t ever bring myself to actually indulge in eating oreos, but I do like to make things containing them. Go figure. I had a package of white chocolate chips in the pantry and some individual packages of Oreos.

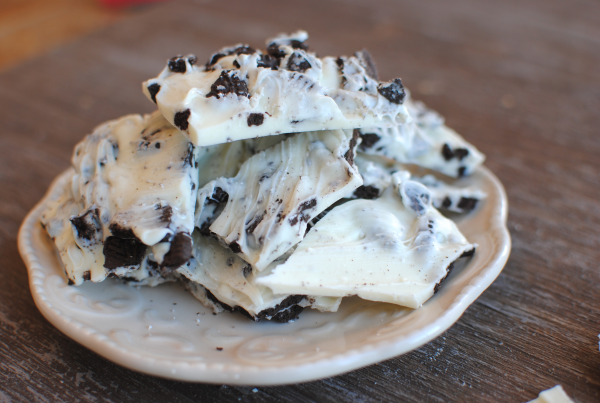
Can you say simple? That’s all that I needed to make this incredibly tasty candy bark. It took literally minutes to make and satisfied my Oreo hankering times 2.

I found myself eating so much of it that I sent it to work with the hubby. That’s my secret weapon, y’all. You notice sometimes I don’t always make “healthy” things. Those are usually the ones that I try to send away to a friend or to work with hubby.

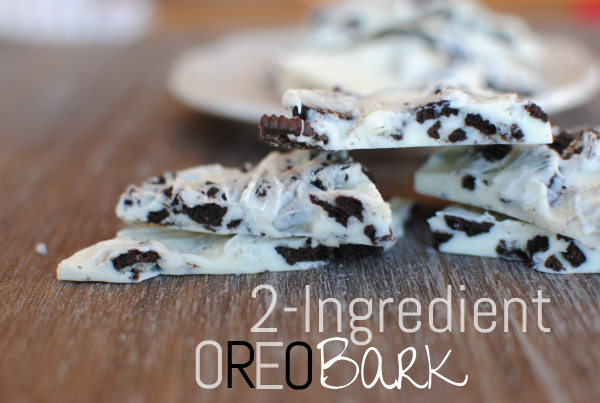
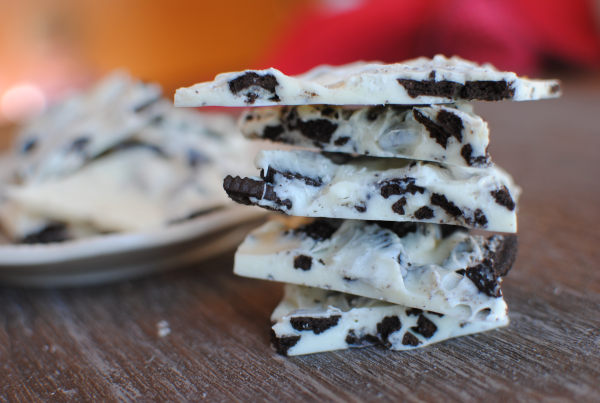
It all starts with a cookie sheet covered in wax paper. Crumble up about 12 or so Oreos and lay them around the cookie sheet. Melt up your white chocolate chips and pour them over the Oreos. Smooth out and place in the freezer for about 10 minutes or so and YOU’RE DONE.

Does it get any easier?

This, my friends, would make a fantastic food gift for Christmas! Simple wrap it up in a fancy tin or treat bag and tie with a Christmas bow and you have one cheap and cheerful gift!

Who wouldn’t enjoy Oreo Bark?

2-Ingredient Oreo Bark
Recipe Type: Dessert, Snack
Author: Pennywise Cook
With only 2 simple ingredients, you can make a Christmas gift or tasty snack within minutes!
Ingredients
  • 12 or so Oreos (Crumbled)
  • 1 (12 oz) Package White Chocolate Chips
Instructions
  1. Line a cookie sheet with wax paper. Spread the crumbled Oreos around the sheet.
  2. Melt entire bag of white chocolate chips according to the package or in a double boiler.
  3. Once melted pour over the Oreo pieces and smooth out. Place cookie sheet in freezer for about 10 minutes and then break into pieces.
Notes

If you don’t have a double boiler to melt your chocolate chips, just use two sauce pans. Place hot water in the bottom one and the chocolate chips in the top. Bring the water to a rolling boil and melt the chips.


Like this post? SHARE it!

Related Posts Plugin for WordPress, Blogger...

Candy Corn Fudge

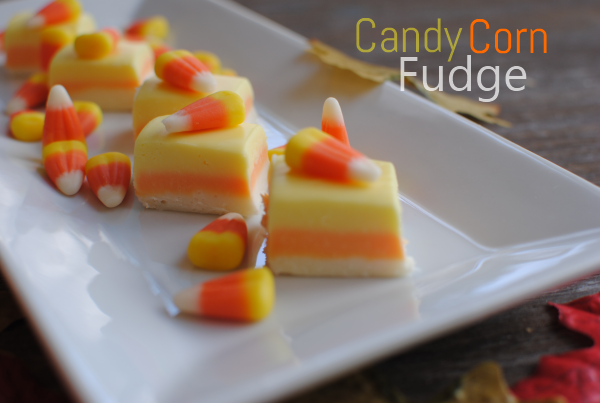
I realize that those of you out there who don’t like candy corn are probably cringing right now. But luckily for you, this fudge doesn’t actually taste like candy corn. And for those of us who do like candy corn, you can make some of this for your candy corn-hater friends and keep all of the actual candy corn for yourself. With Halloween just around the corner now, it’s everywhere!

For Christmas last year, my husband got me 6 bags of candy corn. He got a stellar deal on them after Halloween and put them up until Christmas. He knows the way to my heart. 😉

True story.

And no, that’s not all that he got me. 🙂

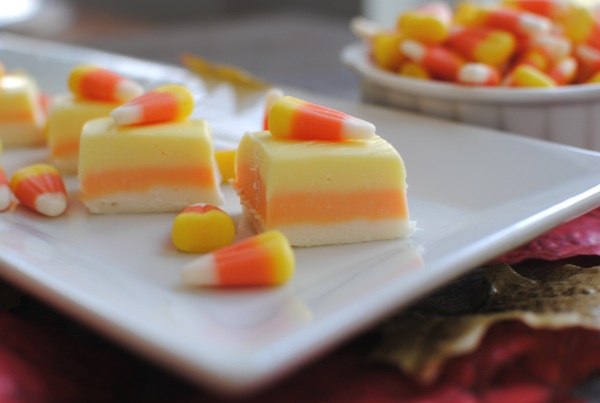
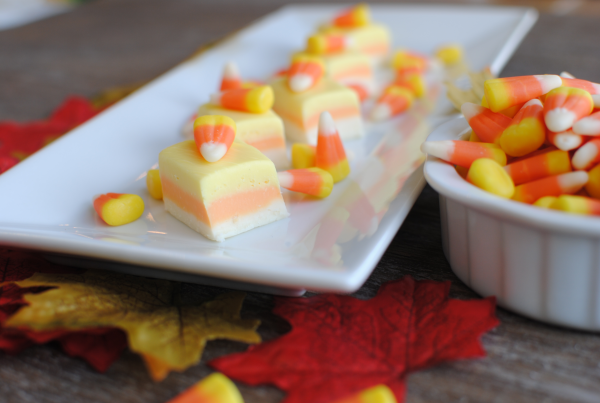
This fudge isn’t for those watching their sugar. Or calories, or carbs at that. It’s high in everything I’m sure, but is a worthy splurge for the candy holiday. It also looks quite festive and makes a great party snack!

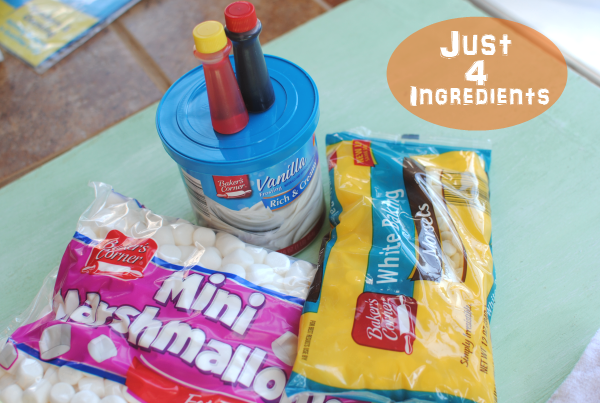
I can’t help but love this recipe because it only contains 4 simple ingredients. Needless to say that the steps are simple too! In total, it took me about 30 minutes, 1 dirtied mixing bowl, a dirtied measuring cup, and a major sugar high to make this.  When I say major sugar high, I mean I ate waaaaay too much of the ingredients while making it.

Learn from my mistakes and don’t do it if you want to eat any of the actual fudge. 😉

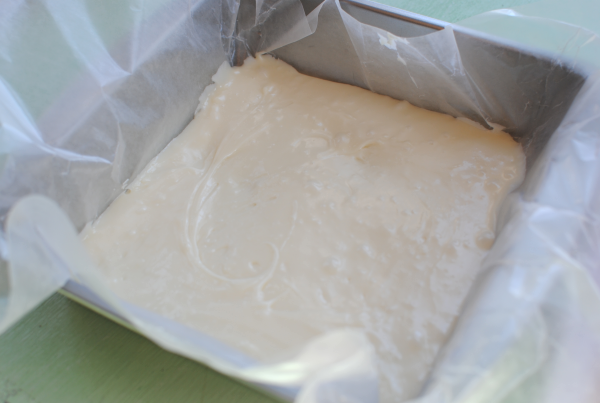
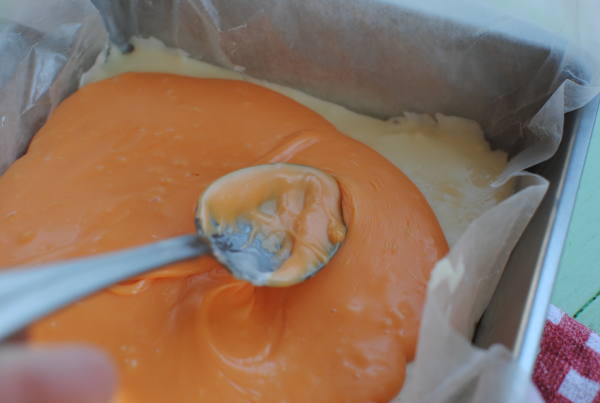
That’s a mix of white chocolate chips, marshmallows, and vanilla frosting. Who wouldn’t want to dive right into that?! This picture begins the layering process which is much easier than it sounds.

We’ve given the white a little time to cool and set and here comes the orange layer! It happens pretty fast.

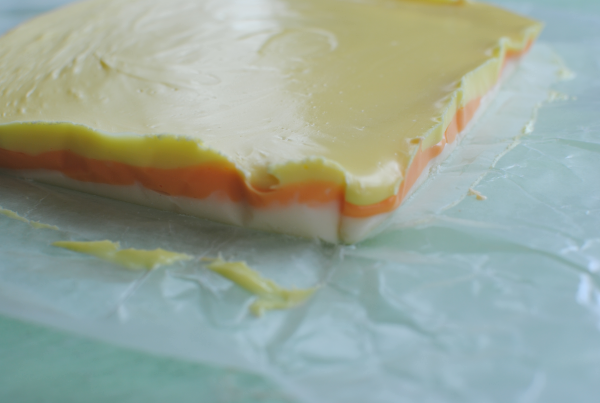
And after finishing up the layering, you’ll be proud that you decided to use wax paper because it makes it super easy to remove from the pan and cut into perfect little fudge pieces!

This would be a great fun fall snack to make with the kiddos. Stirring in the coloring is the best part, aside from licking the spoon. I’ve always got an eager spoon-licker around here.

Here’s how to make it!

Candy Corn Fudge
Recipe Type: Dessert, Snack
Author: Pennywise Cook
With just 4 ingredients, you can create fun and festive fudge that mimics the look of candy corn!
Ingredients
  • 1 Package Mini Marshmallows
  • 1 Tub Vanilla Frosting
  • 1 12 oz Bag White Chocolate Chips
  • Orange and Yellow Food Coloring
Instructions
  1. Line a square baking dish with wax paper.
  2. st Layer:
  3. In a large mixing bowl, place 3/4 c. white chocolate chips, 3/4 c. mini marshmallows, and 1/4 c. + 2 tbsp vanilla frosting. Microwave on 50% power for 30 seconds. Remove and stir. Return to microwave and heat for another 30 seconds. Stir and pour into bottom of baking dish. Smooth out to all of the edges. Place in refrigerator to set for 10-15 minutes.
  4. nd Layer:
  5. Place the same ingredients in bowl and microwave as you did the other layer. Add orange food coloring to melted mix until you reach desired color. Pour onto cooled and set white layer. Smooth out to all edges and return to refrigerator for another 10-15 minutes.
  6. rd Layer:
  7. Place the same ingredients in bowl (use up the rest of the white chocolate chips, but you may have some leftover marshmallows and frosting) and microwave as you did the other layer. Add yellow food coloring to melted mix until you reach desired color. Pour onto cooled and set orange layer. Smooth out to all edges. At this point, I place mine in the freezer for 10-15 minutes for it to set really well.
  8. Using wax paper, pull out from dish and cut into squares. Store in refrigerator to keep firm.

Like this post? SHARE it!

Related Posts Plugin for WordPress, Blogger...

Peanut Butter Brownies

I’m getting this yummy recipe up a bit late in the day. I apologize for my tardiness! But in my defense, I ran a half marathon this weekend. And when I said I ran, I mean I literally ran the entire time. My goal was to 1) finish and 2) not to walk at all. Needless to say, I was practicing the method of sitting for 24 hours or so after the race. I kid you not, I could barely walk that night! In the picture above, I was excited to put the 13.1 on my van.

It’s recipes like this one that are the reason that I run to begin with…

My daughter asked me the other day why I always make things with peanut butter. It got me thinking about how much I really do make things with peanut butter and she is exactly right. I have a deep love for the stuff.

Exhibit A:

I don’t think that’s too much peanut butter, do you?

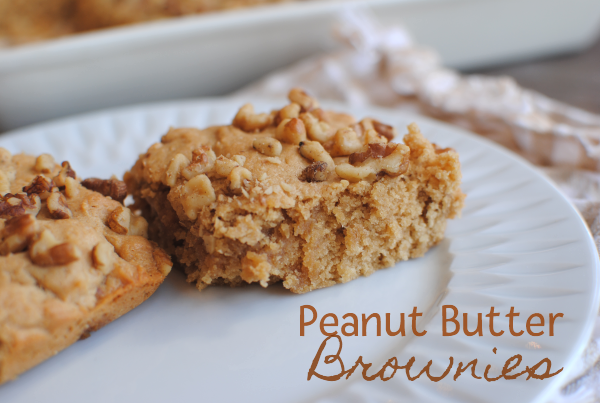
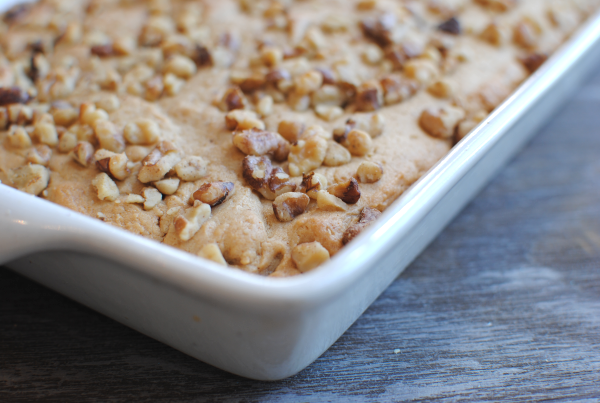
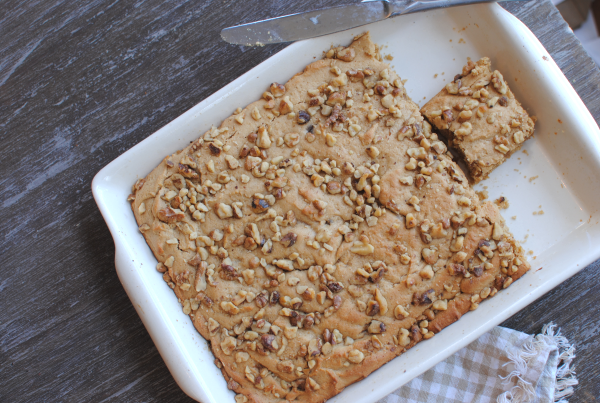
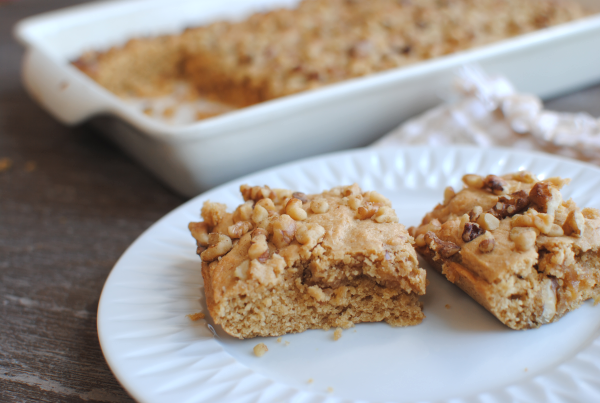
I don’t ever think I’ve gotten opposition to making brownies in this house. In fact, every time I make them you can bet that they will be gone within a day. I have nothing at all against chocolate brownies, but my innovative mind was seeking a twist on regular brownies. Of course! What better than peanut butter to spice things up!

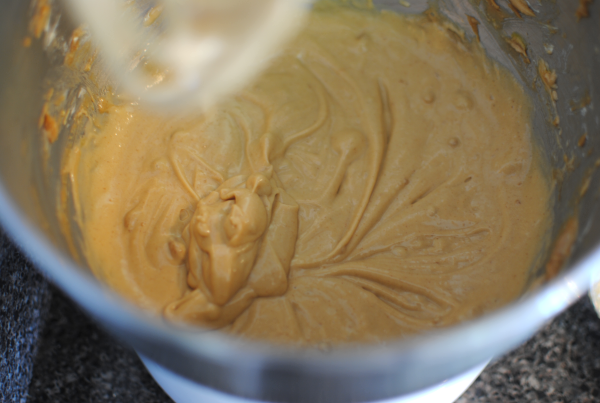
These brownies are really easy to make. The kiddos will surely want to help you out in the kitchen with these. And if not, they will definitely enjoy eating them! The batter is thick like you would expect a peanut butter batter to be. And there aren’t a billion ingredients so you won’t be stuck in the kitchen all day whipping them up.

The recipe calls for nuts on the top, but if your family isn’t fond of nuts, simply leave them off. I’ve always been under the impression that my Addie liked nuts. It was only after making these that I learned that she does not, in fact, like nuts. She brushed them off this go round, but I’ll leave them off next time.

I can’t wait to make these again. They really hit the spot when you’re craving that peanut buttery goodness.

Recipe adapted from Family Living: Our Favorite Cookies Cookbook.

Peanut Butter Brownies
Recipe Type: Dessert, Snack, Bar
Author: Adapted from Family Living: Our Favorite Cookies Cookbook
Brownies aren’t always chocolate! Try this peanut butter version for a unique twist.
Ingredients
  • 3/4 c. Creamy Peanut Butter
  • 1/2 c. Butter, softened
  • 1 and 1/2 c. Firmly Packed Brown Sugar
  • 1 egg
  • 2 Egg Whites
  • 2 Tsp Vanilla Extract
  • 1 c. All-purpose Flour
  • 1/2 c. White Whole Wheat Flour
  • 1 and 1/2 tsp Baking Powder
  • 1/8 tsp Salt
  • 1/2 c. Chopped Peanuts (optional)
Instructions
  1. Preheat oven to 375°.
  2. In a large mixing bowl, cream the peanut butter with the butter and brown sugar. Add eggs and vanilla and beat until smooth.
  3. In a bowl, mix the flours, baking powder and salt together. Slowly add the dry ingredients to the wet ingredients. Blend well.
  4. Grease a 9×13 baking dish. Spread batter into pan and sprinkle with peanuts (optional).
  5. Bake for 15- 18 minutes until the edges begin to brown. Cool.
Notes

I used a little white whole wheat flour for my brownies to bump up the nutrition, but it’s perfectly fine to use only all-purpose. You would just use 1 and 1/2 c. total.

Also, feel free to use whatever nuts that you have on-hand. I actually used walnuts because I was out of peanuts. Almonds or cashews would be lovely too.


Like this post? SHARE it!

Related Posts Plugin for WordPress, Blogger...

After School Snack: Frozen Peanut Butter Bananas

These days school is jam-packed full of learning, extra-curriculars, and even a taddy little bit of fun. They’ve even moved lunch time up for many kiddos to make room for other activities. Some children eat lunch at 10:00! What is this world coming to? But they are waking up at the crack of dawn so an early lunch isn’t so bad. But as parents we must be prepared to hear those impending words each afternoon….

I’m huuuuuungry. Can I have a snack?

Can you blame them? They have been busy for 7 HOURS. All of that icky math and science can really work up an appetite you know? The least that we can do is give them a snack. Here’s a simple snack idea for your busy student (or hungry parent!).

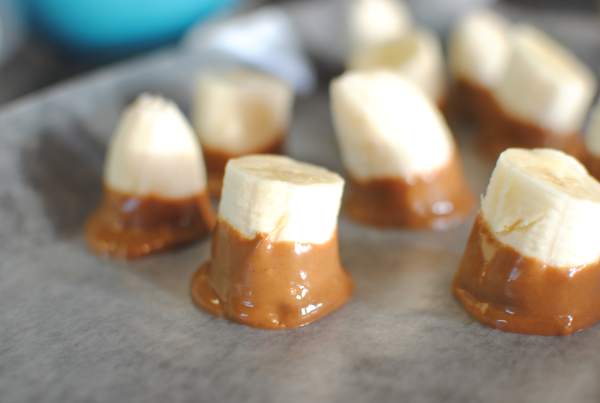
Start by cutting up a couple ripe bananas into bite-size pieces.

Microwave 1/4 cup creamy peanut butter and stir in 1/2 tbsp cocoa powder.

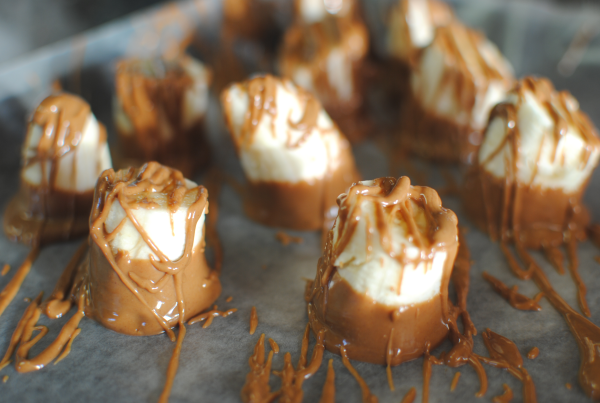
Dip each banana piece into the peanut butter and set on wax paper.

You can drizzle any leftovers on the tops if you’d like.

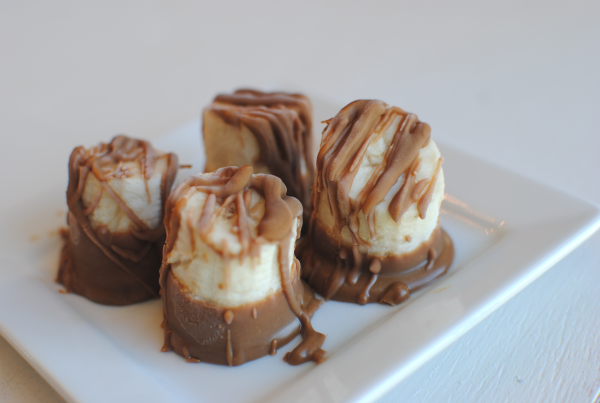
Freeze for at least an hour and you’re done!

Bing bang bong and you’ve got a very tasty (and healthy) snack! It’s a nice little change from chocolate-covered bananas. The peanut butter actually adds nutritional value with it’s healthy fats and boost of protein. Not to mention the potassium in the banana itself. But who cares about all that? The peanut buttery goodness with a hint of cocoa is super yummy!

Here they are after they are frozen. The peanut butter gets hard, but not as hard as chocolate would so you’ll want to eat them pretty quickly after removing them from the freezer. Ie- don’t leave them sitting around for long periods of time.

YUM!

After School Snack: Frozen Peanut Butter Bananas
Recipe Type: Snack, Dessert
Author: Pennywise Cook
Frozen peanut butter bananas create a healthy afternoon snack!
Ingredients
  • 2 Bananas, Cut into bite-size pieces
  • 1/4 c. Creamy Peanut Butter
  • 1/2 tbsp Cocoa Powder
Instructions
  1. Place peanut butter in a microwave-safe bowl. Heat for about 30 seconds to melt. Stir in cocoa powder until mixed well.
  2. Dip banana pieces into peanut butter and place on wax paper. Drizzle remaining peanut butter over top if desired.
  3. Freeze for at least an hour. Preferably 3-5 hours or longer.


Like this post? SHARE it!

Related Posts Plugin for WordPress, Blogger...

Sloppy Joe Stuffed Shells

I am always on the lookout for ways to change up everyday meals. Meatloaf and pizza are good. Don’t get me wrong. But sometimes, they just get old and boring. I have a lot of fun experimenting with food. It’s kind of a hobby of mine. It’s why this blog exists!

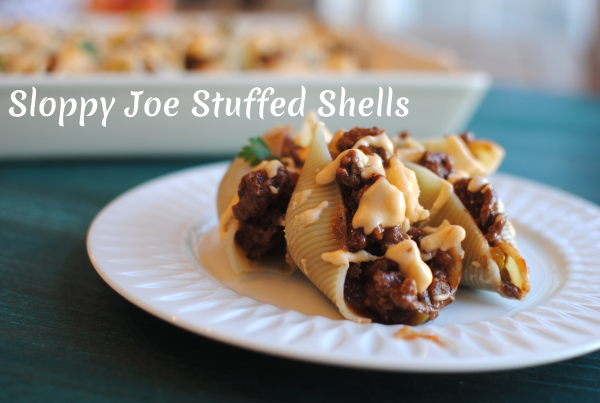
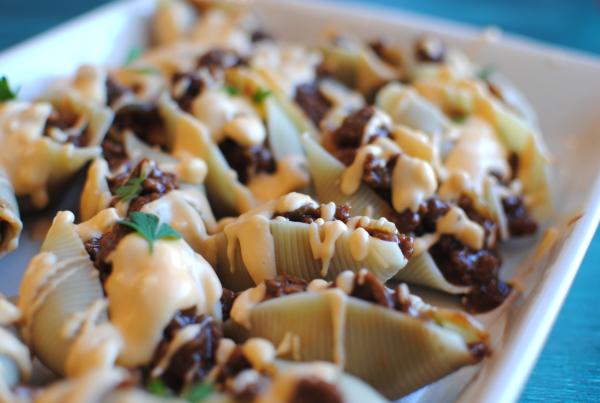
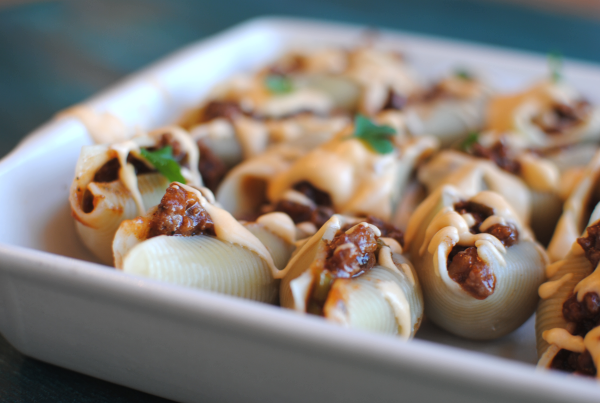
Stuffed shells are a family favorite. There are so many variations and concoctions that you can stuff them with. My latest creation? Sloppy Joe Stuffed Shells.

Sloppy Joes are so simple to whip up on a week night for dinner, but guess what? They are sloppy! (whodathunkit?) I was thinking that if we could eat them in shells, they might stay contained and actually be easy to eat.

Hey, we could get rid of that sloppy and just call them Joes! Joe Stuffed Shells……hmmm. Nah. You could possibly call them Not-So-Sloppy Joe Stuffed Shells. That’s too long. I give up. We’ll stick with Sloppy Joe Stuffed Shells.

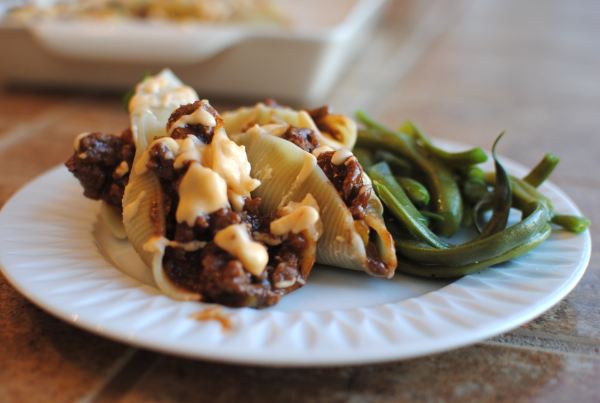
These aren’t made with the canned Sloppy Joe sauce. It’s homemade and extra easy. I even got to use a green pepper from my garden in it. I’m sure that you’re wondering about the cheese sauce on top there. Well, you see, my husband likes to add cheese to just about everything. And following suit, he asked if I could drizzle some cheese sauce on top of the shells too. I did this for him. Feel free to add it if you like, but they are still just as great without the cheese sauce.

Just as I suspected, these were quite neat to eat! Much neater than a messy old Sloppy Joe Sandwich. My husband isn’t a huge fan of Sloppy Joes themselves. We came to the conclusion after this meal that it was in fact, because they are sloppy. The shells make it really easy to keep all the yummy and sweet meat inside. Which means that you’ll most likely end up eating them with your fingers.

We did and we’re not ashamed!

The best part about this meal is that it’s super affordable. With the meat of your choice (ie ground beef, ground turkey, even chicken!), a few handy sauces, and simple spices, these shells comes together in no time and don’t even require baking.

Sloppy Joe Stuffed Shells
Recipe Type: Main Dish,
Author: Pennywise Cook
Believe it or not, Sloppy Joes don’t have to be sloppy when you make them in shells like this!
Ingredients
  • 1/2 Package Jumbo Shells (you can make an entire box, but you won’t need it)
  • 1 lb Extra lean Ground Beef
  • 1/2 c. Onion, chopped
  • 1/2 c. Green Onion, Chopped
  • 1 Clove Garlic, minced
  • 1/4 tsp salt
  • 1/2 c. Ketchup
  • 1/2 c. BBQ sauce (your choice)
  • 2 tbsp Brown Sugar (I used Splenda Brown)
  • 1/2 tsp Italian Seasoning
  • For Cheese Sauce
  • 2 tbsp Butter
  • 1/4 c. Skim Milk
  • 4 oz Cream Cheese
  • 1 c. Shredded Cheddar Cheese (Reduced Fat)
Instructions
  1. Prepare noodles according to package. Drain and set aside to cool.
  2. In a large skillet, brown ground beef with onion and green pepper. Drain and add in all other ingredients. Simmer for 5-10 minutes or until warmed through.
  3. Stuff shells with meat mixture.
  4. For cheese sauce- melt butter in a small sauce pan. Add the skim milk. Melt in the cream cheese stirring until smooth. Add in shredded cheese until melted and smooth. Drizzle over stuffed shells.
Notes

These could even make little appetizers at a party!


Like this post? SHARE it!

Related Posts Plugin for WordPress, Blogger...

No-Bake S’mores Pie

Fall is here! On our trip these past couple of weekends I noticed the trees a changin’ and they are just beautiful. It was especially beautiful driving through the mountains in Chattanooga. I love looking down on huge valleys just covered in autumn-colored fall trees. Makes the drive more enjoyable for sure!

Along with the leaves falling and cooler weather, campfires are sure to follow! In fact, we’re thinking about having a family night this weekend around our fire pit. The feel of cool, crisp air mixed with a crackling fire and marshmallows just can’t be beat in the fall. And you can bet that some fall treats will be eaten! S’mores are my all-time favorite campfire food. I enjoy a roasted hot dog every now and then. And popcorn in those foil packages are fun, but s’mores are the real deal.

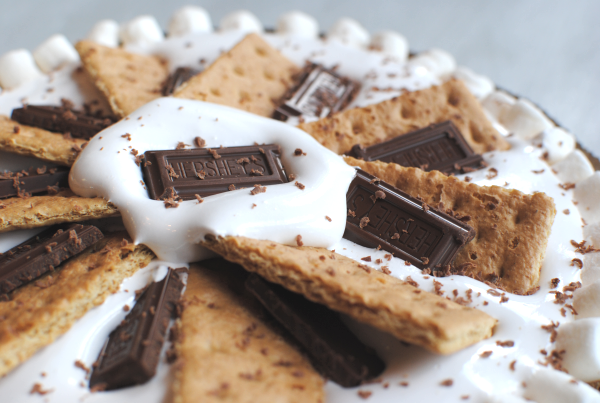
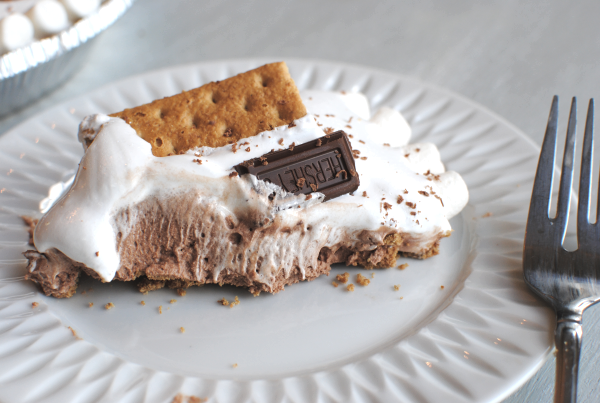
Even before the weather even pretended to cool off, I got a hankerin’ for a s’more. Somehow, instead of creating just 1 s’more, I ended up creating this pie. That’s ok. I’d rather have an entire pie than 1 s’more anyways.

So this pie is super simple. I wanted to make it a little better for you, so instead of using creams, I opted for a nonfat yogurt. Of course after using an entire bag of chocolate chips, it doesn’t really matter. But hey, at least I make the effort right?

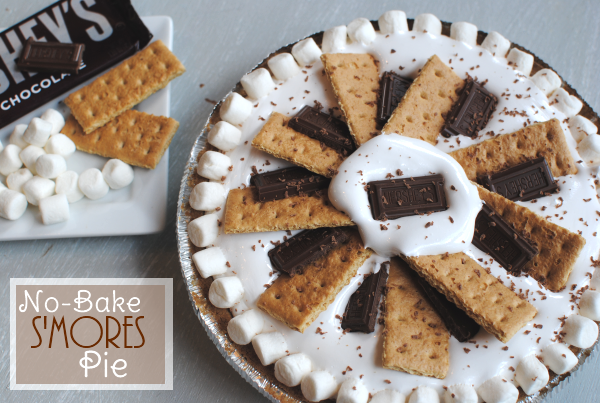
All the prettiness on the top is completely optional. I had just bought the ingredients for my s’more so I had them and thought why not make the pie look pretty? So depending on how pretty you make yours look, you’re talking between 4 and 6 ingredients. Most of which are highly inexpensive and easy to work with. This pie would be a GREAT thing to bring to a cookout get together.

The one thing that I will point out is that the yogurt does give the chocolate filling a bit of a tang. Clearly this was my sacrifice for making something better for you. My daughter noticed this immediately, but it didn’t bother my husband. If you think you might not like that, try using heavy cream instead. Should taste great and give the same type consistency.

Here’s how to make it:

No-Bake S’mores Pie
Recipe Type: Dessert
Author: Pennywise Cook
You don’t have to make a fire to have s’mores! Try this easy pie to satisfy your craving!
Ingredients
  • 1 Graham Cracker Crust (reduced fat)
  • 1 Bag Semi-Sweet Chocolate Chips (12 oz)
  • 1 c. Plain, Nonfat Yogurt (or heavy cream)
  • 1 tub Marshmallow Cream
  • 2 c. Mini-marshmallows- Optional
  • 5 Graham Crackers for Topping- Optional
  • 1 Hershey Bar for Topping- Optional
Instructions
  1. In a large microwavable bowl, place the chocolate chips and 1 cup yogurt. Microwave on 50% power for 5 minutes. Remove and jiggle the bowl getting the chocolate chips to move around without stirring. Return to microwave and heat on 100% powder in 15-30 second increments until the chips begin to melt. Stir until smooth. Place in the refrigerator for at least 1 hour- 2 hours.
  2. Chocolate mixture should be cold. Place in a mixing bowl and whip until the chocolate turns a light brown color. Whip for about 5 minutes on high. Pour into graham cracker crust.
  3. Top with marshmallow cream (though you may not need the entire tub). Top with chocolate pieces and graham crackers if you wish and line the outside with mini marshmallows.

Like this post? SHARE it!

Related Posts Plugin for WordPress, Blogger...

Easy Roasted Broccoli

When I was a kid, I never remember thinking I really want broccoli. In fact, I don’t really remember eating it ever as a kid. The word itself had some type of unappealing association with it so we just never spoke of it. Props to my mom for not shoving it down my throat! Luckily I grew up to love it and I’ve passed on that love to my daughter. Though she won’t touch most things that are green, broccoli is something that she will gladly gobble up in a moment’s notice.

Parental mission, accomplished.

We like to make broccoli many ways around here. Steamed, chopped, swimming in cheese sauce, and in a plethora of casseroles. But mostly, it’s easiest to just roast it to go along with a meal.

When you get a good price on a head of broccoli, stock up and make it for dinner. And if you need an idea for how to make it, consider this roasting method if you haven’t tried this before. It’s quite tasty.

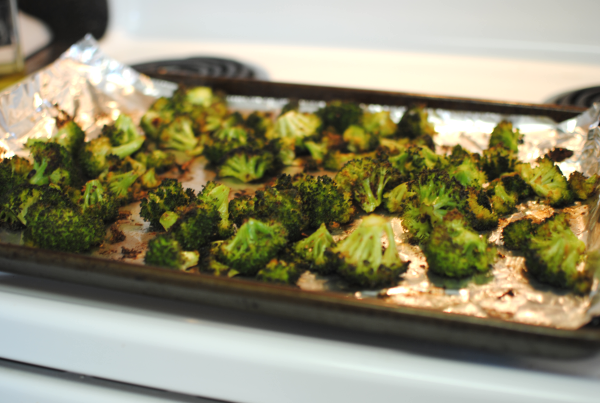
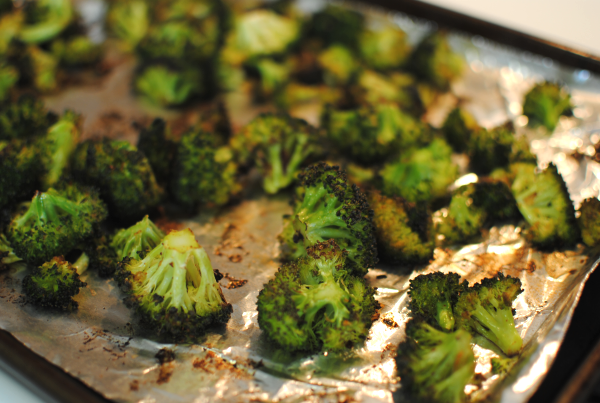
Cut up the head into bite-size pieces. Throw it in a bowl with some salt, garlic (oooooooh, aaaaaahhhhh), chili powder, and of course olive oil. Toss it up and pop it in the oven to get roasted and toasted.

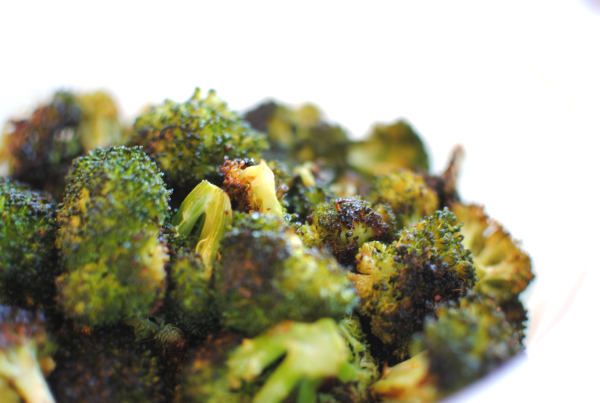
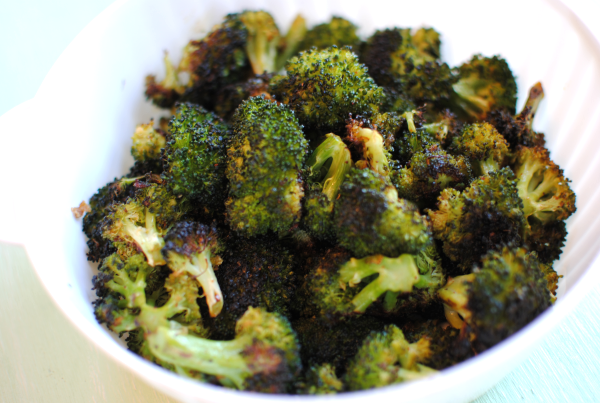
What comes out of the oven is nothing short of amazing. Yummy, flavorful broccoli.

It’s that simple and frugal too!

Easy Roasted Broccoli
Recipe Type: Side Dish, Vegetable
Author: Pennywise Cook
This simple method for roasting broccoli makes for an easy side dish that’s full of flavor!
Ingredients
  • 4 c. Fresh Broccoli (Cut into bite-size pieces)
  • 1/4 Tsp Salt
  • 1 Tsp Chili Powder
  • 4 Cloves Garlic, Minced
  • 1/4 c. Olive Oil
Instructions
  1. Preheat oven to 425°.
  2. In a large bowl, combine all the ingredients and toss well.
  3. Place on a foil-lined cookie sheet. Bake for 20-22 minutes flipping once halfway through cooking.

Like this post? SHARE it!

Related Posts Plugin for WordPress, Blogger...